

On 13 August 2026, DeepSeek released DeepSeek Harness, an open framework for building and customising AI agents. Its philosophy can be summed up in two words: freedom and openness. Instead of giving users a finished agent and asking them to work within its limits, Harness opens up the system itself, allowing users to inspect, modify, and extend it.
What Makes DeepSeek Harness Different
Customisable
It is not a finished product, but a box of building blocks.
Tools such as Claude Code and Codex are largely finished products: you can change their settings and add instructions, but the underlying system, including how the agent works with the model, uses tools, manages sessions, and presents its interface, is largely determined by the developer.
DeepSeek Harness takes a different approach. Its basic principle is ‘everything is a plugin’. The model, tools, skills, agent loop, session system, sandbox, and even the user interface are all built as replaceable components. There is no single ‘official’ core that users are expected to leave untouched.
This is made possible by Cordis, the plugin framework underneath DeepSeek Harness. In simple terms, Cordis is what allows these different pieces to be added, removed, connected, and replaced without rebuilding the whole system. It also keeps track of which pieces depend on which others, and cleans up the changes made by a plugin if it is removed.
For users without a technical background, this has a simple meaning: you are not limited to the features the original developers decided to give you. You can add new capabilities, replace existing ones, or even change how the interface works. The growing plugin ecosystem already includes tools that add new functions and new interface components.
Later in this article, we will see what this means in practice: using natural language to change the interface, and then turning a research skill into a visual dashboard with a timeline and information cards.
Traceable
The agent’s work leaves a detailed trail. Instead of seeing only the final answer, you can follow the whole execution record: what the agent was instructed to do, what tools it called, what those tools returned, and what information was passed into the next step.
This distinction matters when something goes wrong.
Imagine an AI spends several minutes searching files, reading documents, and making changes. If you only see a condensed account of what it did, you may know that the final result is wrong without knowing where the mistake happened. With a detailed execution record, you can go back through the sequence and ask: What did the agent see? What did it do? What did the tool return? At which step did the wrong turn happen?
That means debugging does not have to begin by simply running the entire task again and hoping for a better result. You can inspect the path that produced the result and identify where it went wrong.
This is also what makes the visual dashboard later in this article possible. The dashboard is, in effect, turning the agent’s execution record into something a human can read and understand at a glance.
How to Install It
At the time of writing, the official installation process requires using a terminal at least once. Although there are ways to turn DeepSeek Harness into a standalone application, as shown later in this article, we will begin with the official terminal-based method so that you can see how it works. The process is straightforward.
Install DeepSeek Harness on Mac
Press Command + Space to open Spotlight, search for Terminal, and open it.

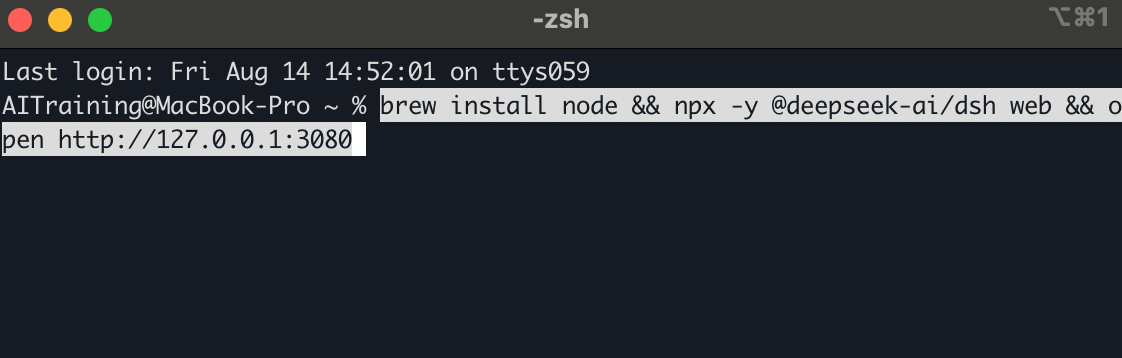
Copy the following command into Terminal and press Enter. This installs Node.js, starts DeepSeek Harness, and opens its web interface. If you restart your computer, you will need to start it again.
Note: If something goes wrong, first check your network connection. If you see ‘zsh: command not found: brew’, install Homebrew first by running:
/bin/bash -c "$(curl -fsSL
https://raw.githubusercontent.com/Homebrew/install/HEAD/install.sh)"
Then run:
brew install node && npx -y
@deepseek-ai/dsh web > ~/.dsh/dsh-web.log 2>&1 & sleep 3 && open http://127.0.0.1:3080/
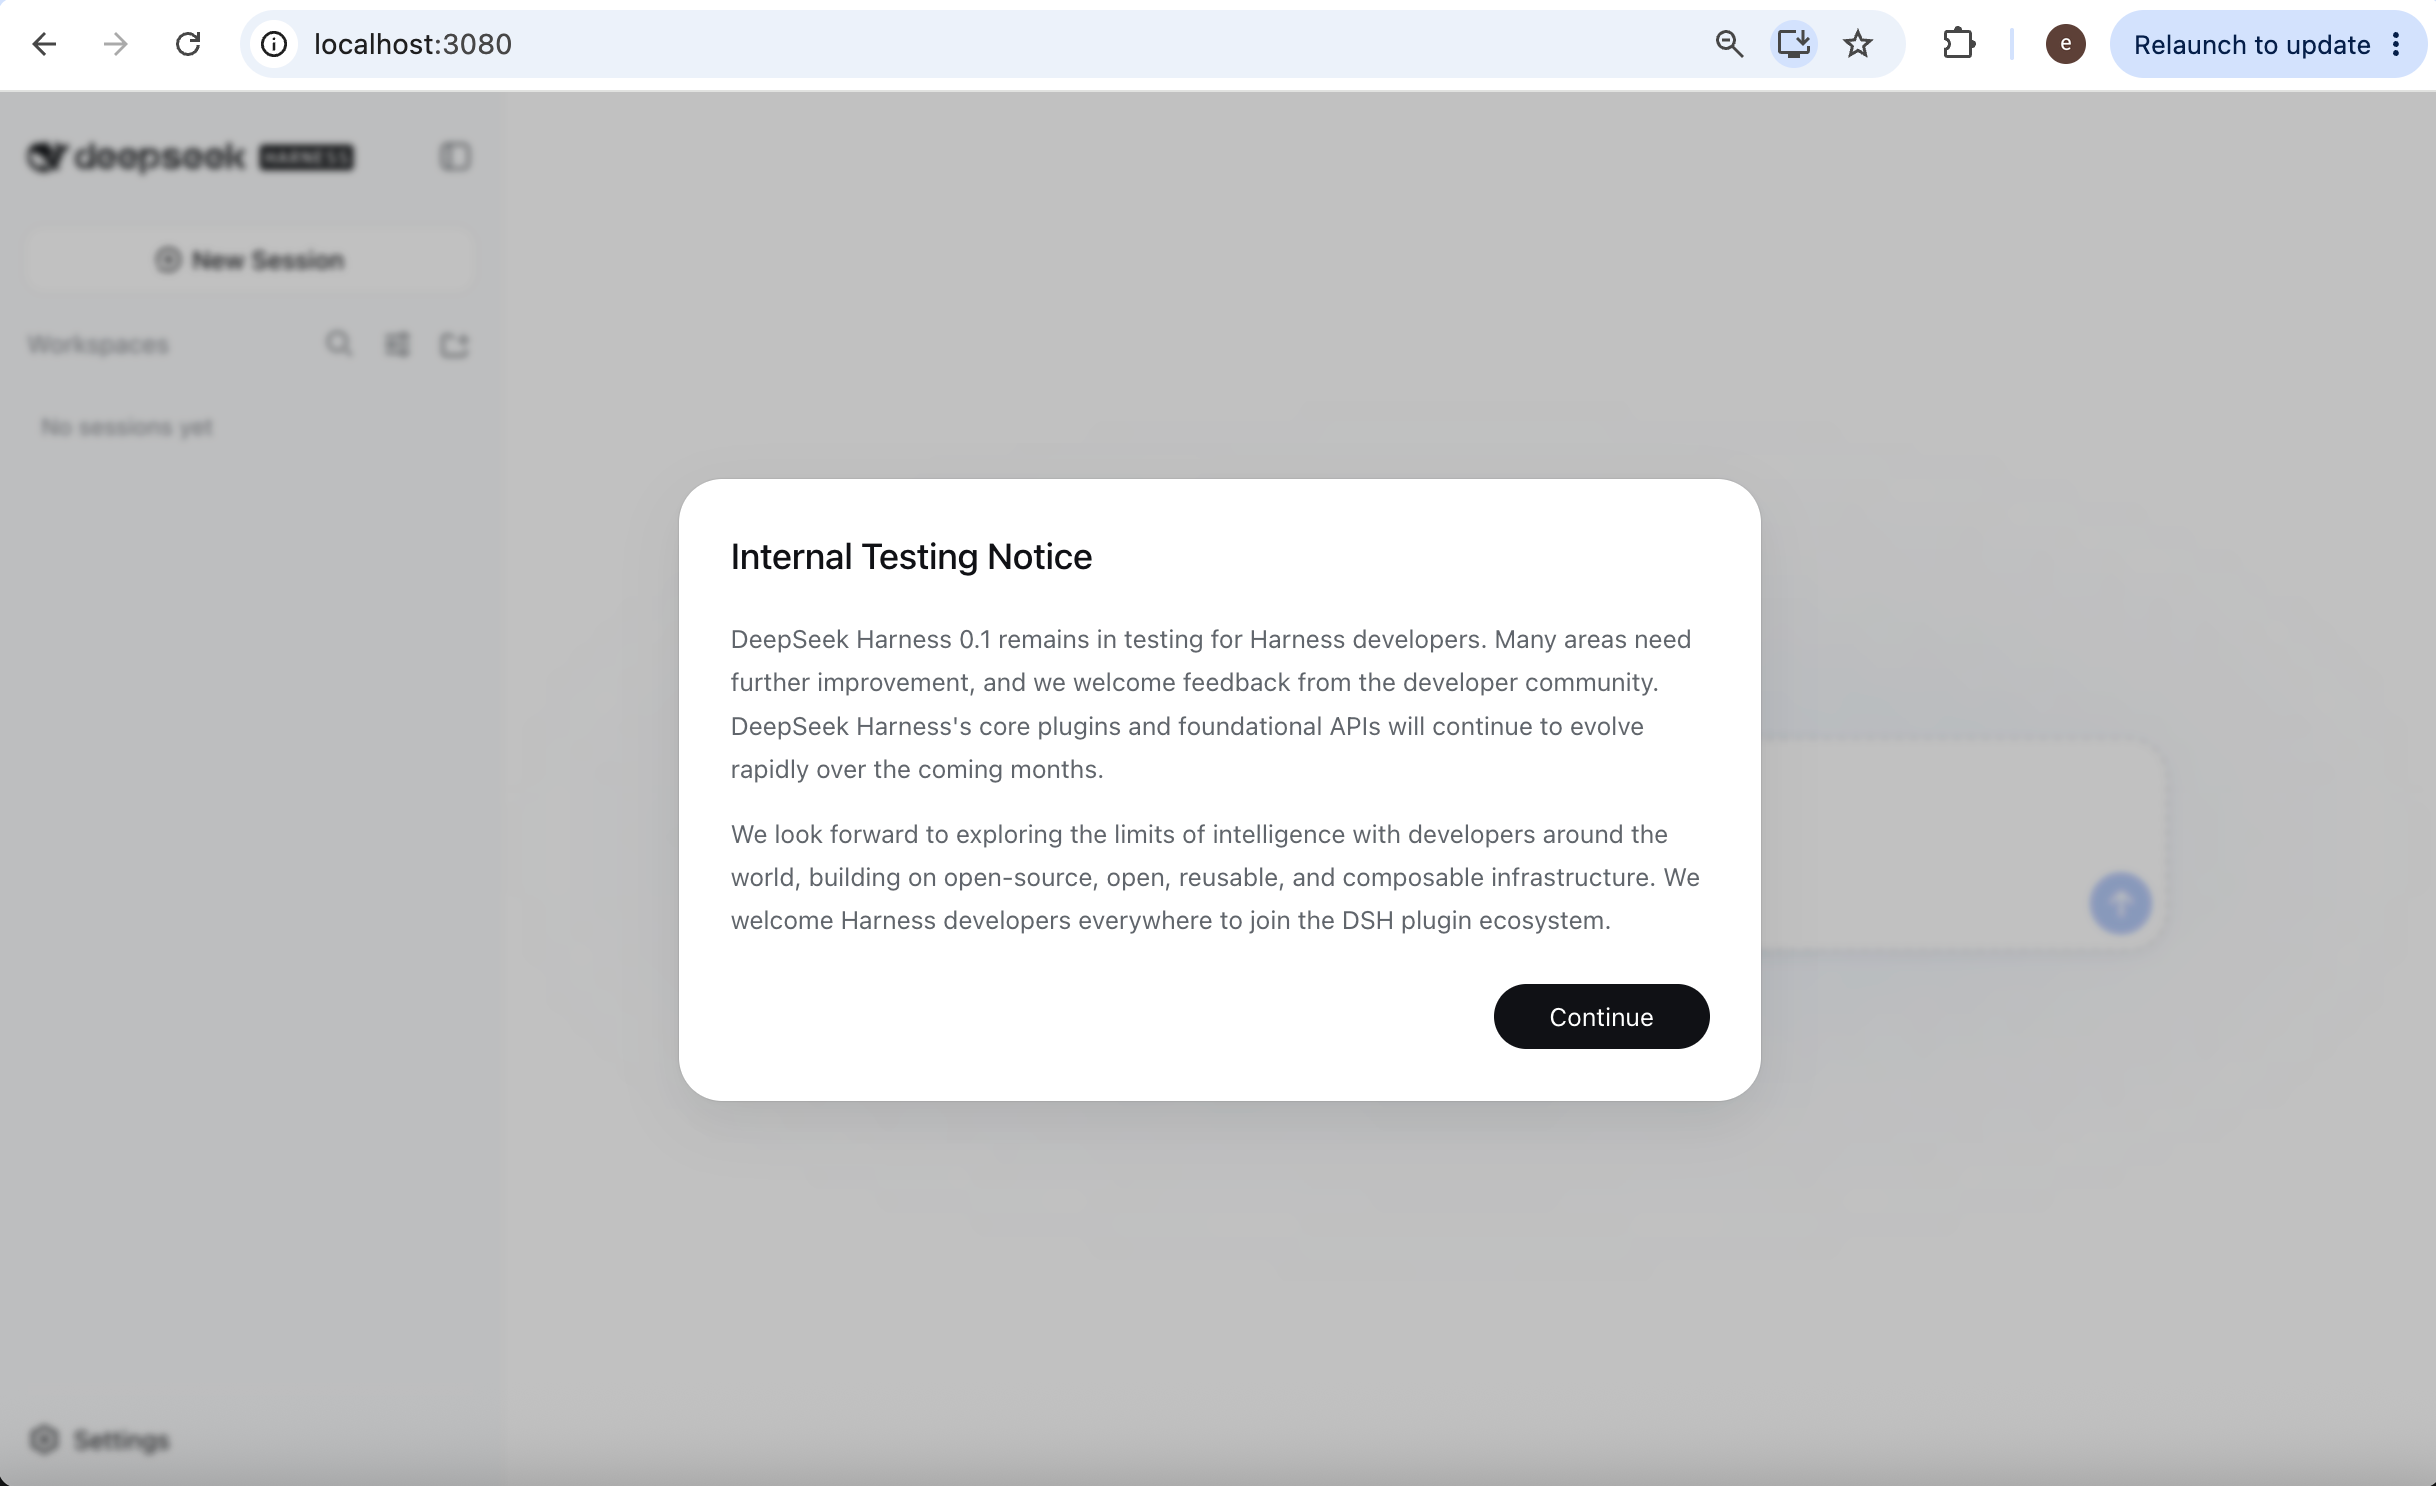
This is only a test statement. Press the button below to continue.
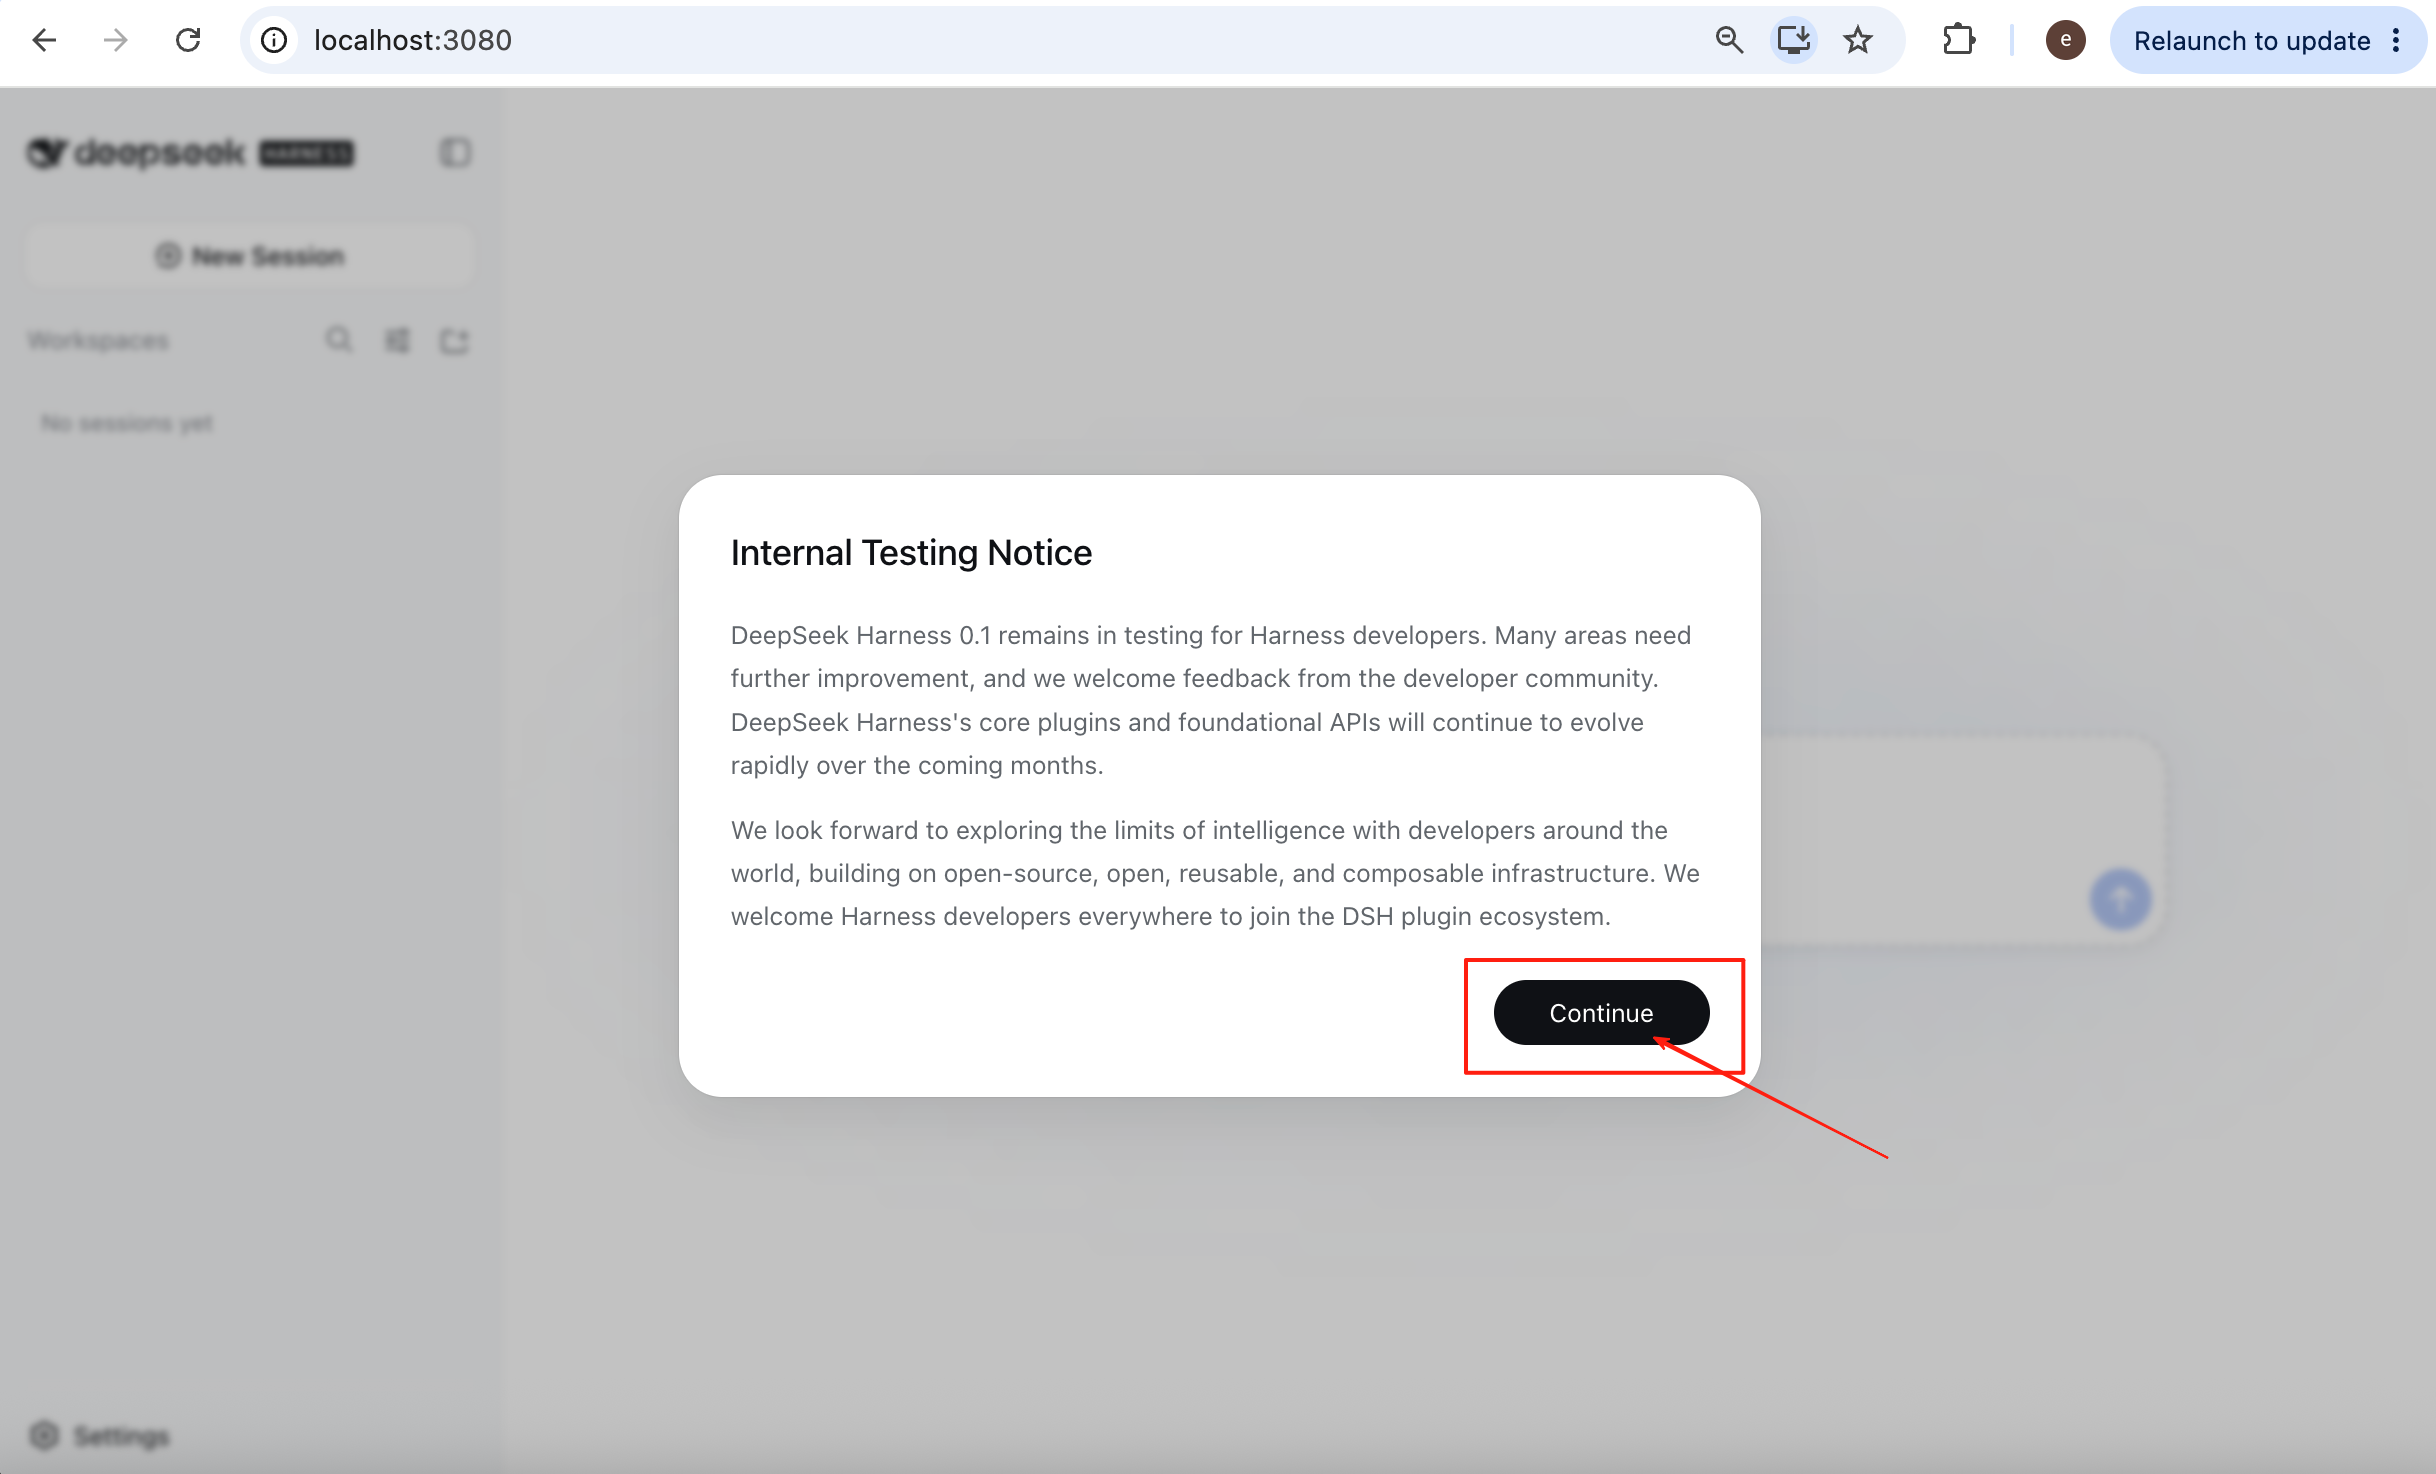
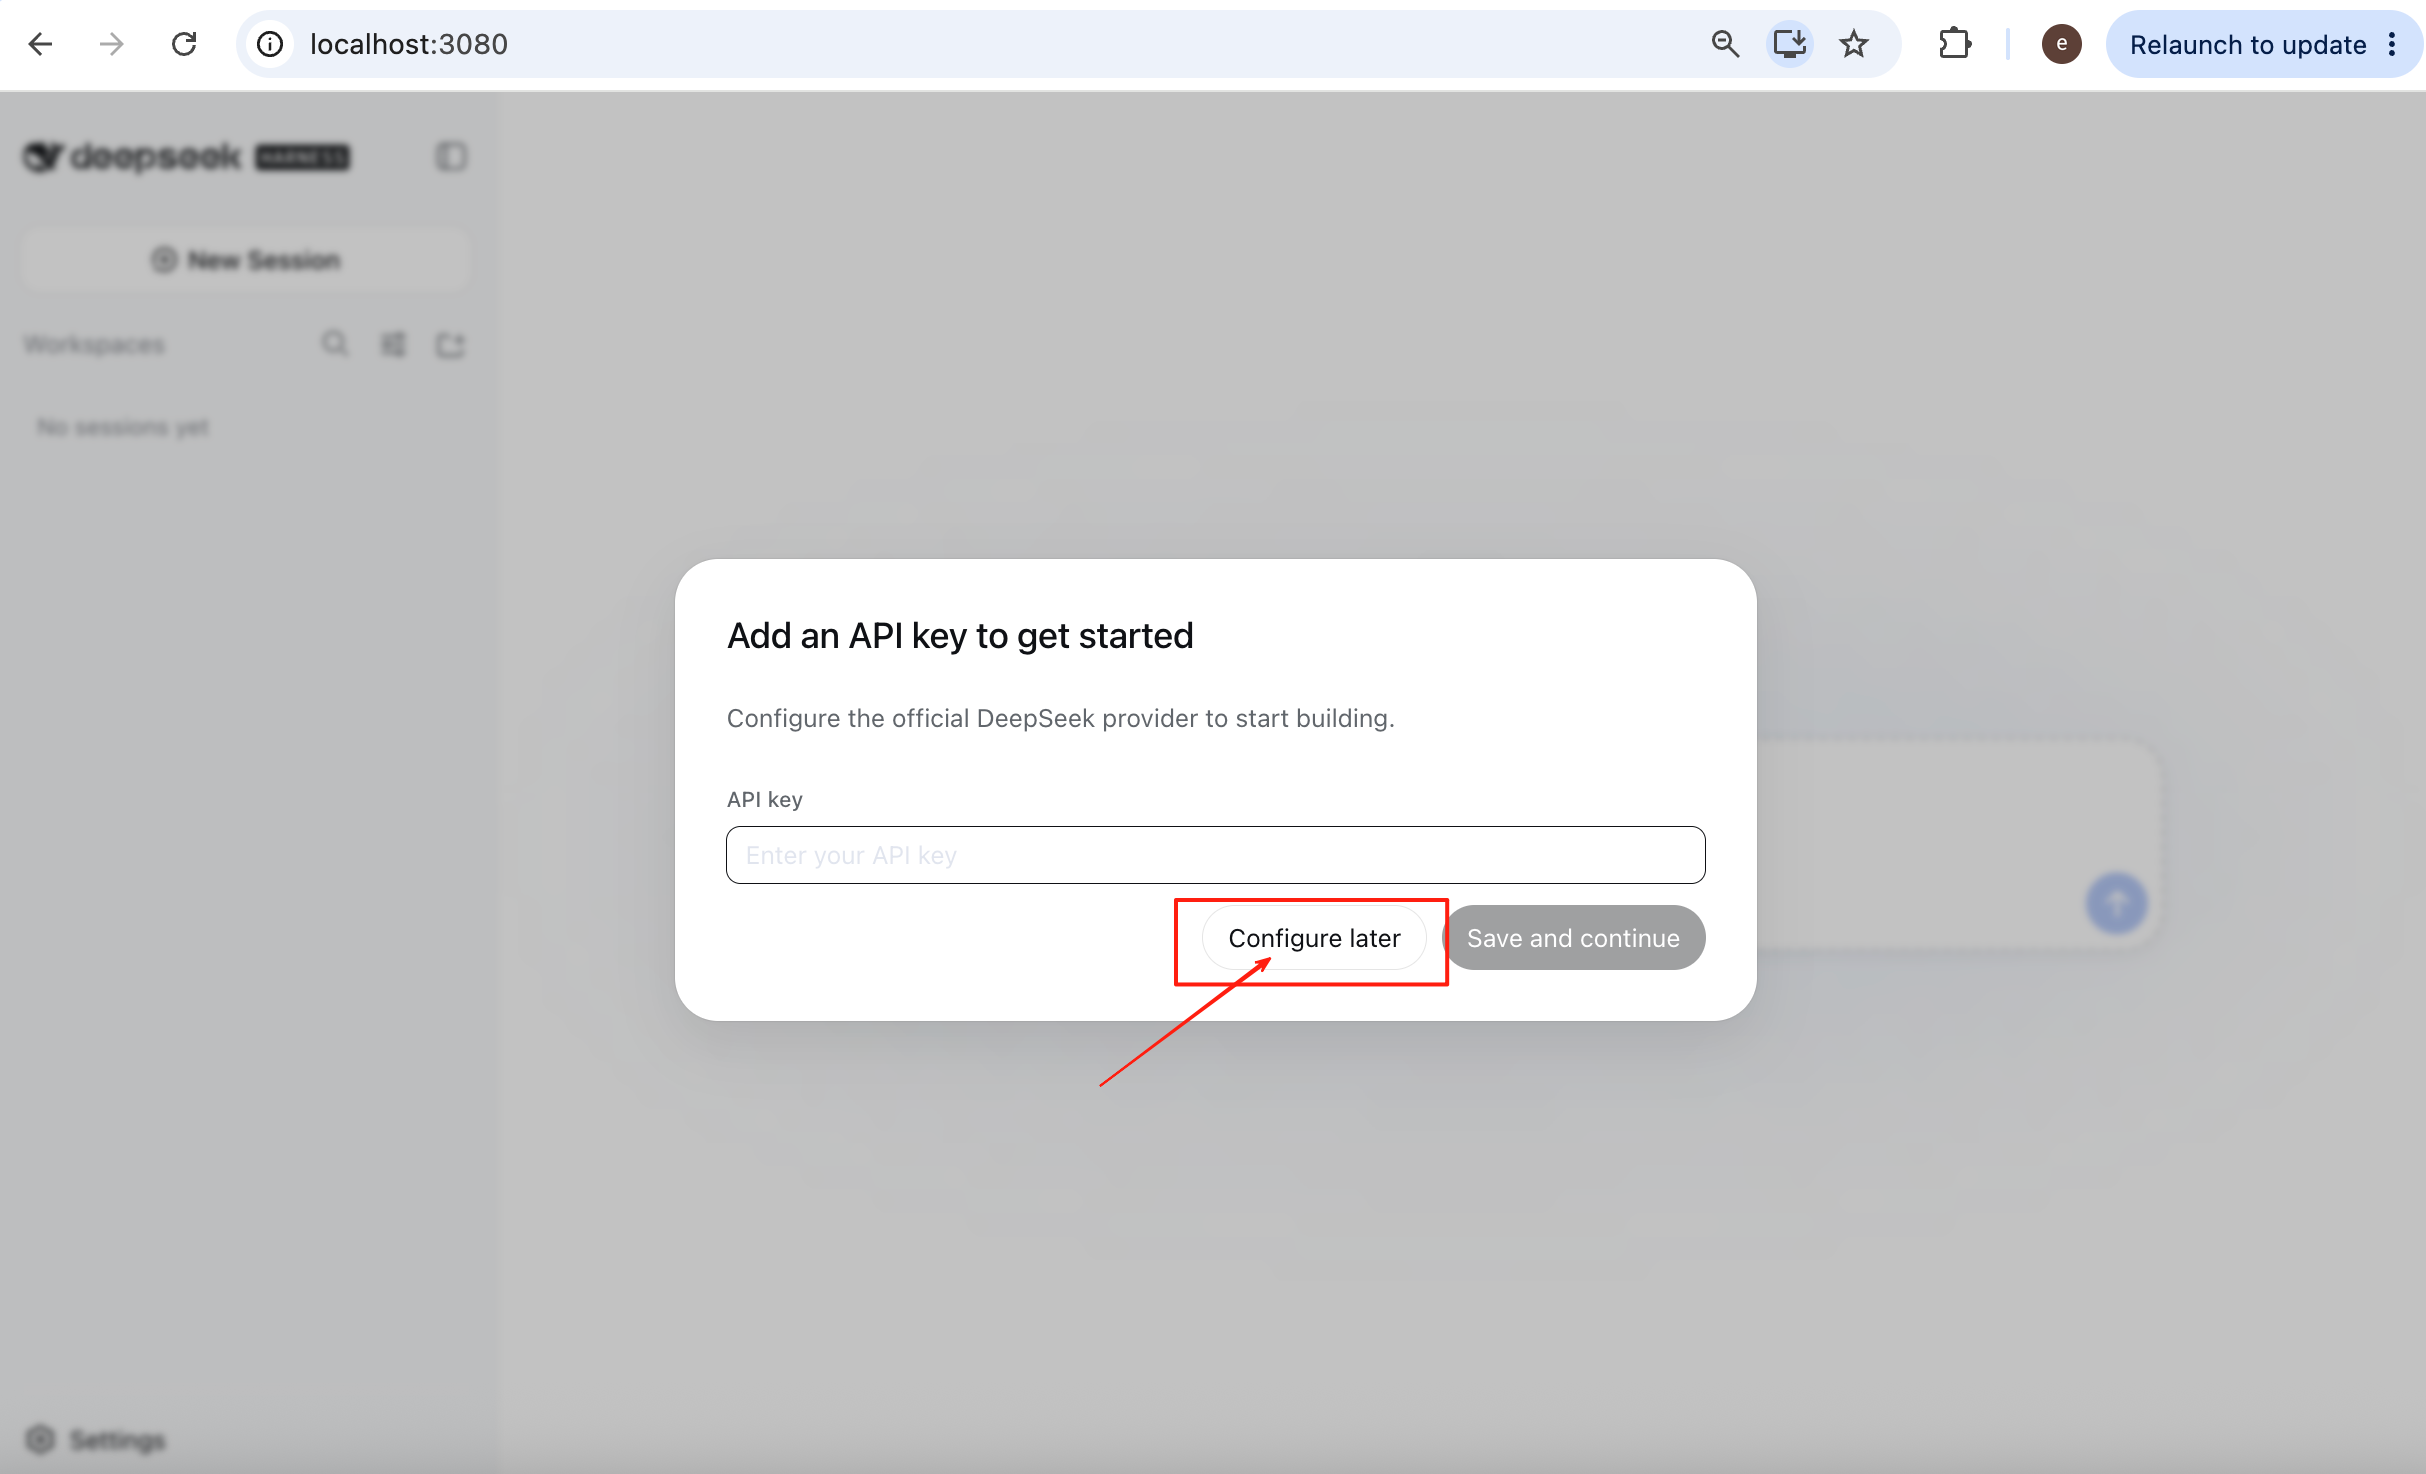
The next window asks for an API key. If you do not have one yet, simply use the first button. We will create one in the following section.
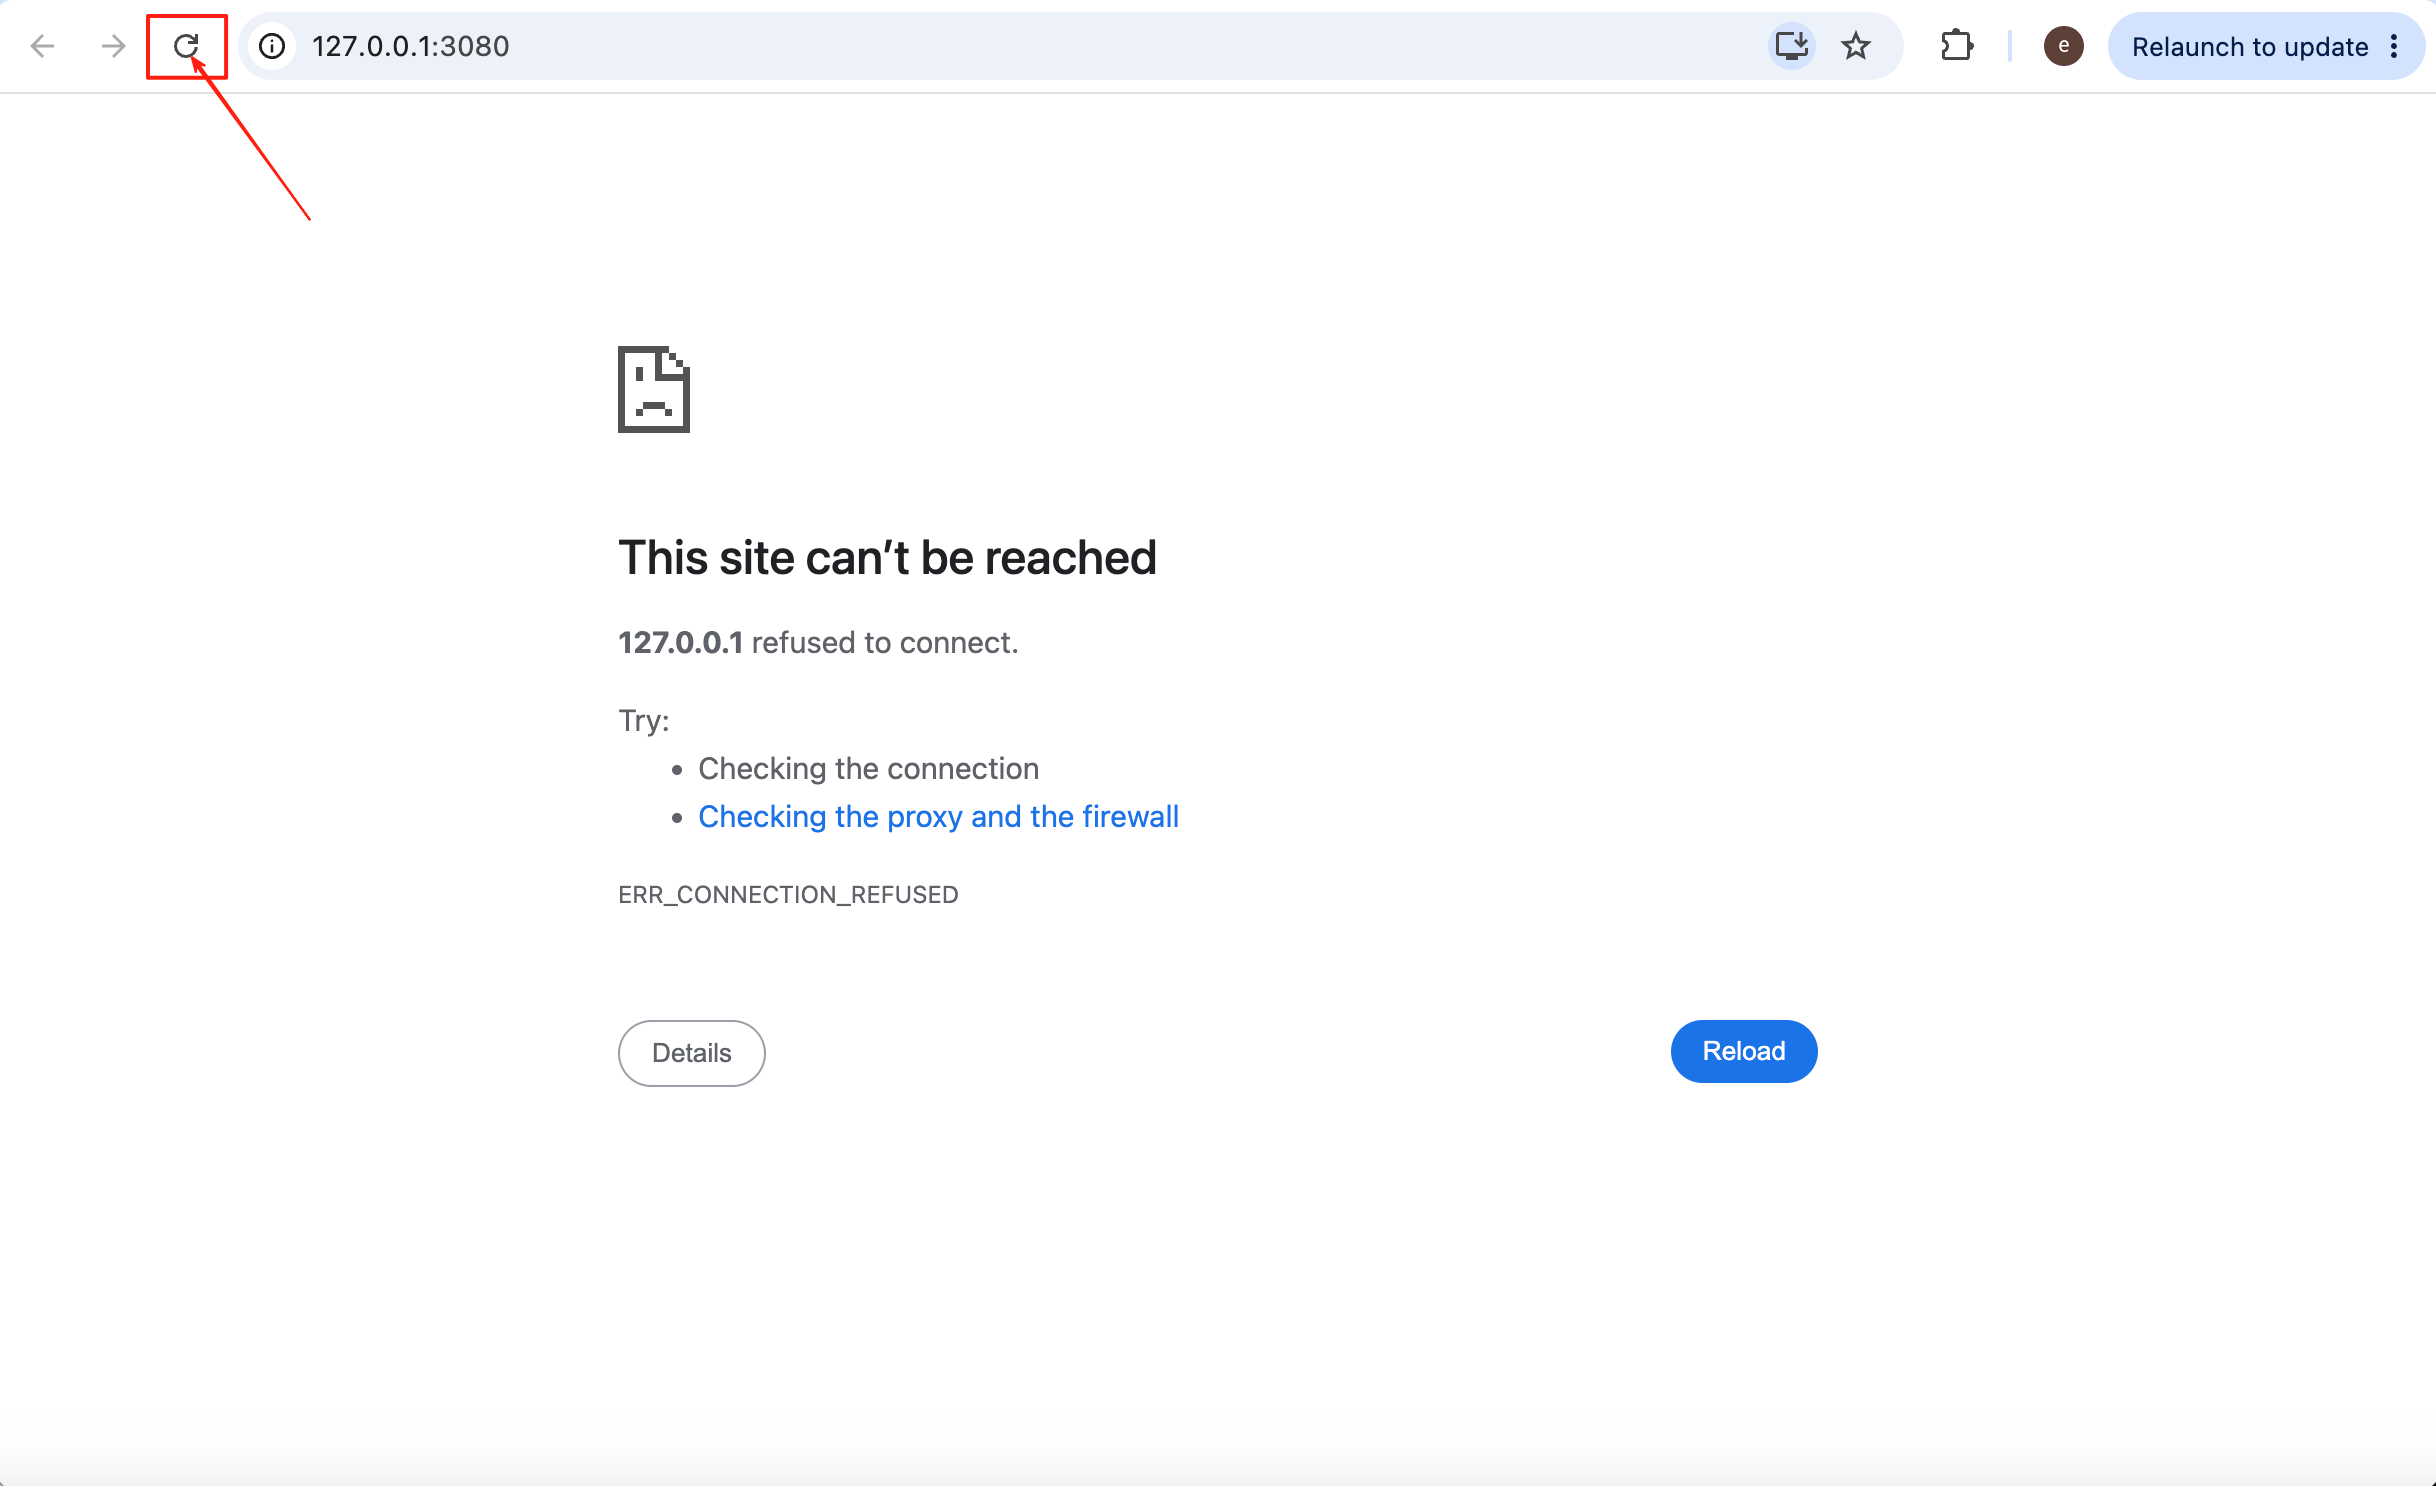
Occasionally, the browser may show ‘This site can’t be reached’, especially during the first launch. This usually means the local service has not finished starting. Wait a moment and refresh the page. After closing the tab, you can reopen DeepSeek Harness at http://127.0.0.1:3080/.
Install DeepSeek Harness on Windows
Press the Win key, search for PowerShell, and open it.
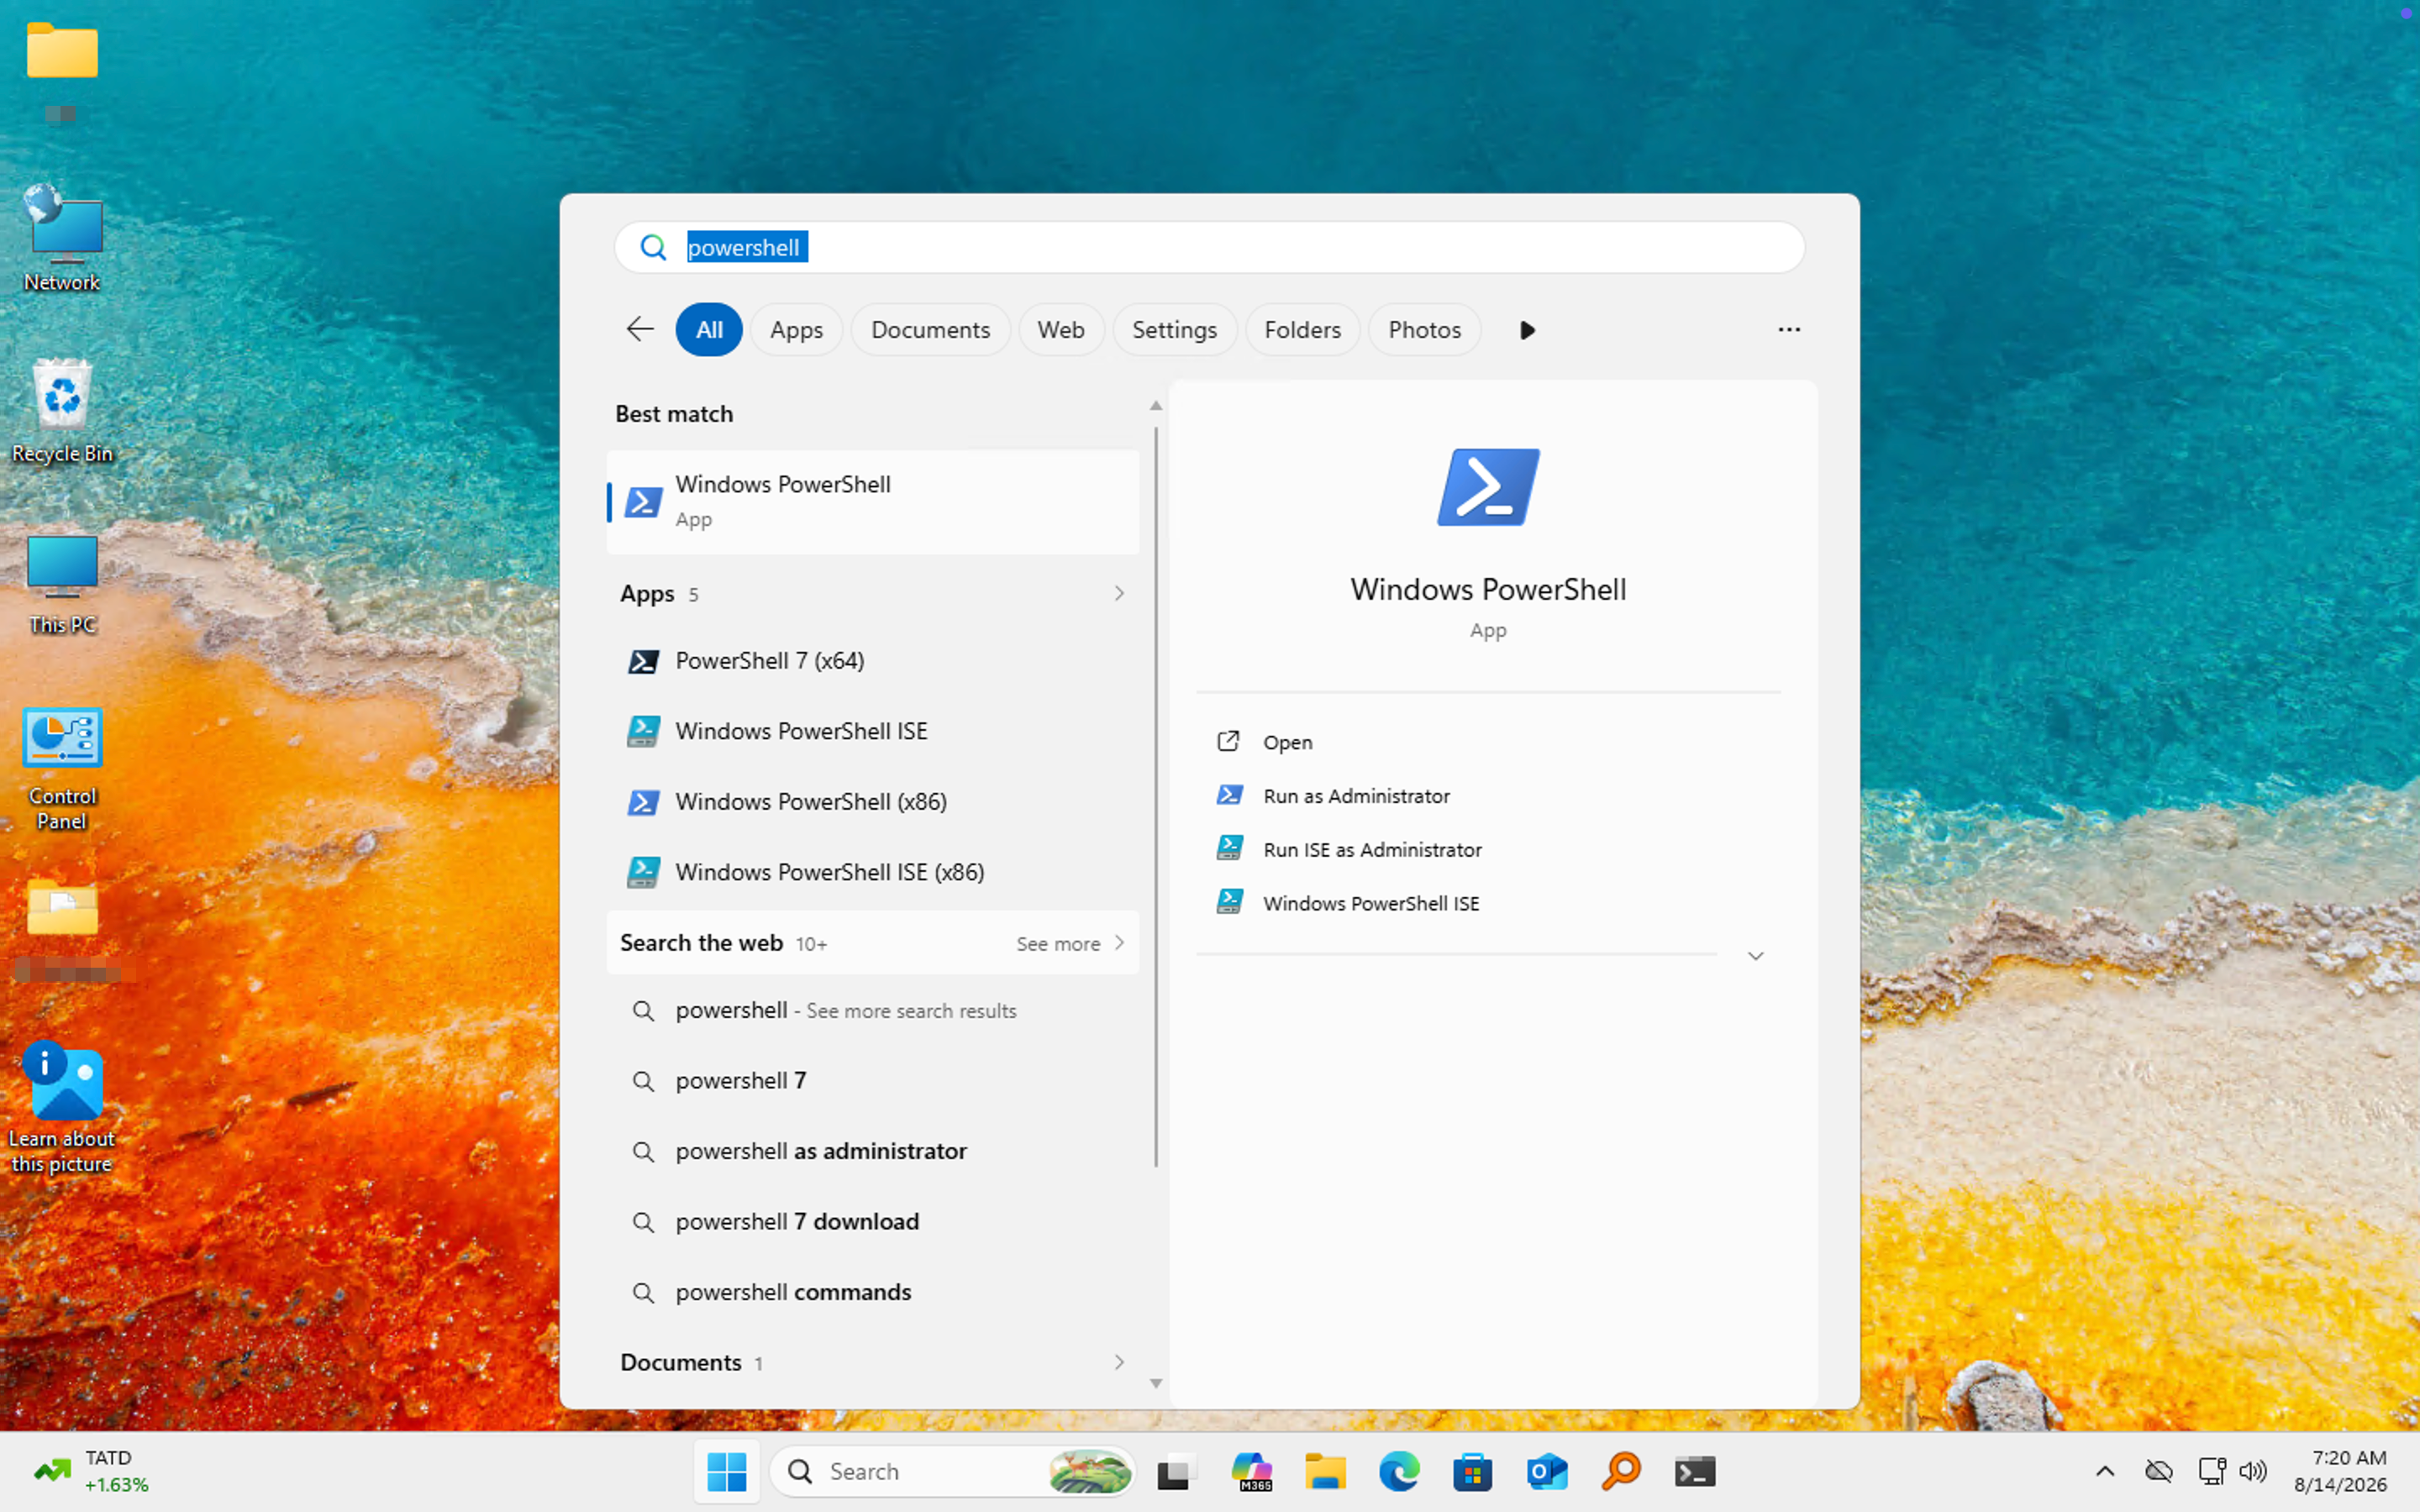
Copy the following command into PowerShell and press Enter. It installs Node.js, starts DeepSeek Harness in the background, and opens the local web interface. After restarting your computer, you will need to run it again.
winget install OpenJS.NodeJS.LTS -e --accept-source-agreements --accept-package-agreements; $env:Path="C:\Program Files\nodejs;$env:Path"; Start-Process cmd.exe -ArgumentList '/c','npx -y @deepseek-ai/dsh web > "%USERPROFILE%\.dsh-web.log" 2>&1' -WindowStyle Hidden; Start-Sleep -Seconds 3; Start-Process "http://127.0.0.1:3080/"
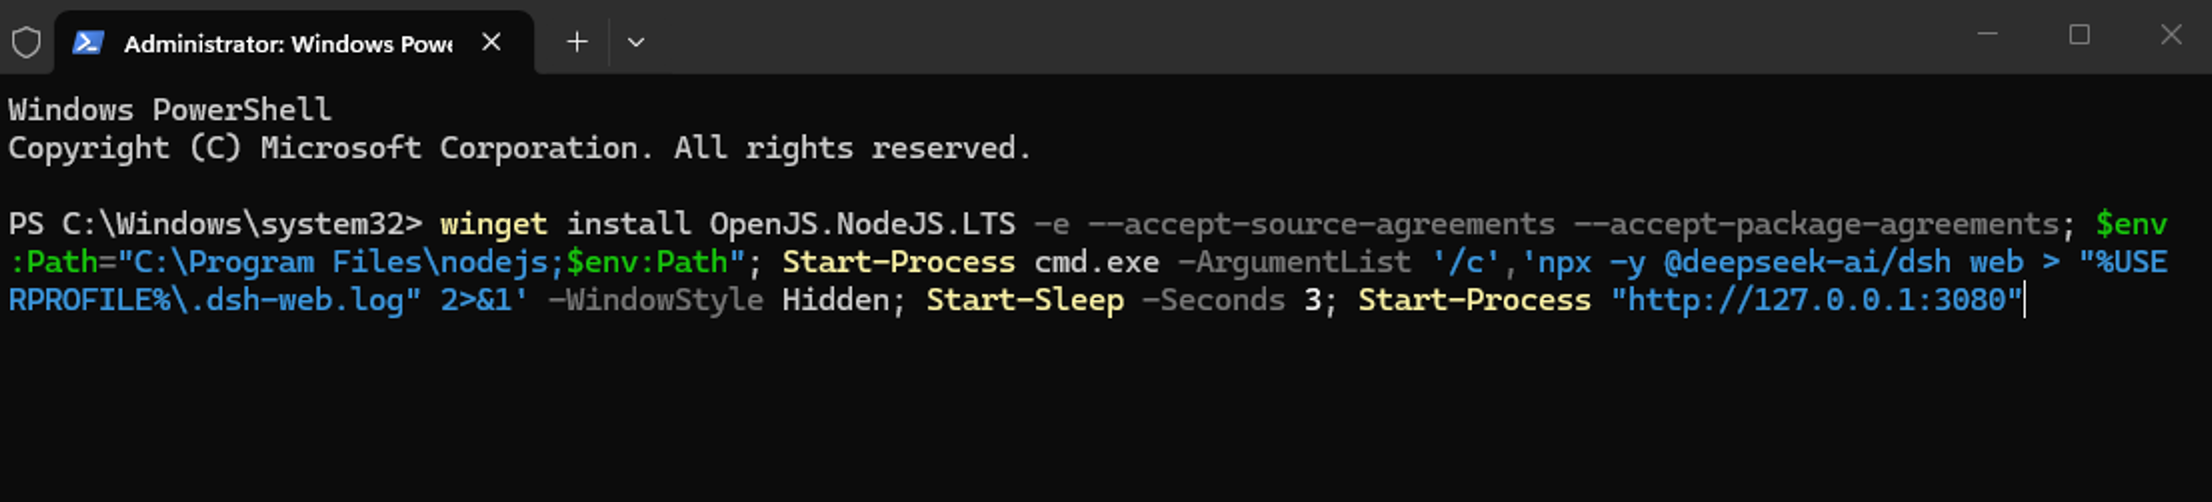
This is only a test statement. Press the button below to continue.
The next window asks for an API key. If you do not have one yet, simply use the first button. We will create one in the following section.
If the browser shows ‘This site can’t be reached’, especially on the first launch, wait a moment and refresh the page. After closing the tab, you can reopen DeepSeek Harness at http://127.0.0.1:3080/.
Basic Configuration
Click the Settings button in the lower-left corner to open the DeepSeek Harness settings page. It is a useful way to explore and better understand its features.
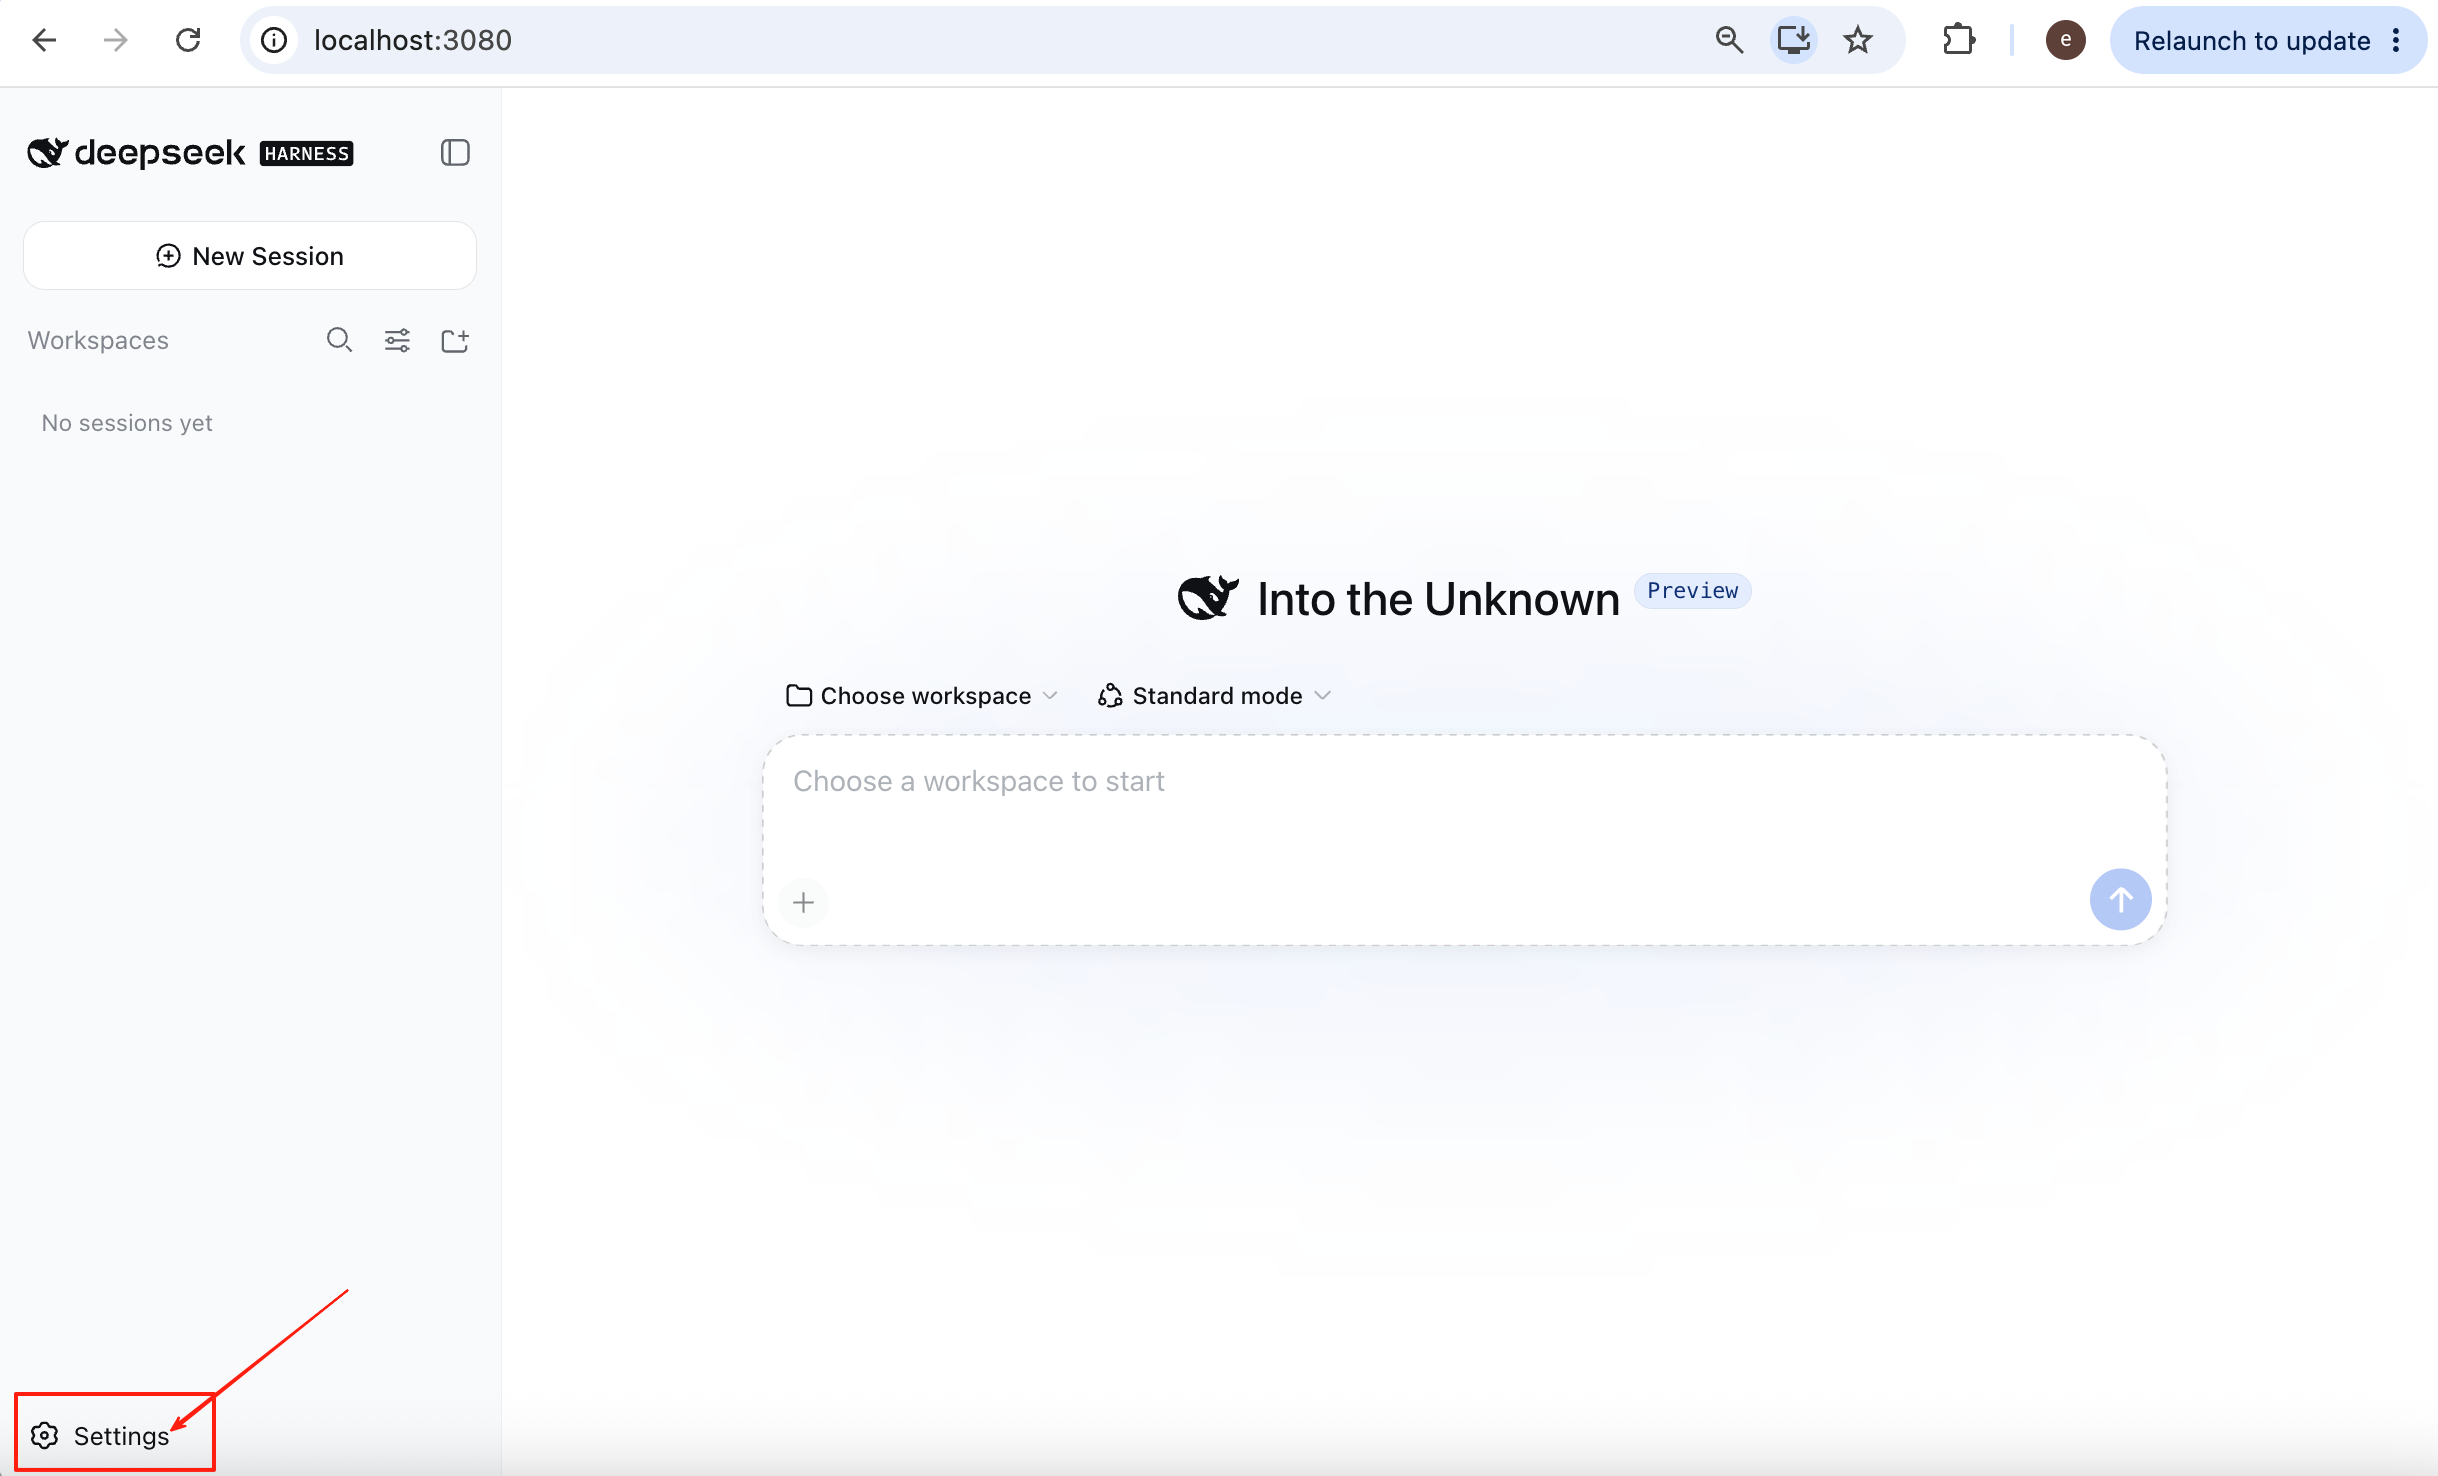
General
The General tab contains several basic settings. For example, you can change the language if necessary. Currently, English and Chinese are the two officially supported languages.
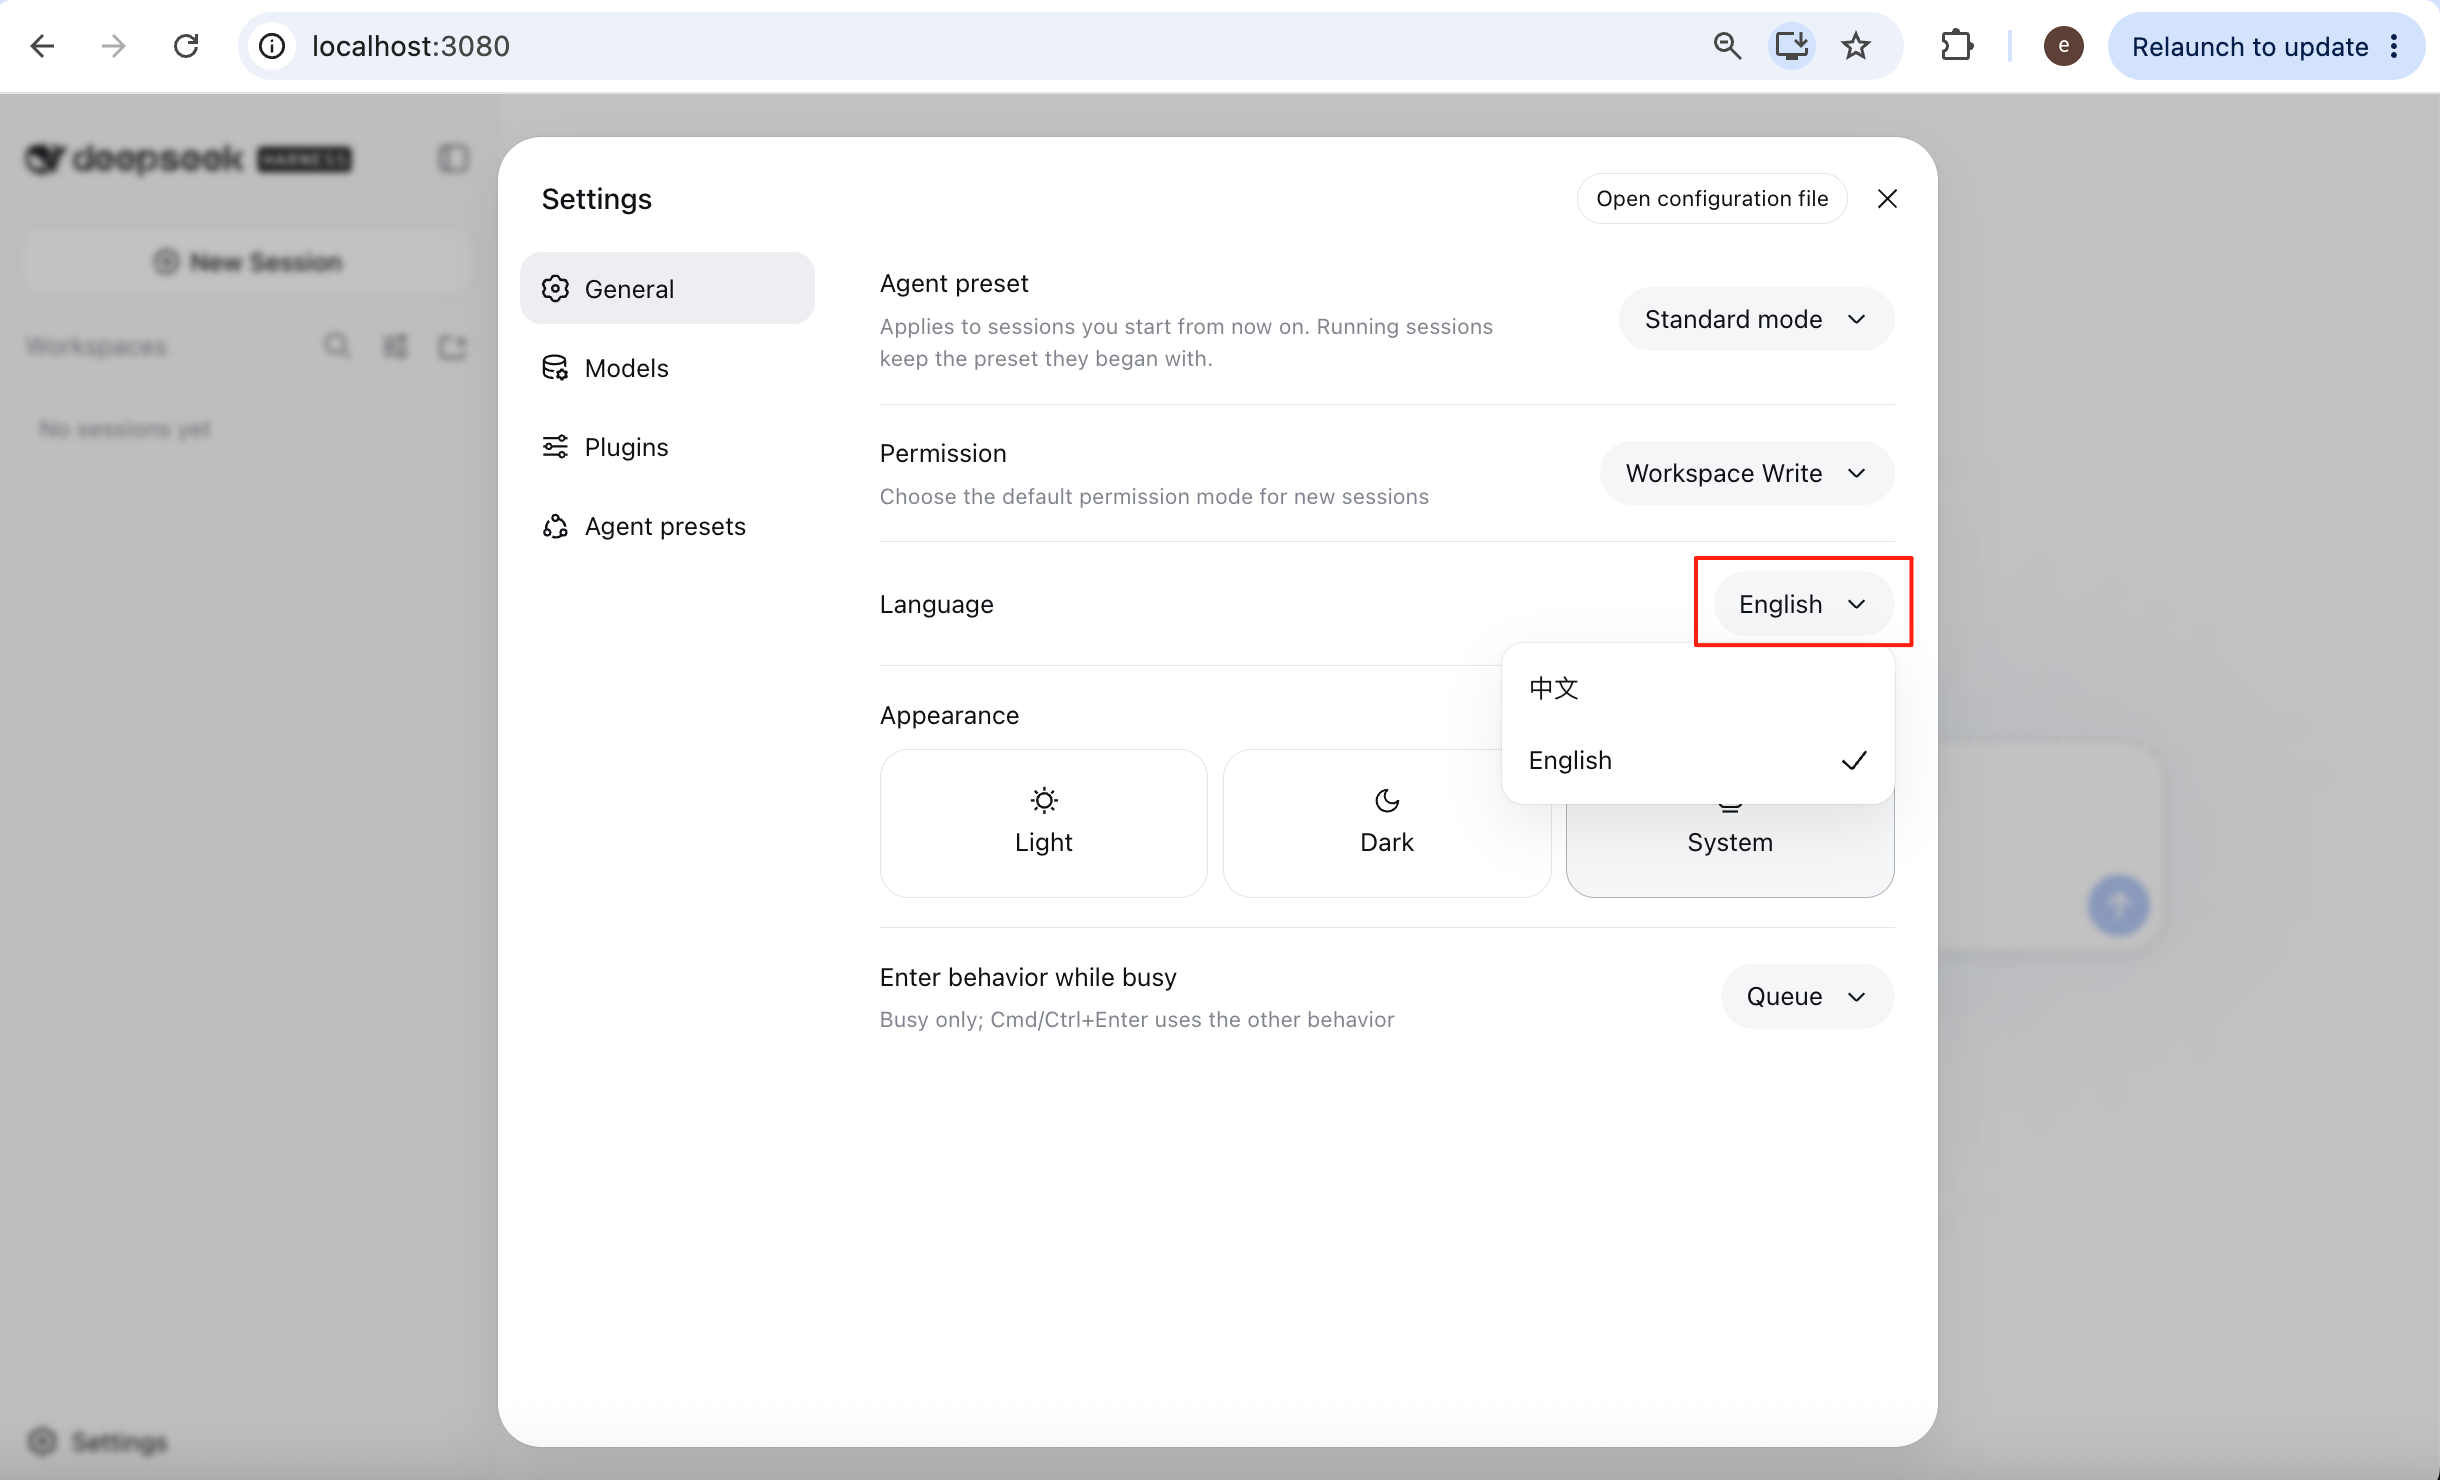
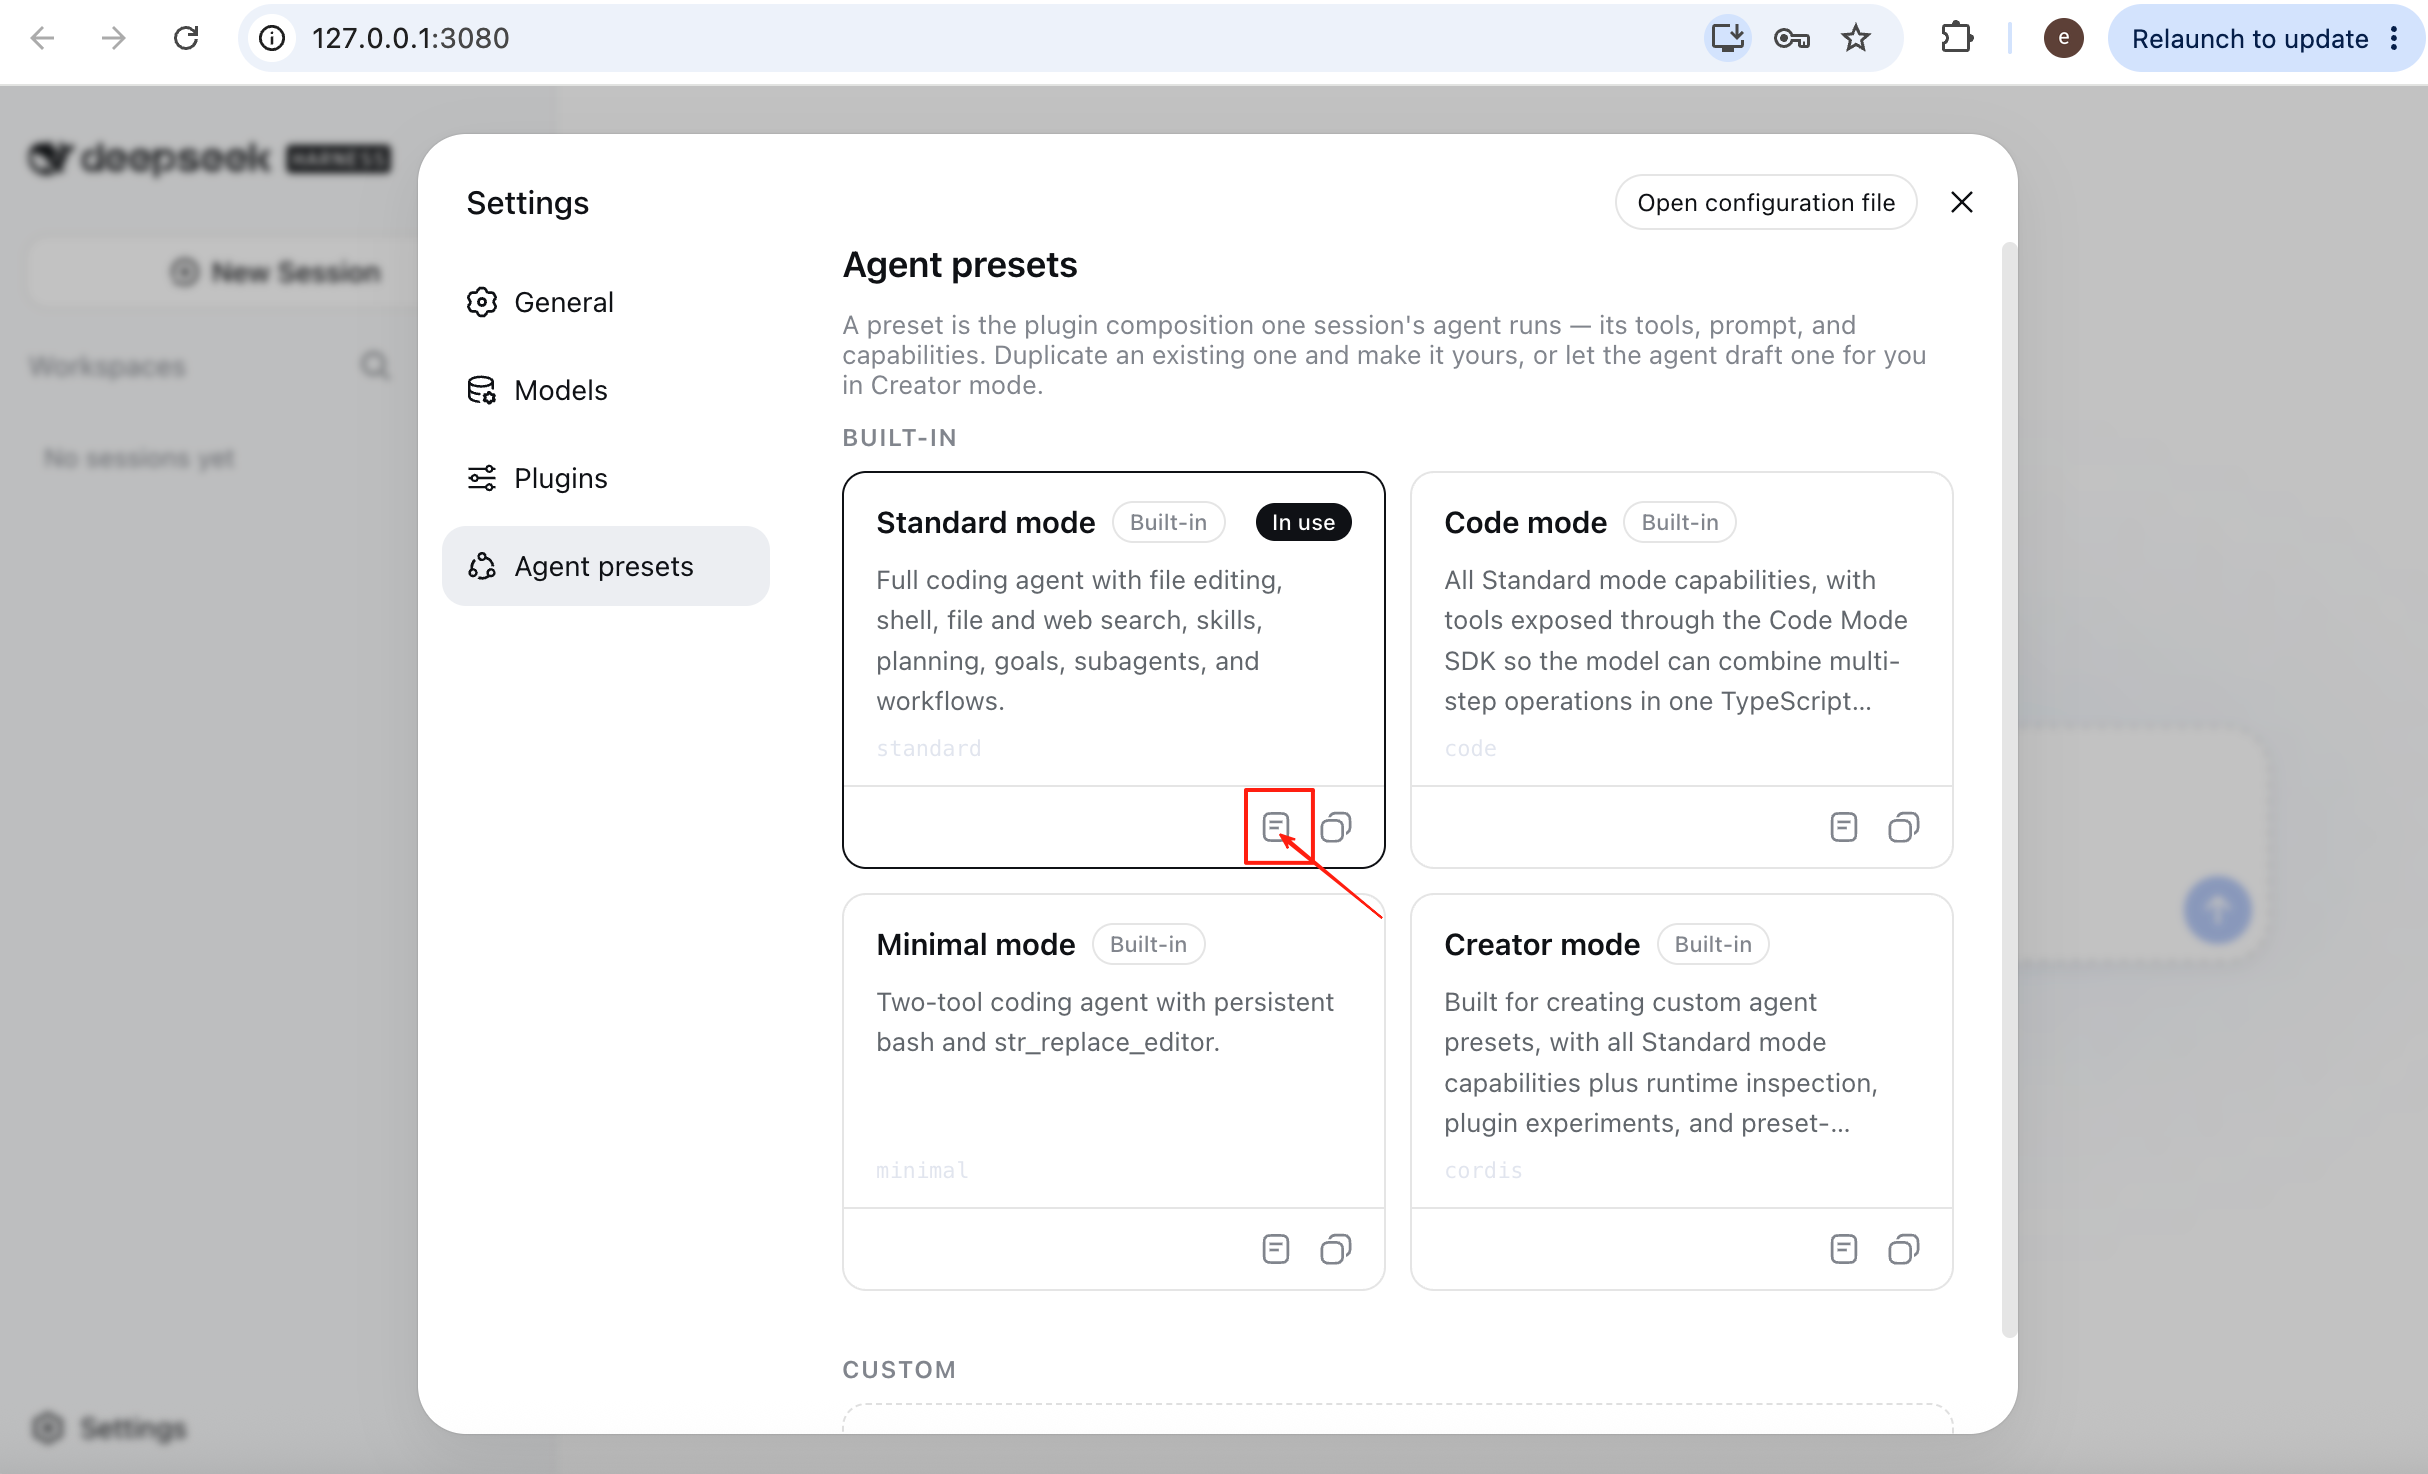
Agent Preset determines what the AI can do. Standard Mode is for most users. Code Mode is useful for repetitive tasks. Minimal Mode is mainly for testing. Creator Mode lets you build your own DeepSeek Harness setup.
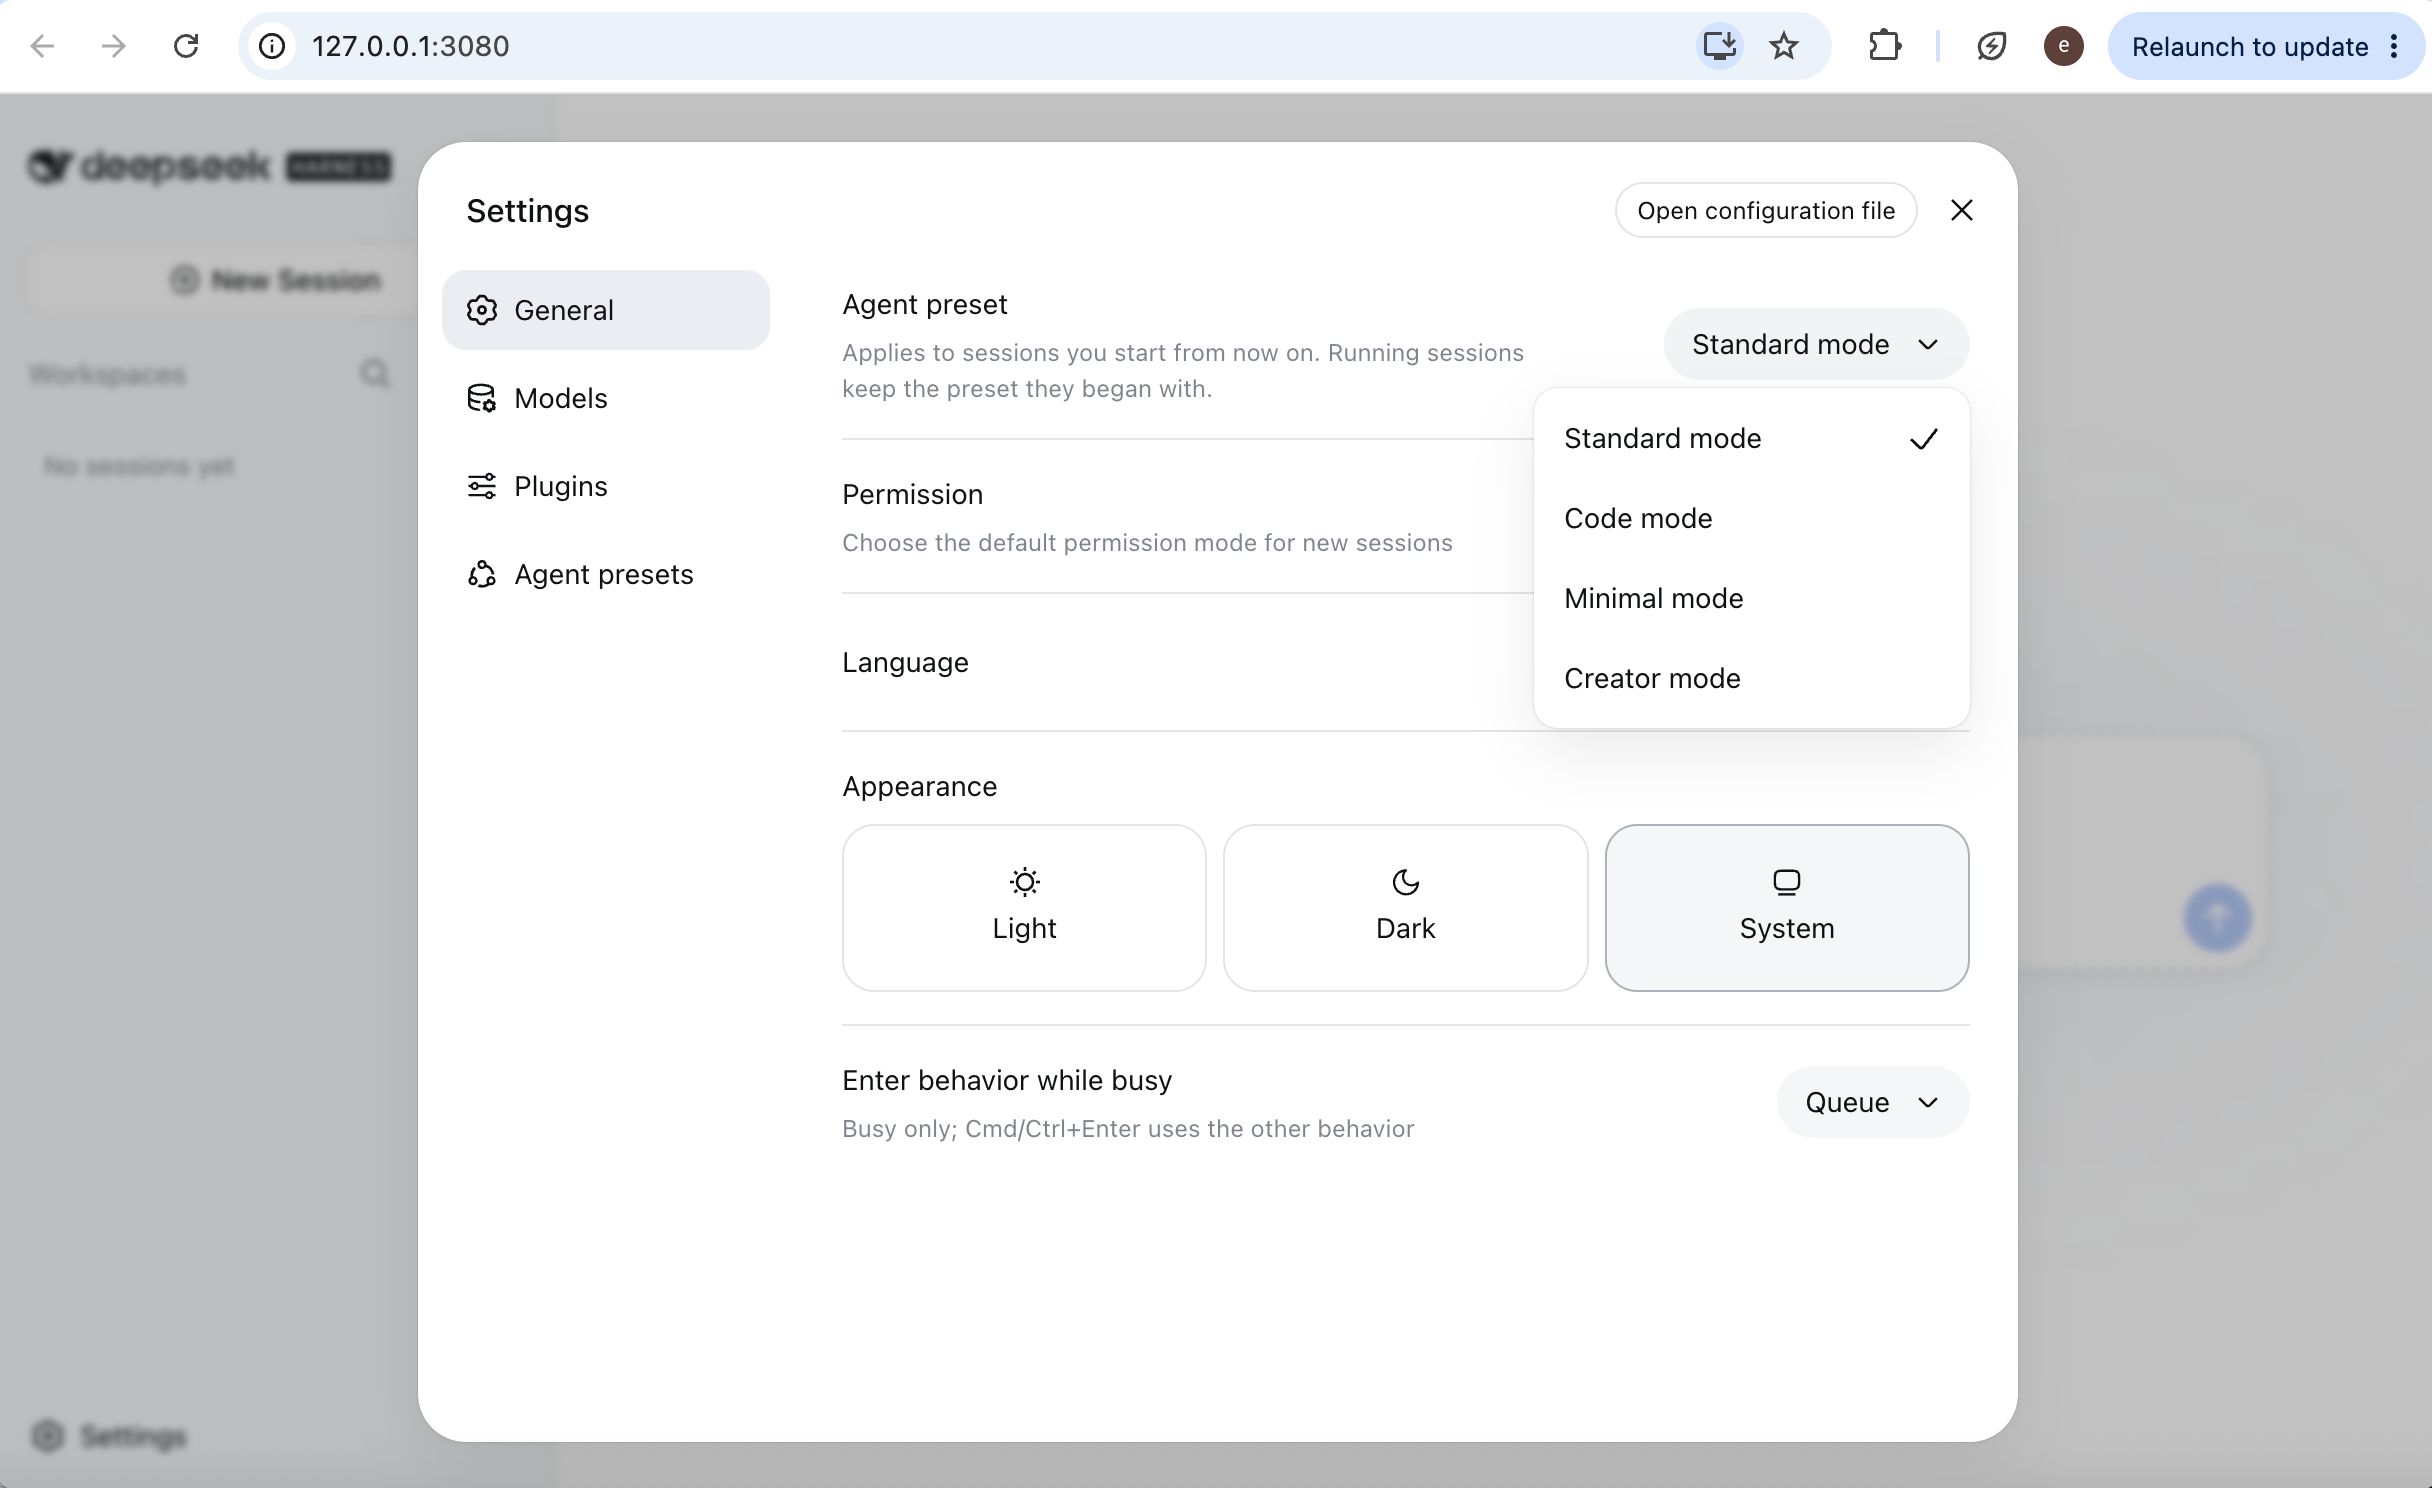
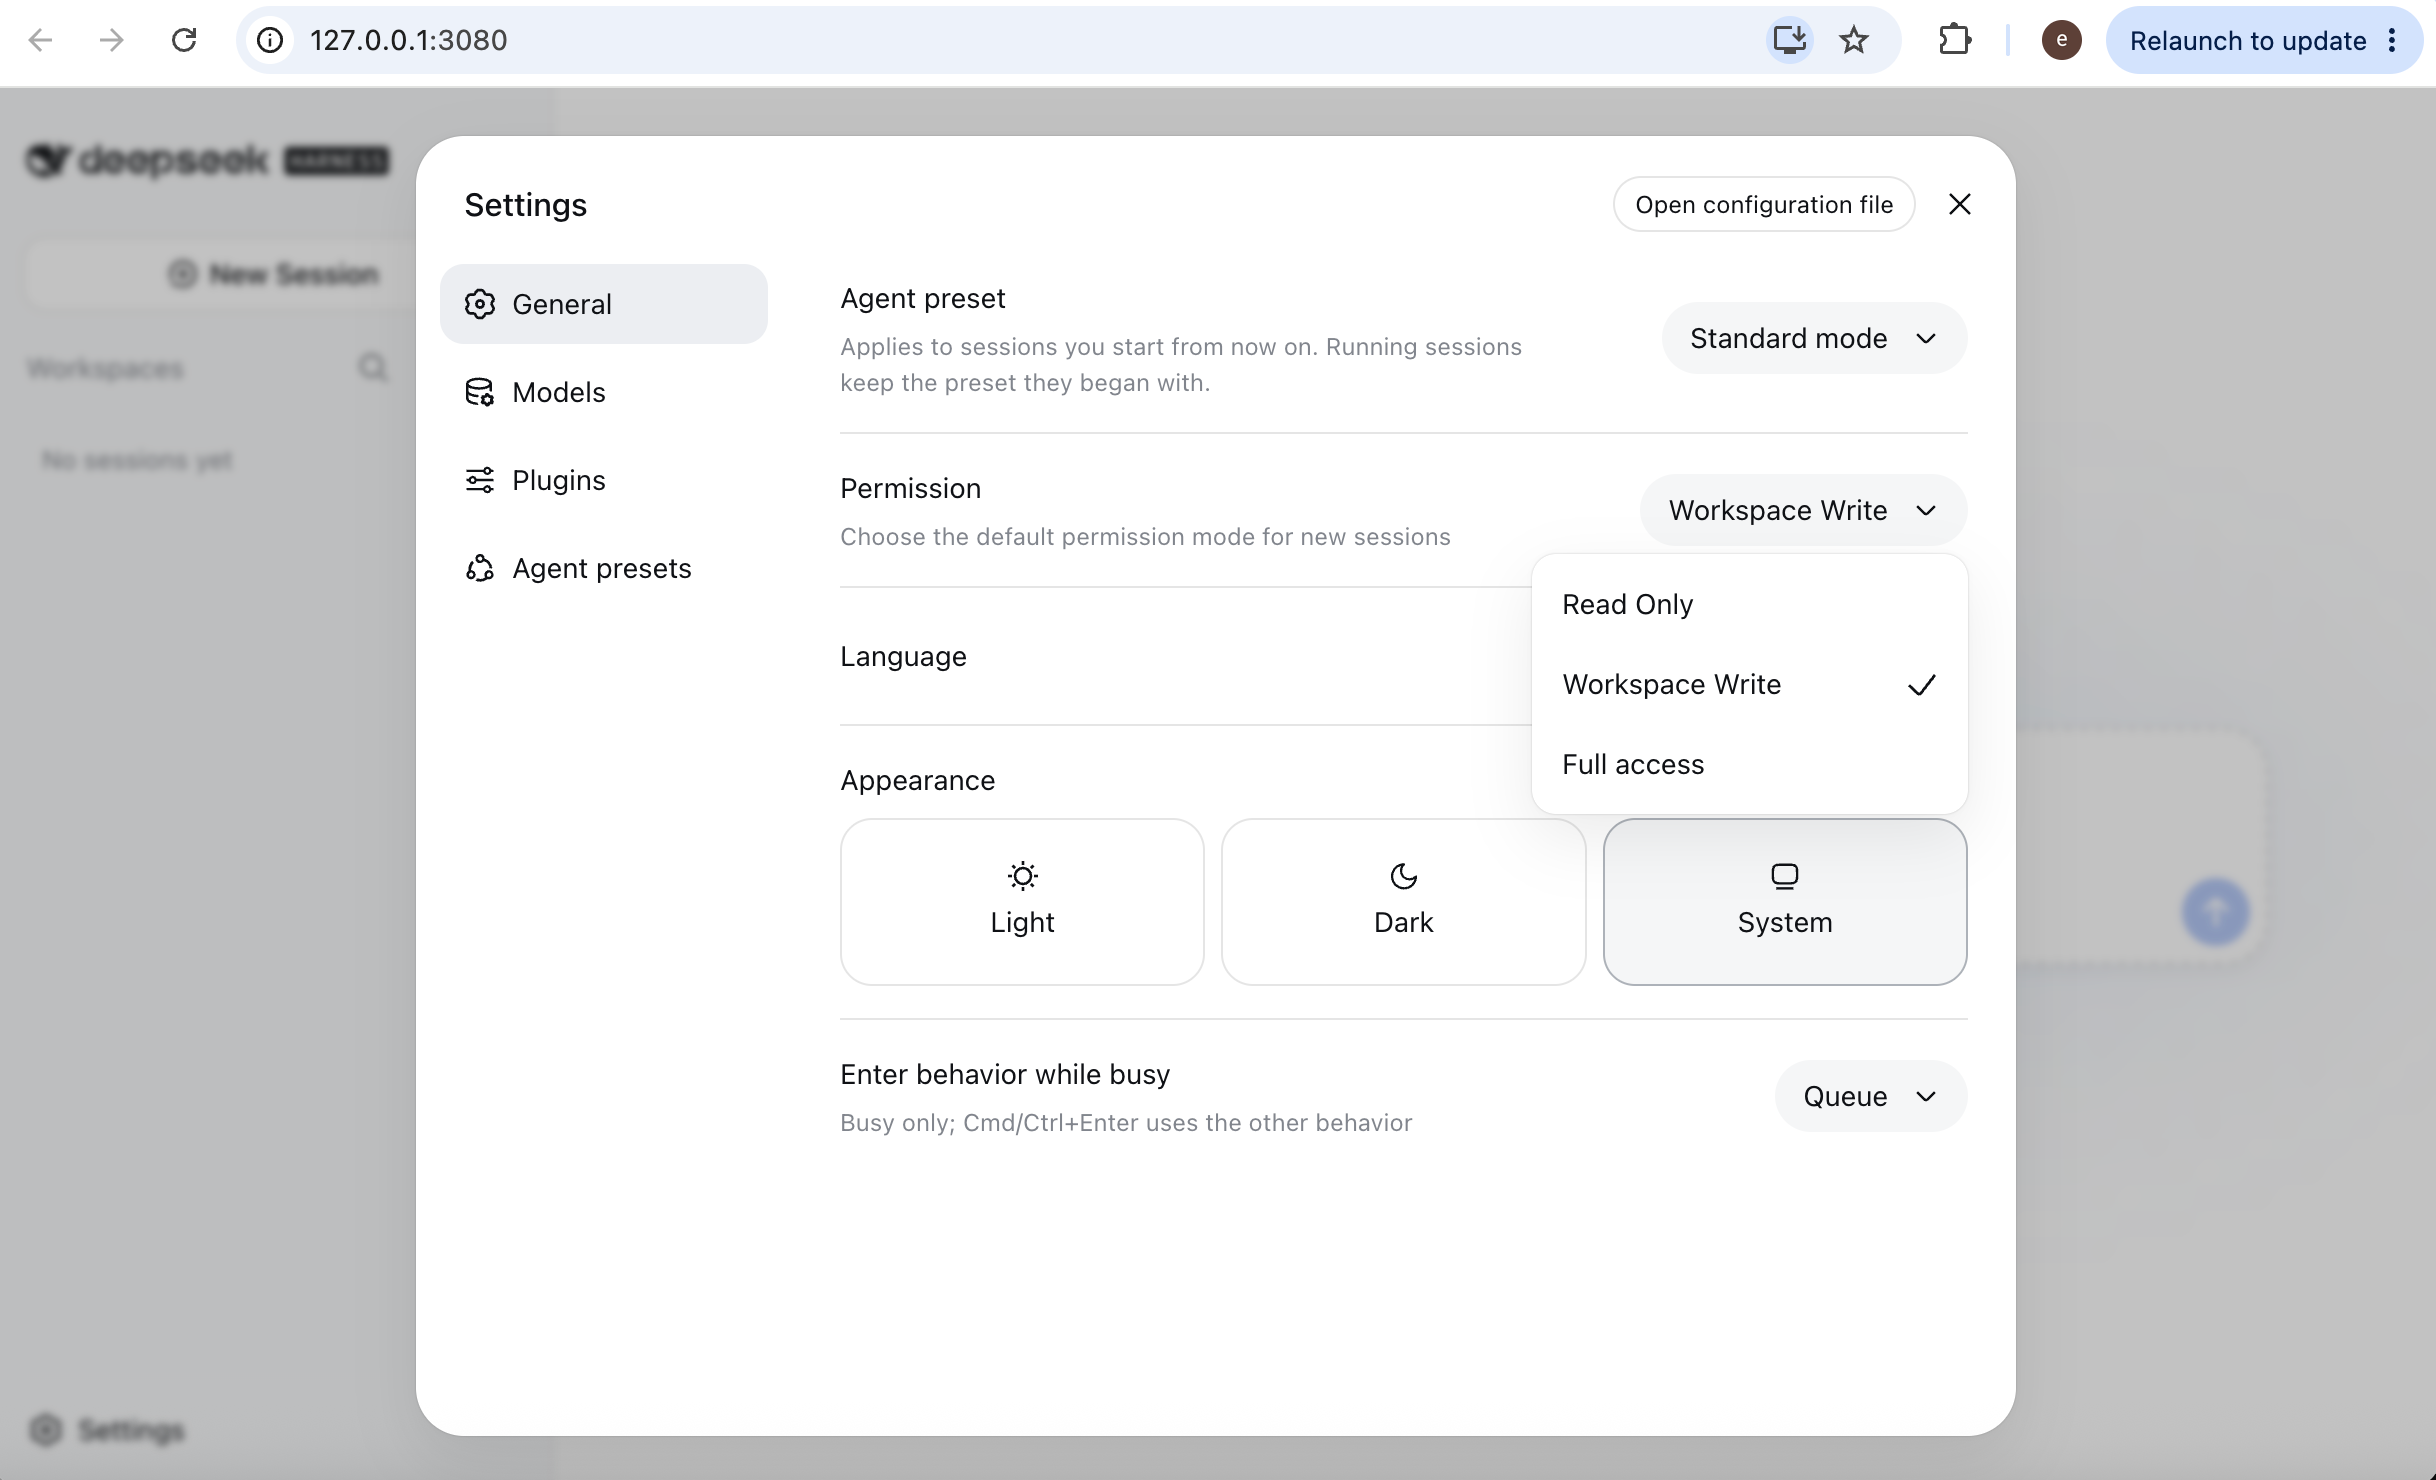
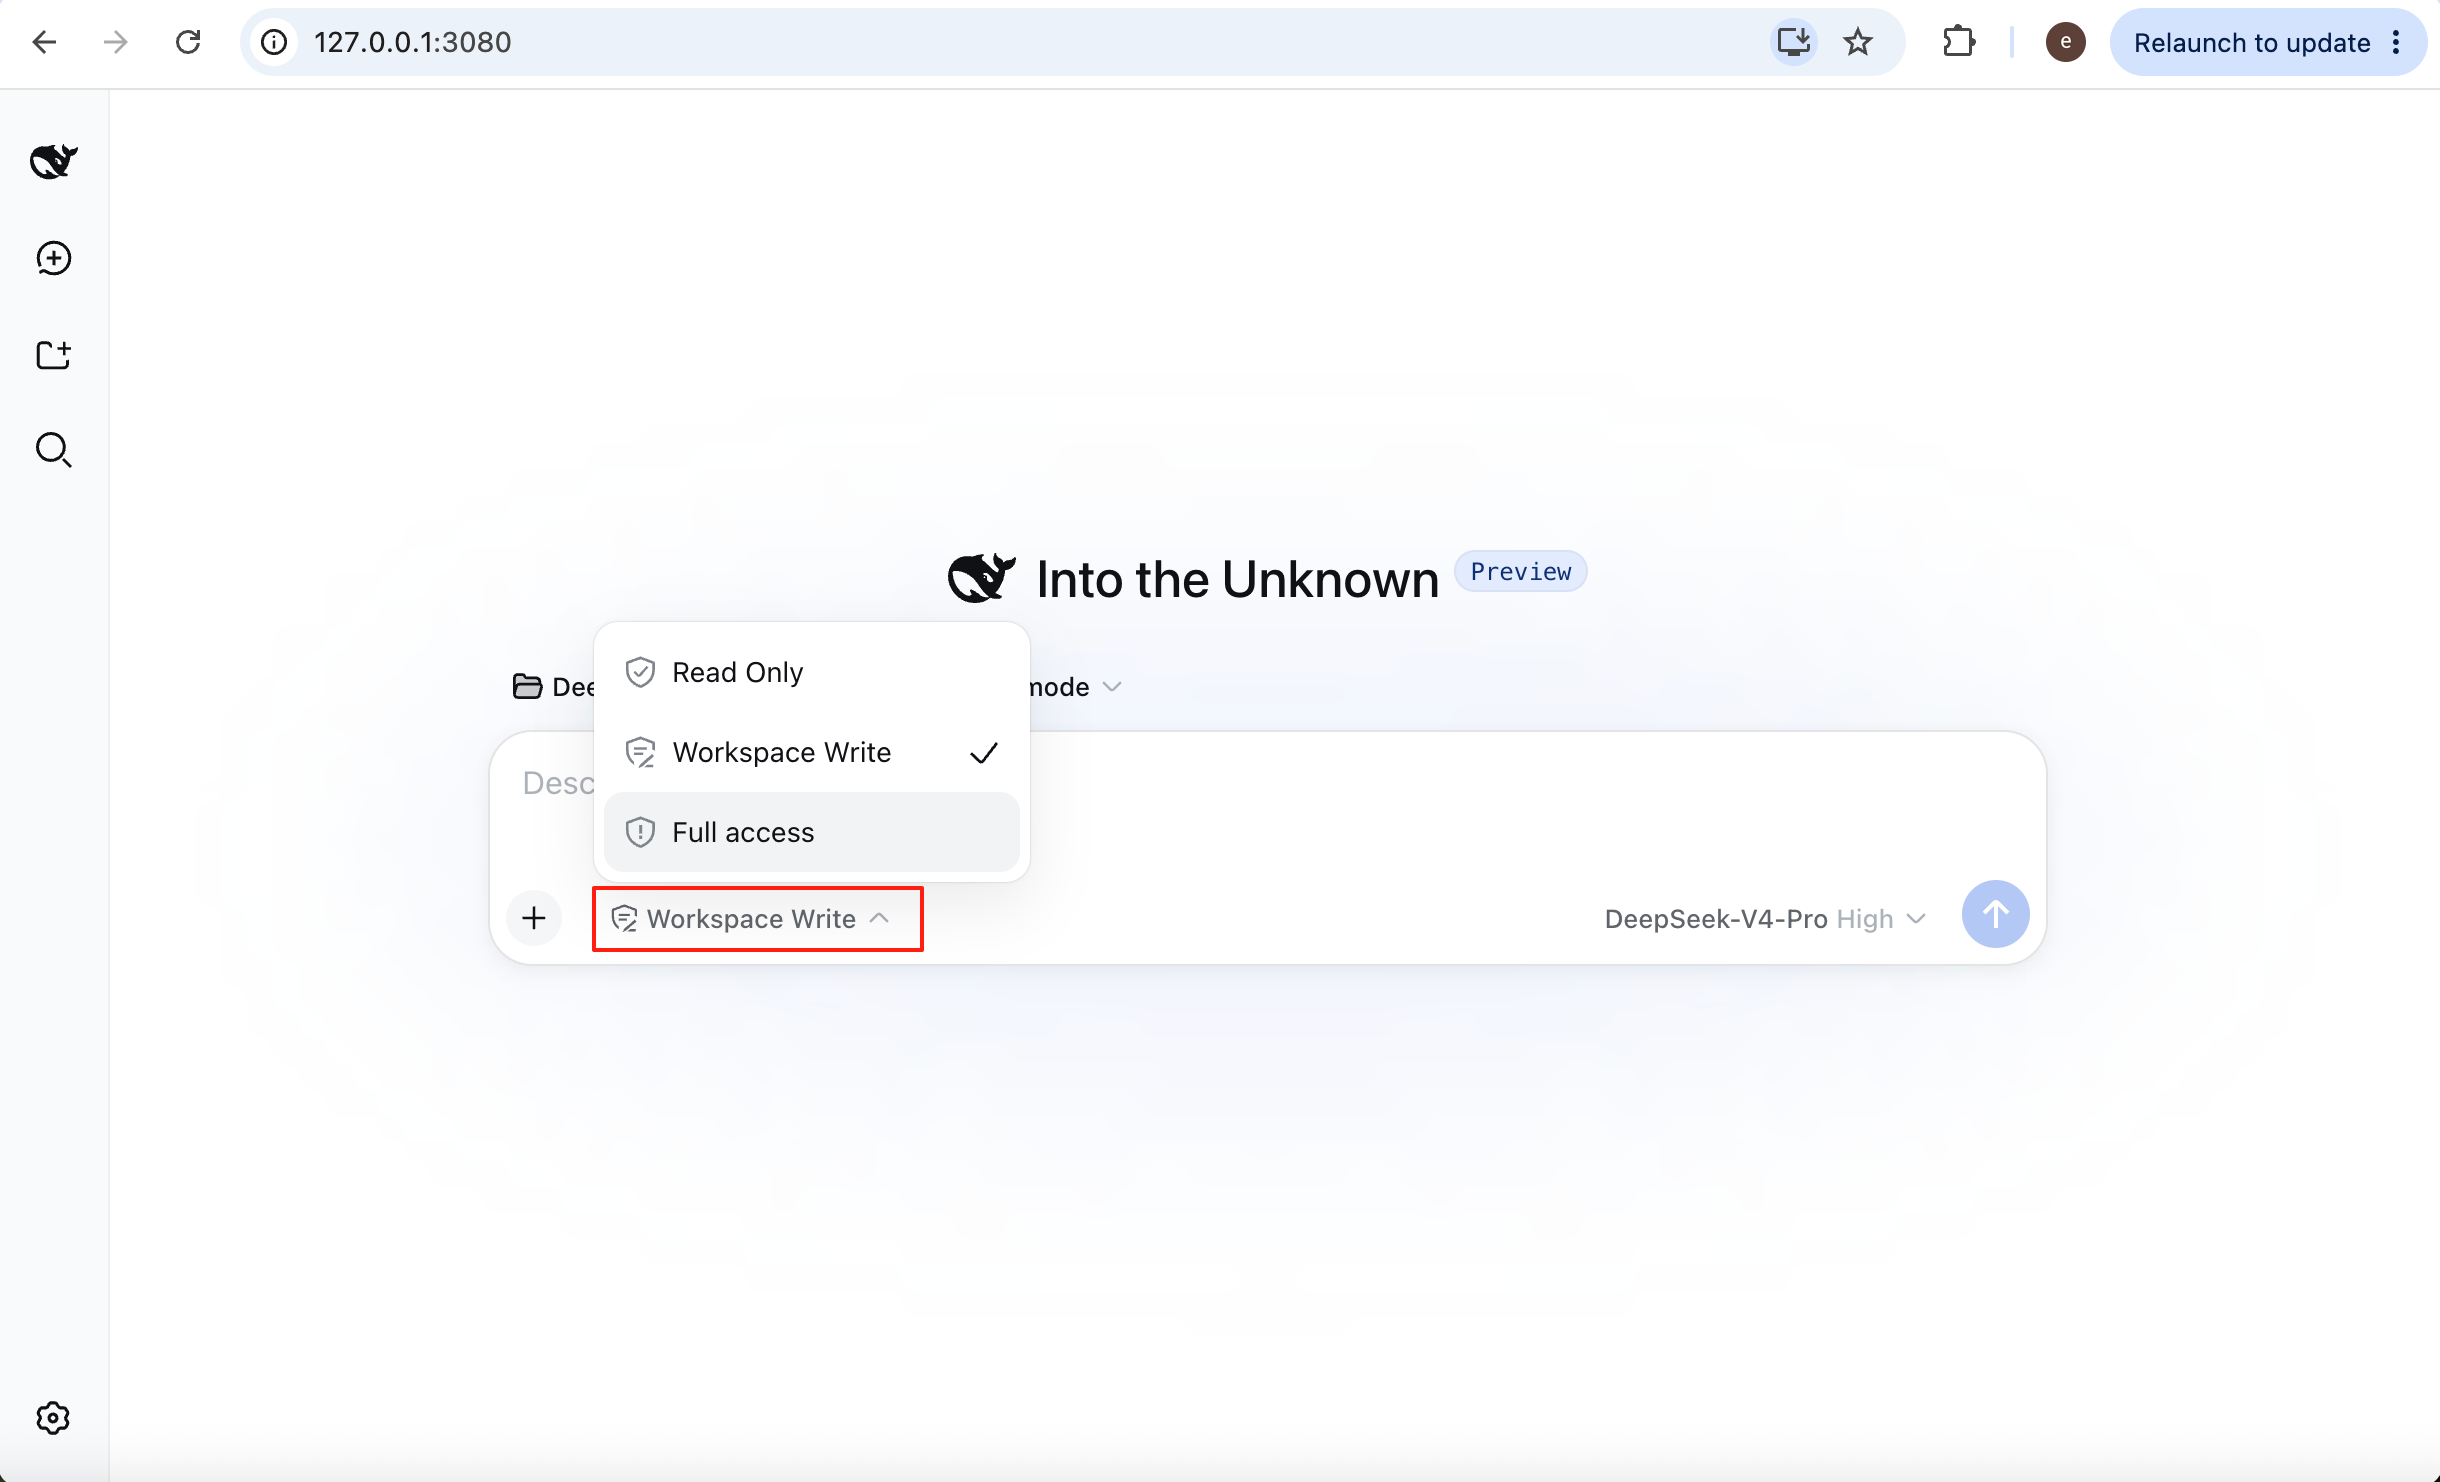
Permission Mode determines where the AI can act. Read Only lets it read files without changing them. Workspace Write limits file changes to the folder you selected. Full Access allows it to modify files anywhere on your computer.
Models
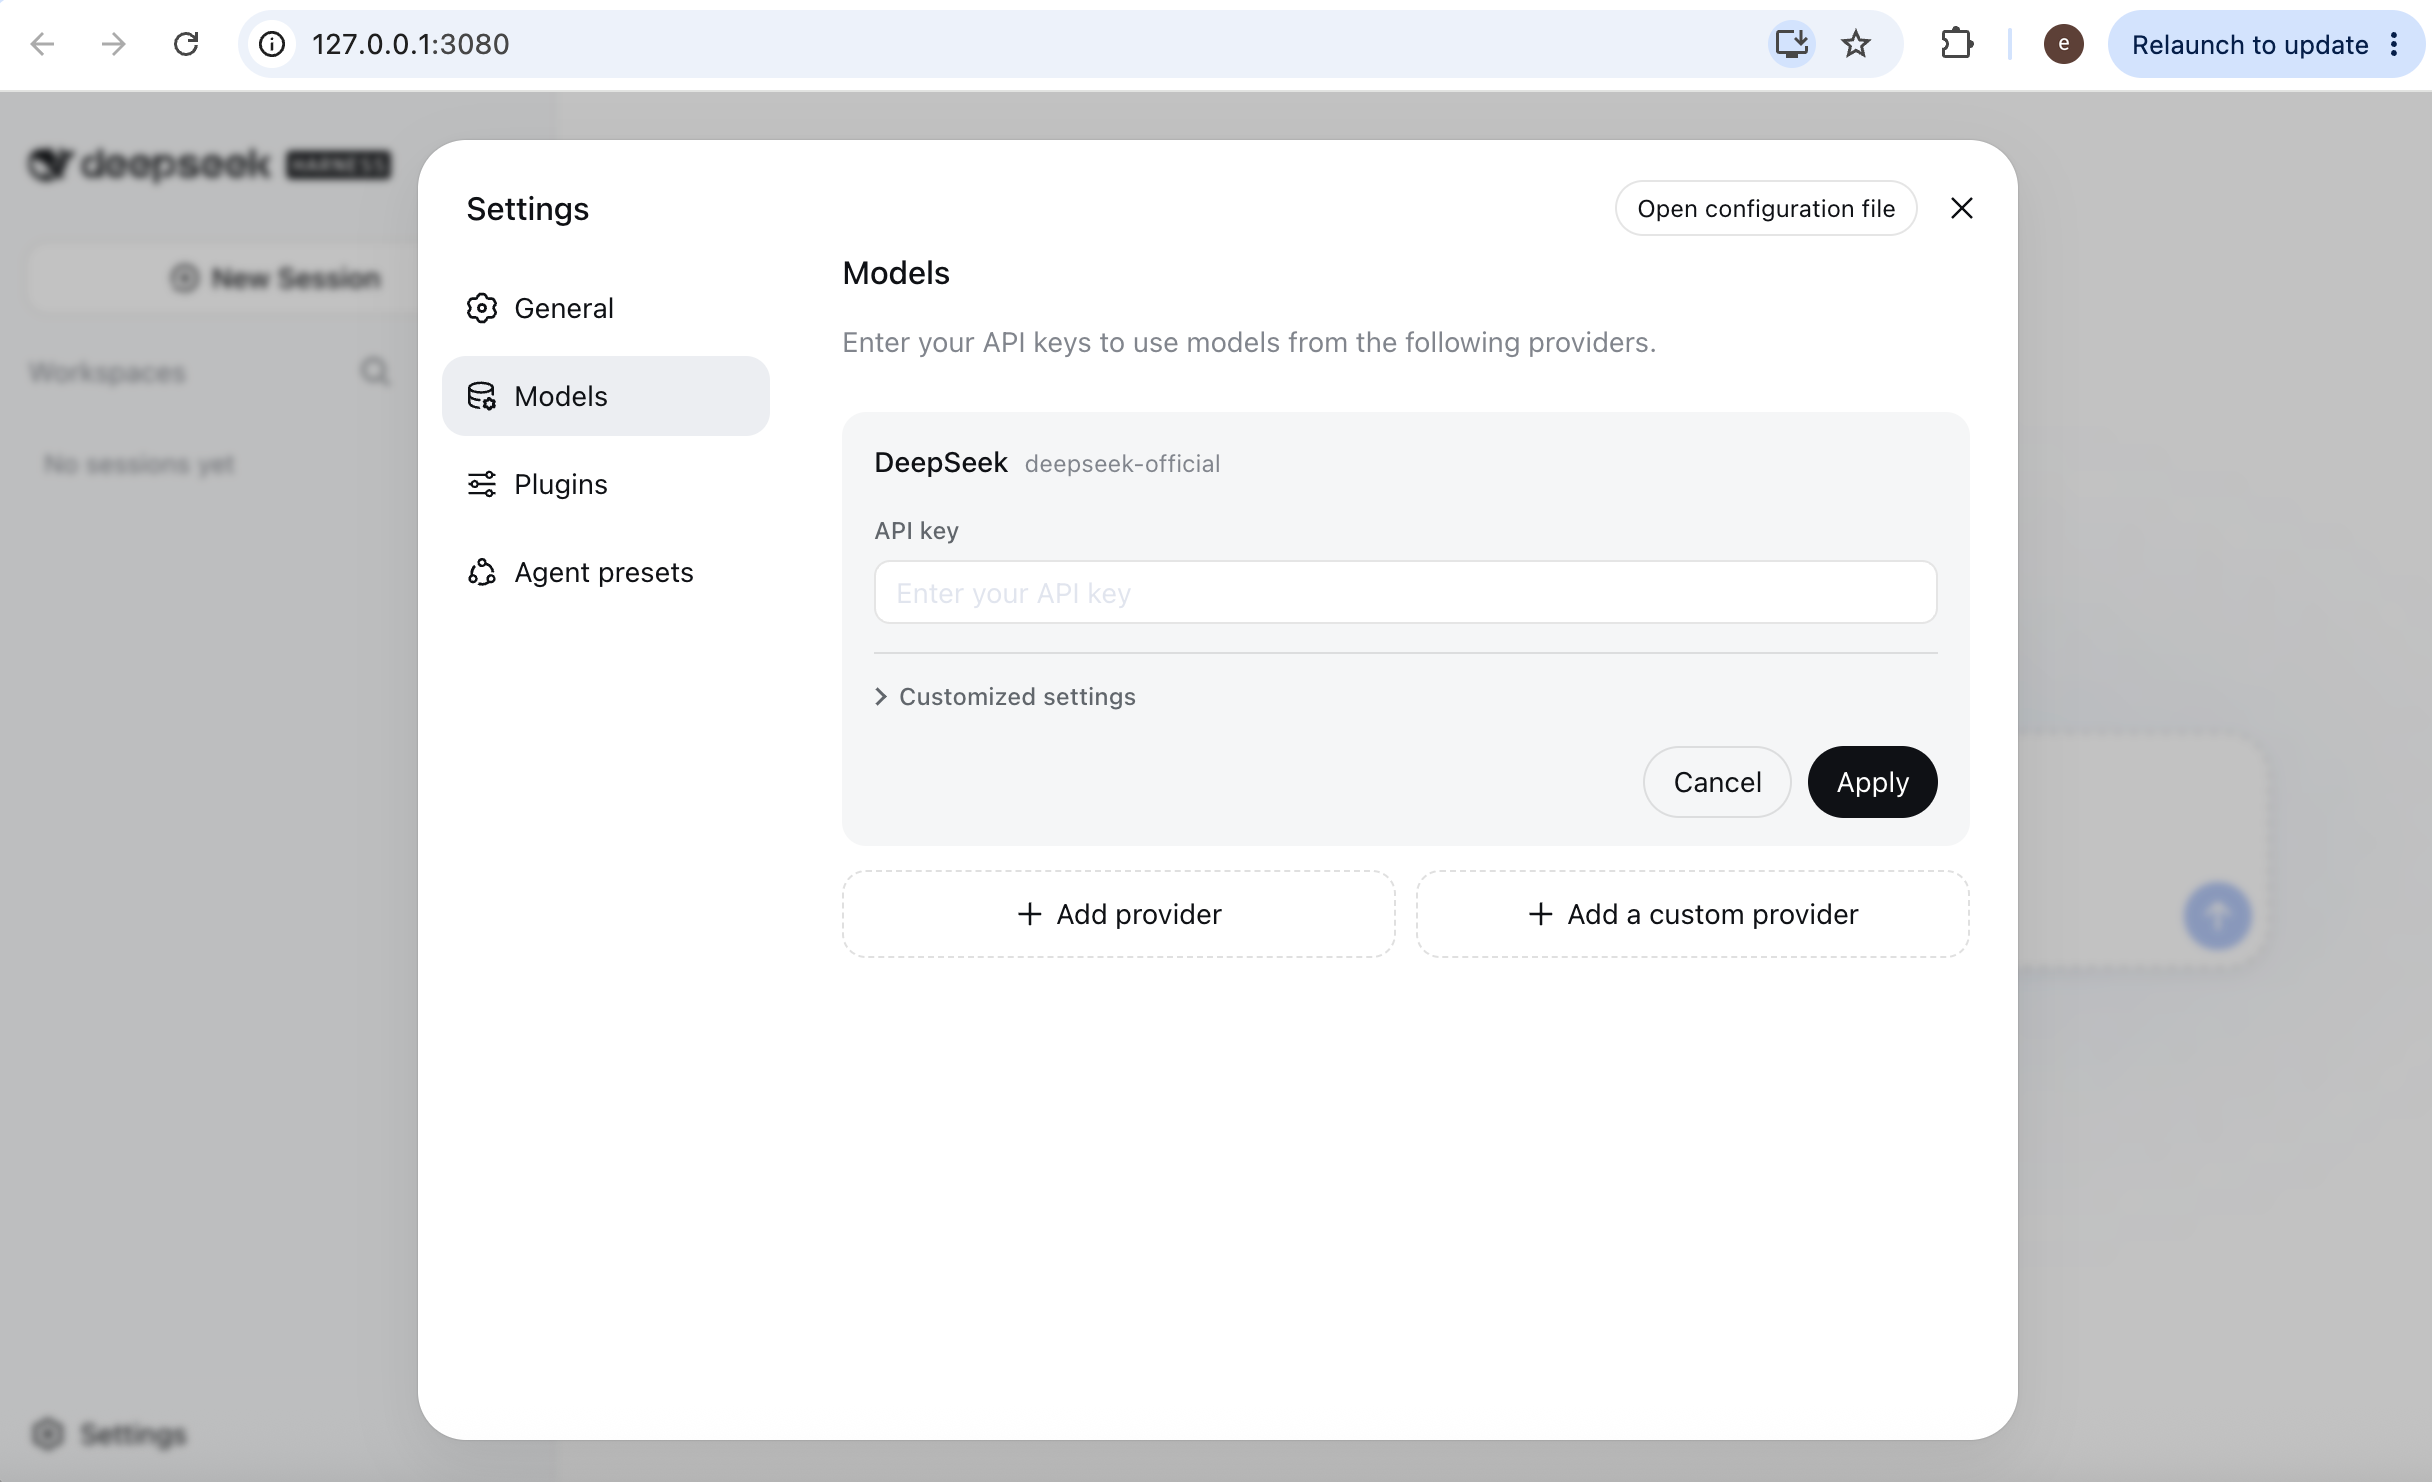
Go to the Models tab to configure the model that powers your Harness. The language model handles the reasoning and planning, while DeepSeek Harness provides the tools and execution environment. Since DeepSeek Harness is designed to work particularly well with DeepSeek models, we will mainly use DeepSeek as the example here.
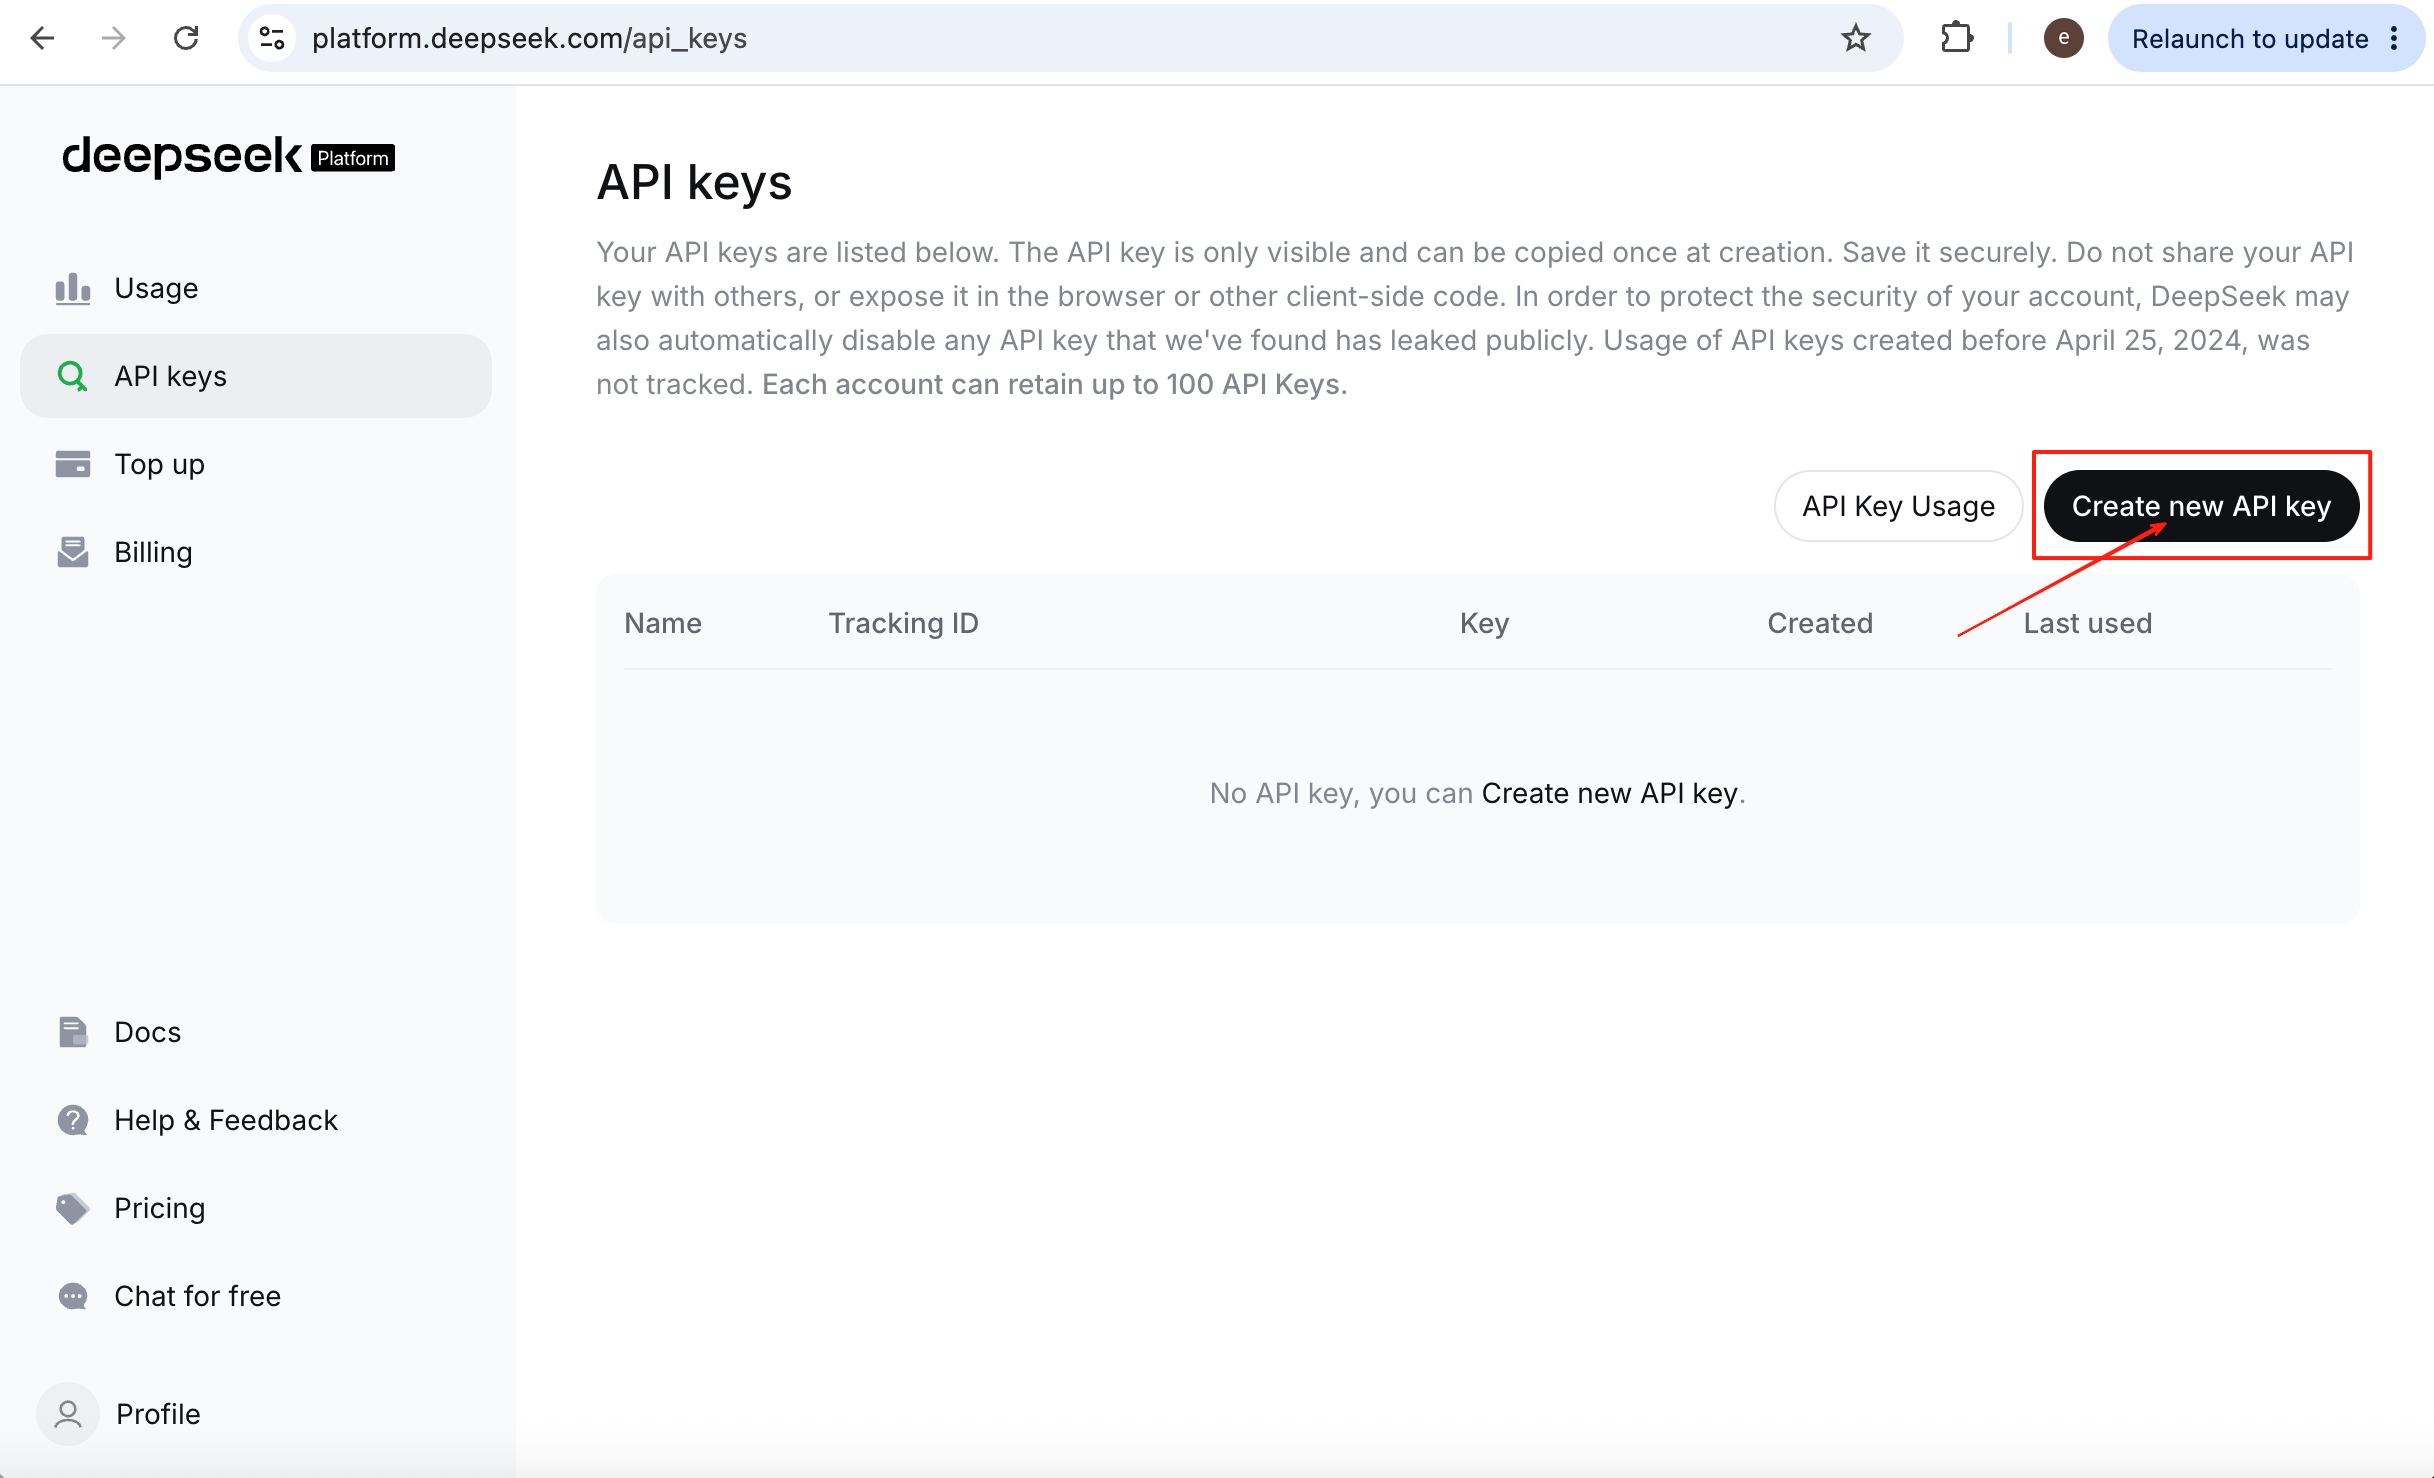
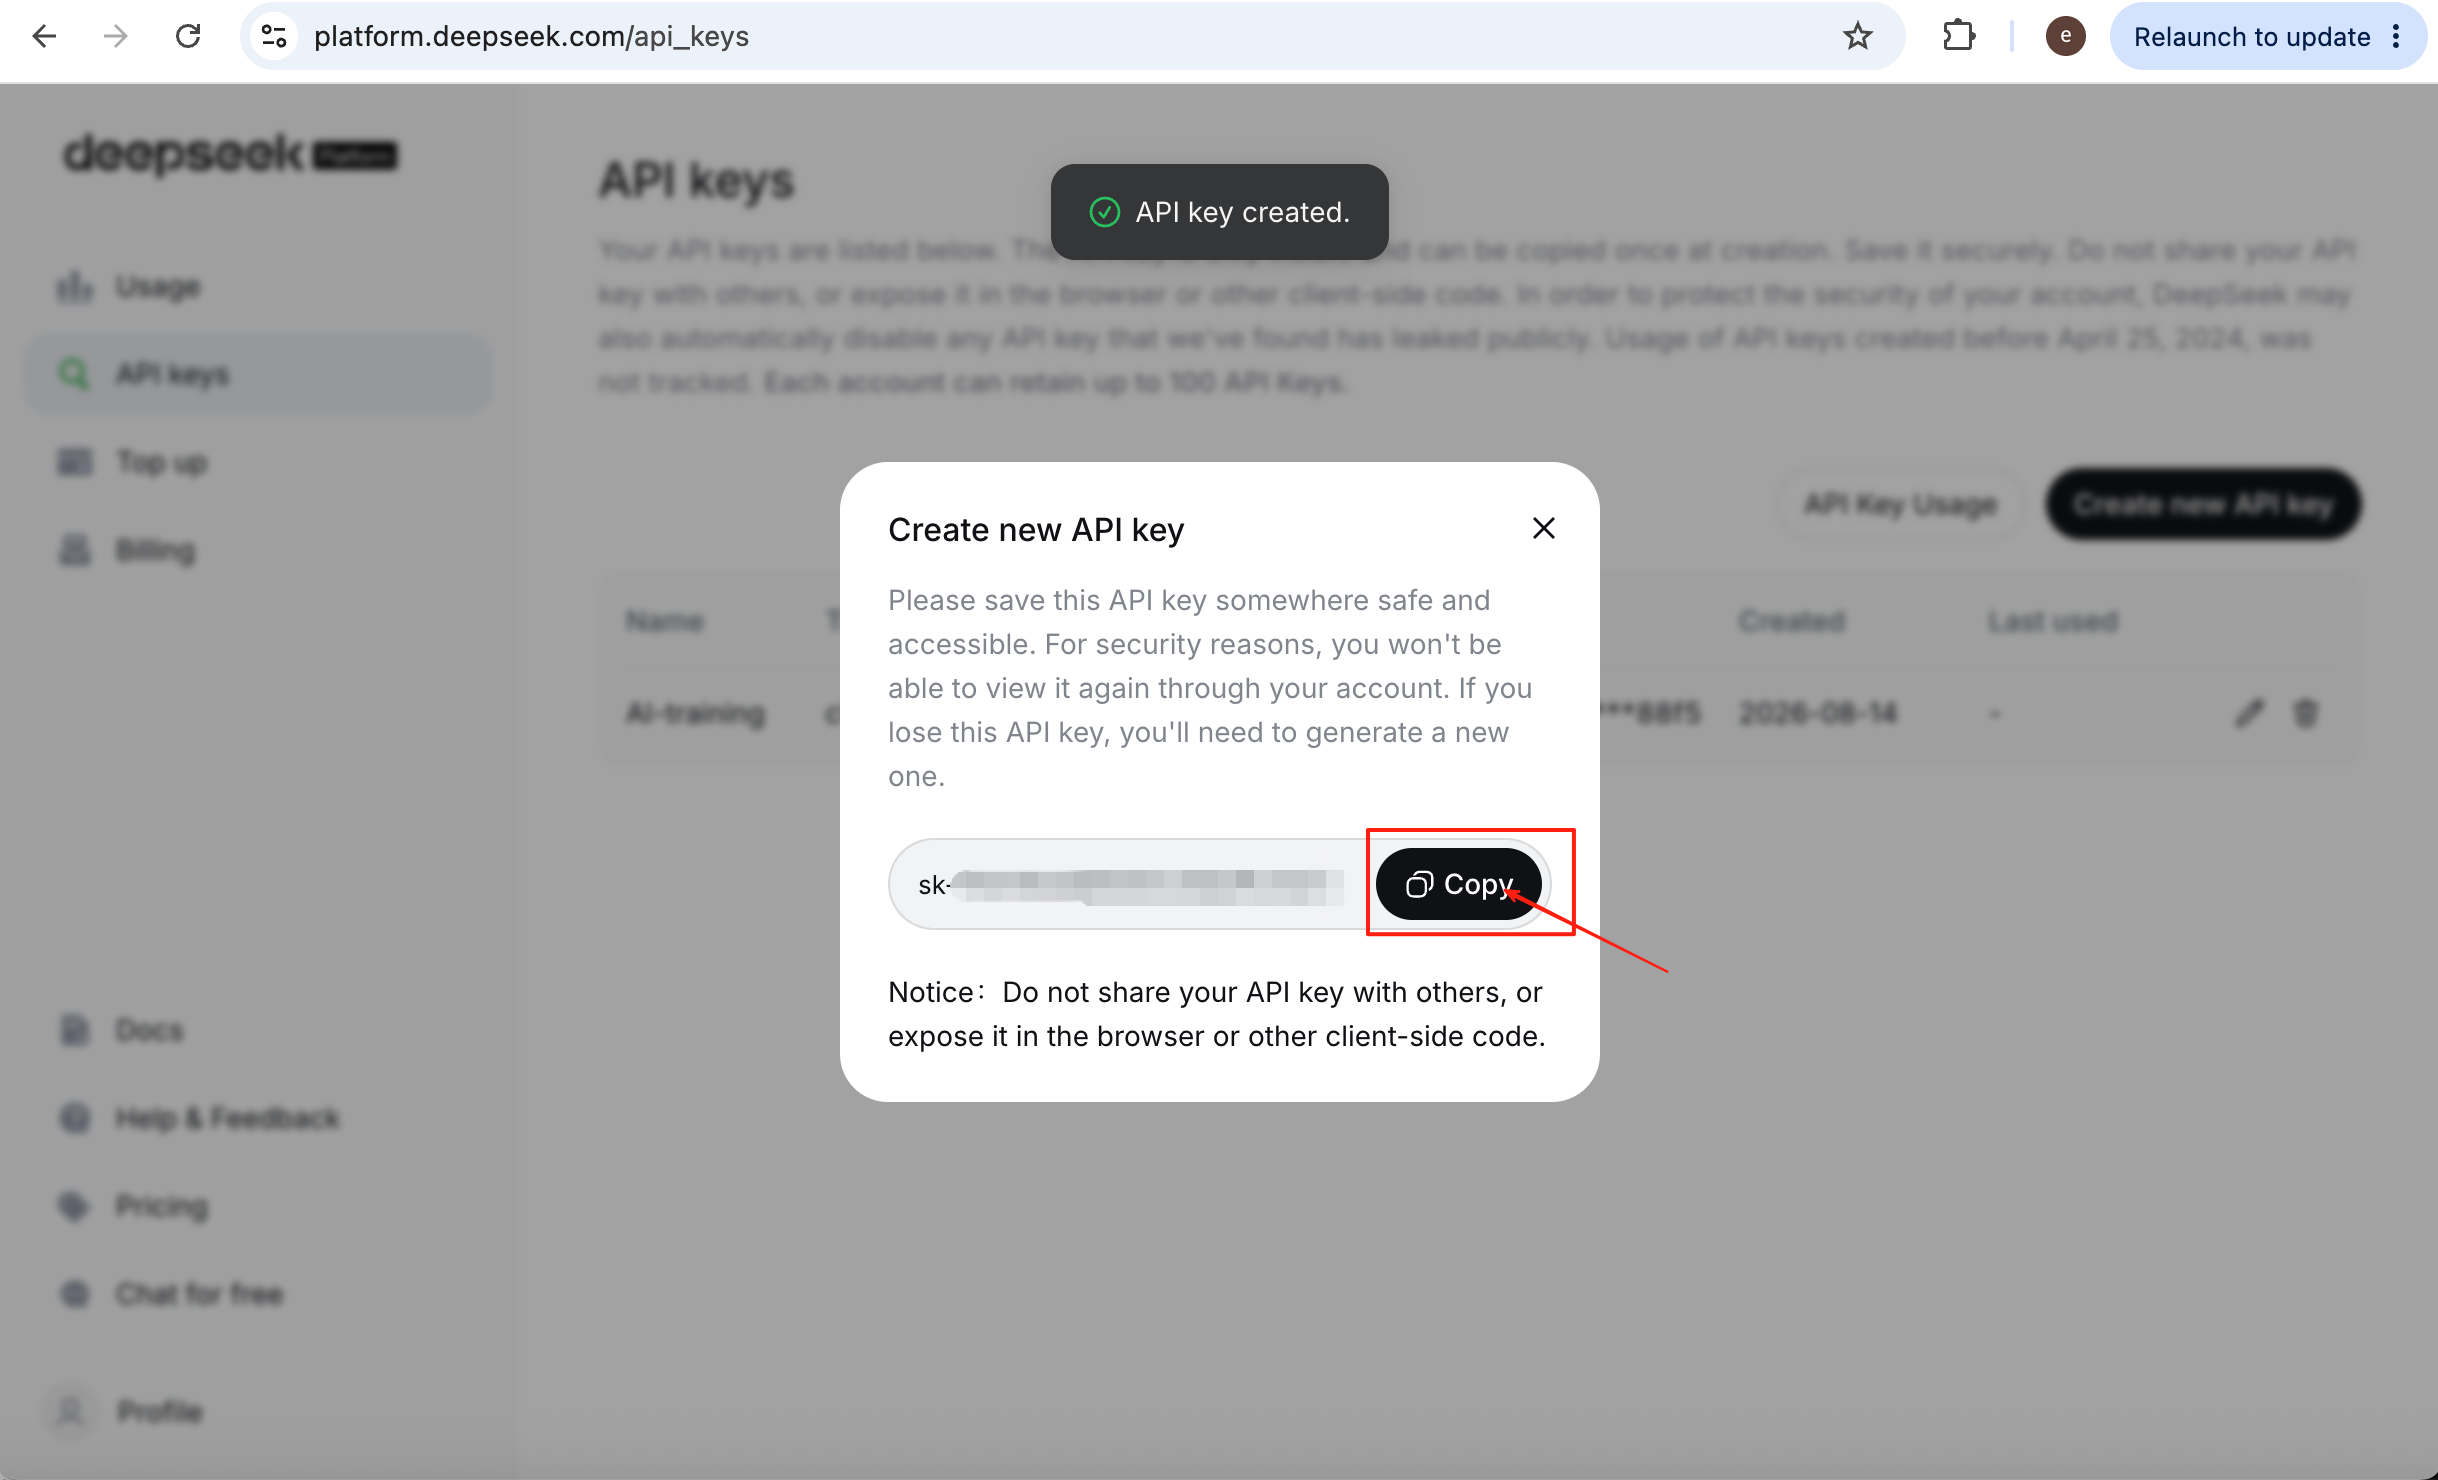
To use a DeepSeek model, you first need an API key. Go to https://platform.deepseek.com/api_keys and sign in. Then click Create new API key.
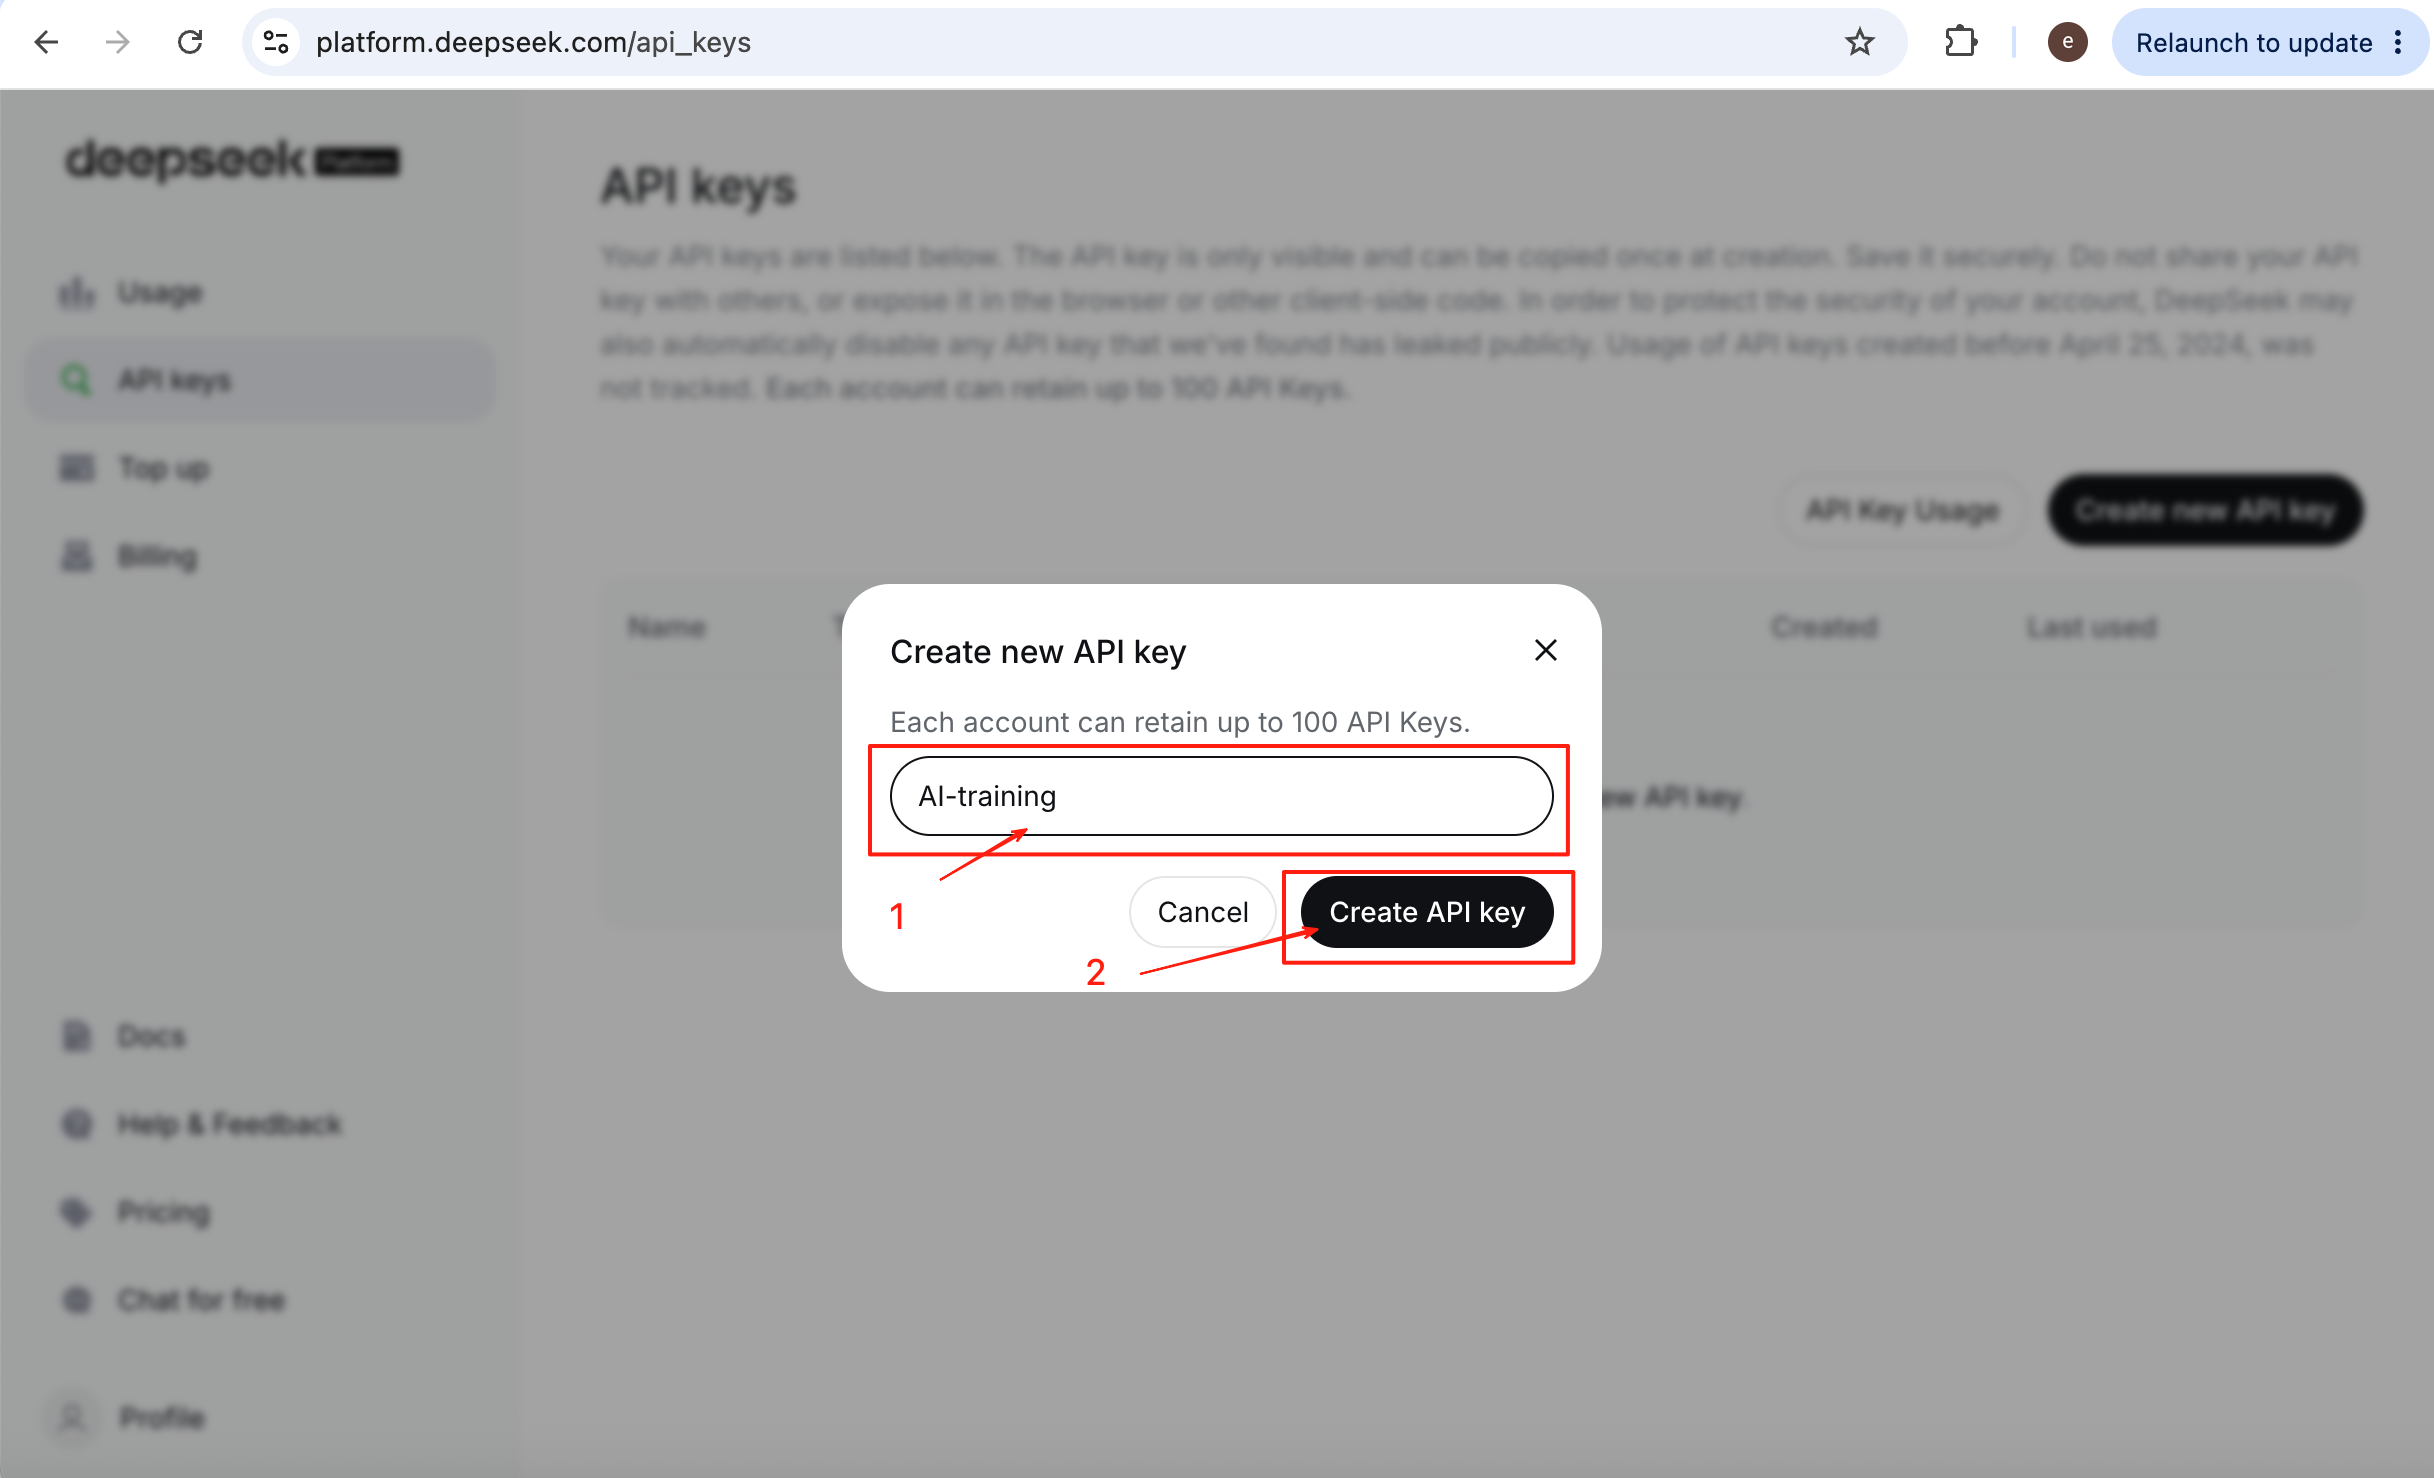
Give the key a name and click Create API key.
Click Copy to copy the API key, then return to DeepSeek Harness and paste it into the provider settings before applying it.
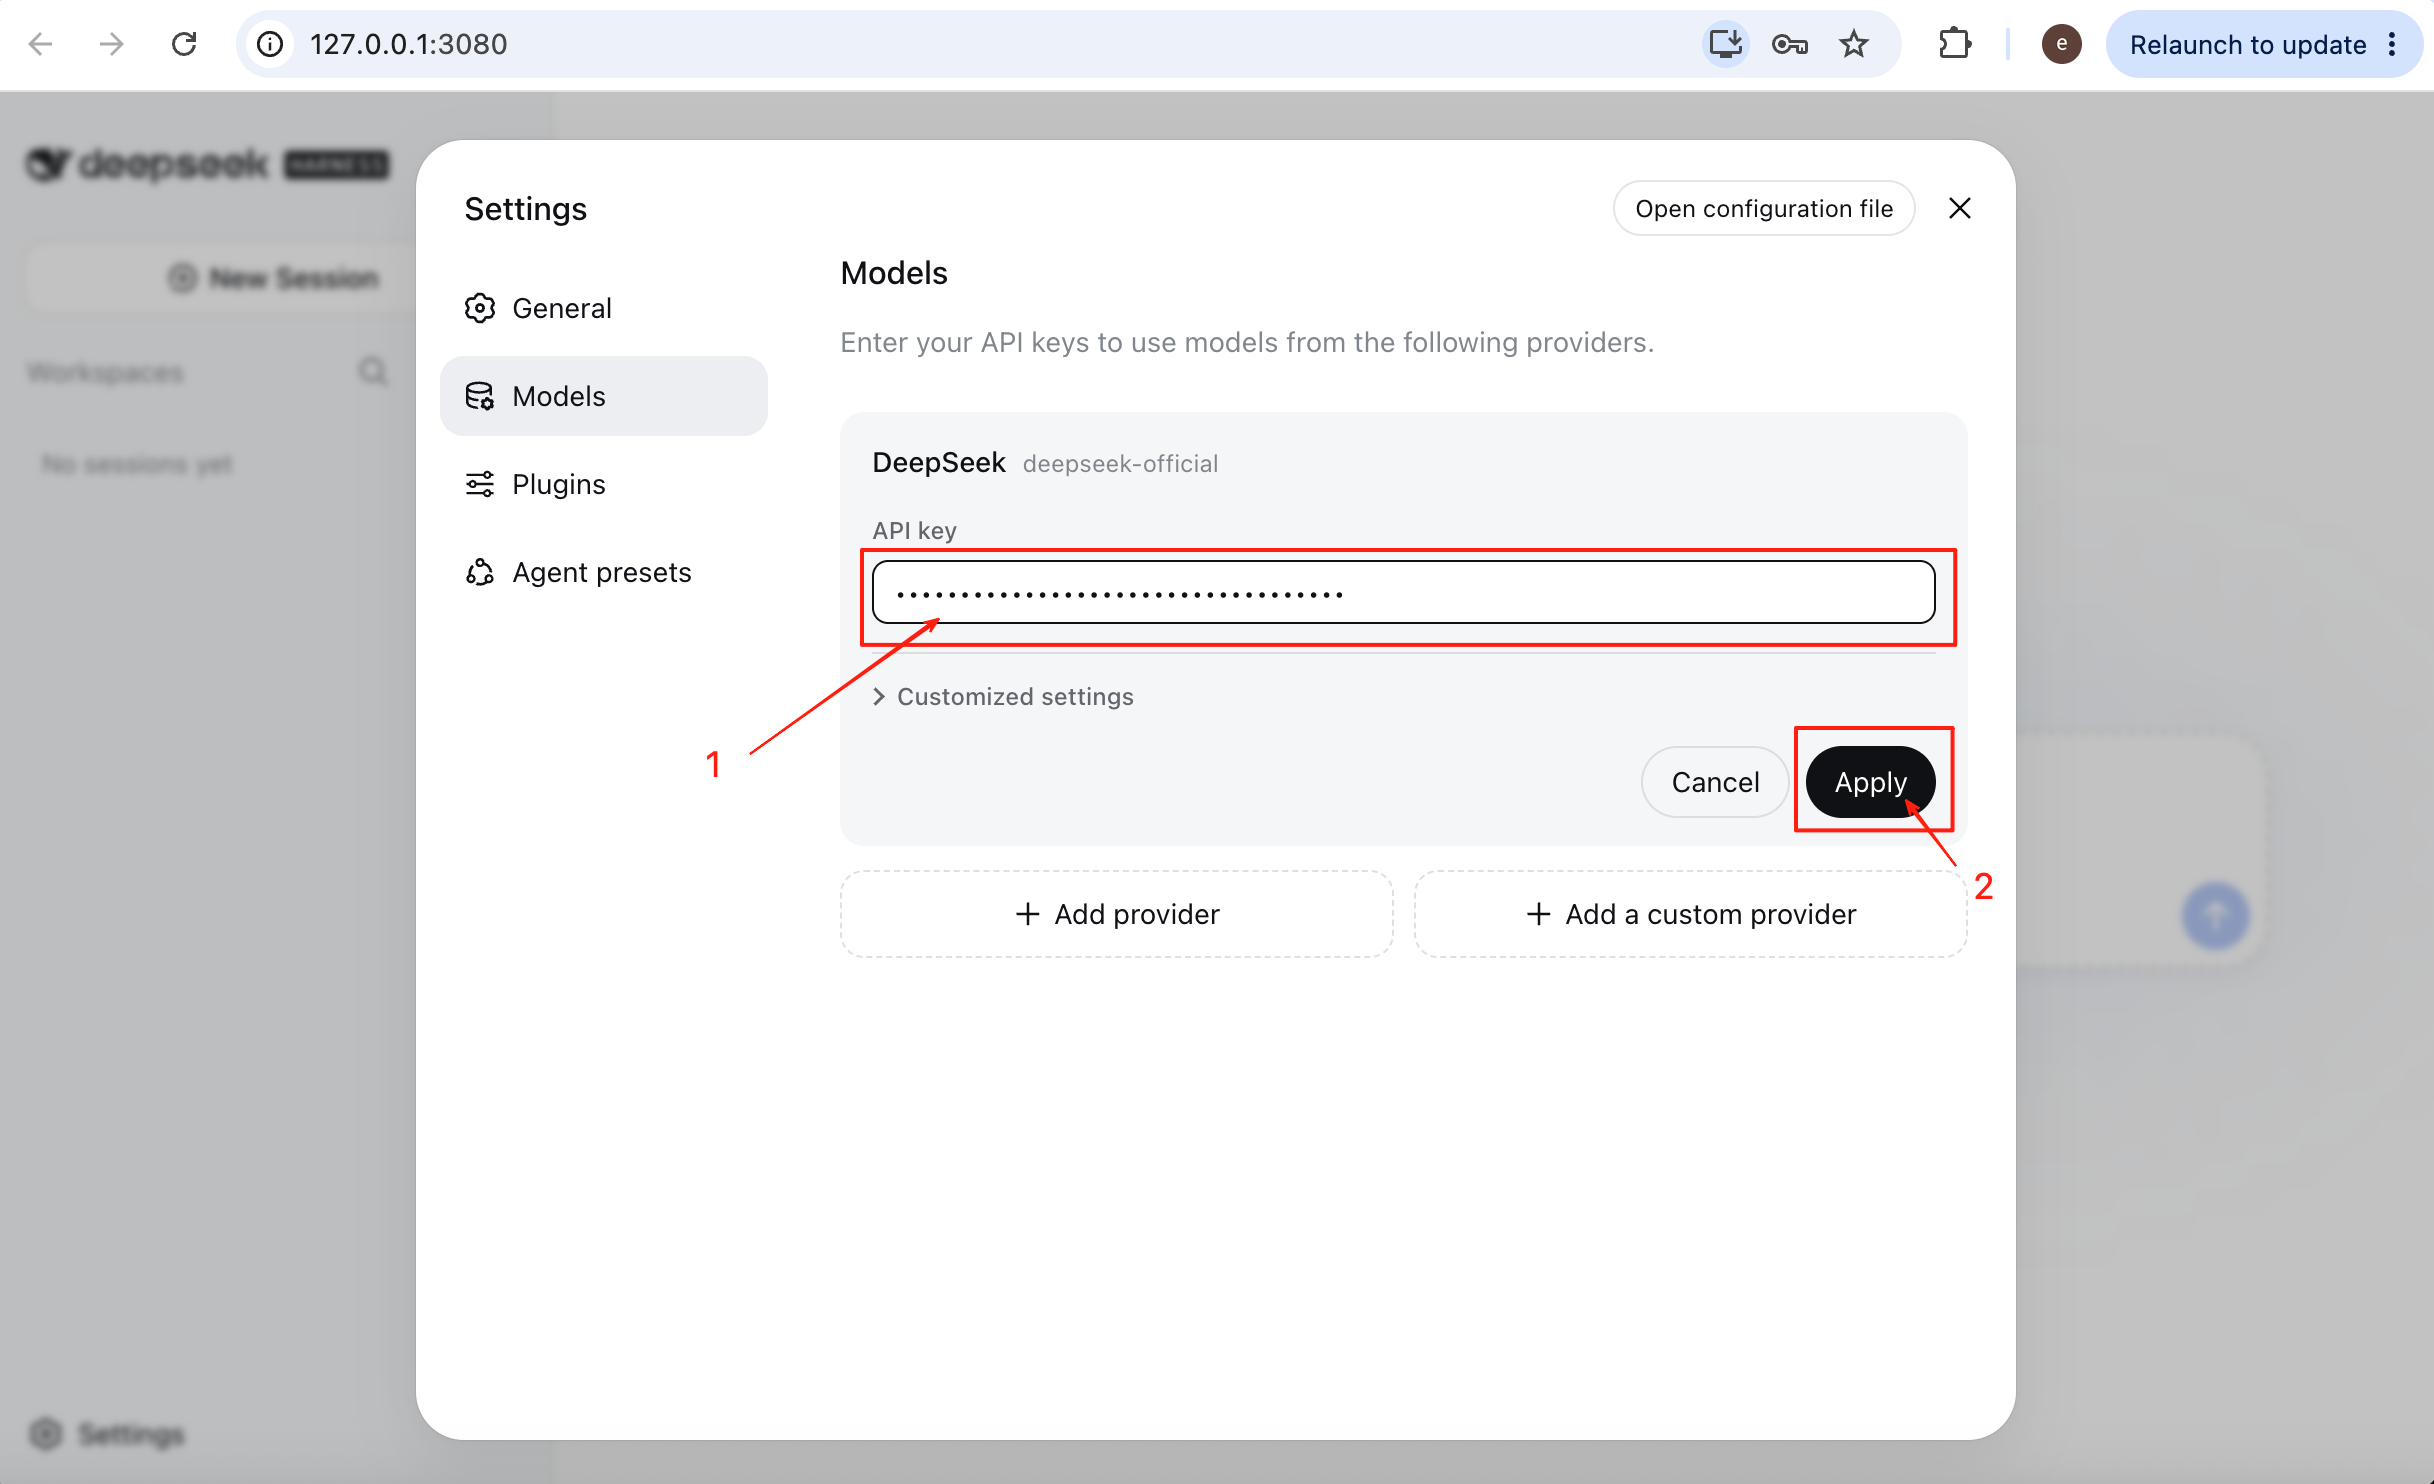
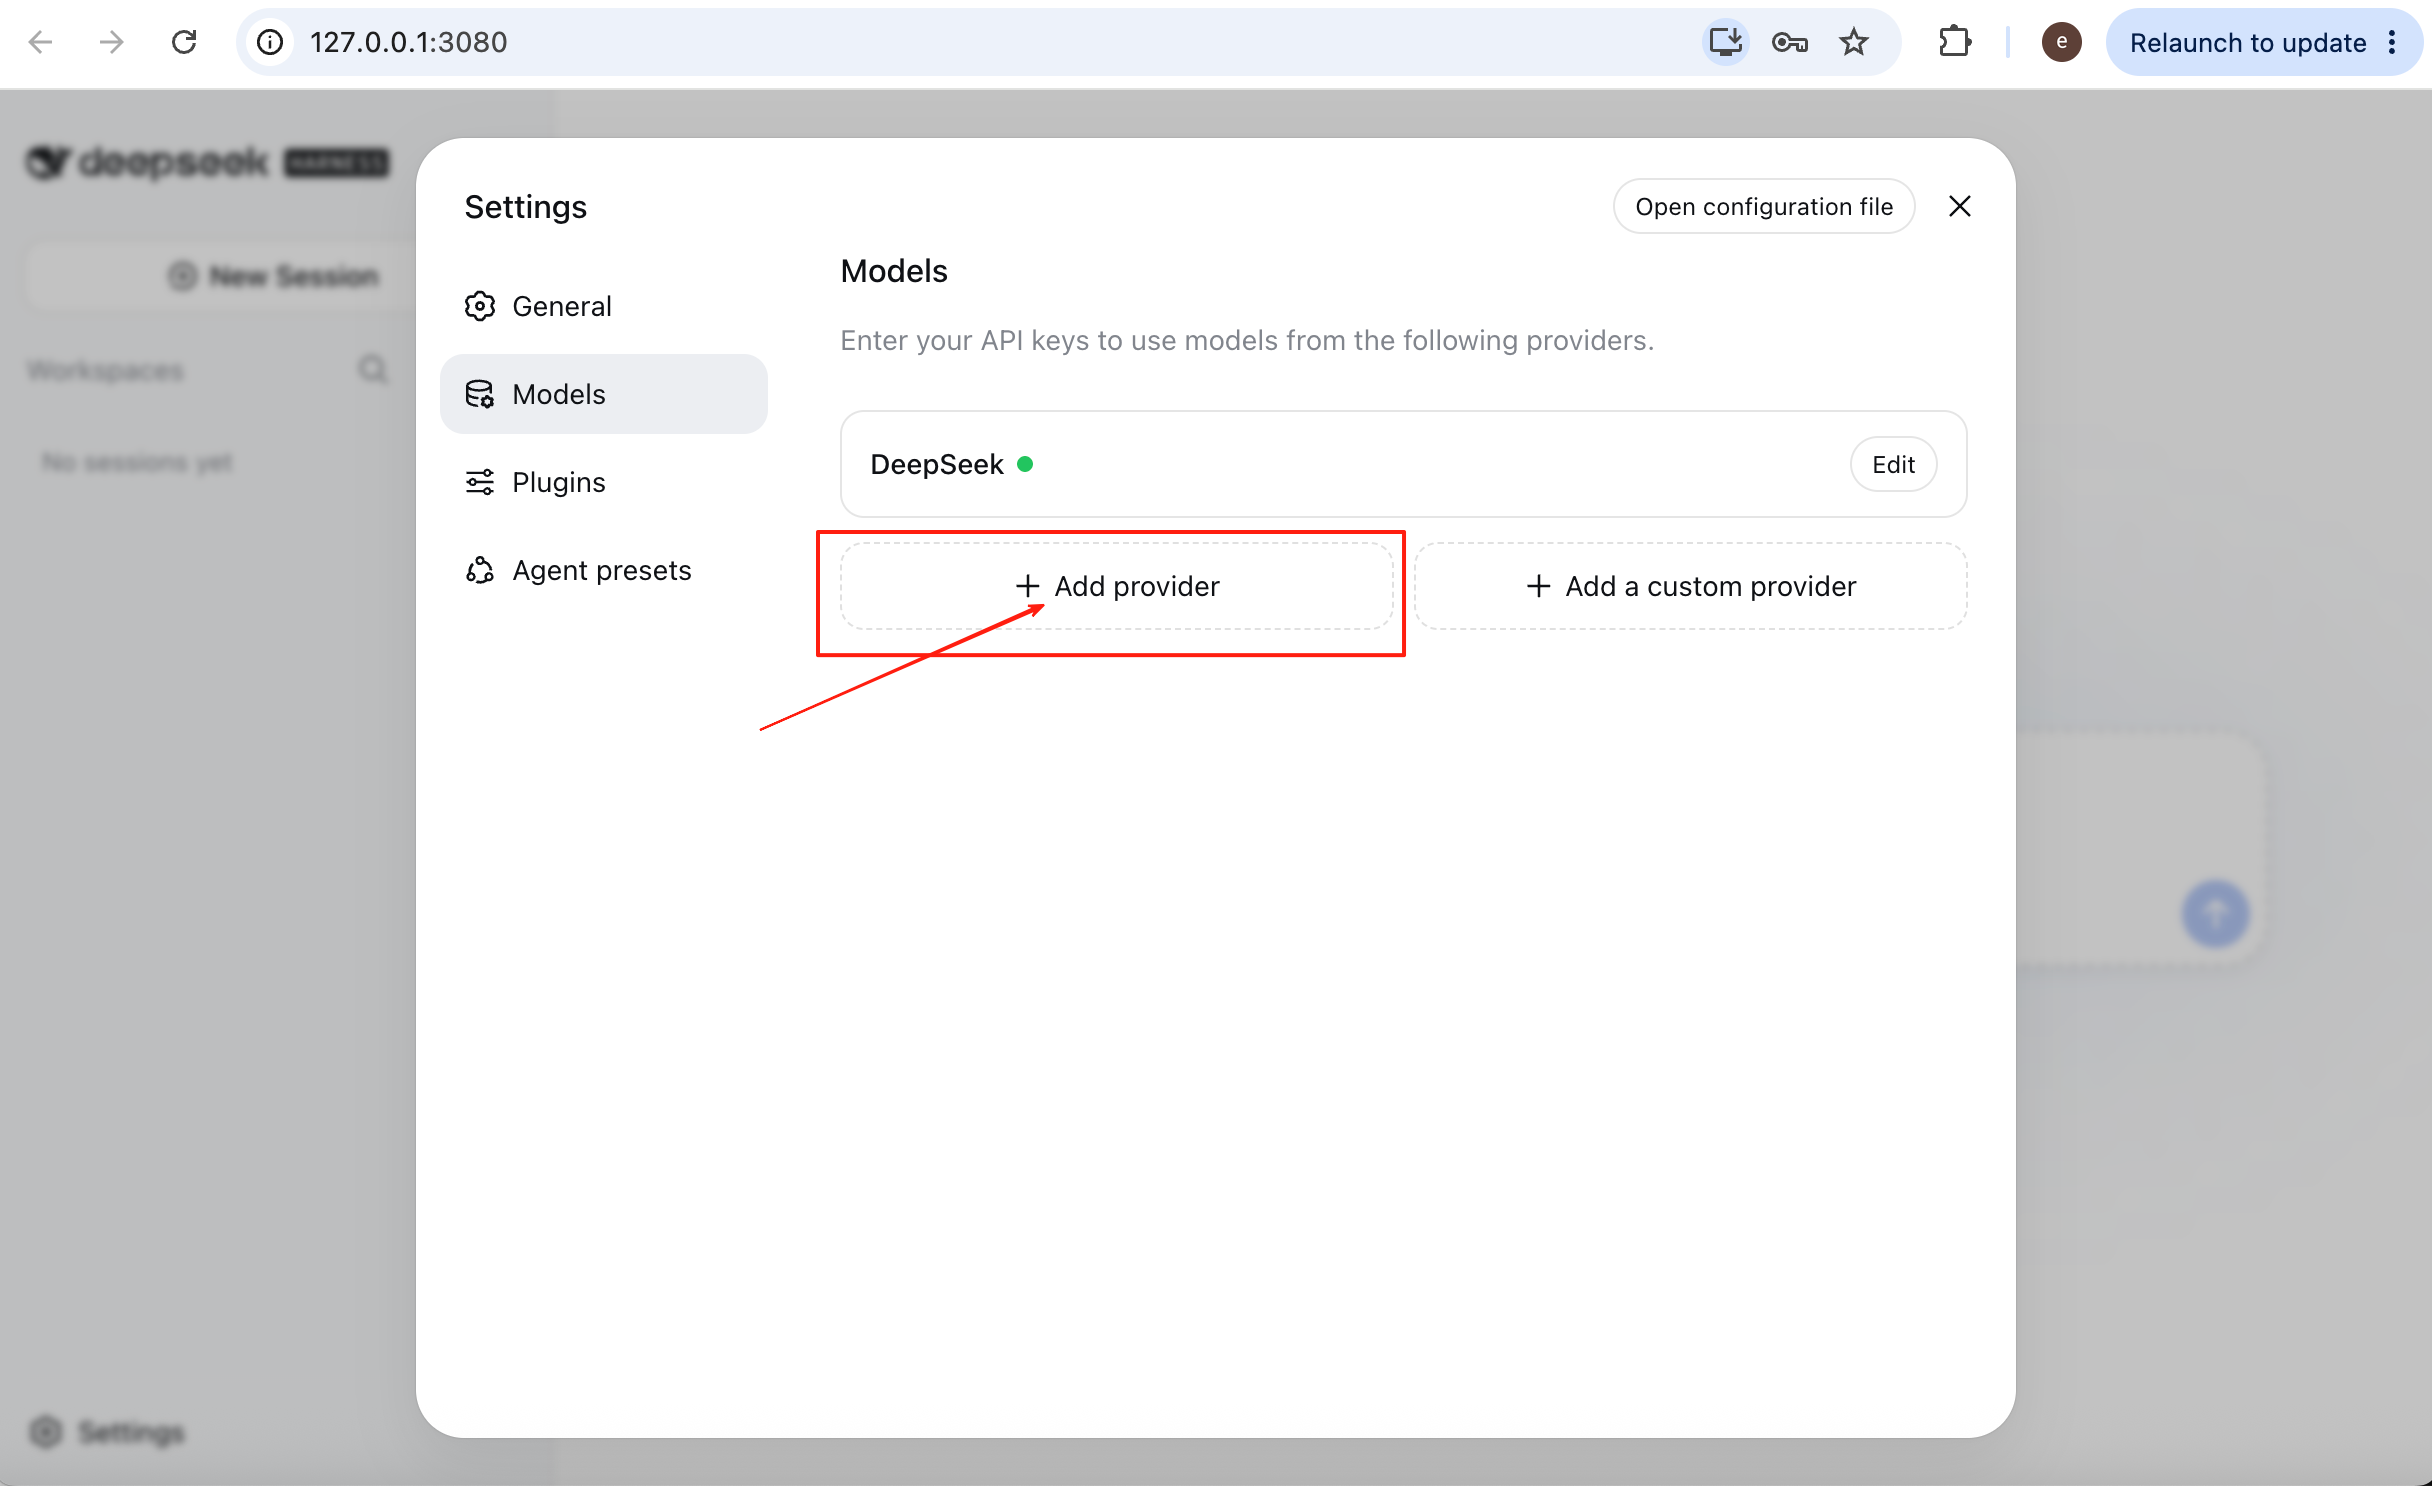
DeepSeek Harness also supports many other model providers. Click Add provider to browse the available options. You only need an API key from the provider you want to use.
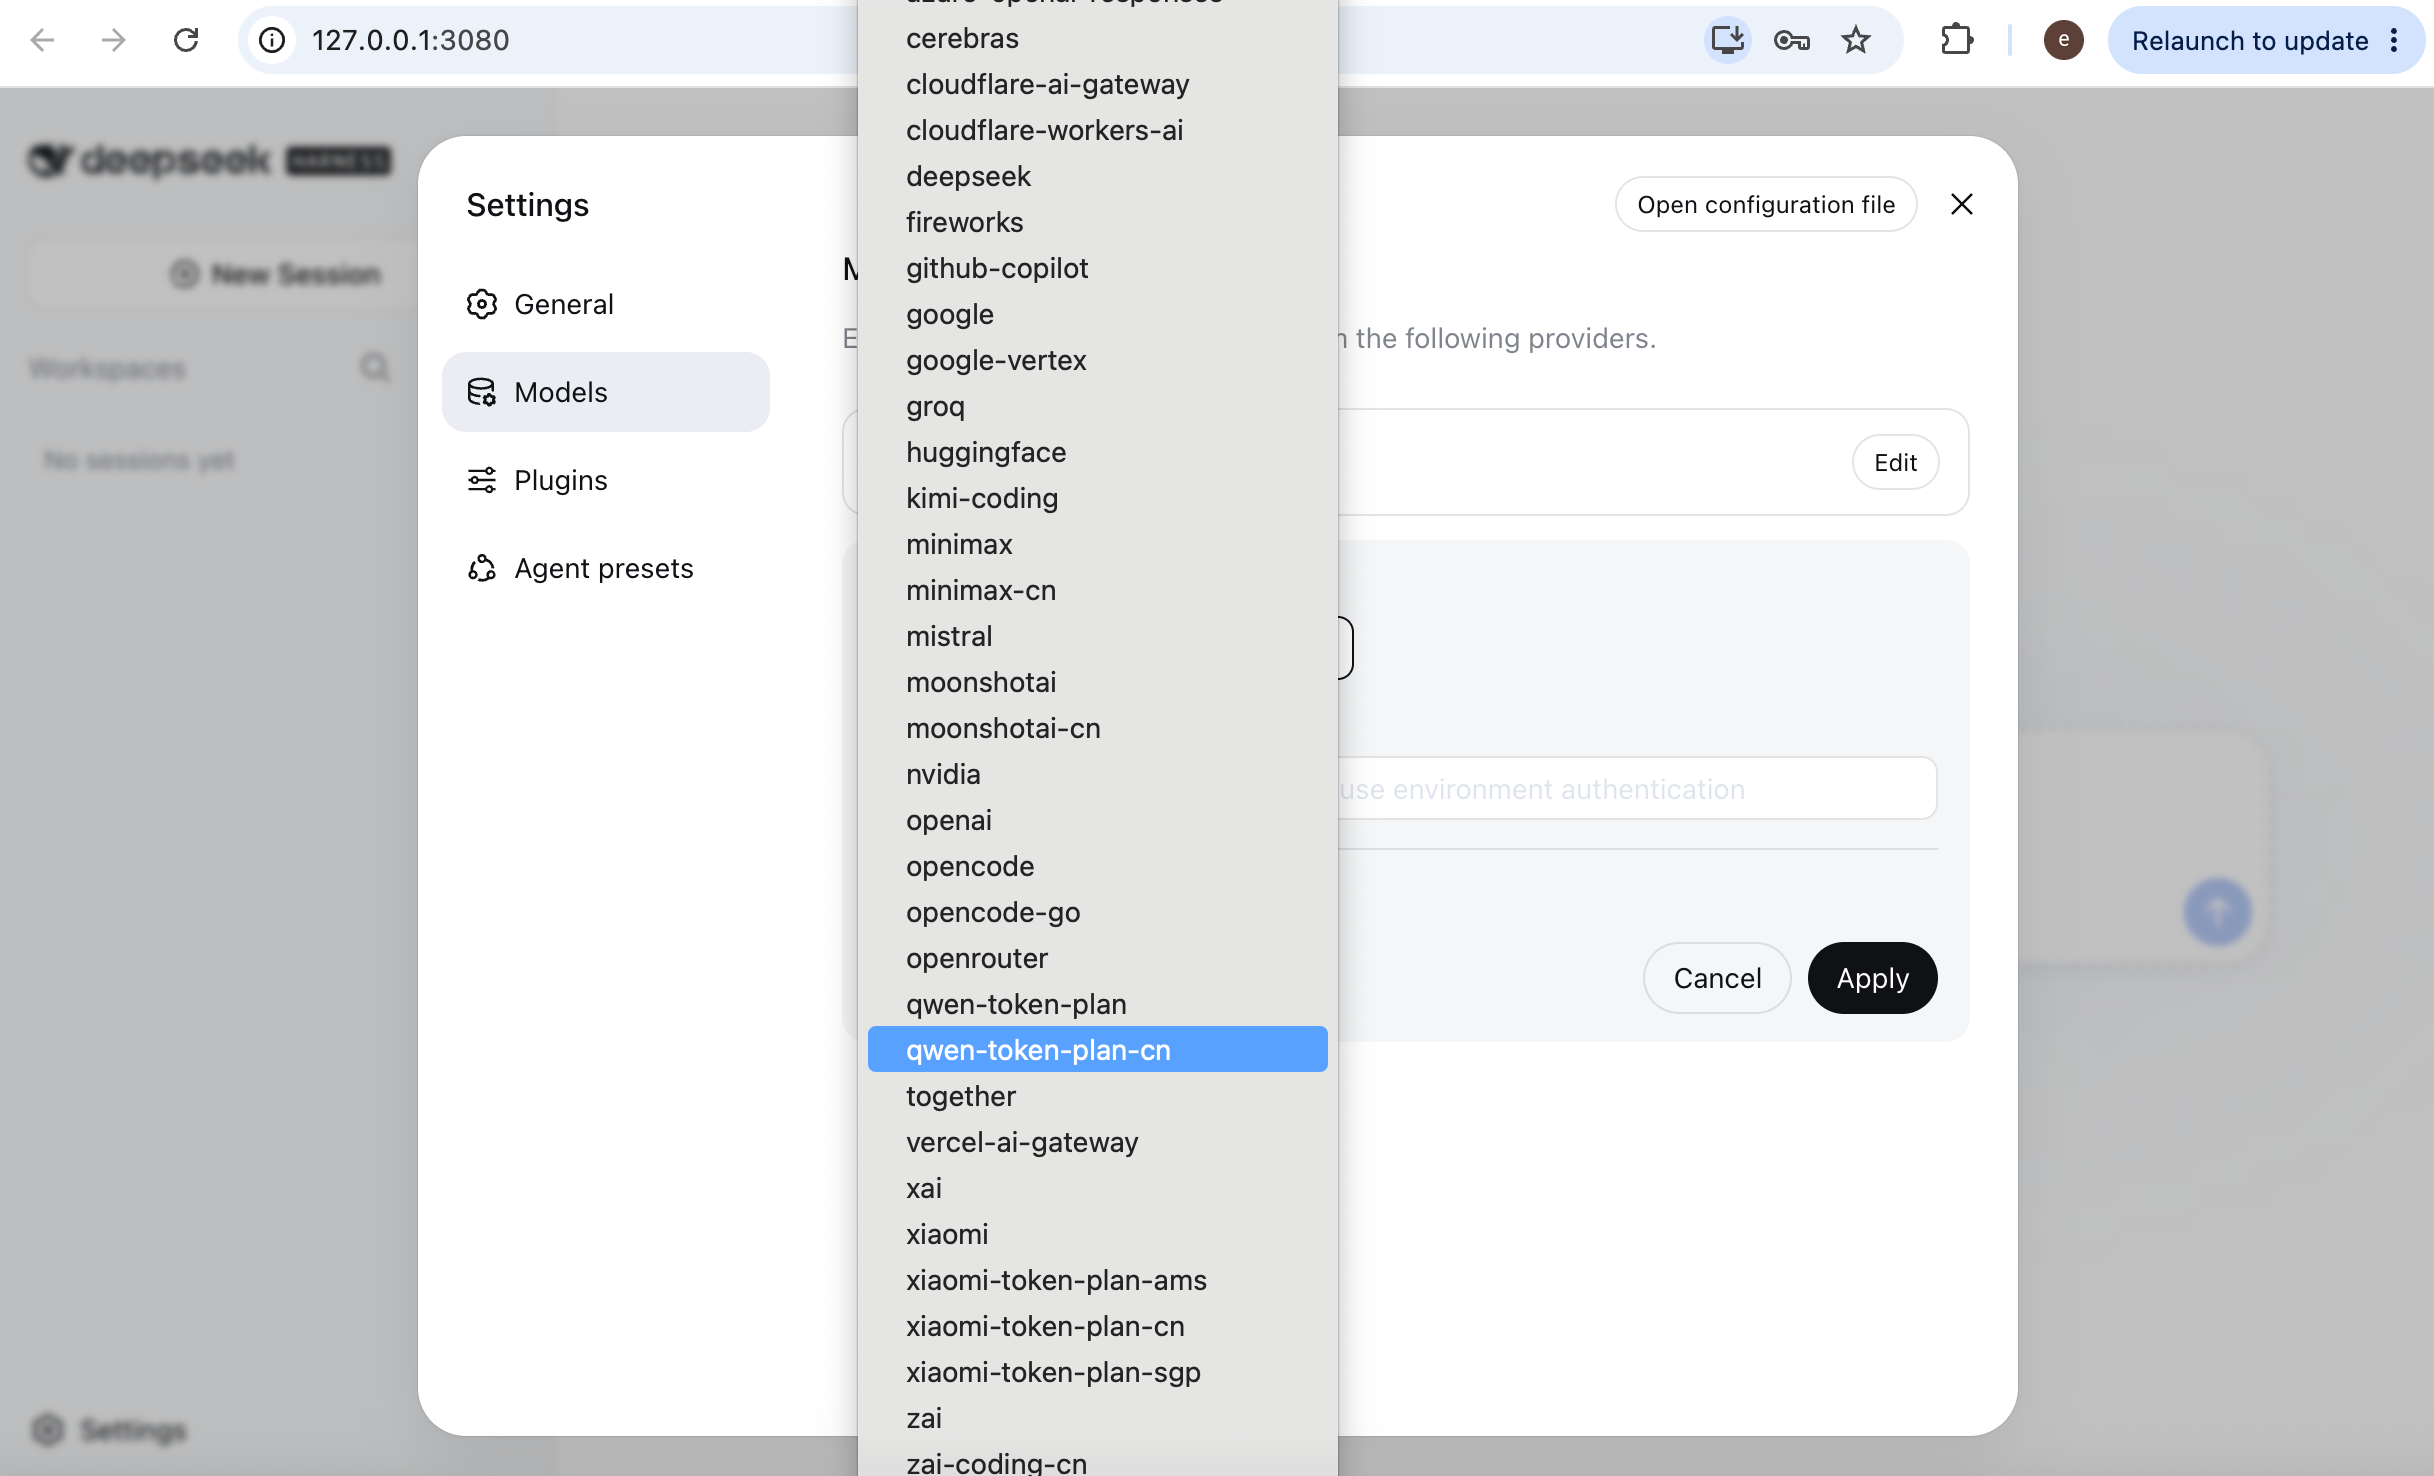
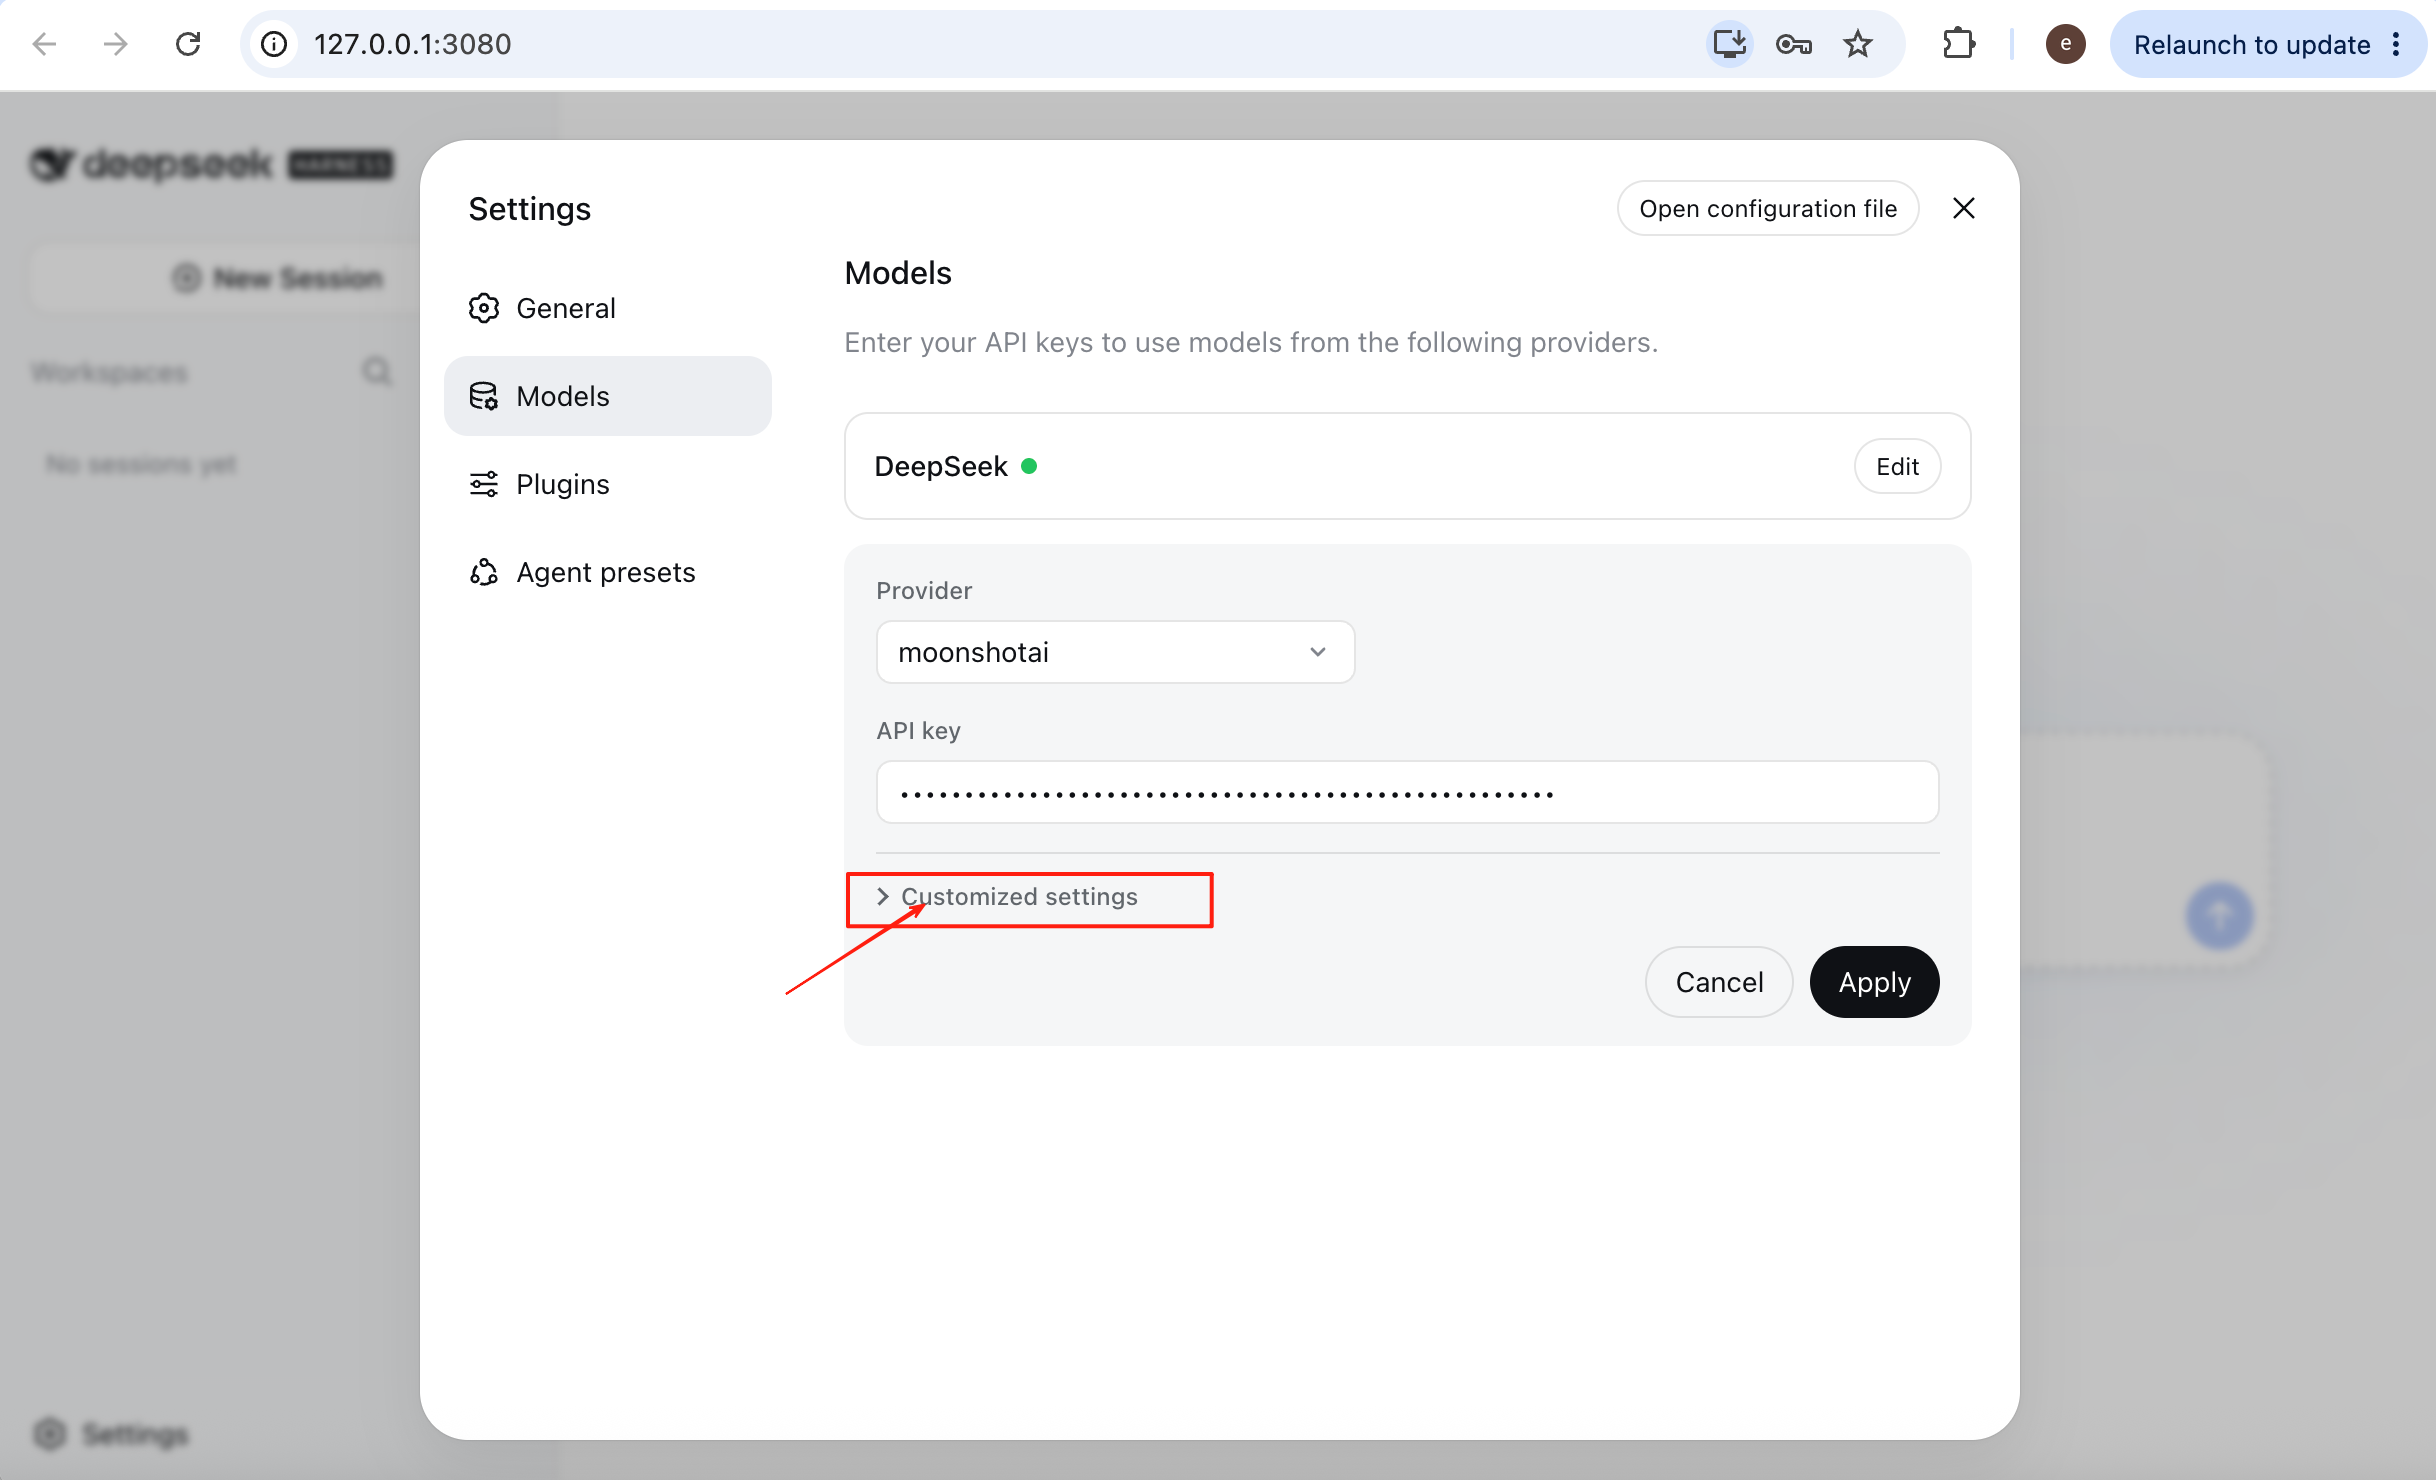
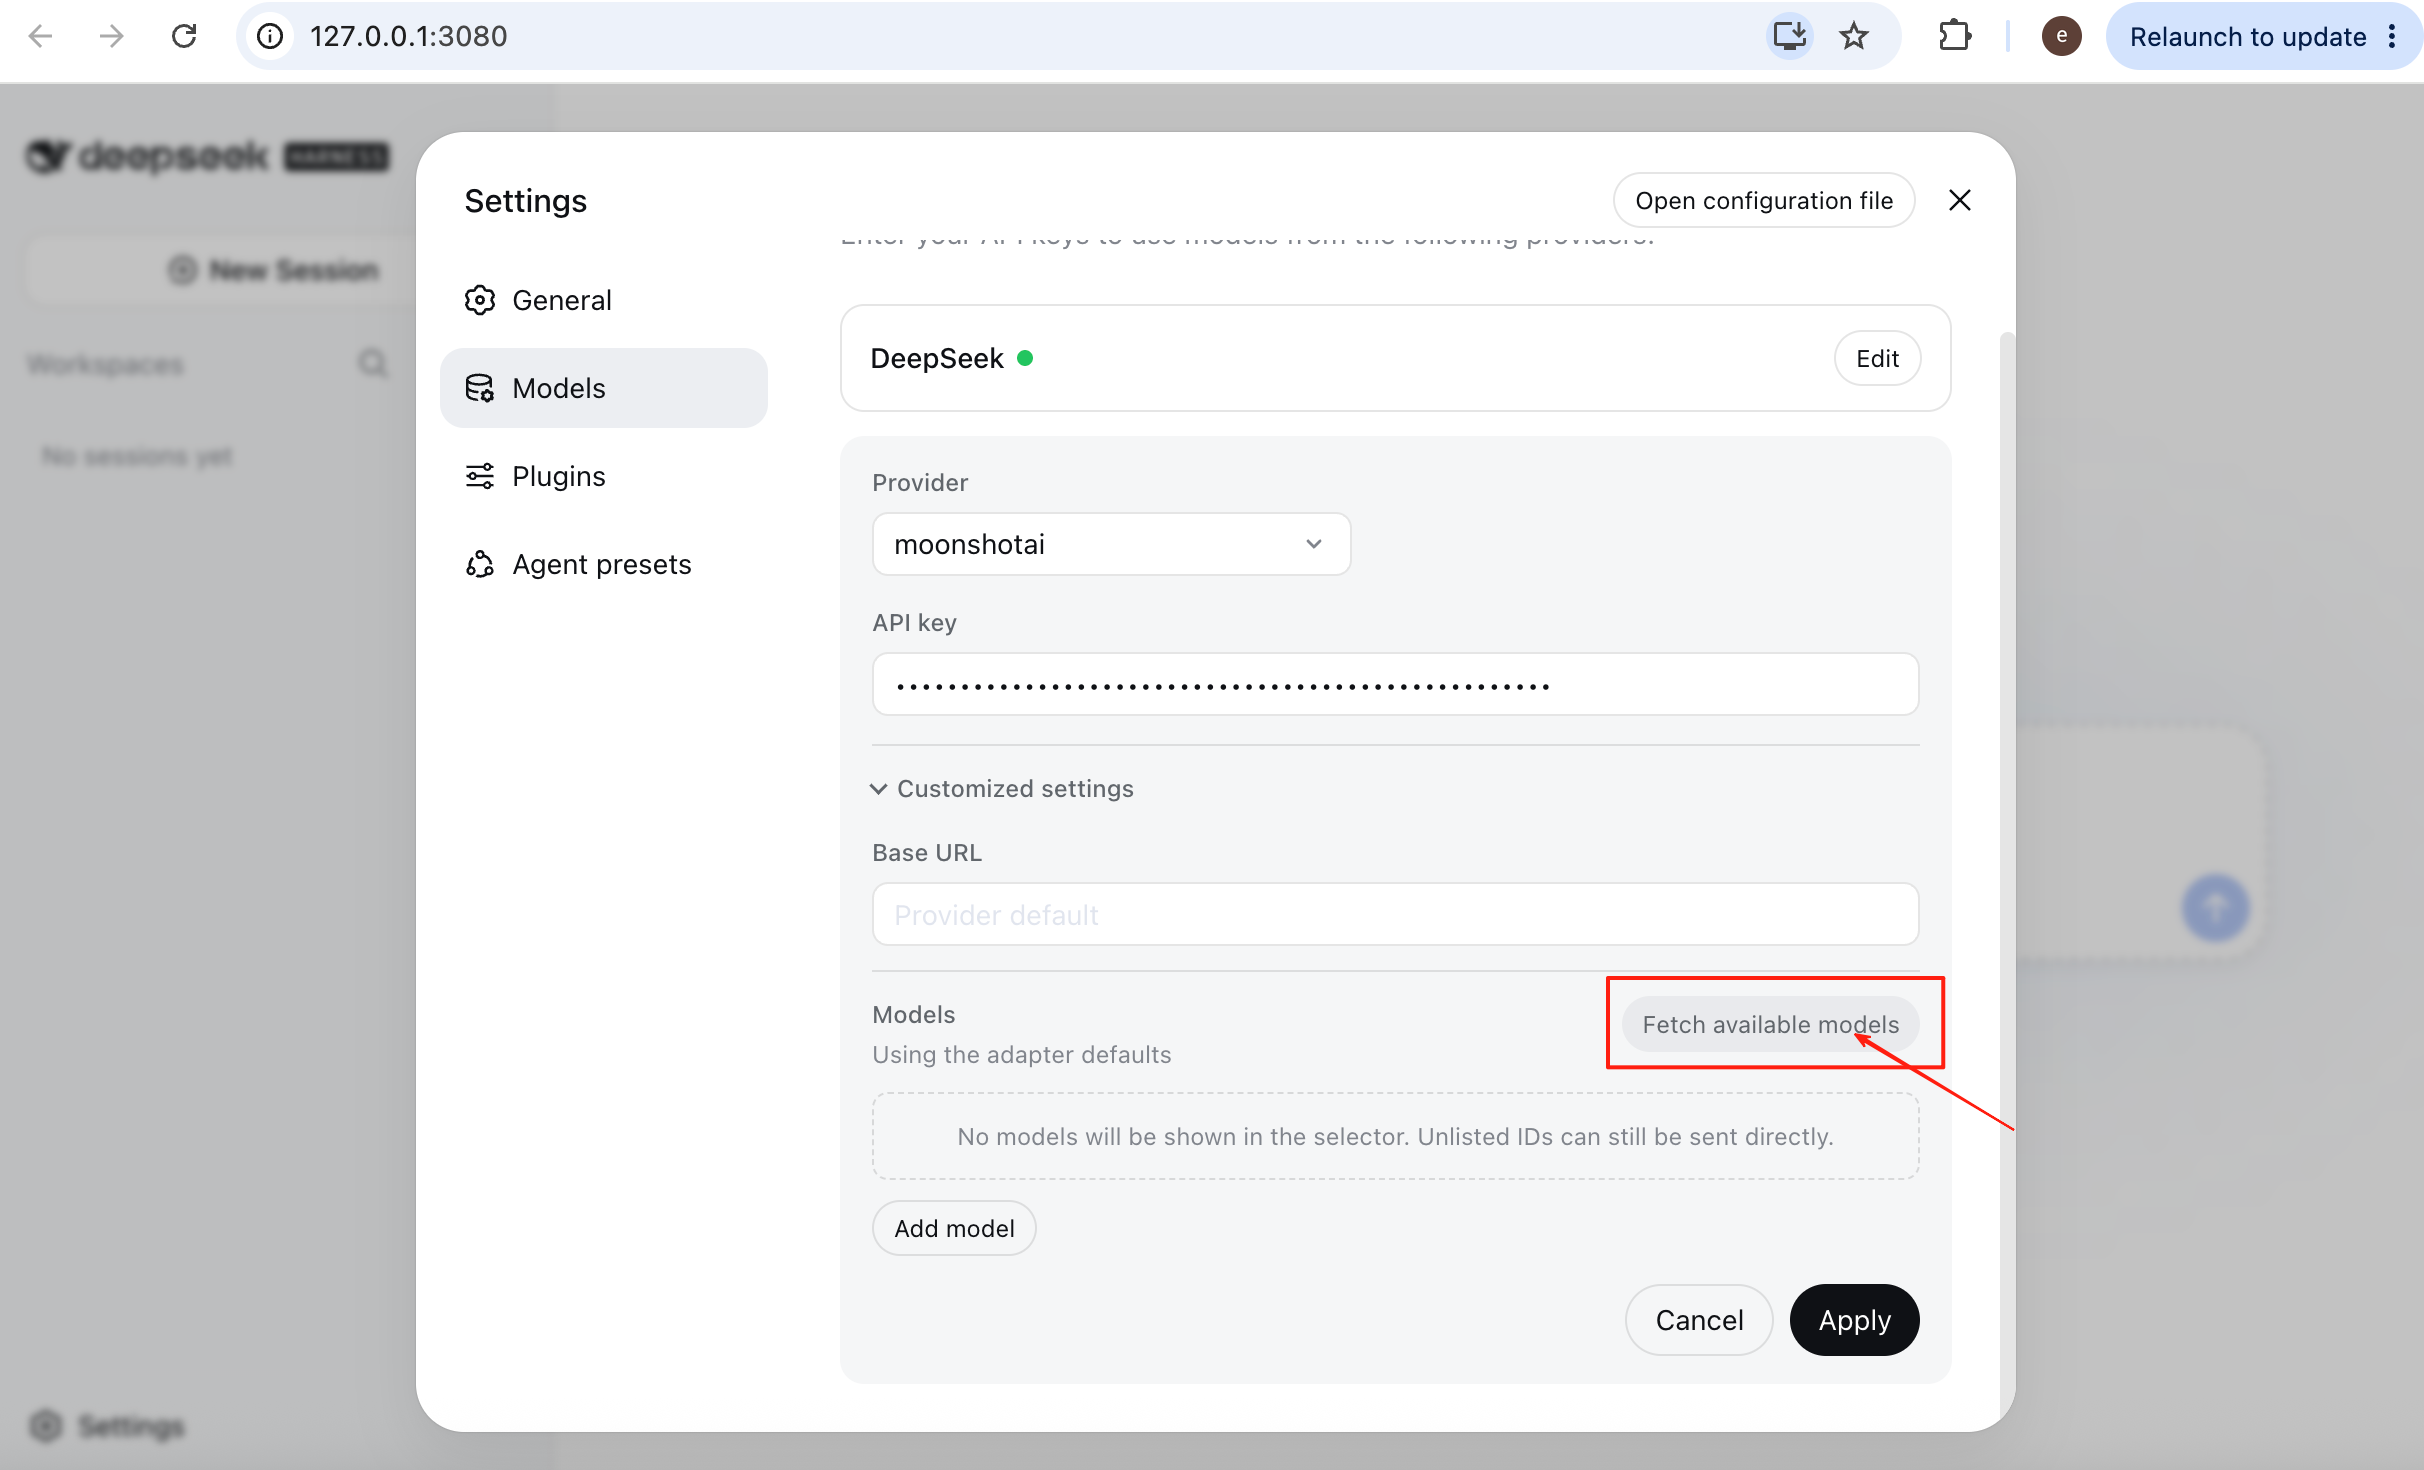
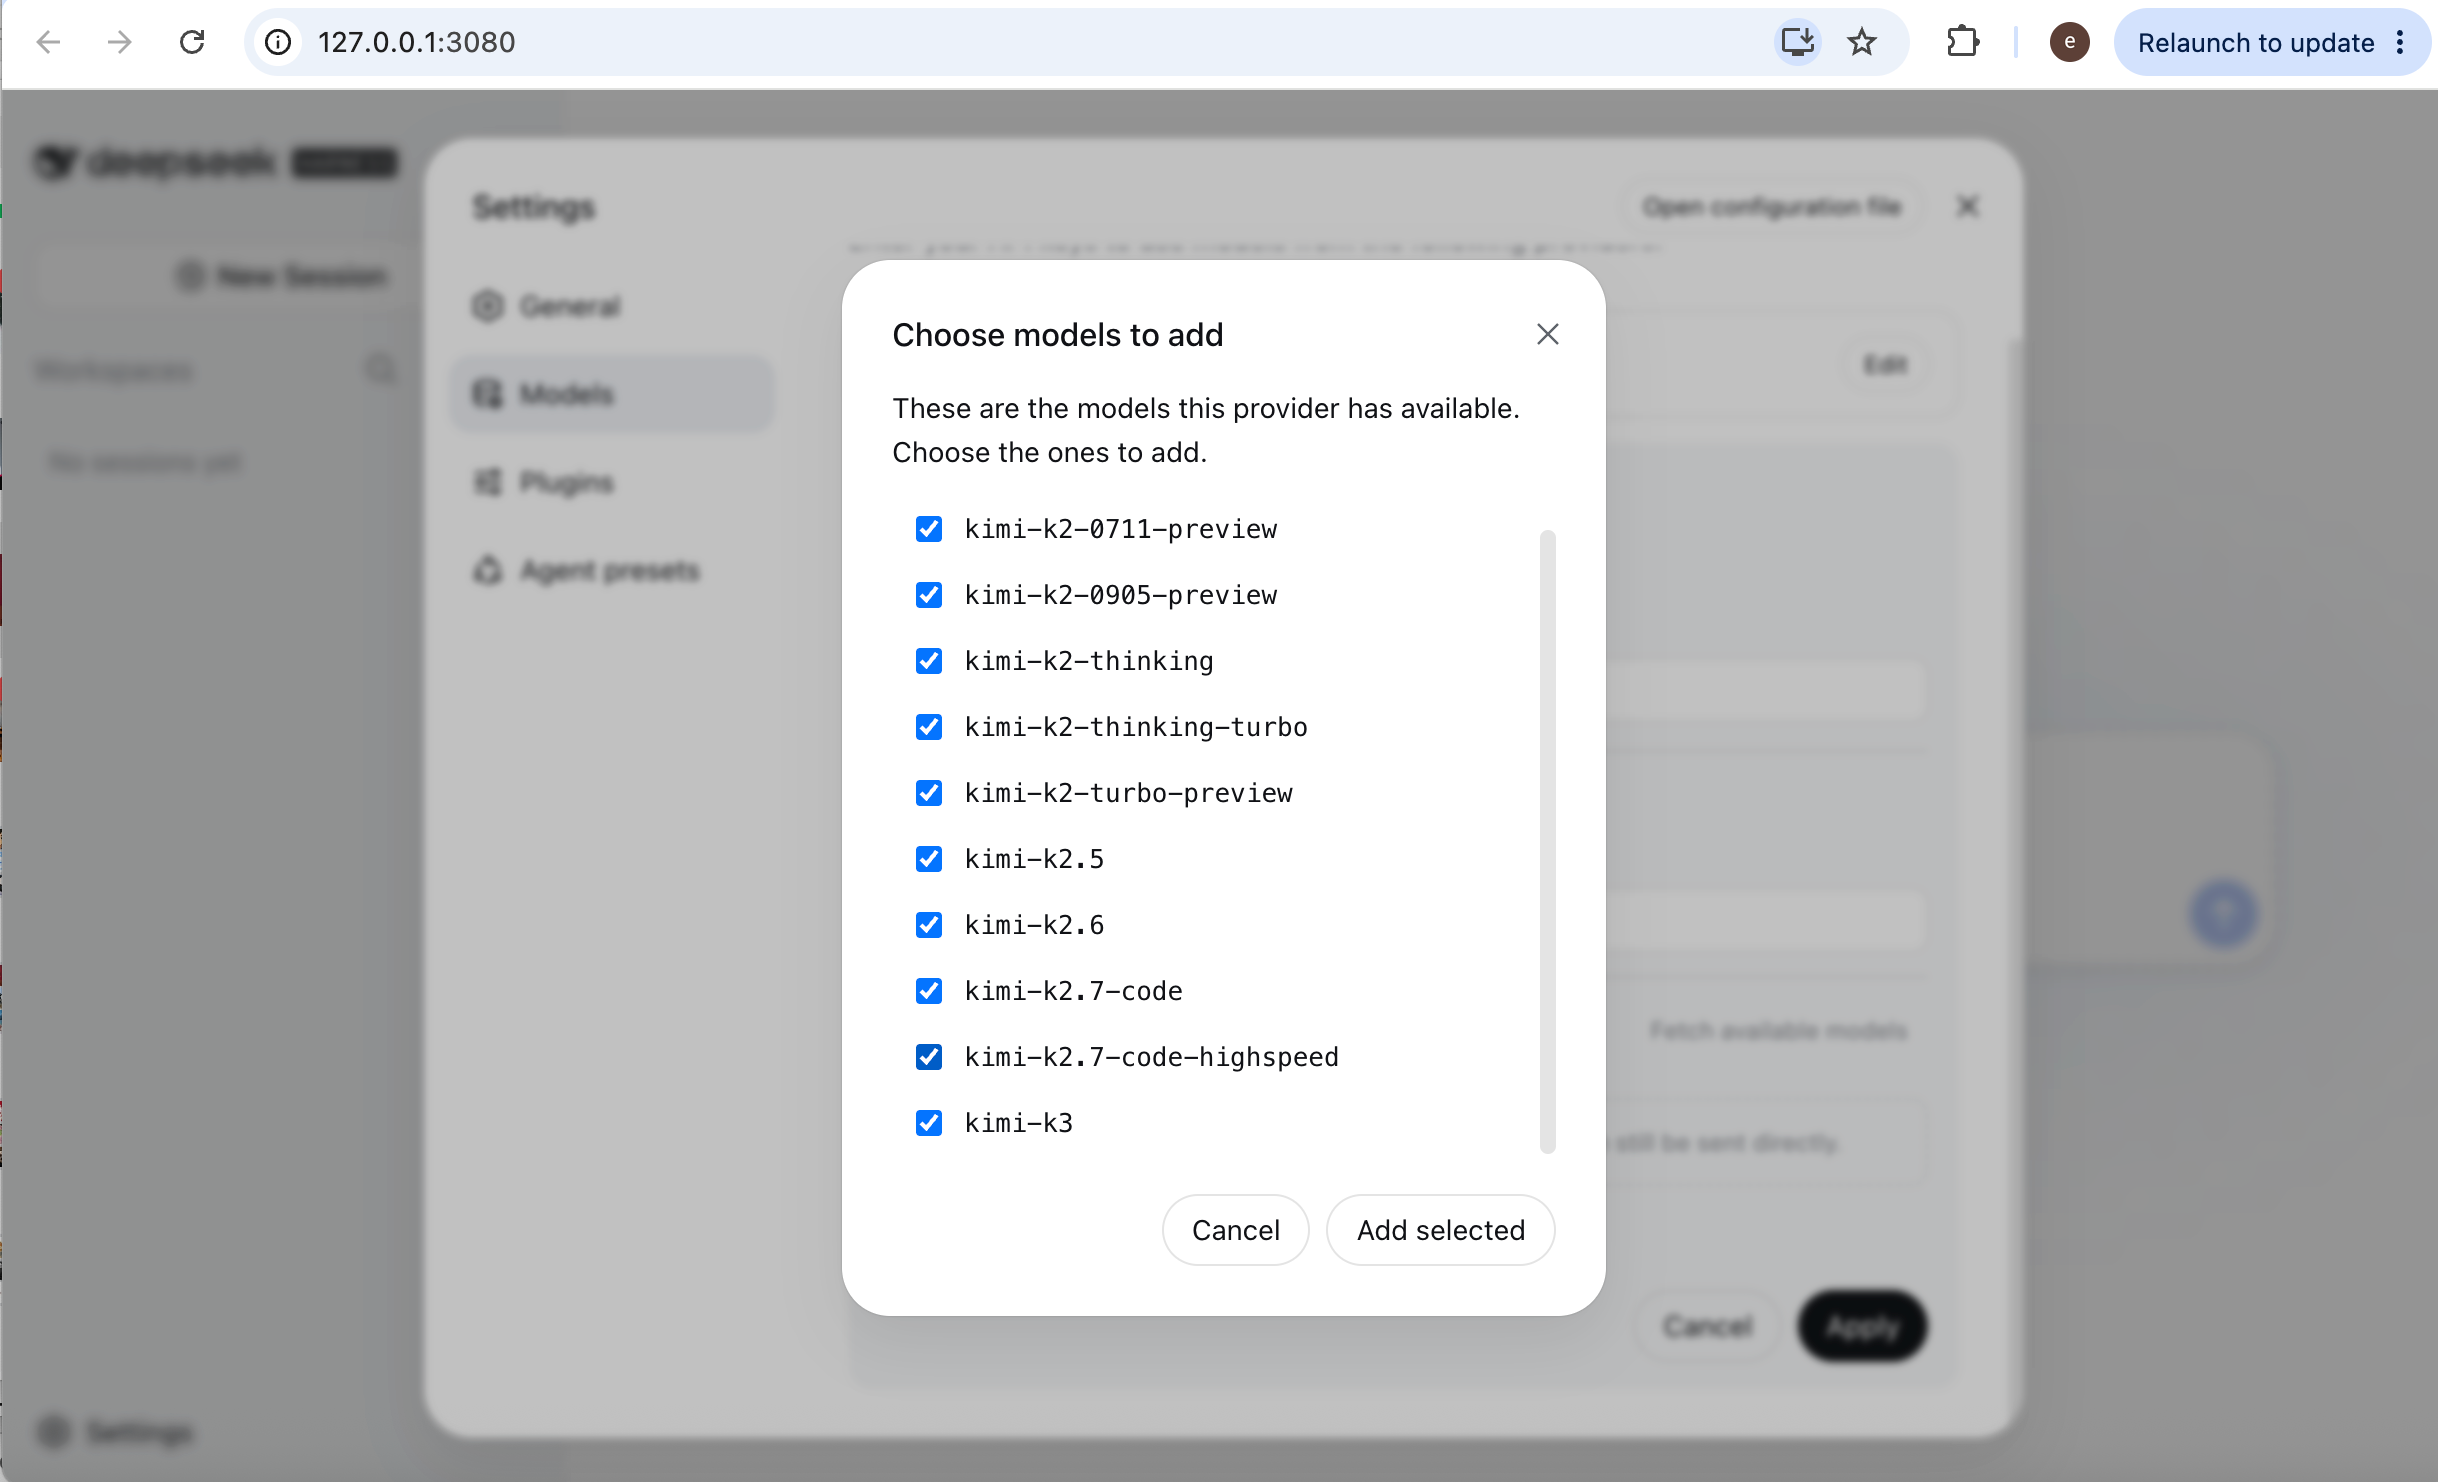
DeepSeek Harness also provides a convenient way to discover the models currently available from a provider. For example, after adding moonshotai and entering its API key, click Customised settings, then use Fetch available models to retrieve the latest model list.
Plugins
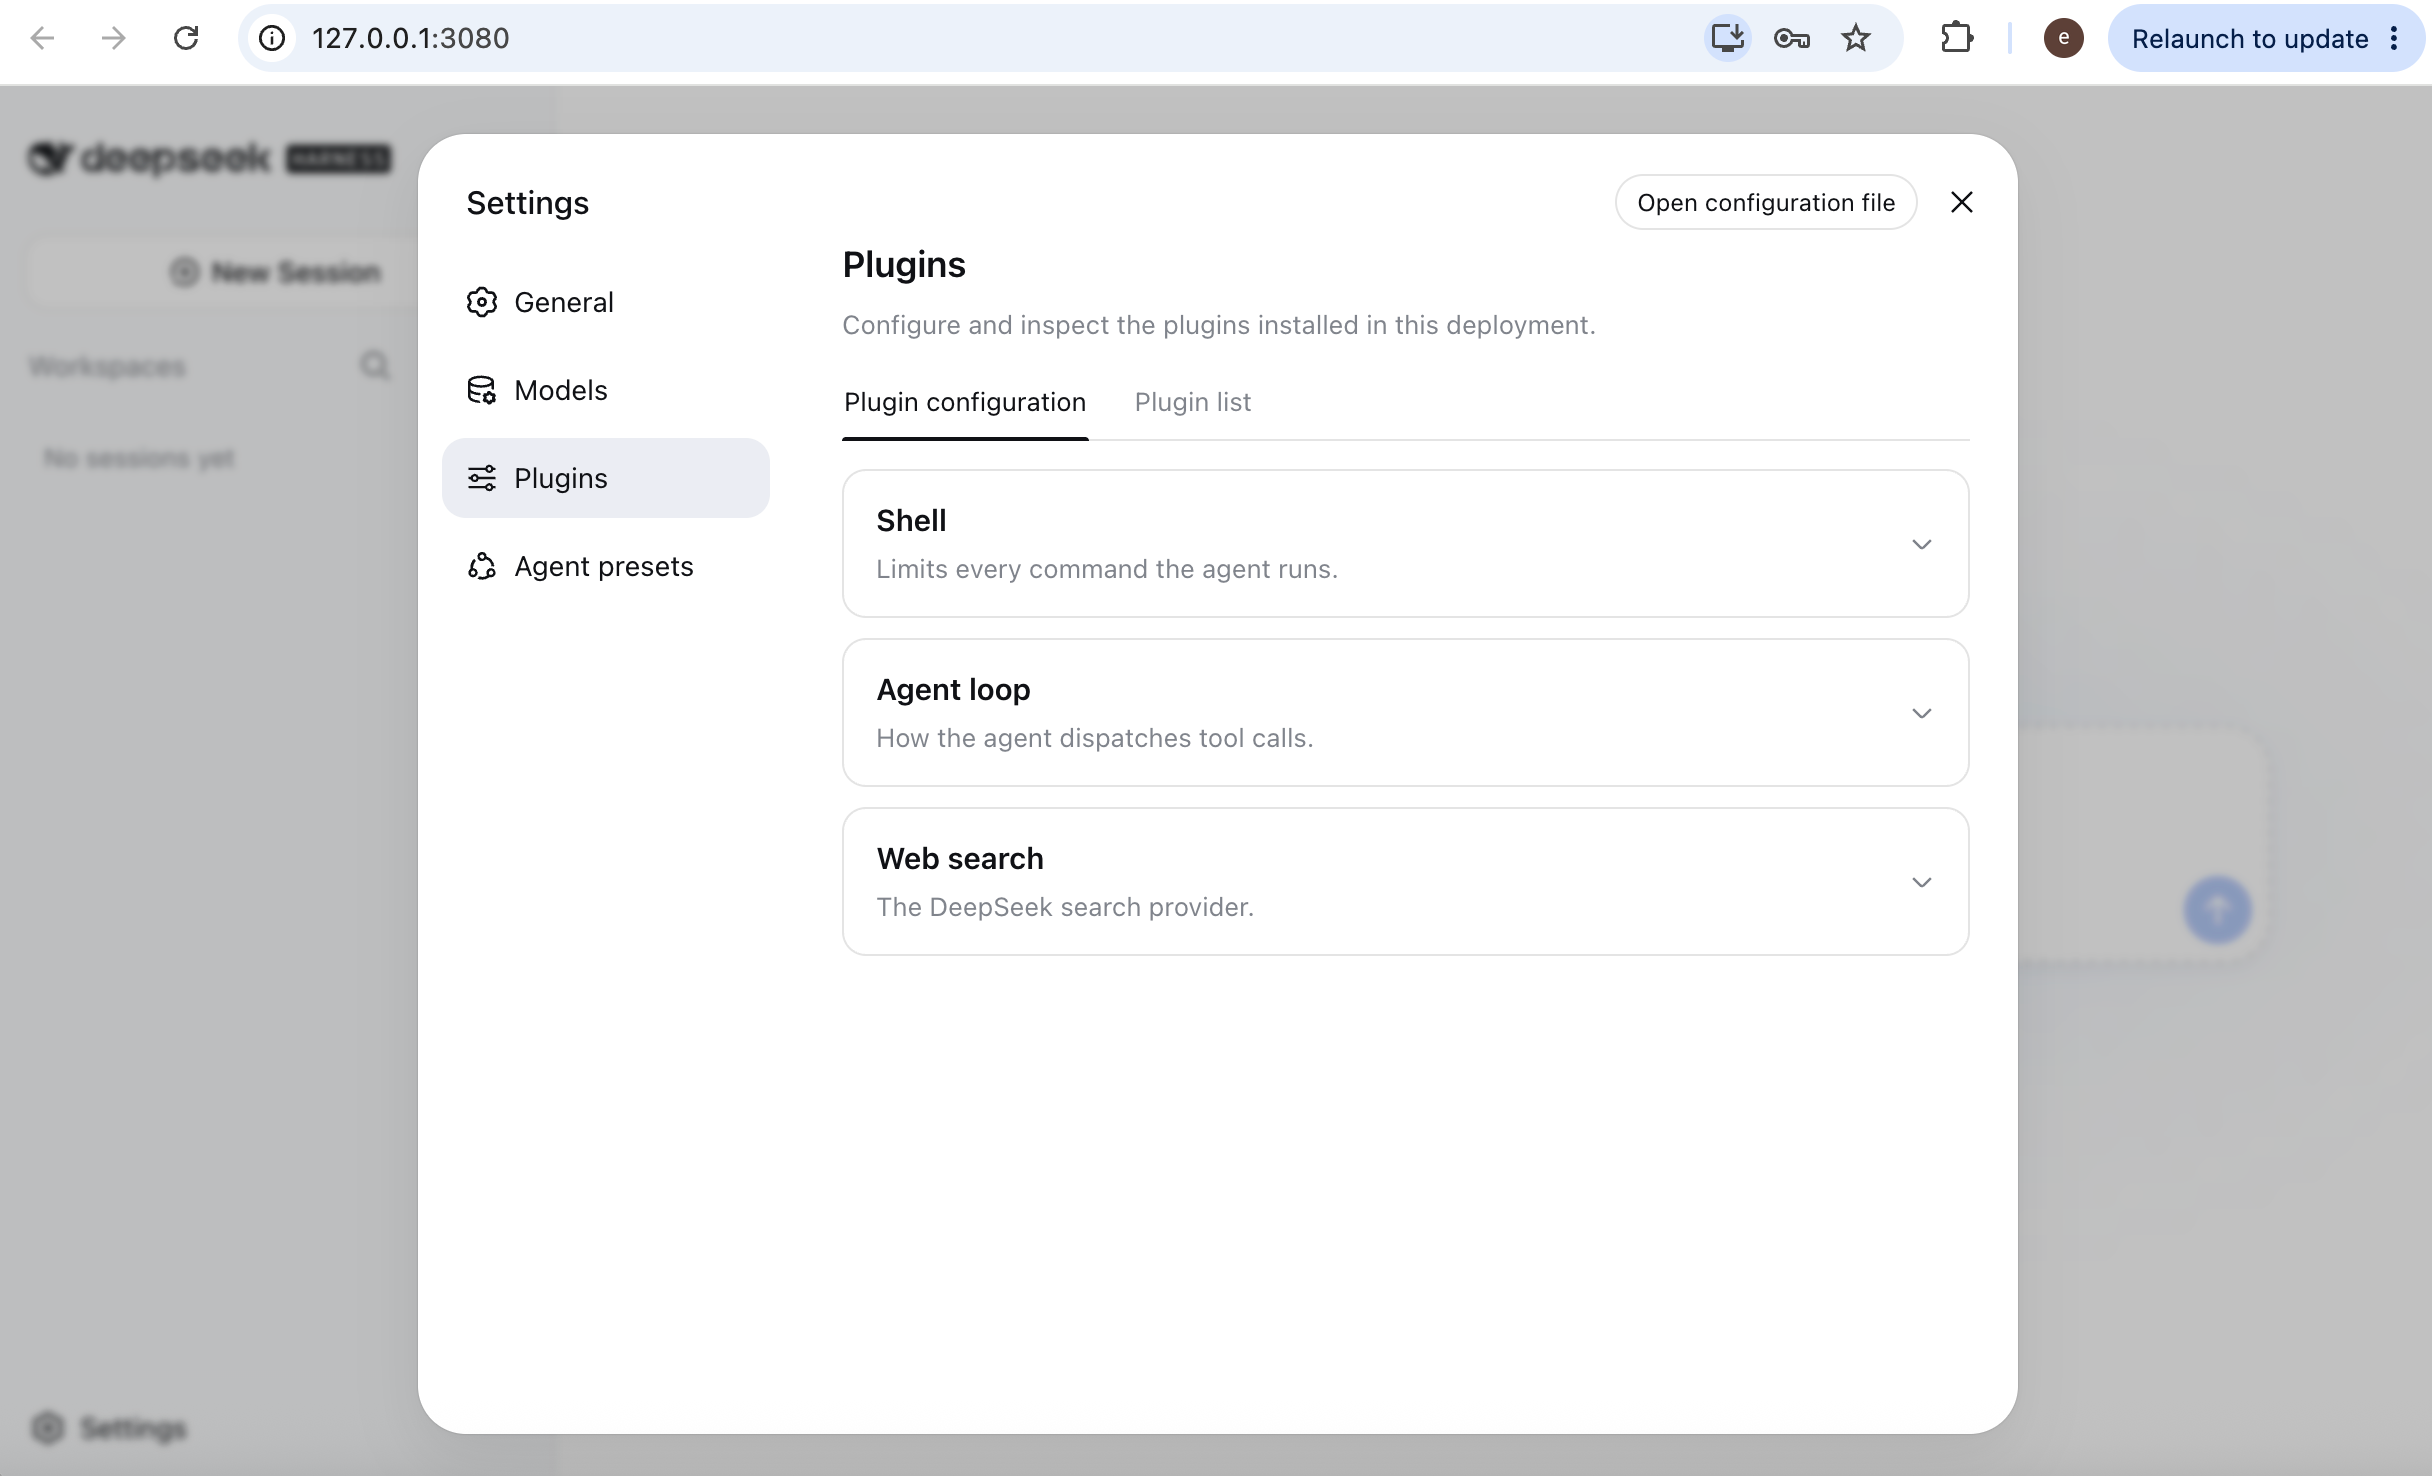
Plugins are at the core of DeepSeek Harness, but you do not need to understand them in detail at the beginning. For now, it is enough to know that DeepSeek Harness is highly customisable. You can turn your own experience into reusable instructions, create your own programs, or change the default functions and settings of the Harness.
DeepSeek Harness also provides instruction files that can be used by AI agents. You can use DeepSeek Harness itself to create new plugins or modify existing ones.
Agent Presets
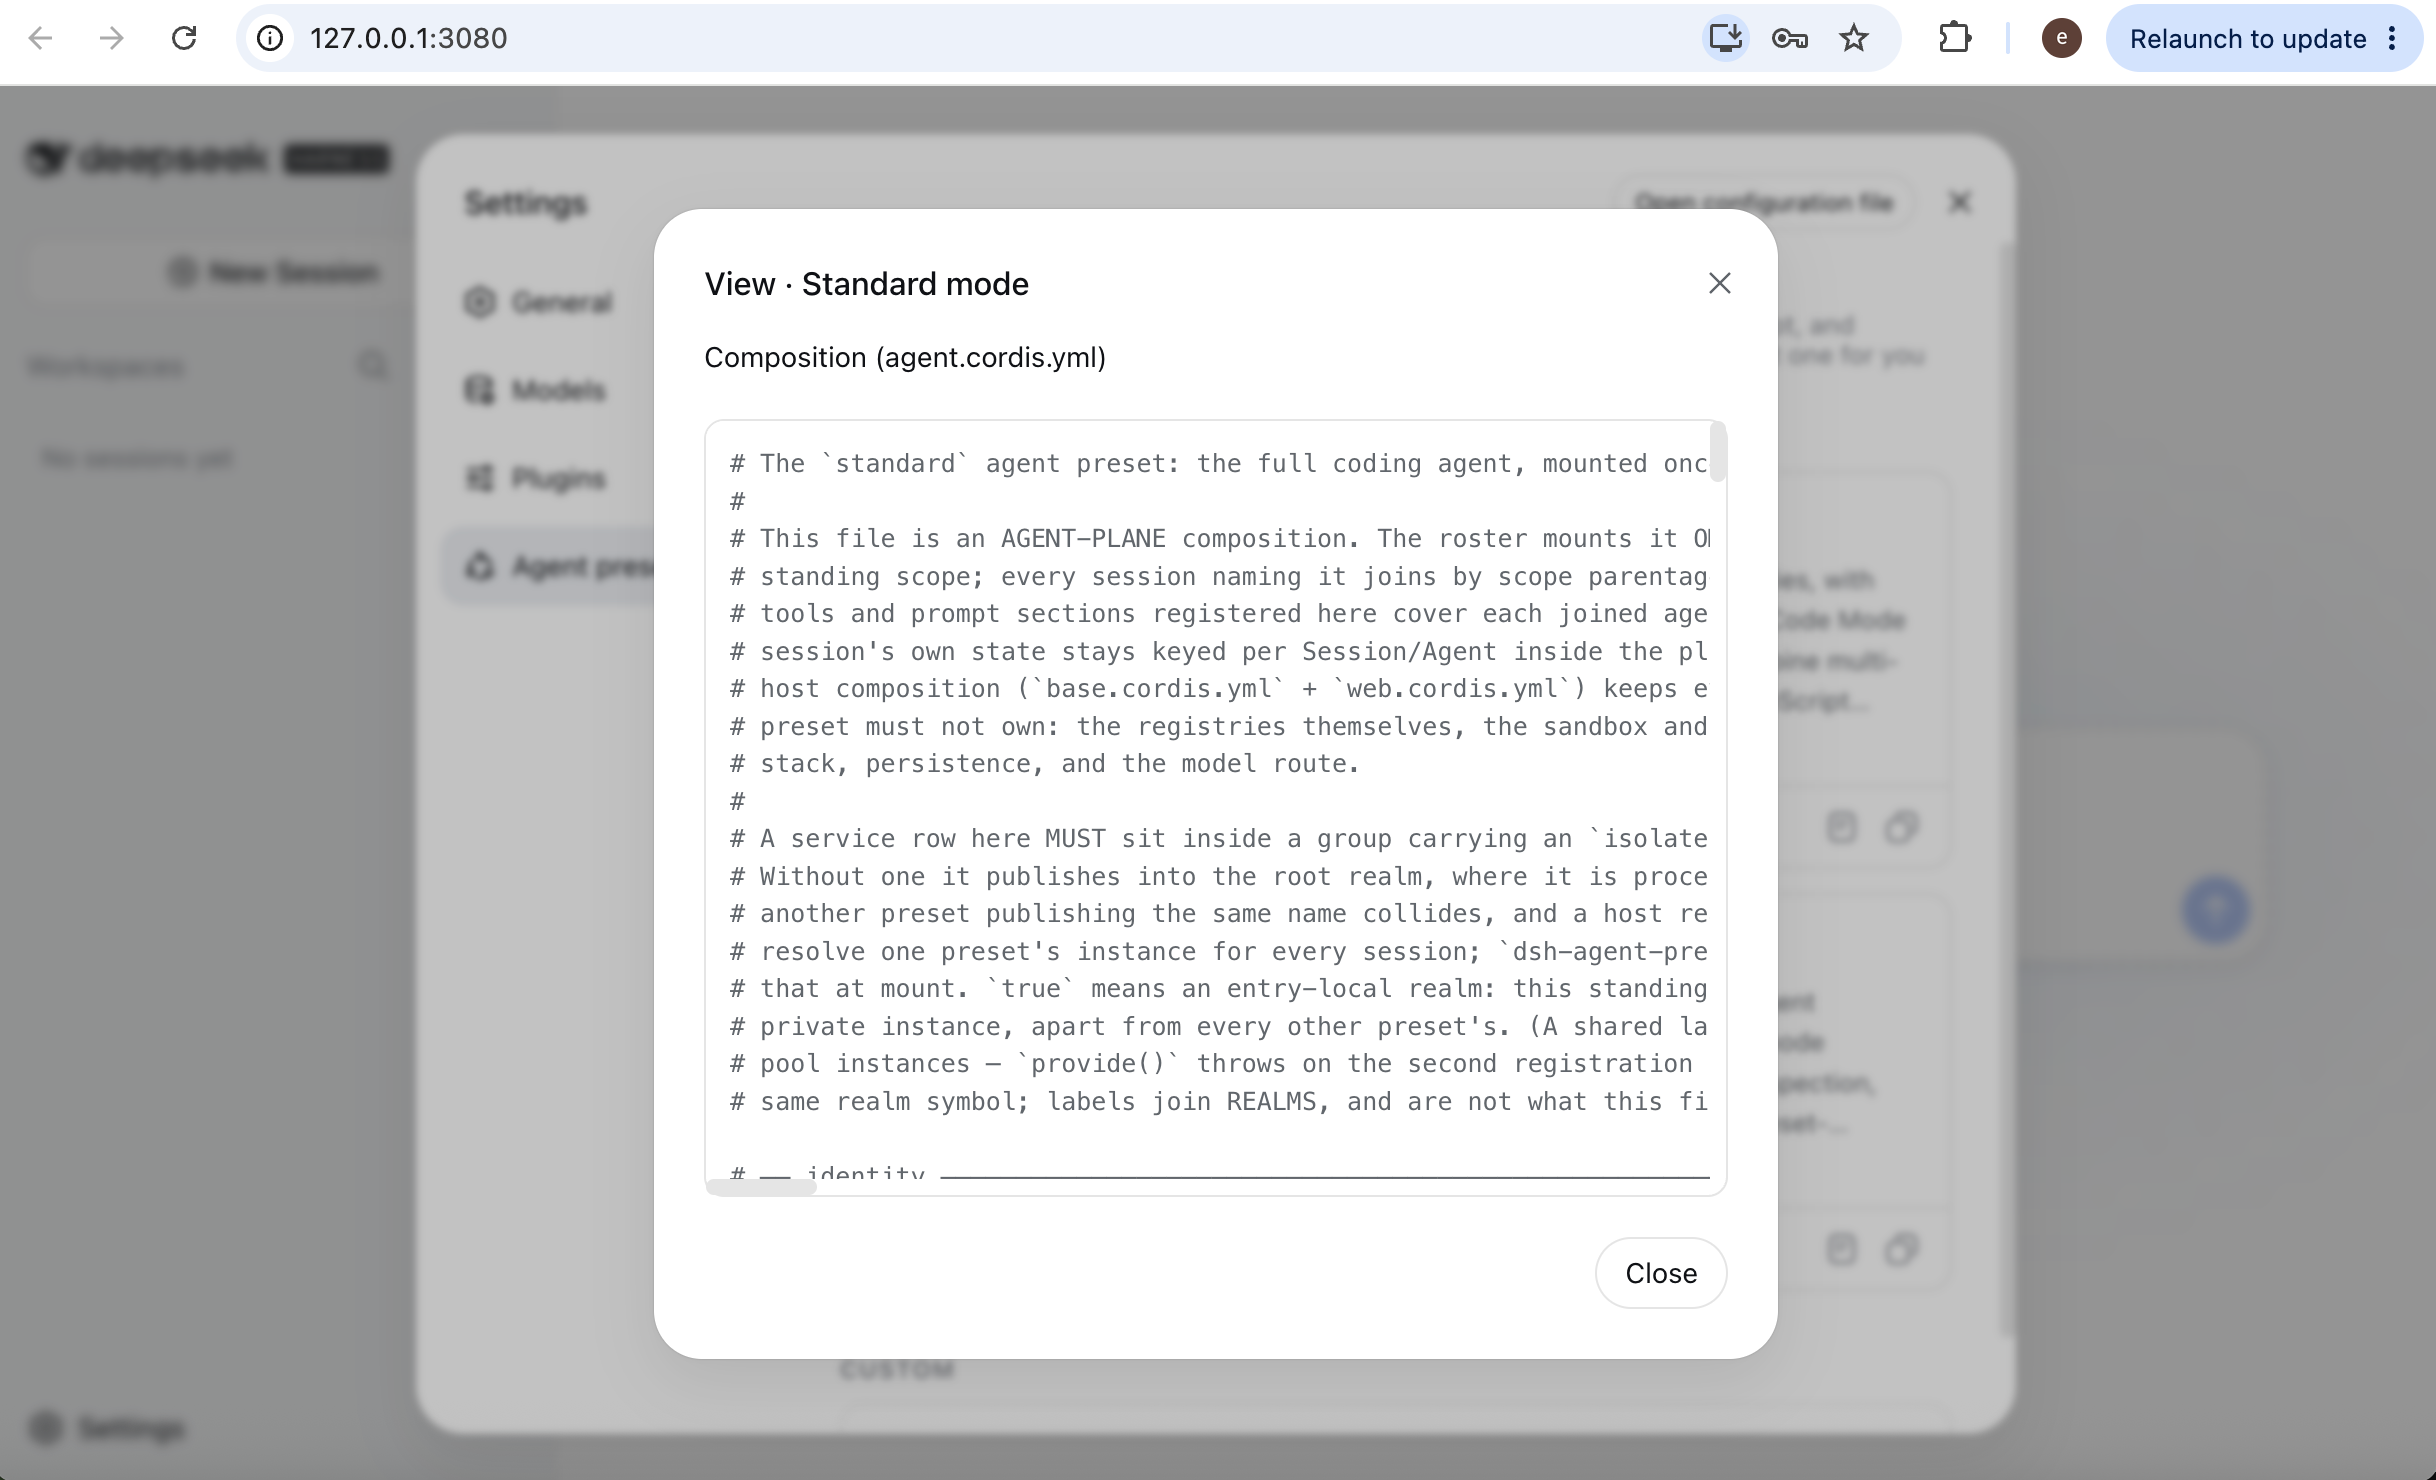
The Agent Presets tab shows the presets available for the Harness. You can click the view button for a preset to inspect its configuration and instructions.
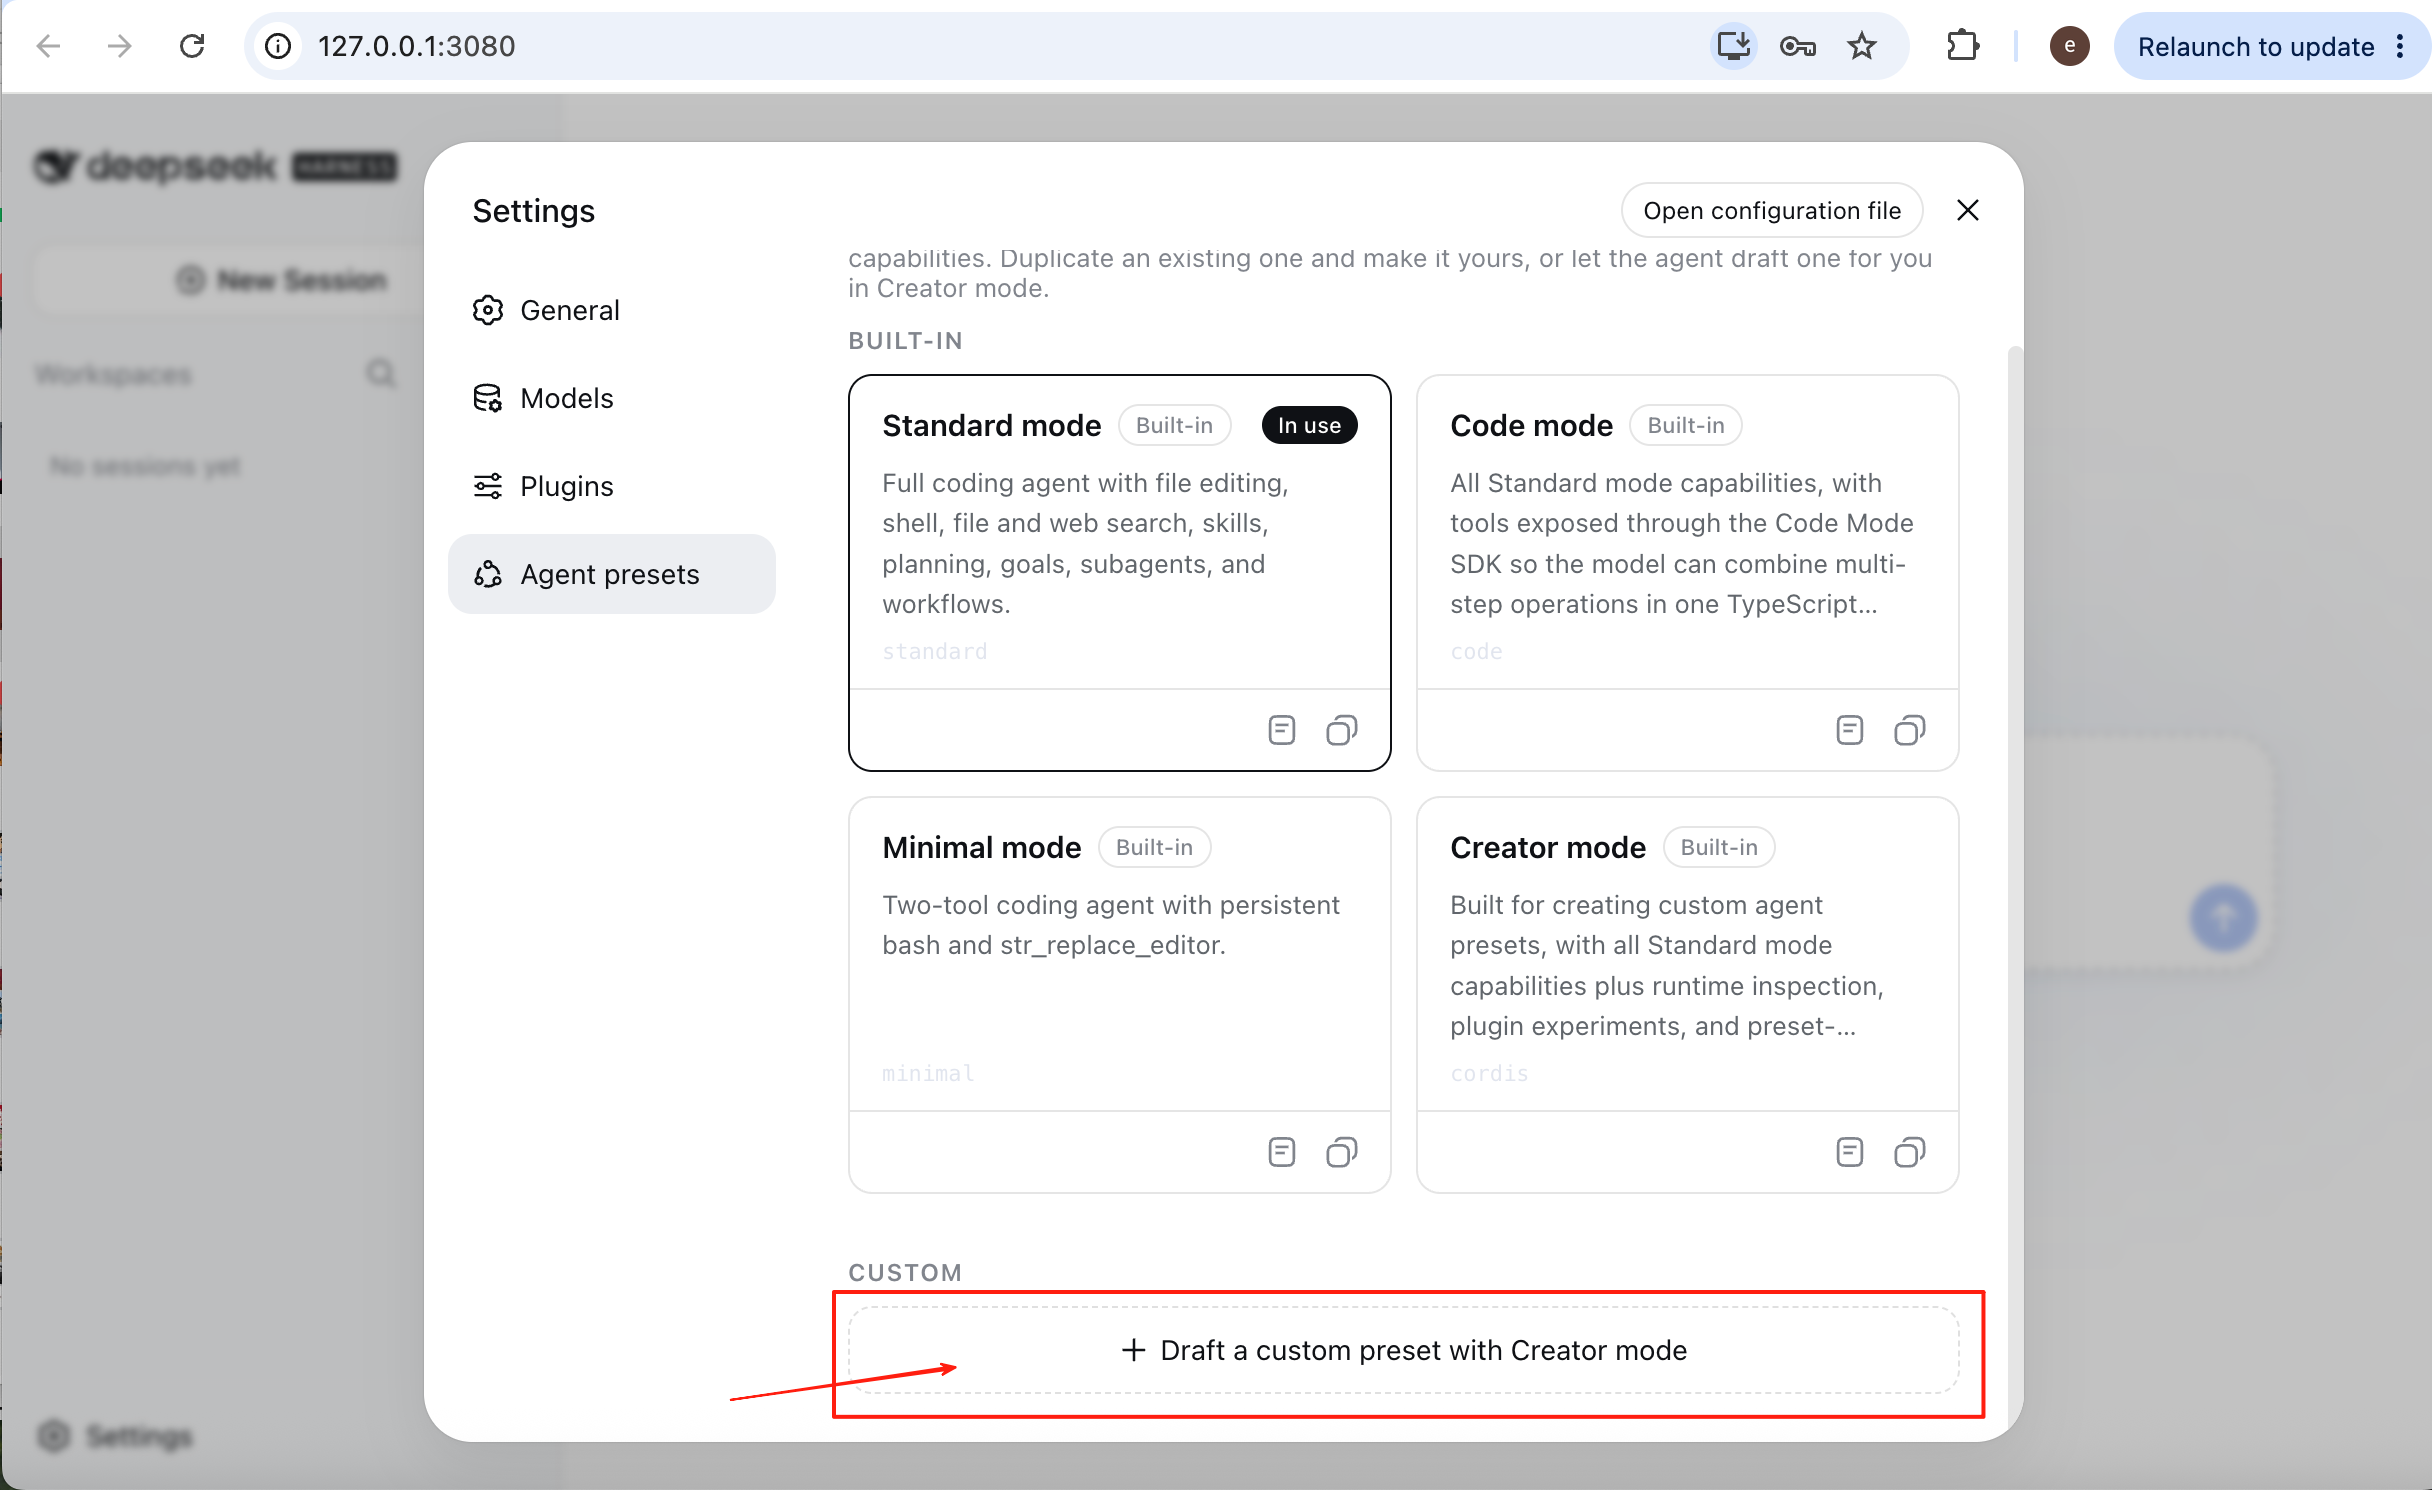
You can also create your own customised preset. In the next section, we will use DeepSeek Harness and explore how it differs from other agent tools.
Using DeepSeek Harness
Dialogue Page
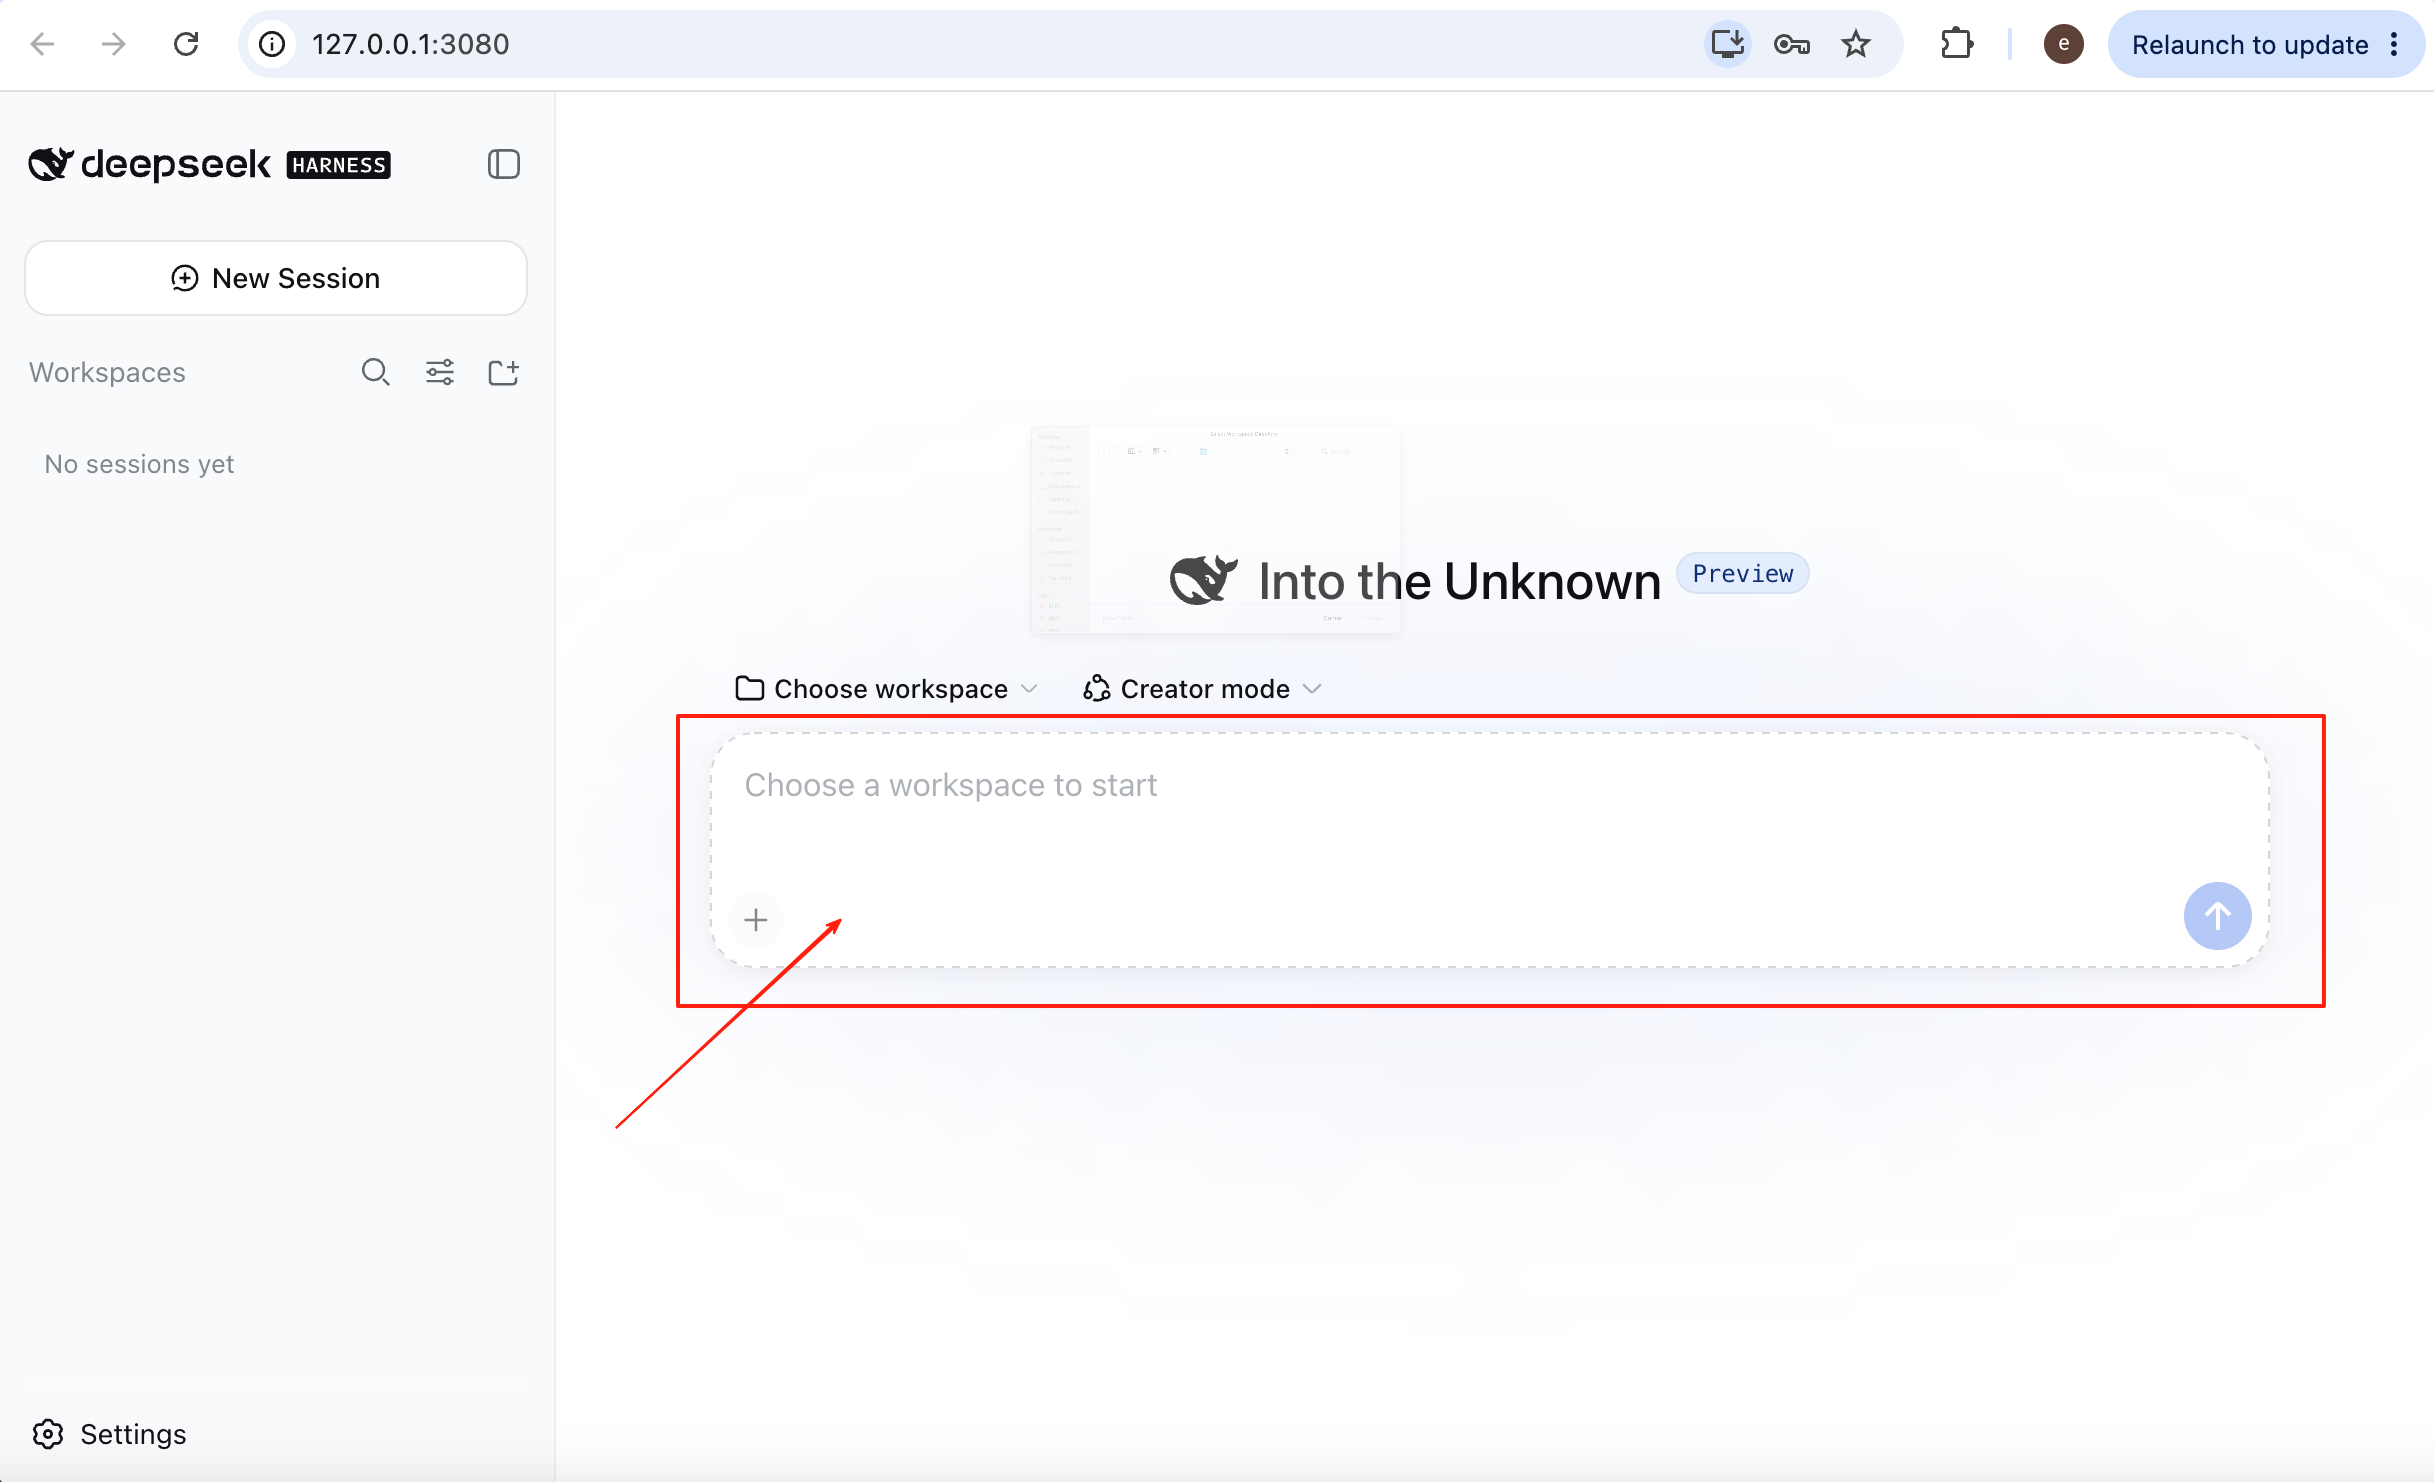
Click the dialogue box in the centre to choose a folder as your workspace. DeepSeek Harness will work within this folder. When Permission Mode is set to Workspace Write, it can only modify files inside the selected workspace.
You can change the model used for the current task by clicking the model selector next to the submit button.
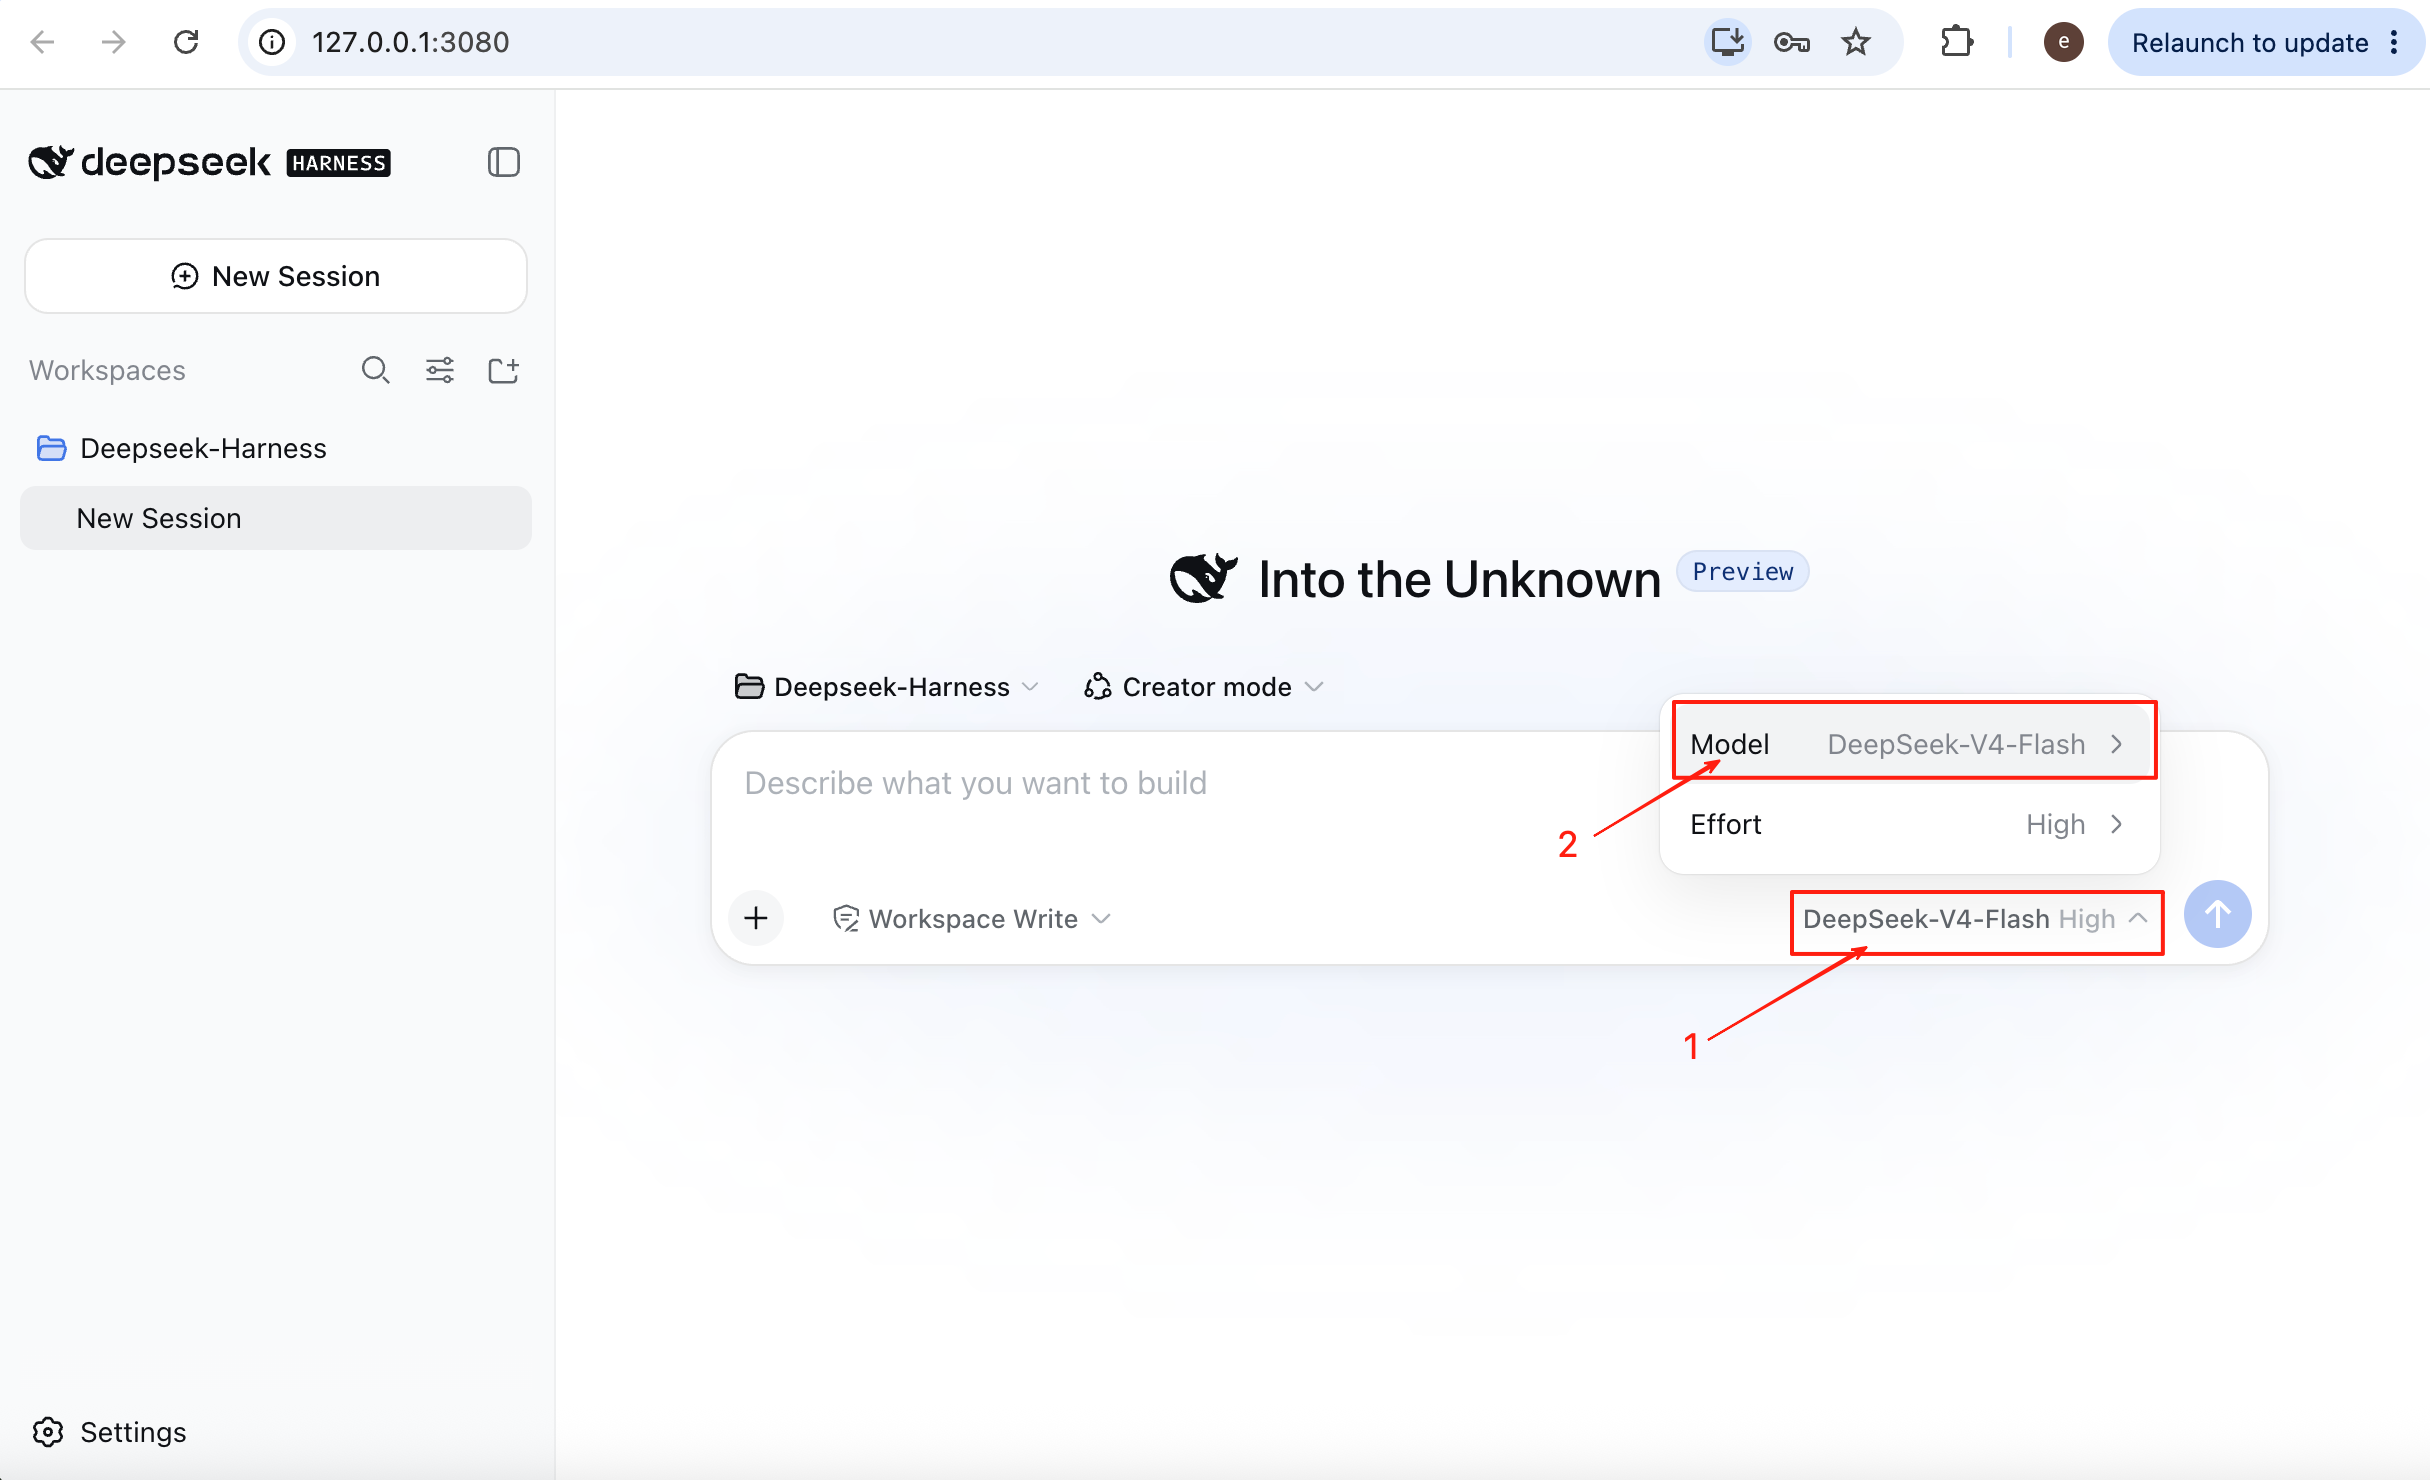
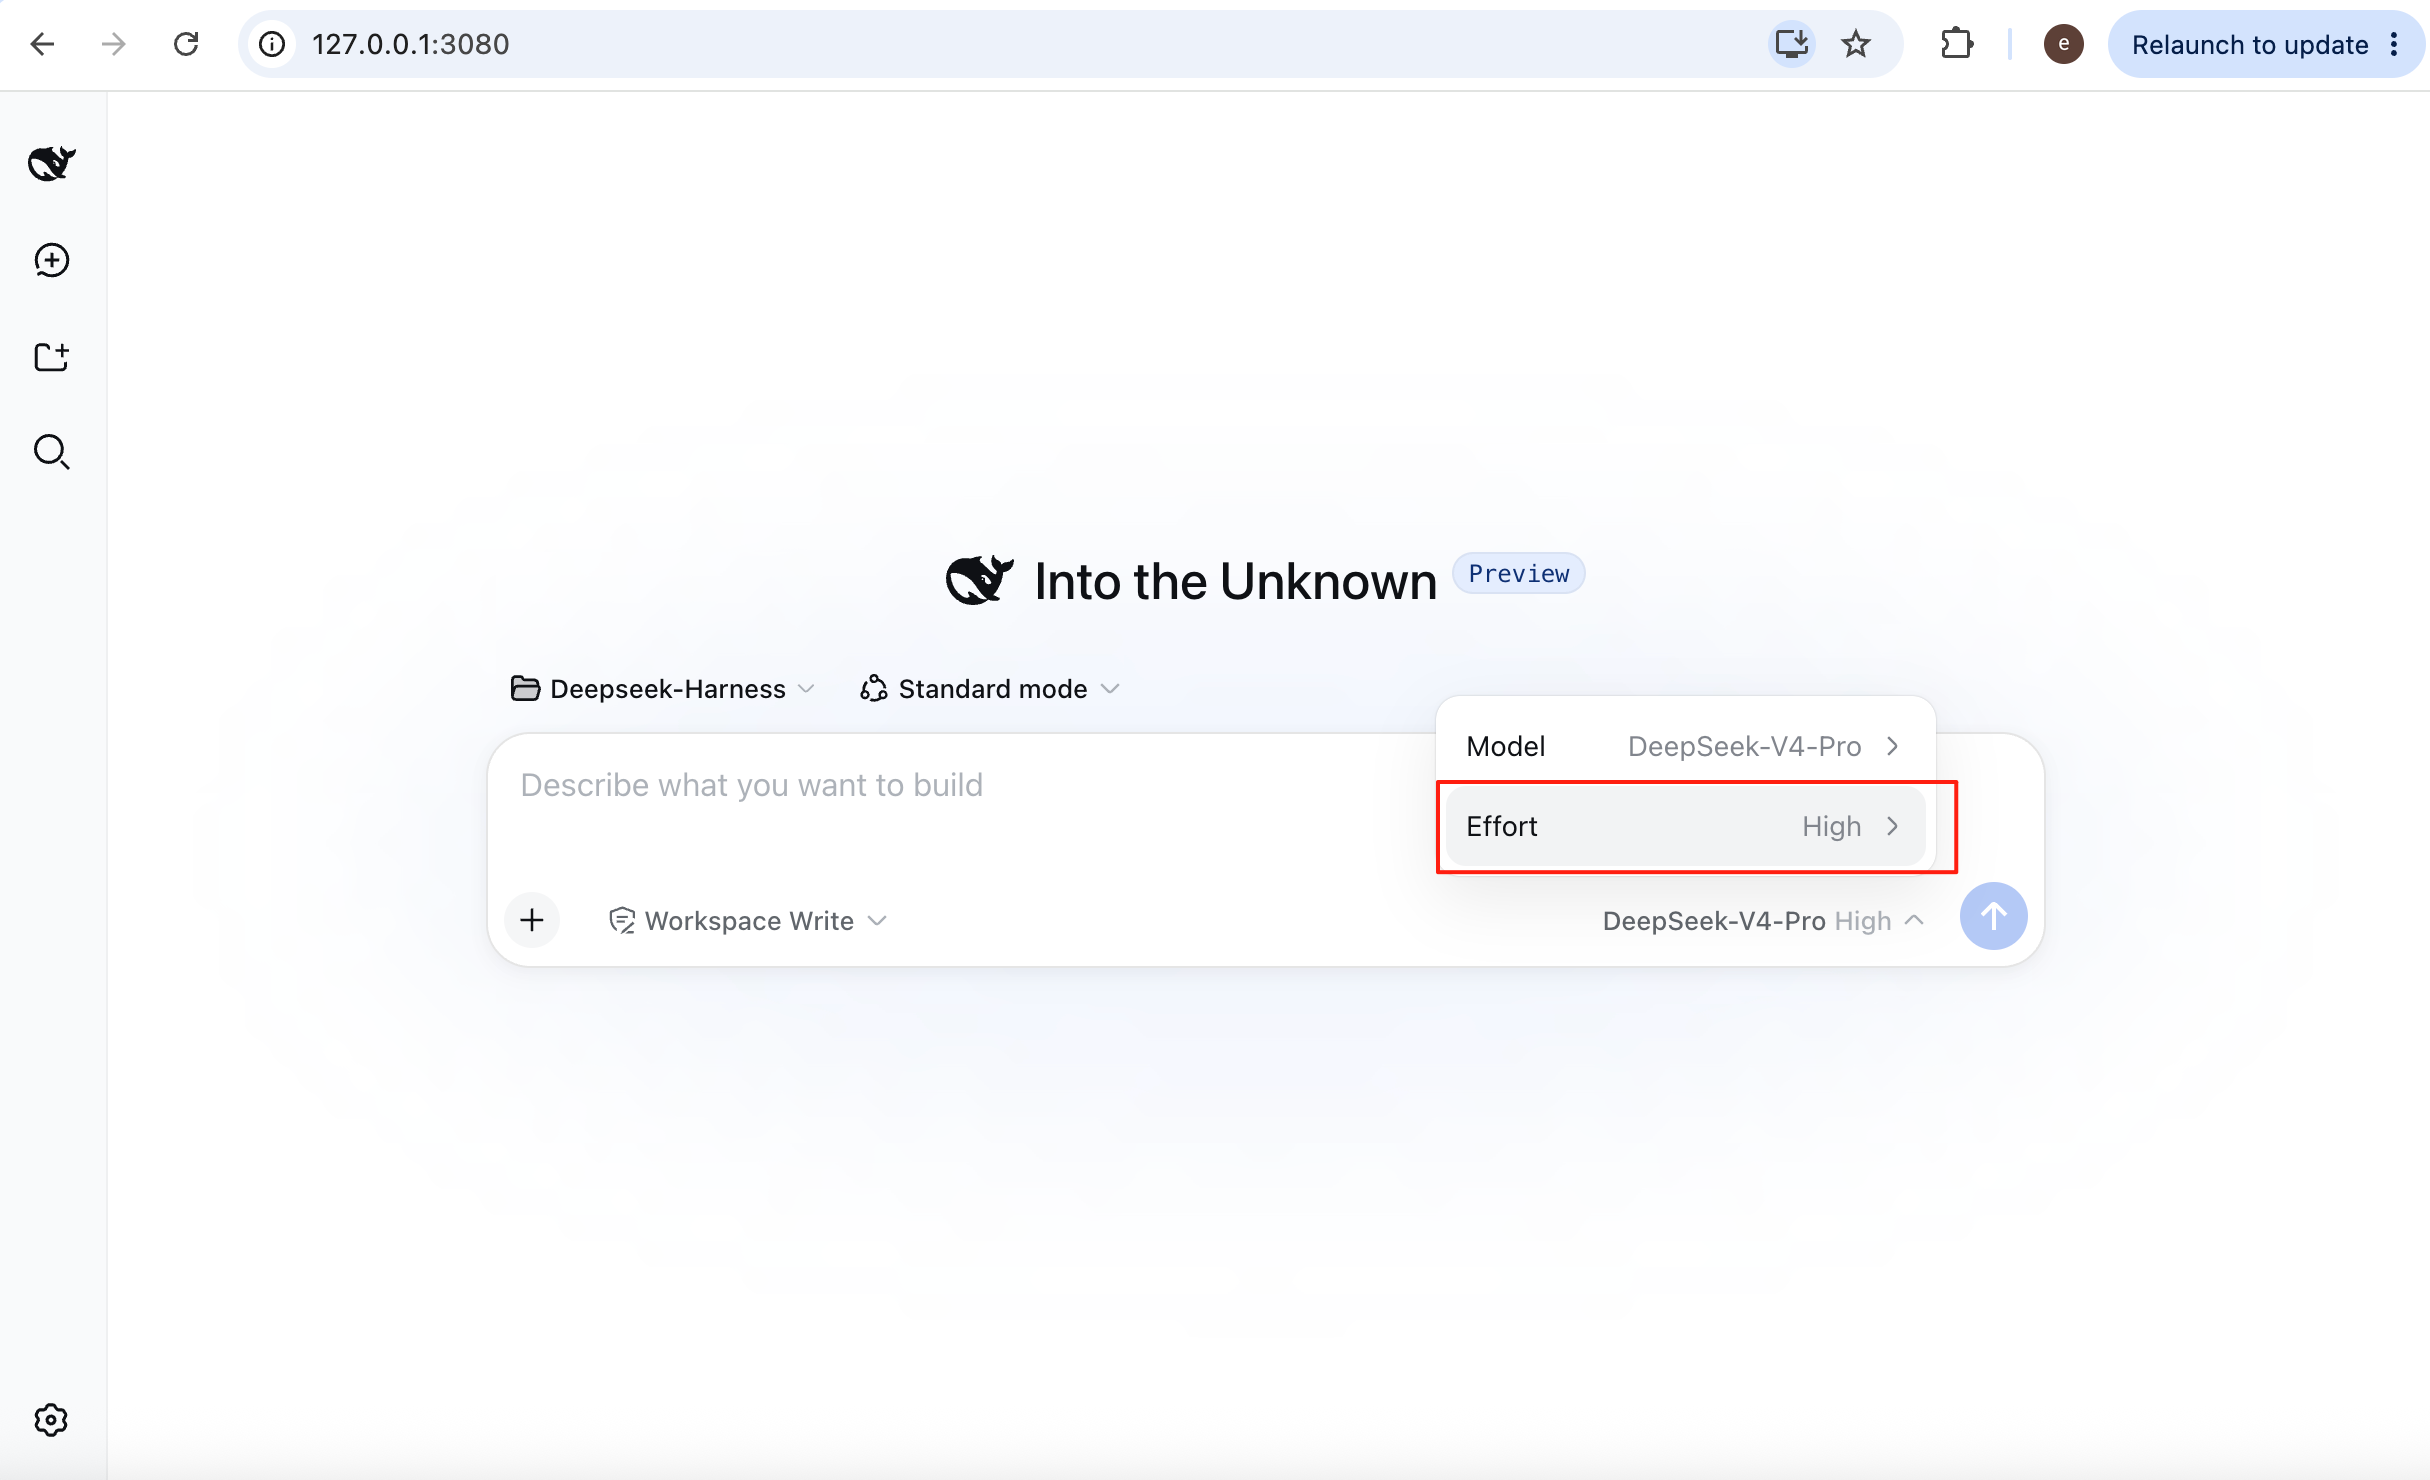
Effort determines how deeply the model investigates a task. Higher effort does not always mean better results; it can also increase both execution time and cost. For most tasks, the default setting is a good starting point.
You can also adjust the other task settings directly from the dialogue page.
Transform Your Main Interface
As mentioned earlier, DeepSeek Harness allows us to create a new plugin by ourselves. Let us start with a simple example.
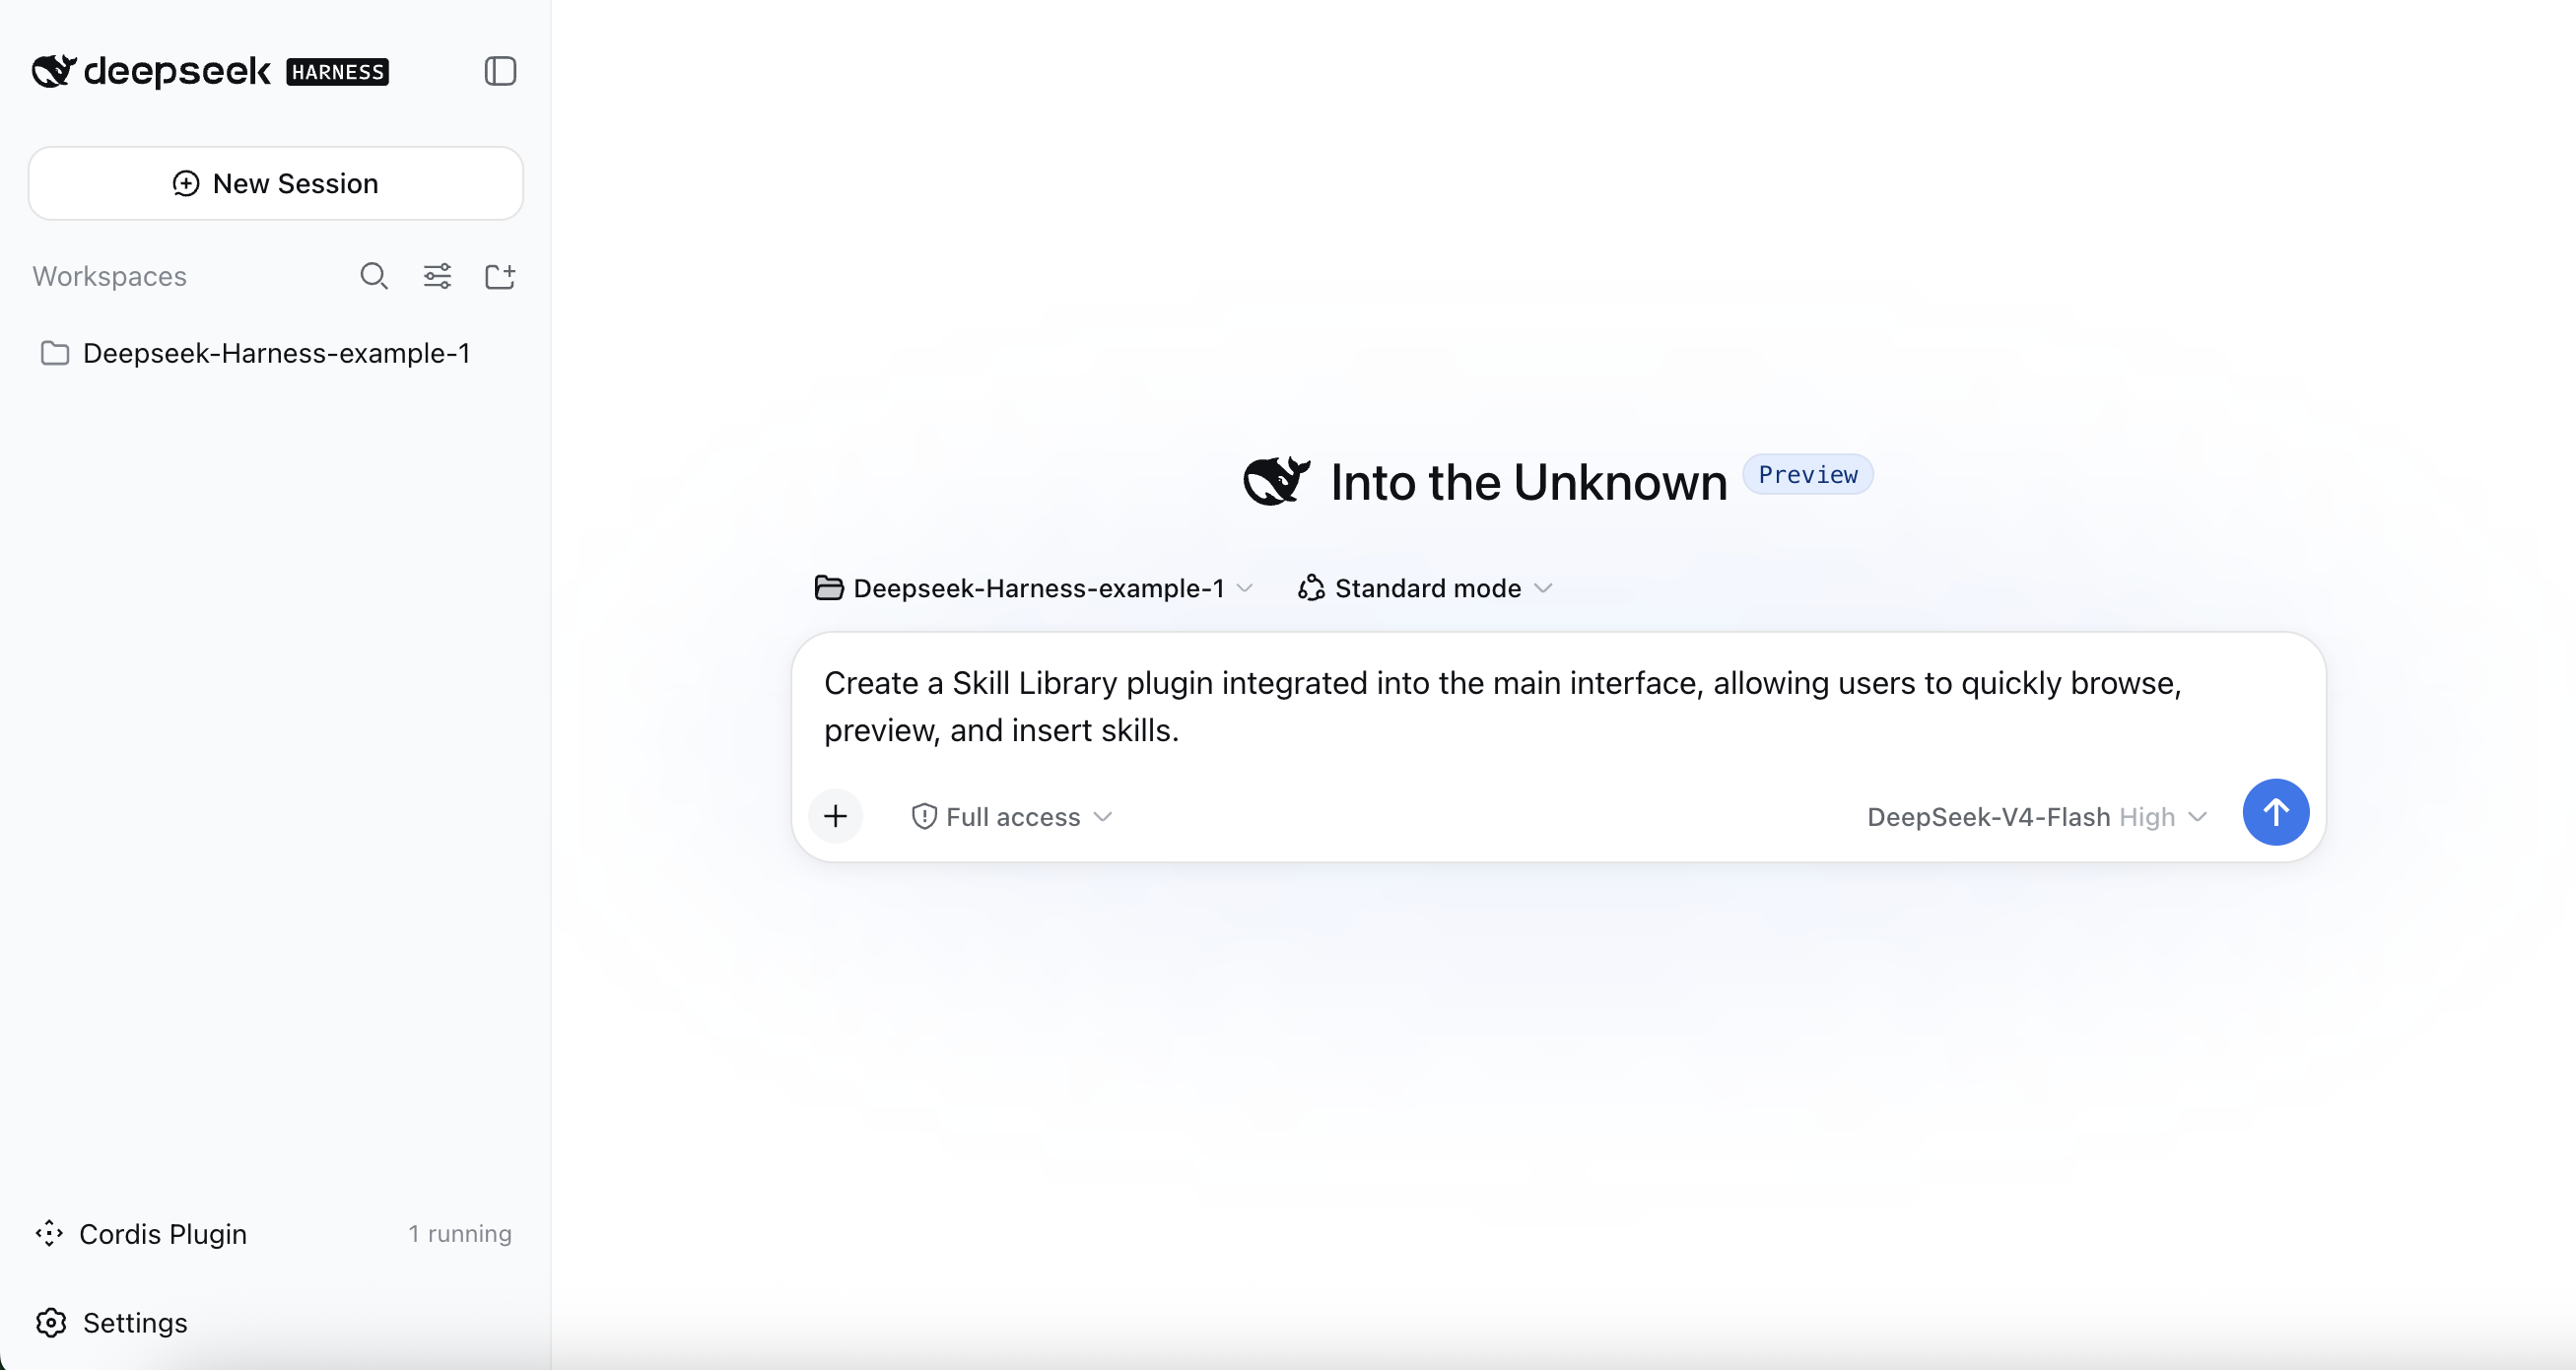
Have you ever forgotten the name of a skill installed on your computer, or found it troublesome to type /xxx every time you wish to invoke it? DeepSeek Harness allows you to build a convenient plugin to solve exactly this problem; all you need to do is describe your needs to the AI.
Create a Skill Library plugin integrated into the main interface,
allowing users to quickly browse, preview, and insert skills.
After completing the task, click the Skills tab to open the Skills Library. This page displays basic information about each skill, making it easier to review and manage our skills.
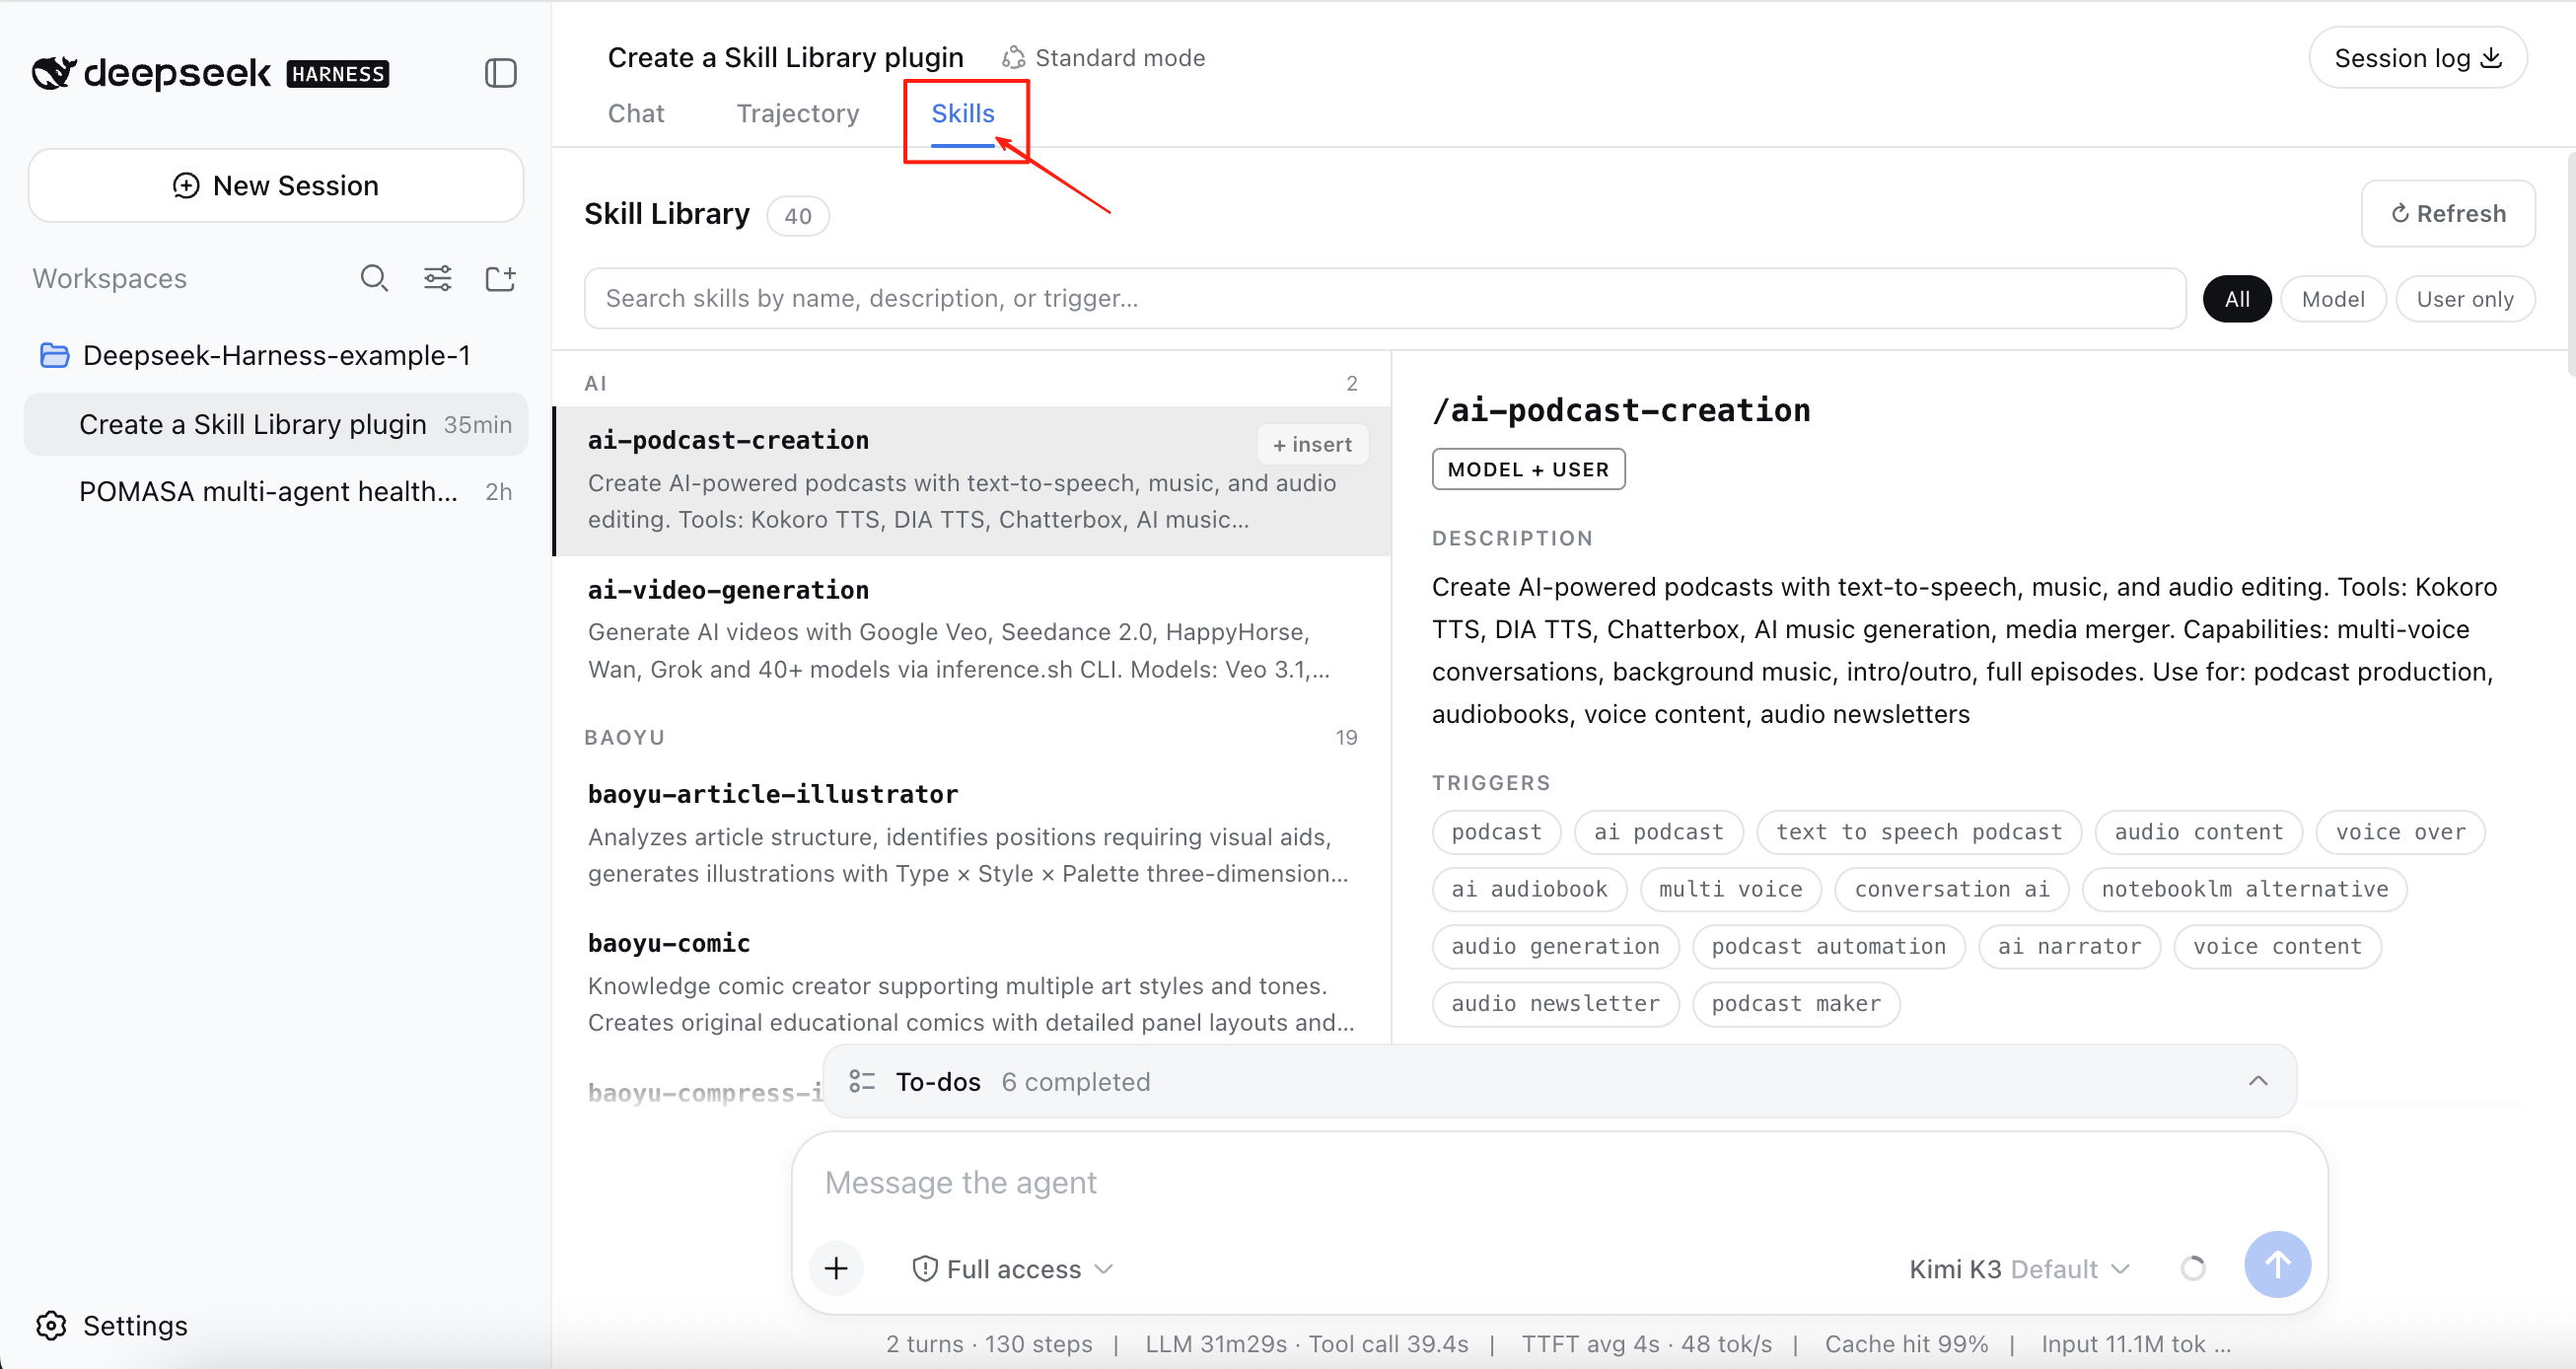
Click Insert into composer to insert a reference to the selected skill into the chat box. This saves time and makes the skill easier to use.
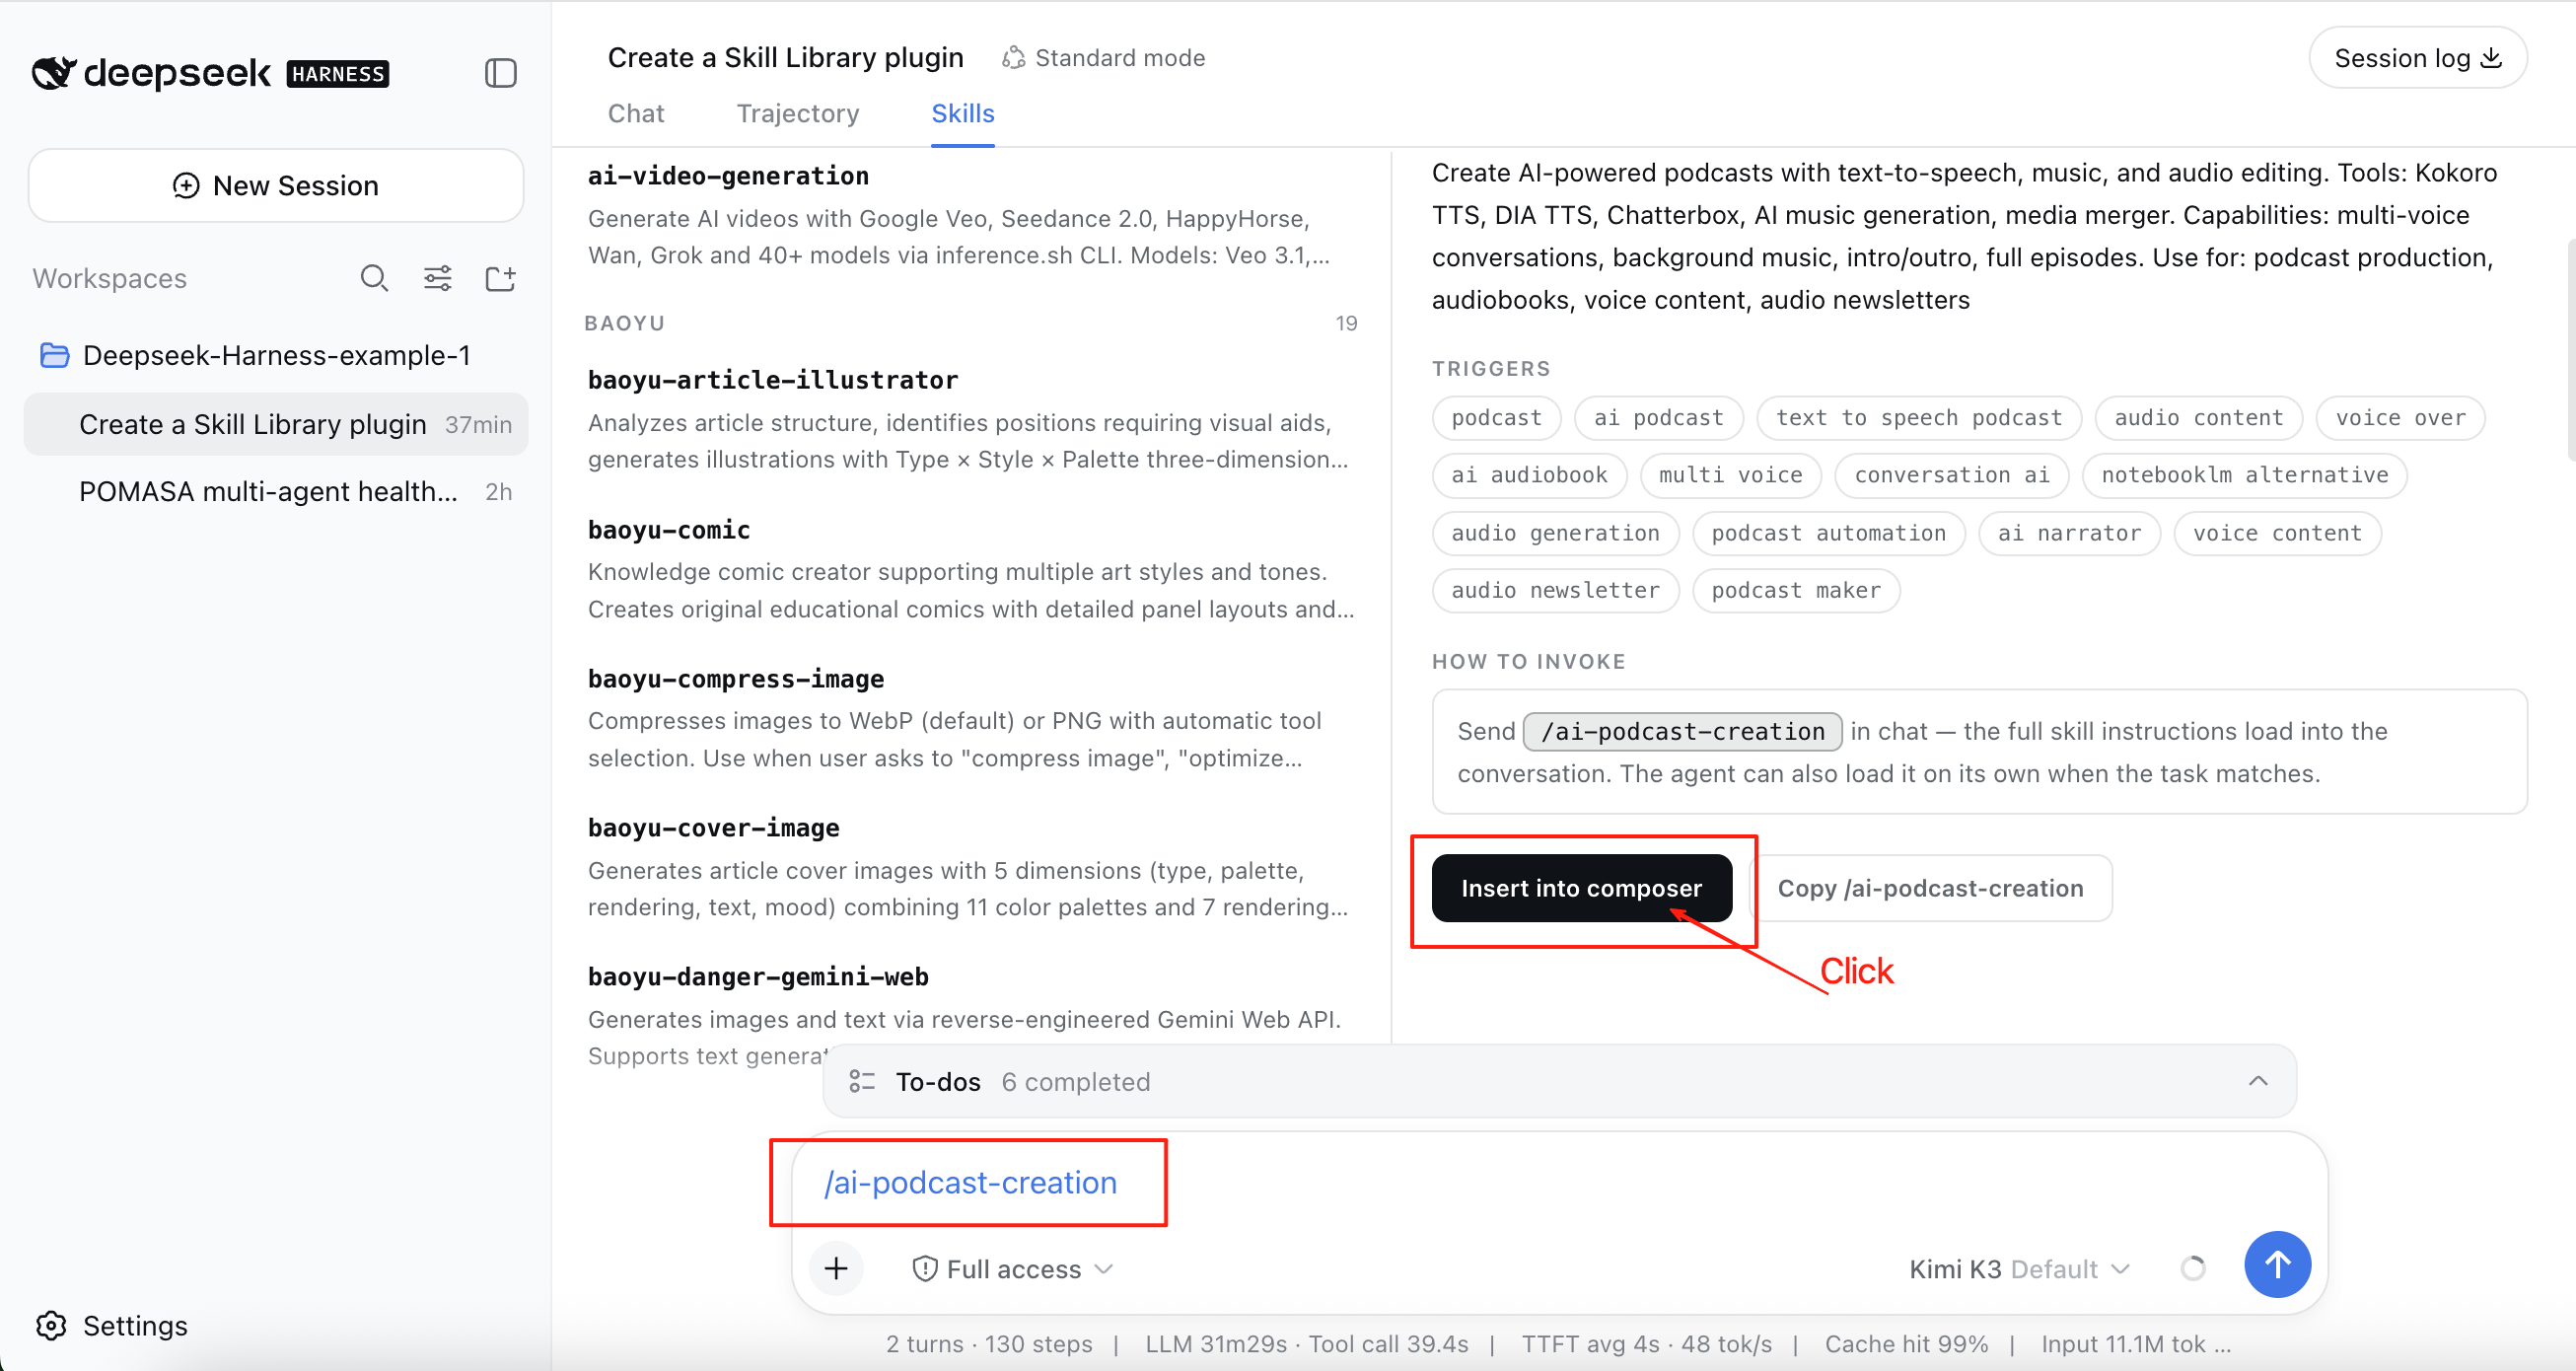
Because this model’s capabilities are strong and this requirement is relatively straightforward, there is no need for us to adjust the result. If any problems do exist in your plugin, simply describe them and ask the AI to solve them.
Make a Plugin for Your Skill
In an era when AI is often used together with skills, many people simply type in the name of a skill and wait for the output. The execution process, however, remains a black box: if the output is not satisfactory, we have no choice but to run the skill again, which is a waste of time and money. Although the AI may occasionally ask us to make a choice, such prompts are random and far from sufficient.
By using DeepSeek Harness, we can upgrade our skills with visual interfaces that allow us to monitor and intervene in the operation of the AI. The section below uses POMASA as an example.
POMASA is an open-source skill that creates a multi-agent research system to investigate a given topic; the code is available at https://github.com/eXtremeProgramming-cn/pomasa. Its defining feature is that it separates the research process into a variety of stages and executes them step by step based on the given topic.
We can therefore build an interface for the various stages, see which stage is currently running, and see which files each stage generates, thereby keeping control of the implementation. For example, we can view the intermediate files while the AI is running, without having to search for them in the Finder, and spot errors in good time.
To get started, we need to install POMASA in our project folder.
Please install the following skill as a project skill in the current project.
npx skills add eXtremeProgramming-cn/pomasa
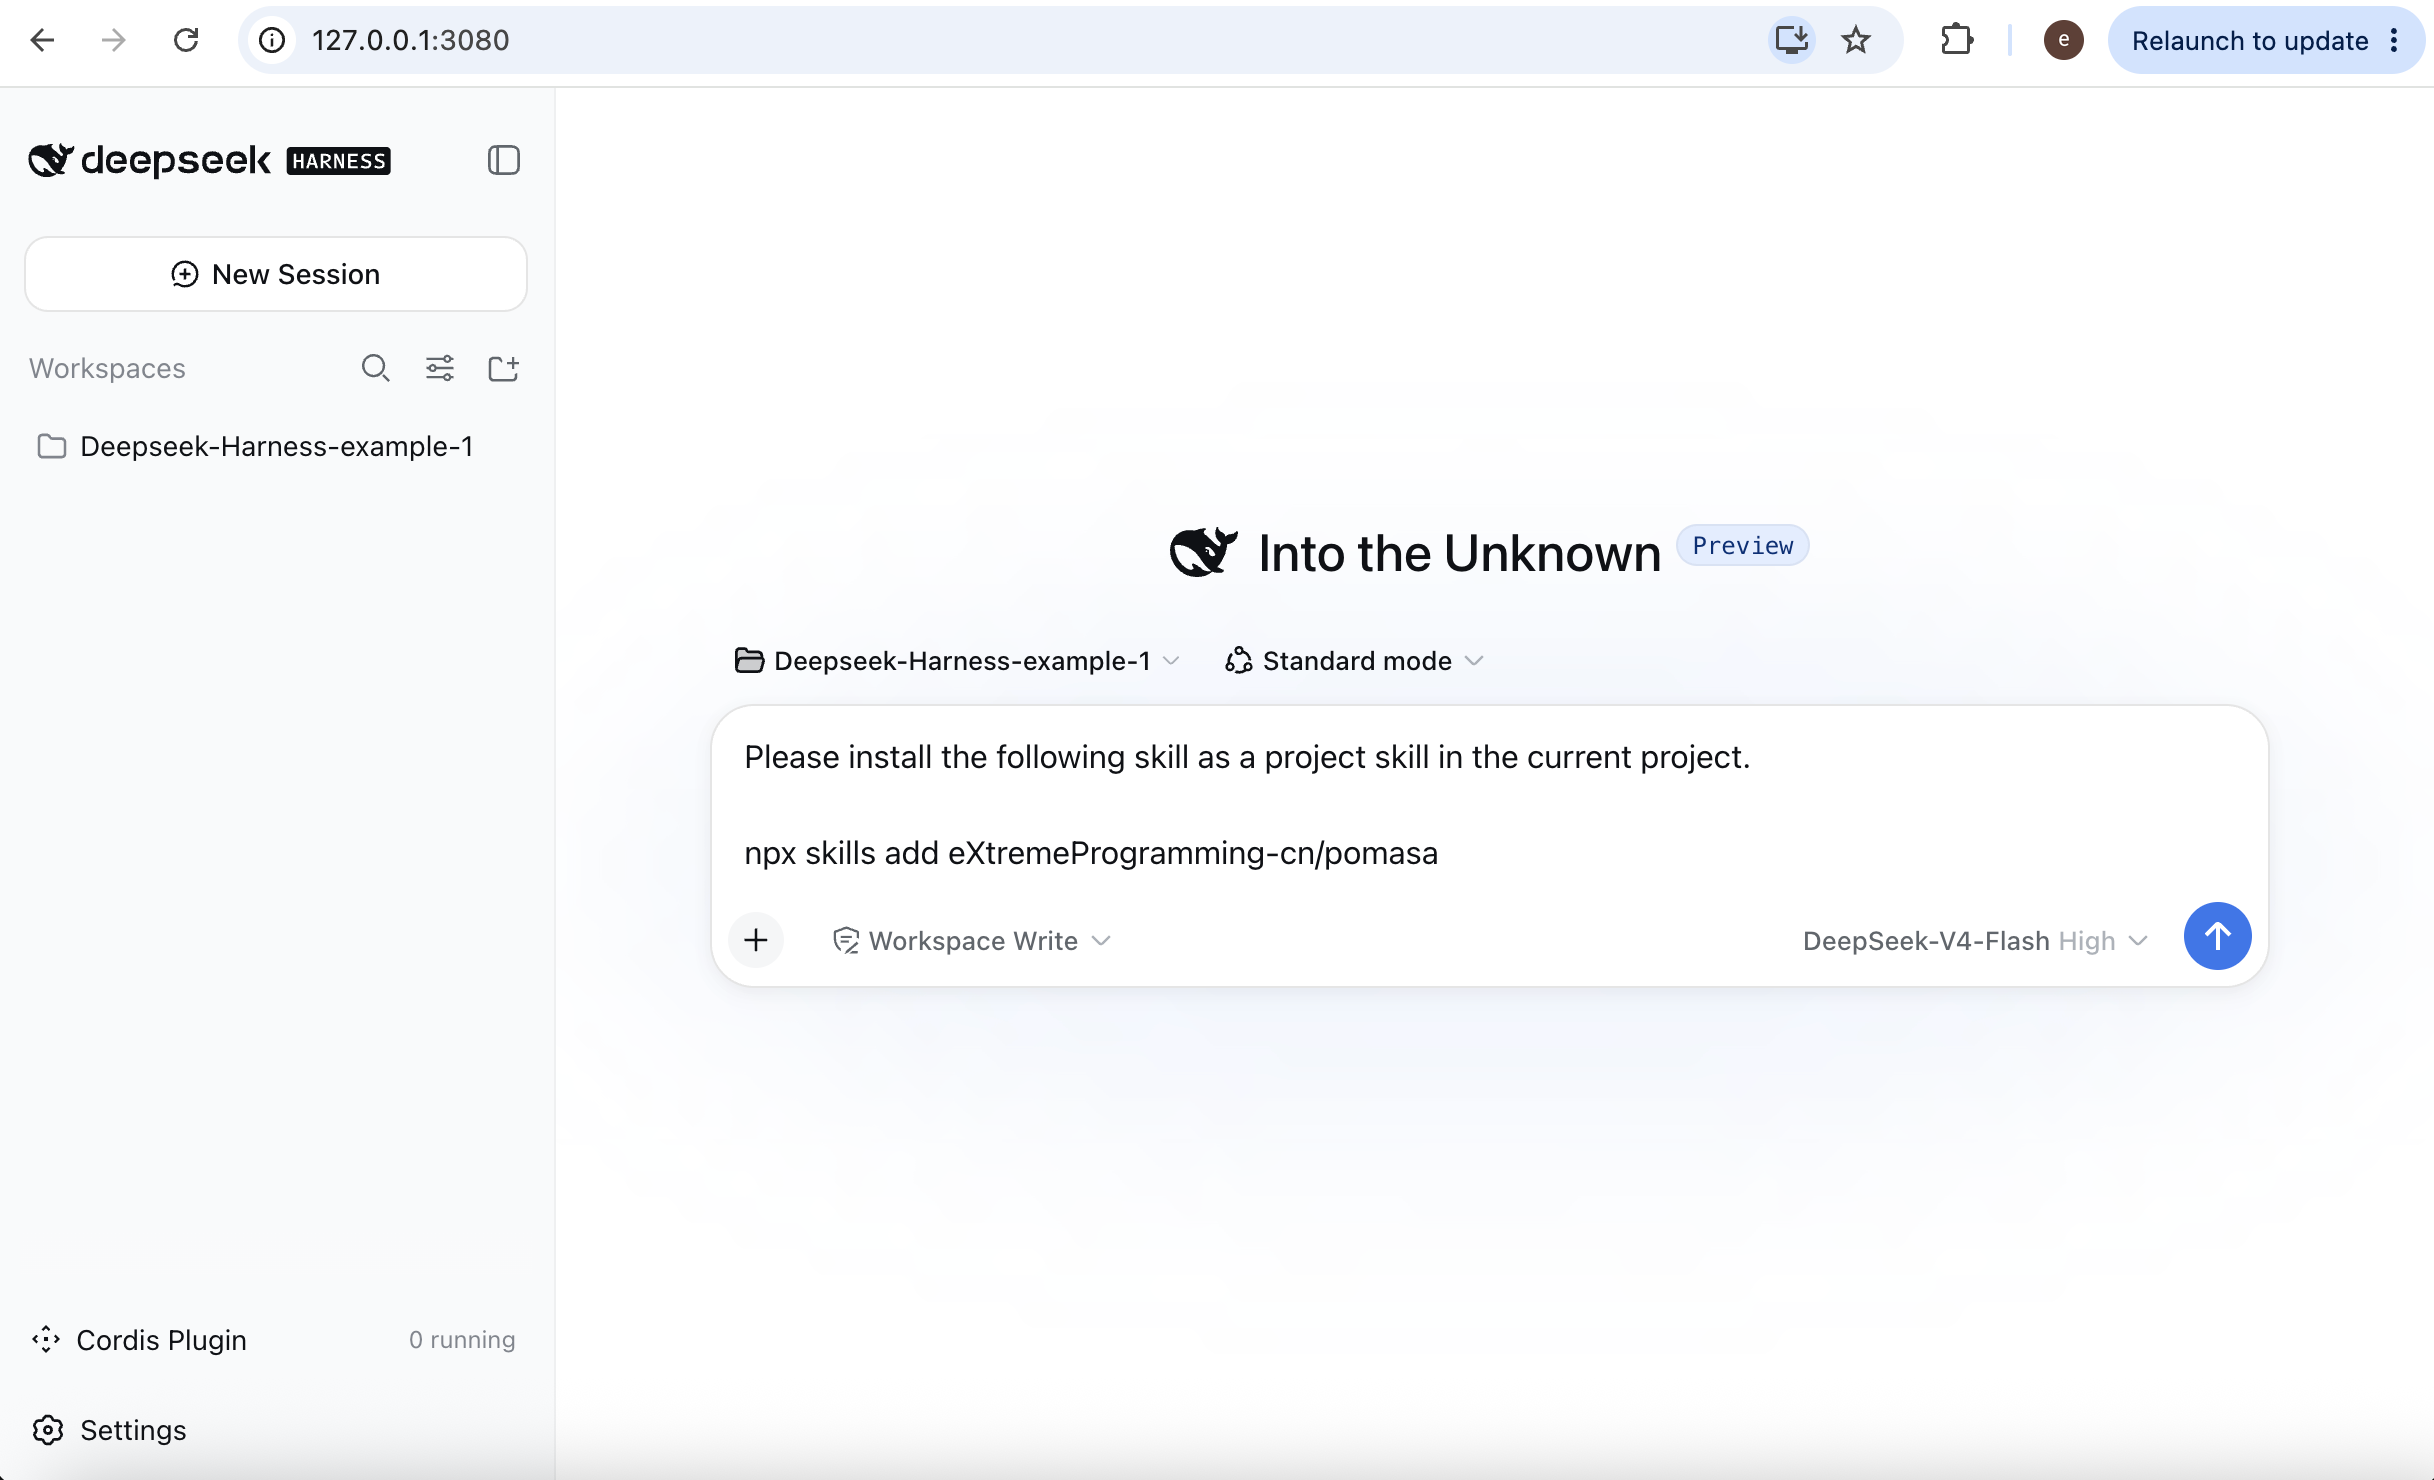
To begin our visualisation, it is better to understand roughly how this skill works. It is perfectly fine to simply tell the AI to create a visualisation plugin for it, but if you know what your skill will require from human operators in the long term, the visualisation can be much better.
Simply speaking, POMASA separates a complicated task into several stages, provides methodology, generates initial ideas, and builds a reusable research system according to your study. We can use the official prompt as an example.
Help me create a multi-agent research system for analysing AI trends in healthcare.
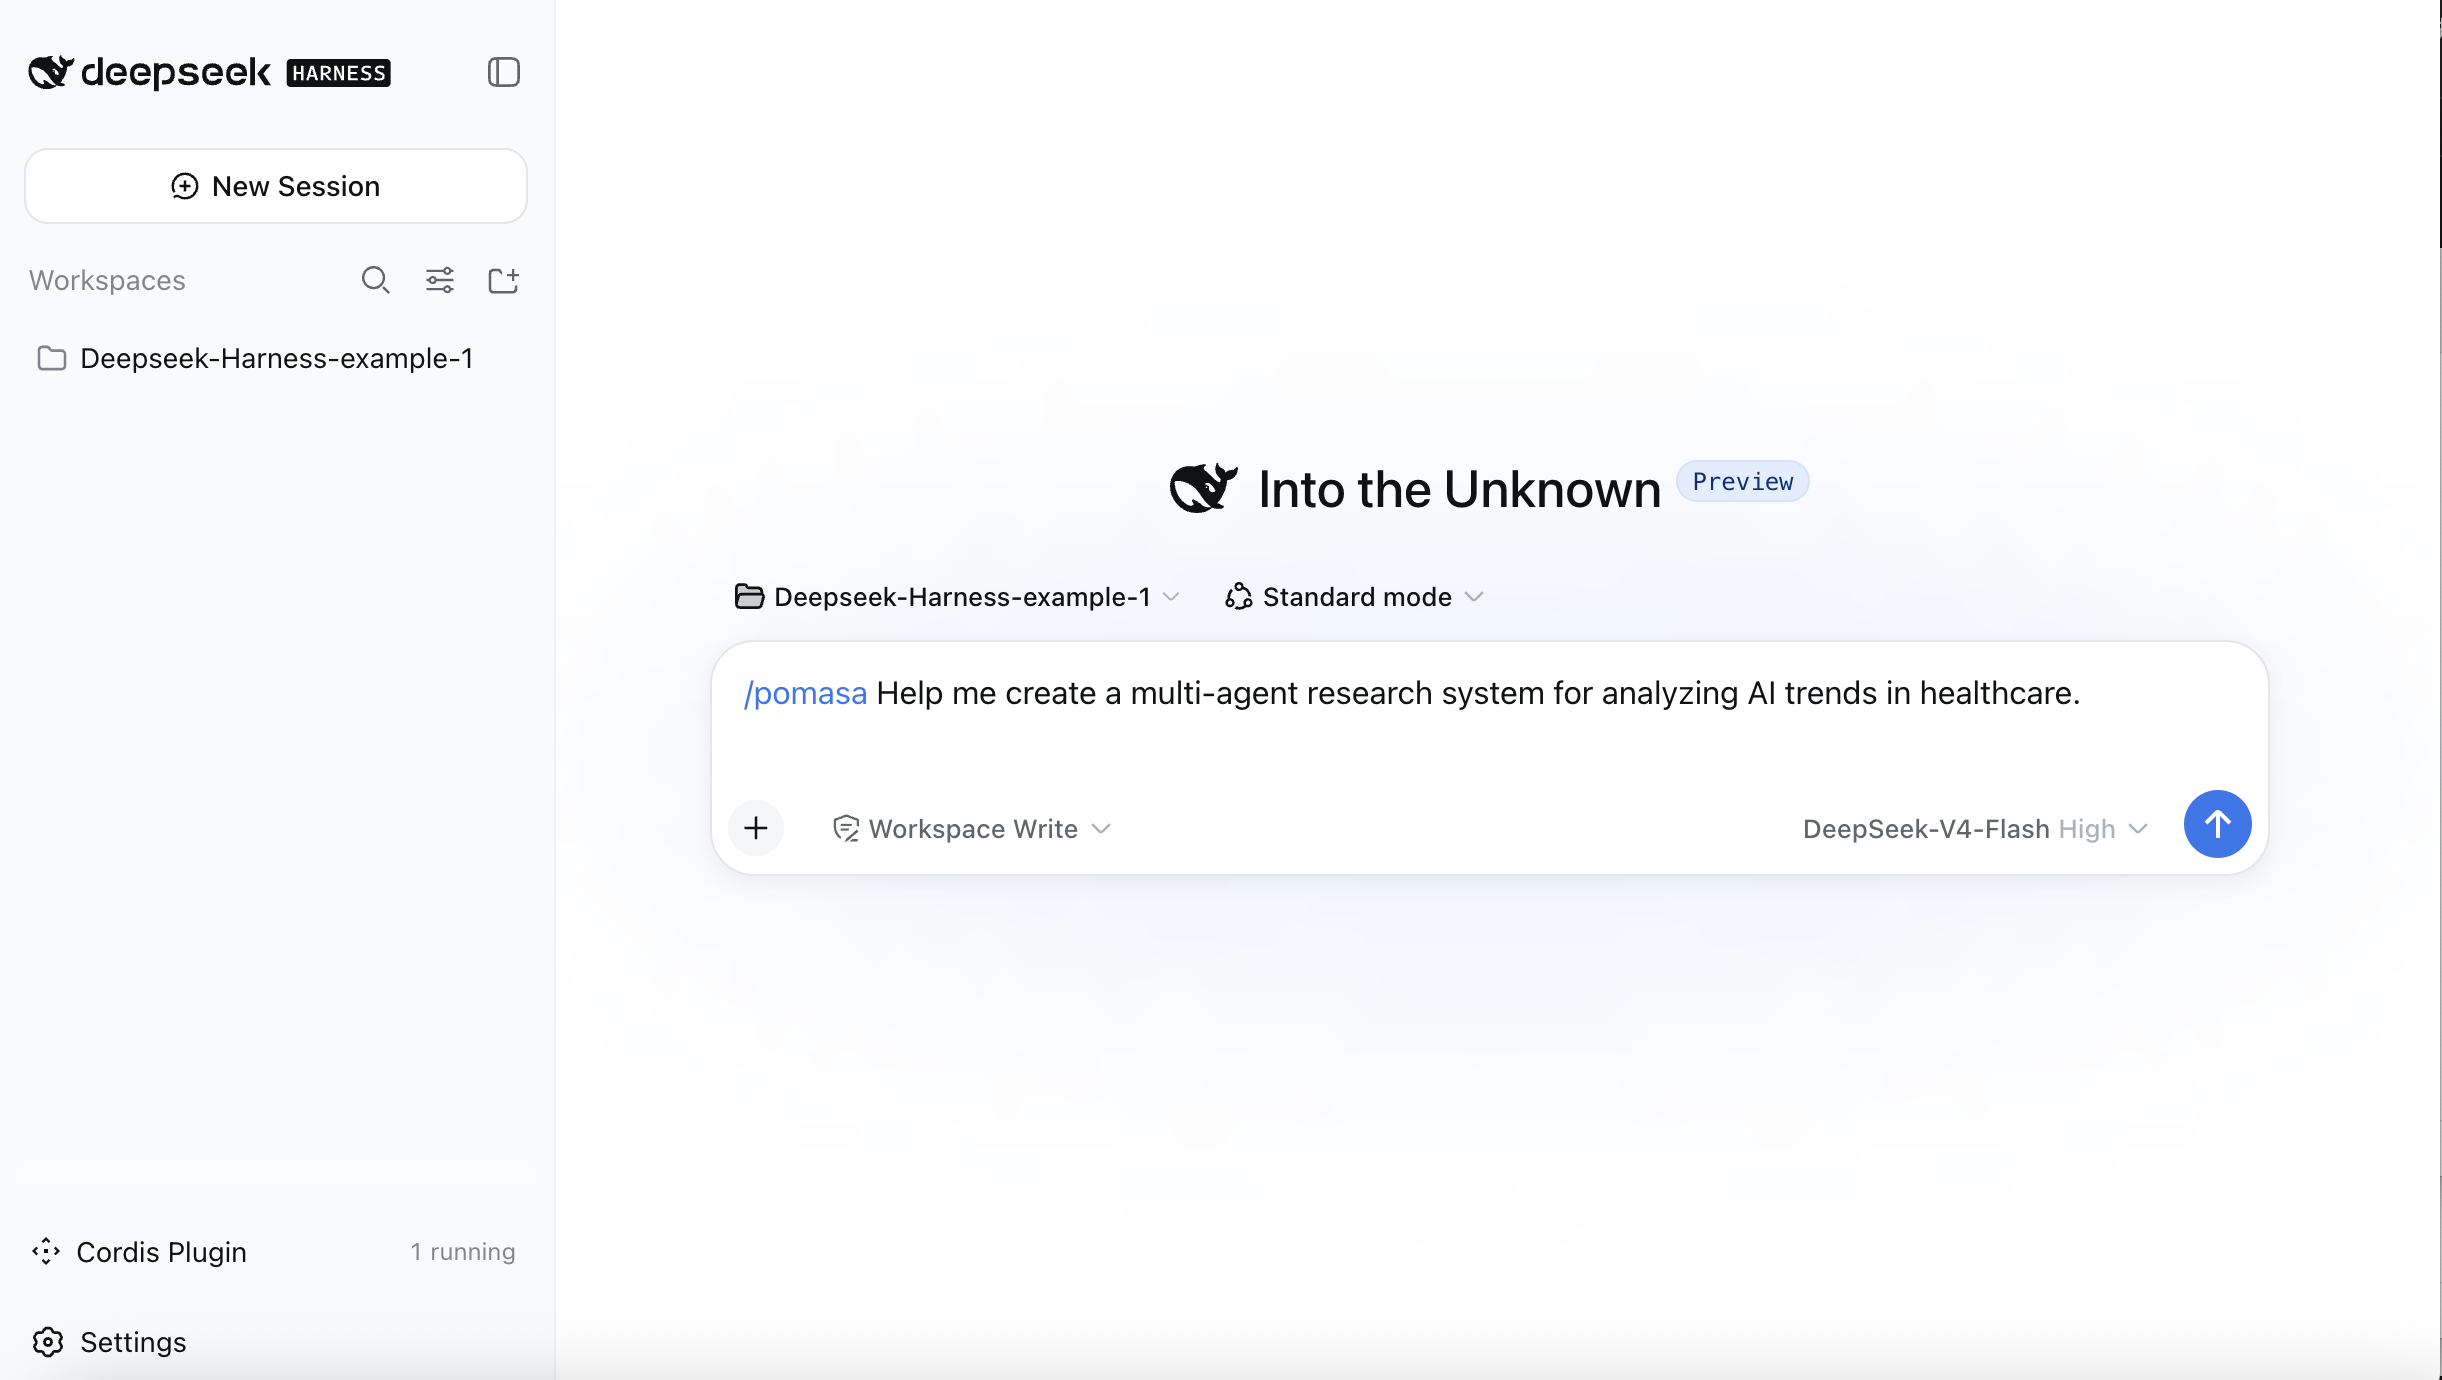
After the AI has completed its work, we can see the working folder it has produced, which contains several subfolders:
- agents: Sets up the workflow for the research.
- library: Contains the external resources collected by the AI for writing.
- references: Contains the primer, initial ideas, and methodology that serve as the basis of the study.
- wip: Records the state of the study, such as when each session started and ended.
- workspace: Contains the outputs generated at different stages of the workflow.
- _output: Contains the final report generated by this skill.
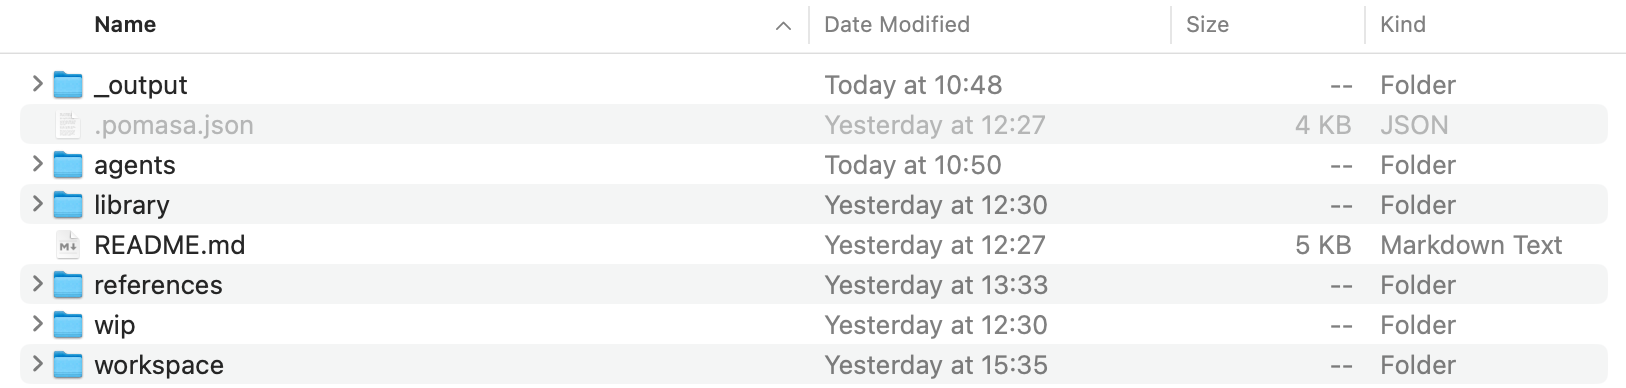
Here is a simple example of a workspace folder generated by a workflow of ‘collect sources -> verify sources -> analyse arguments’. Many skills use similar structures to break complicated tasks down into a series of steps.
However, if the sources searched are wrong, the analysis will probably produce the wrong arguments and cost a great deal of time and money in an unexpected direction. Since the workflow has been separated clearly and has files that can be reviewed by humans, it would be ideal to build an interface that guides the user to read them.
A clear interface can also decrease the difficulty of usage: there is no need for other people to read the specifications and documents before using a skill.

To begin with, we can simply describe our needs.
/pomasa Design a research-process visualisation interface
called POMASA Observatory for DSH that provides a real-time
view of a POMASA multi-agent research workflow.

The interface is an observer:
its purpose is to visualise the research process,
agent activity, and files.
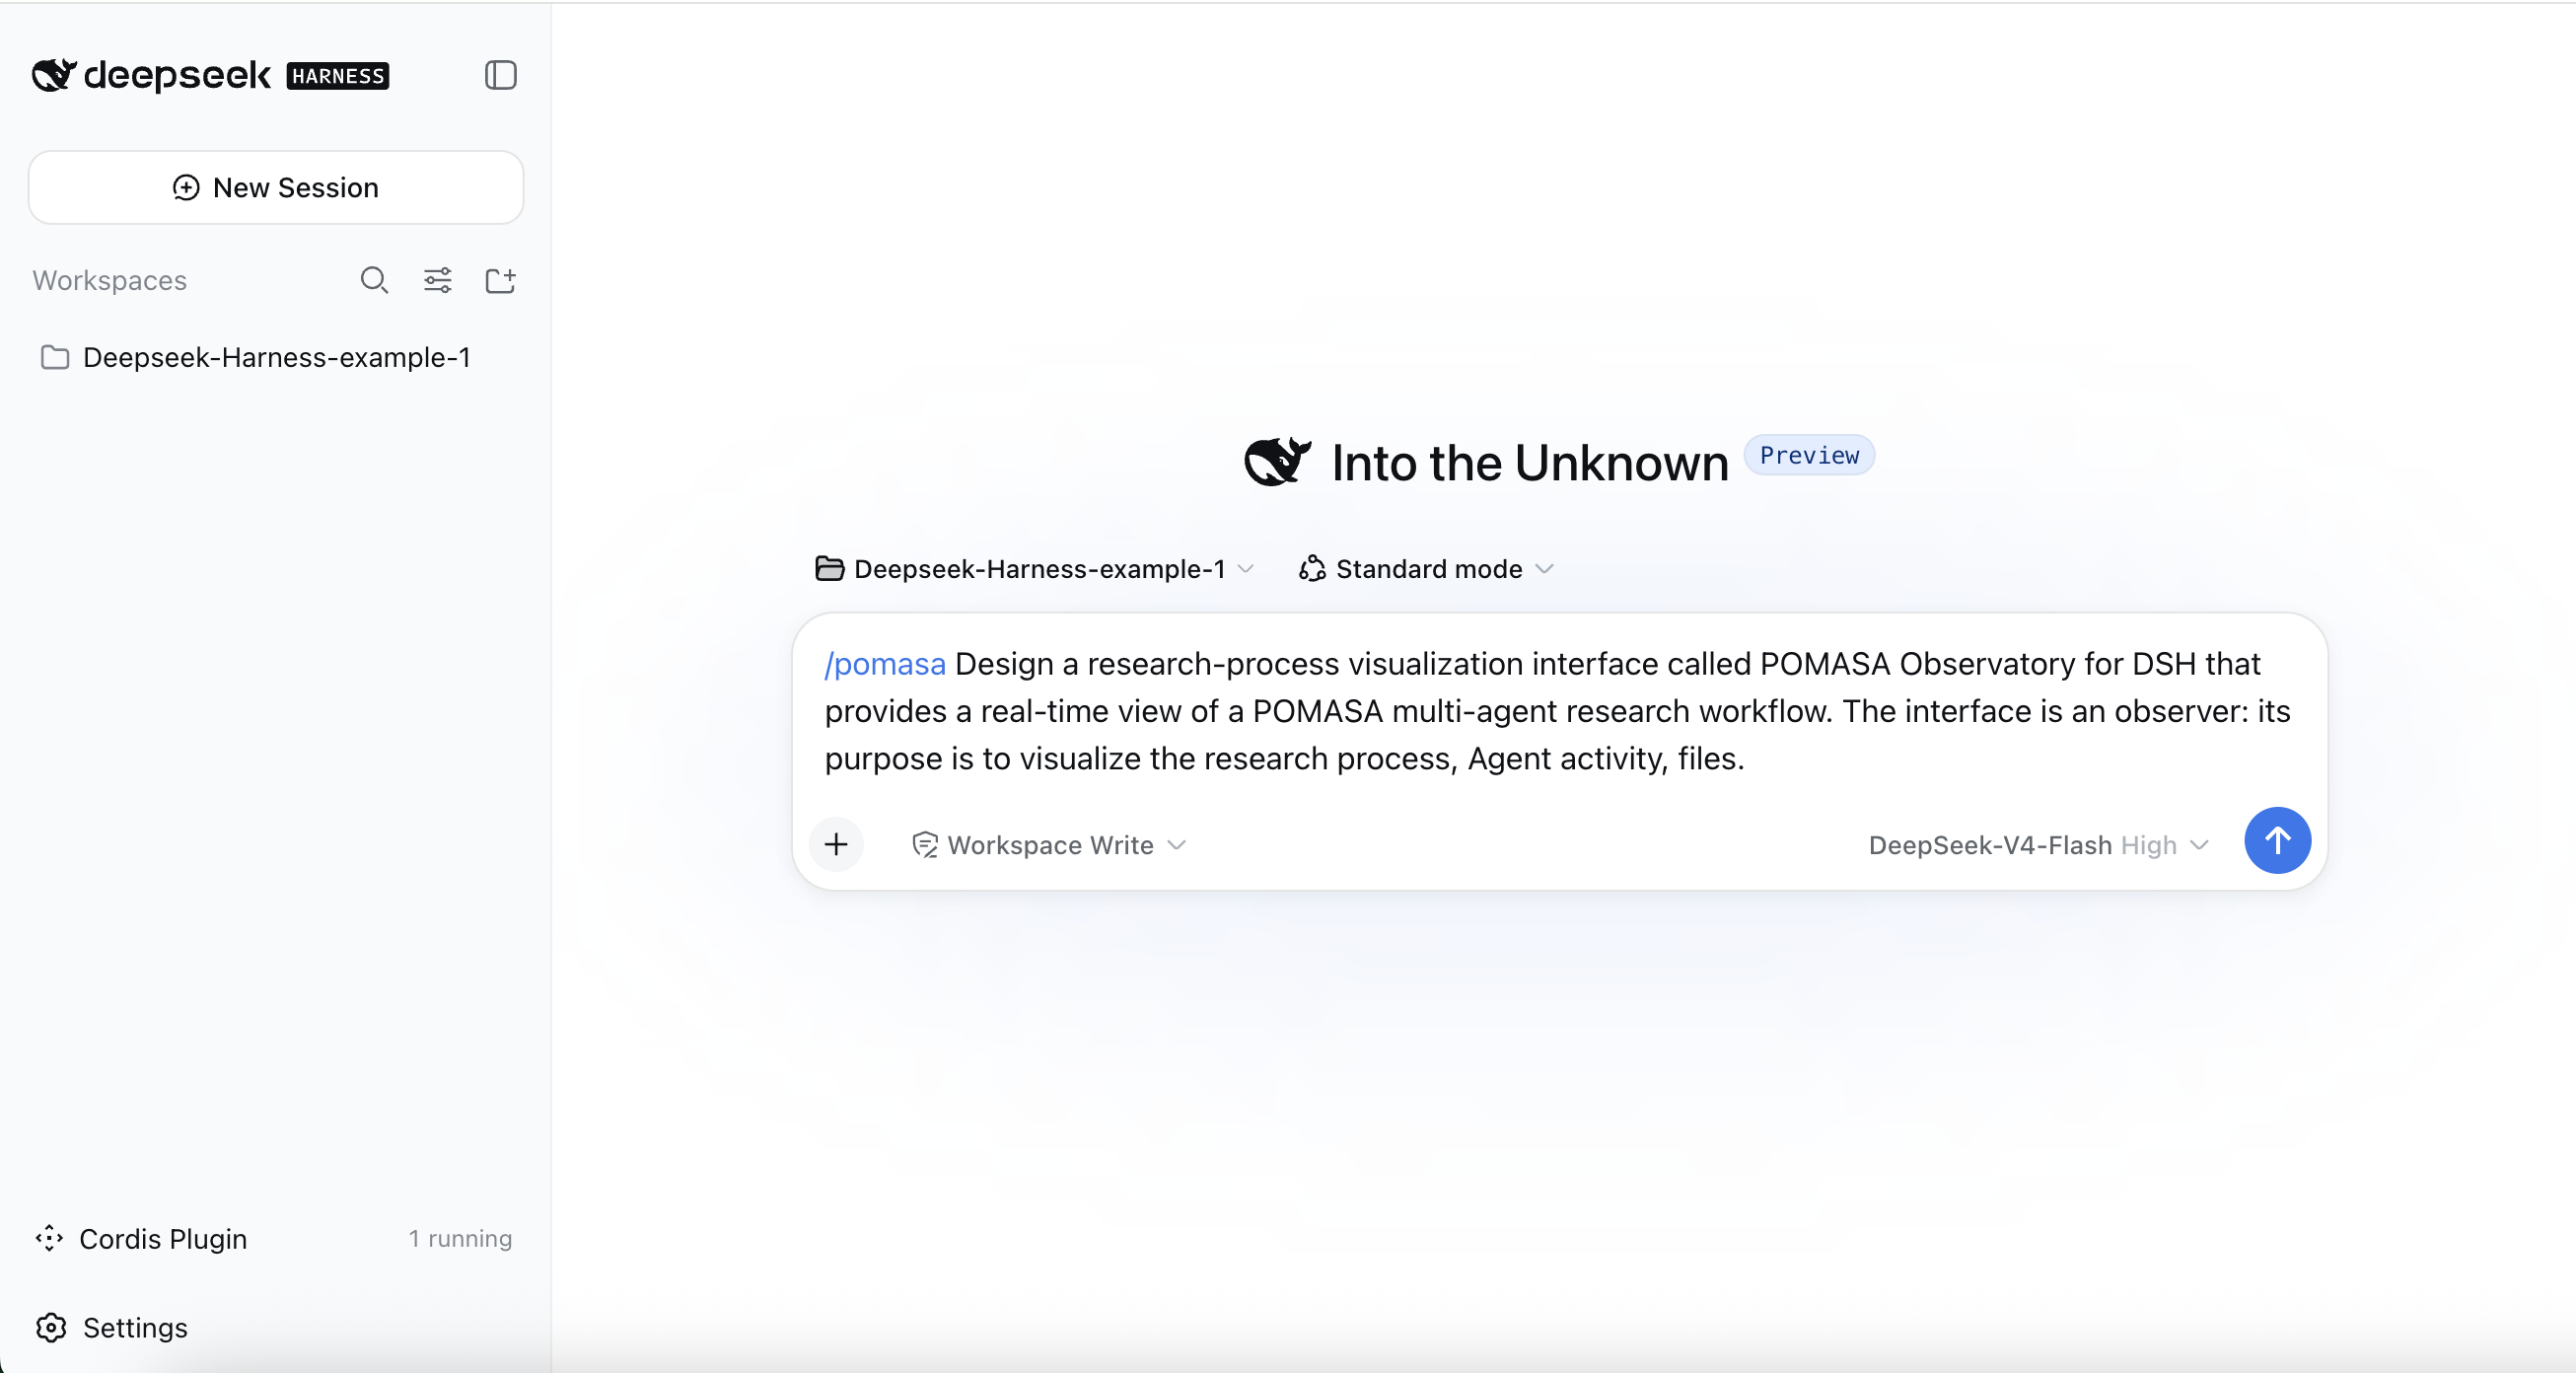
Click the tab named POMASA next to the chat. The first version may not be perfect, nor conform to the vision in our minds, but do not worry, we can complete it step by step. As you observe the interface generated by the AI, you may also come up with new ideas for improving it.
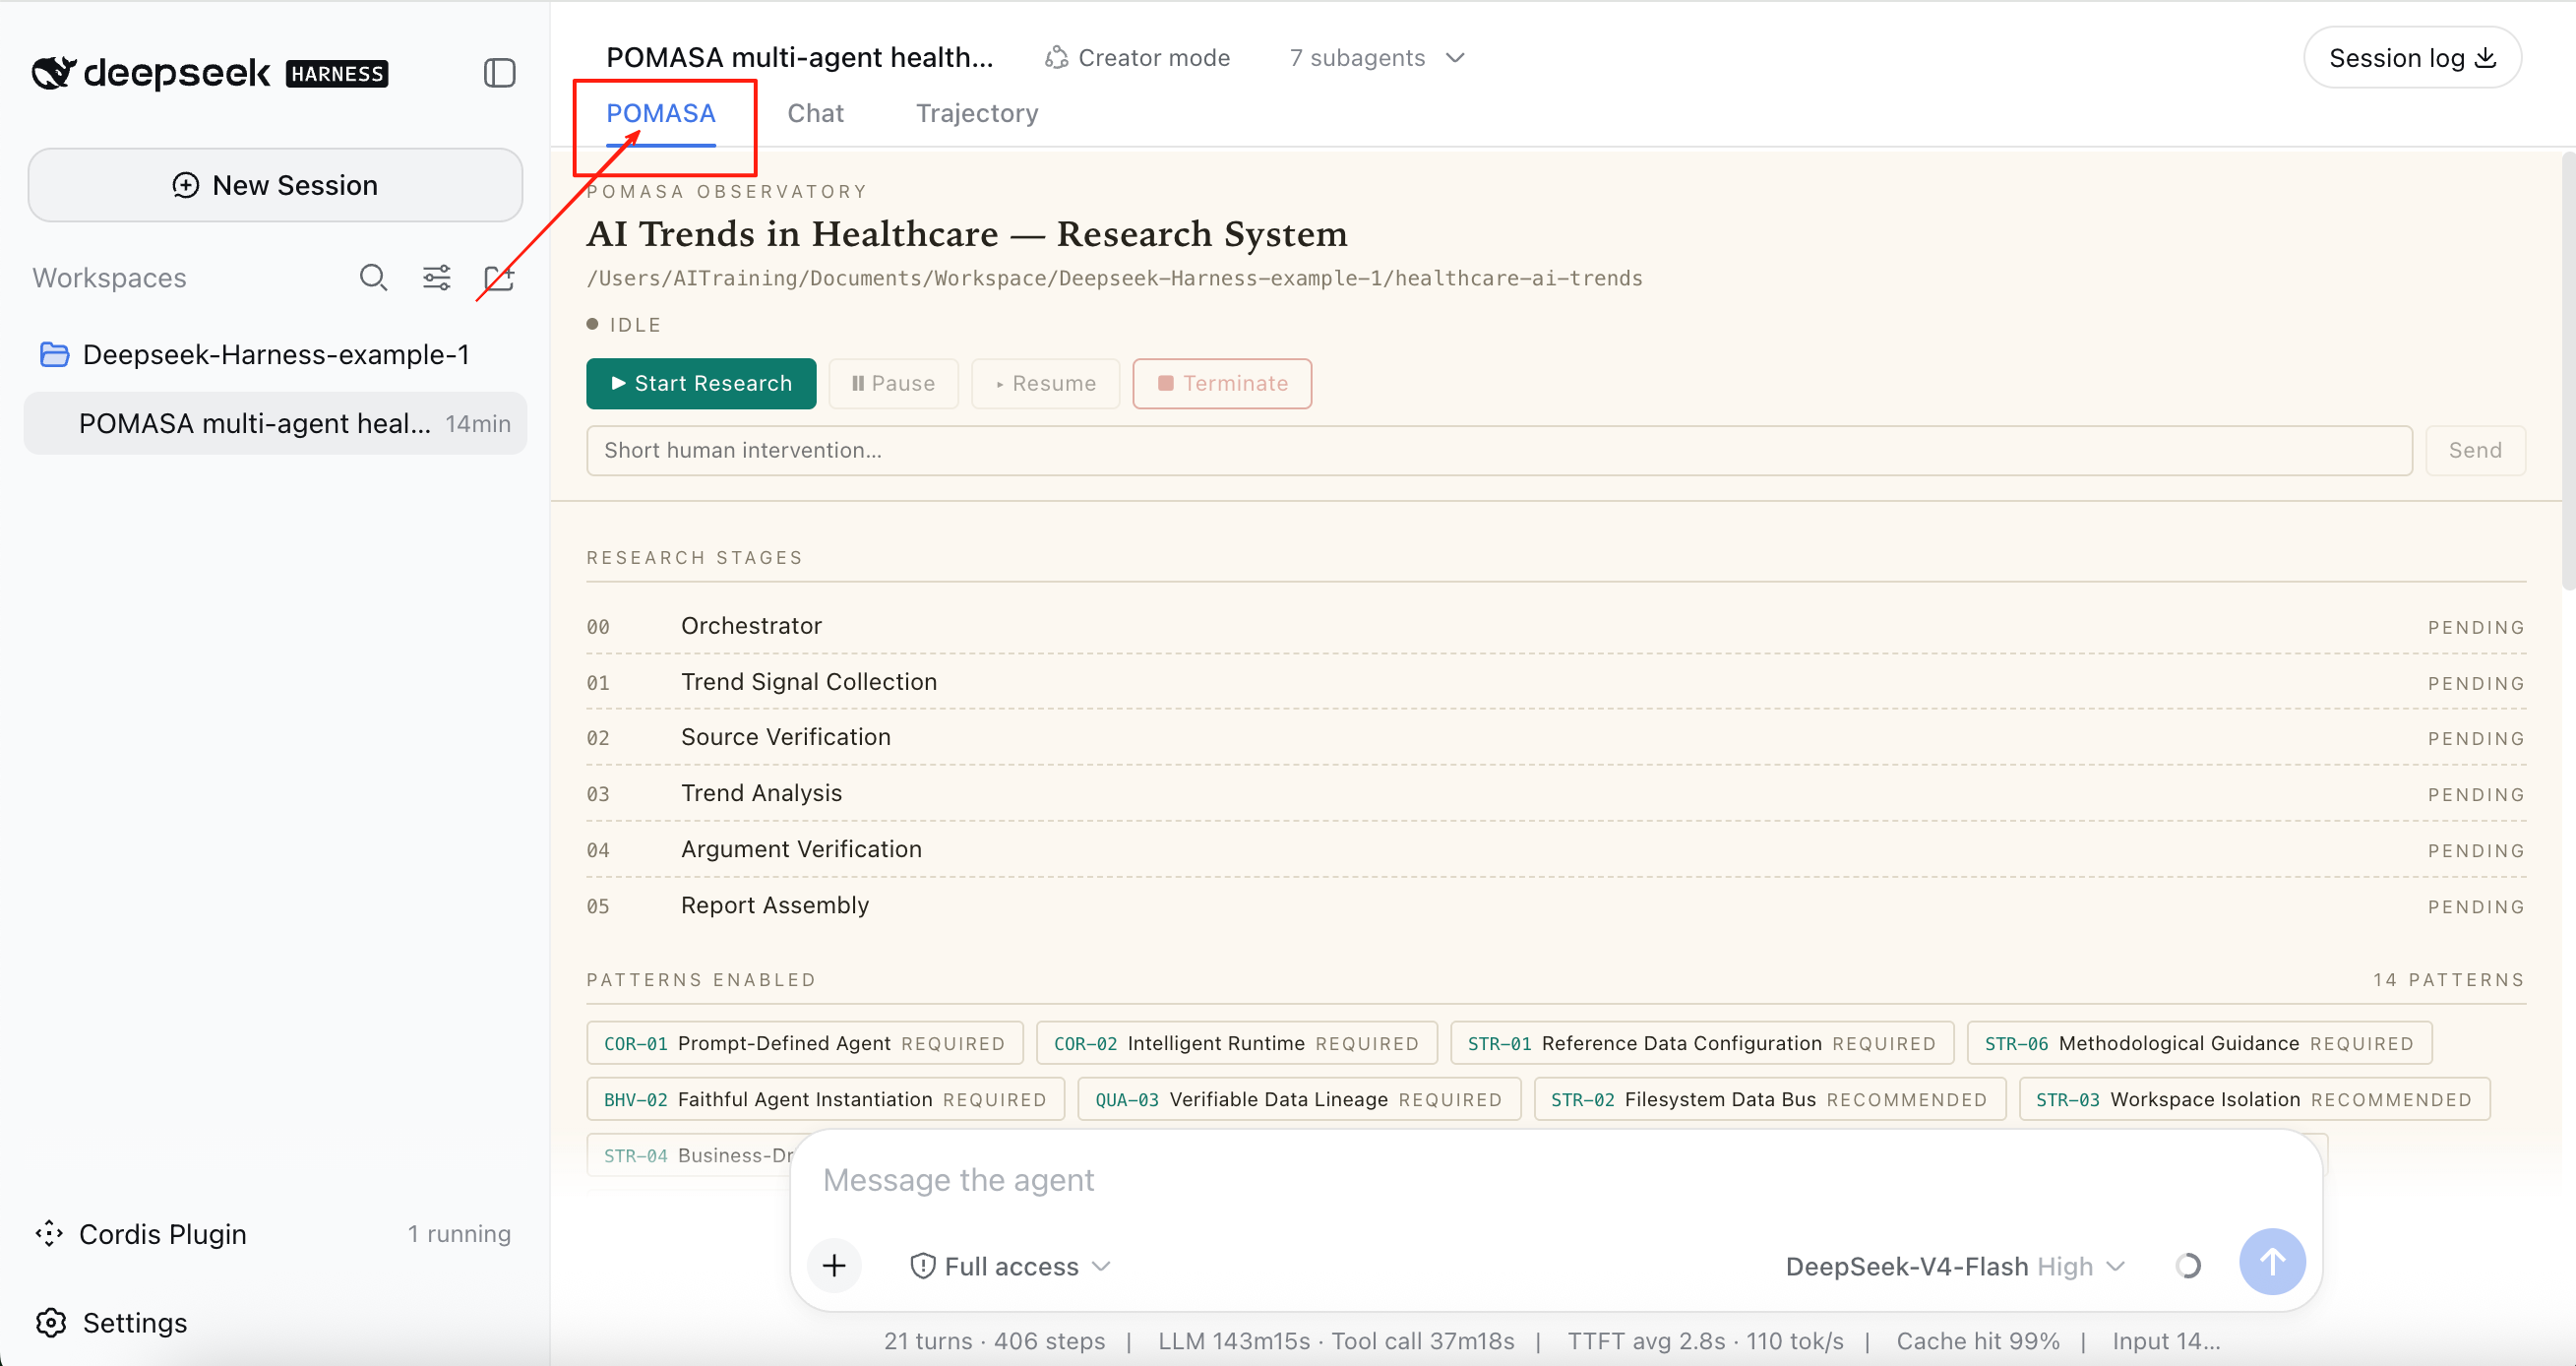
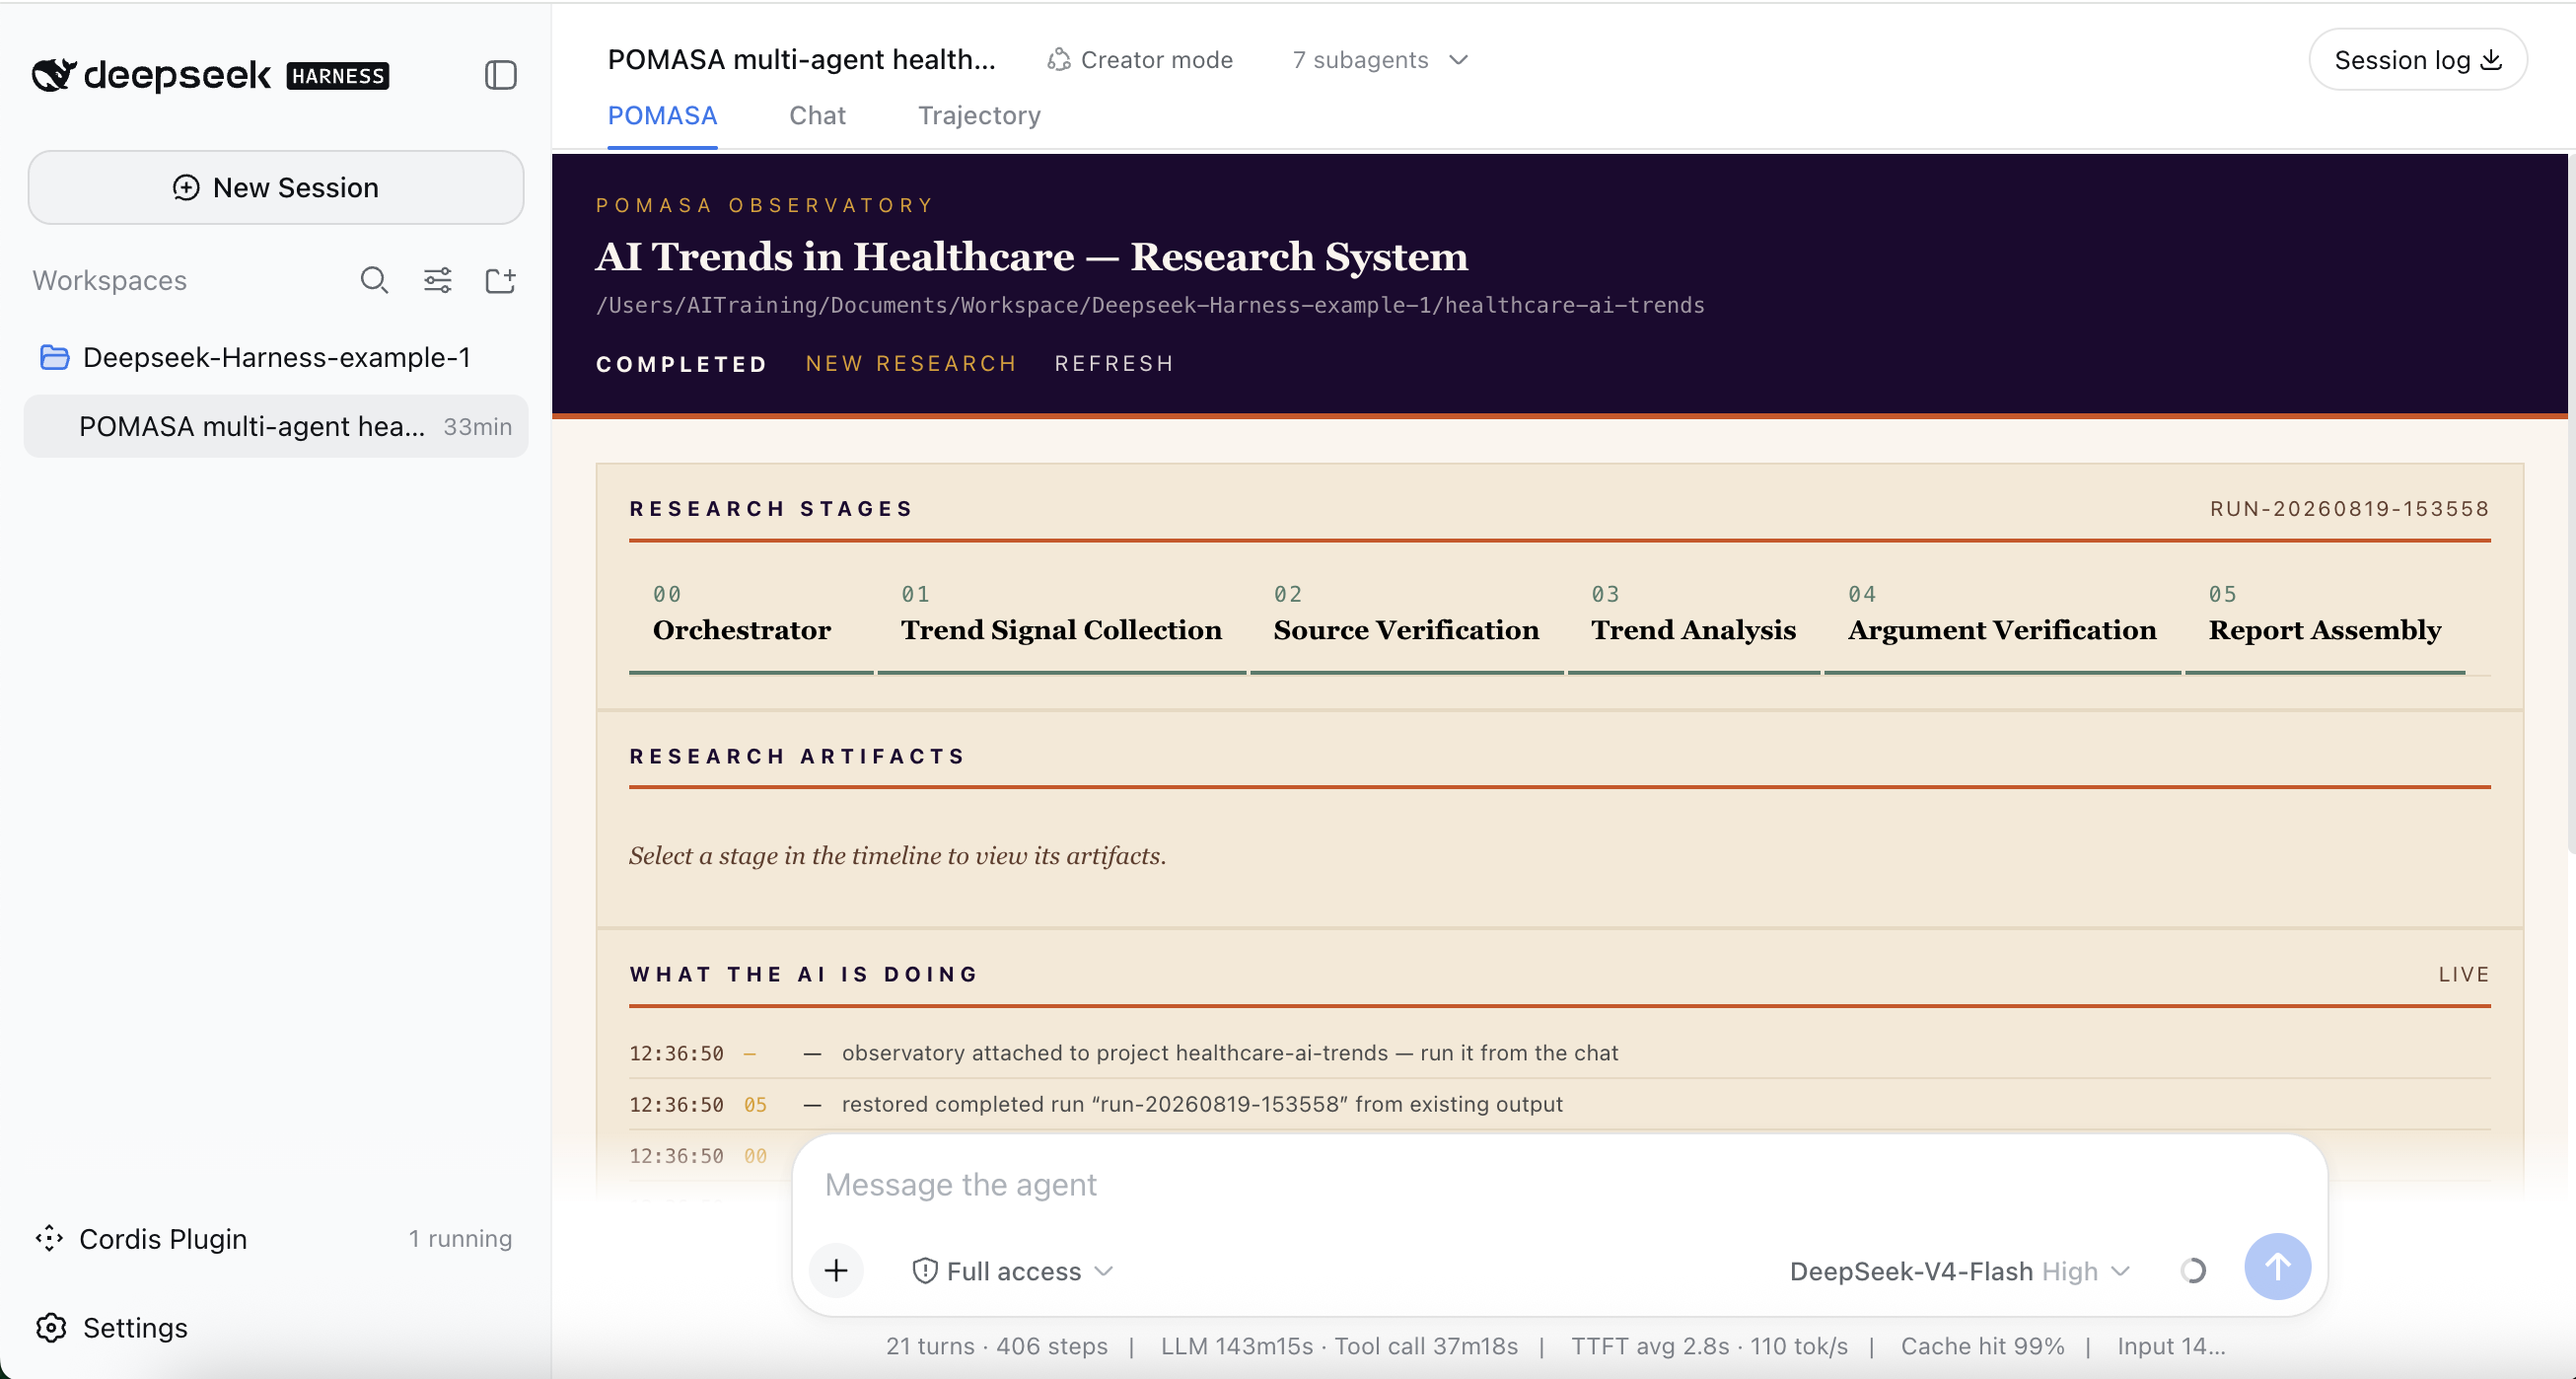
For example, I thought we needed a timeline instead of showing one line for each stage, so that we could see which stage the AI is in and what it is doing. I used the prompt below to modify it.
The RESEARCH STAGES should be displayed as a timeline from left to right.
Below, users can see the actual execution in the chat in real time,
while the same process is simultaneously translated into
a clear visual language through structured graphics.
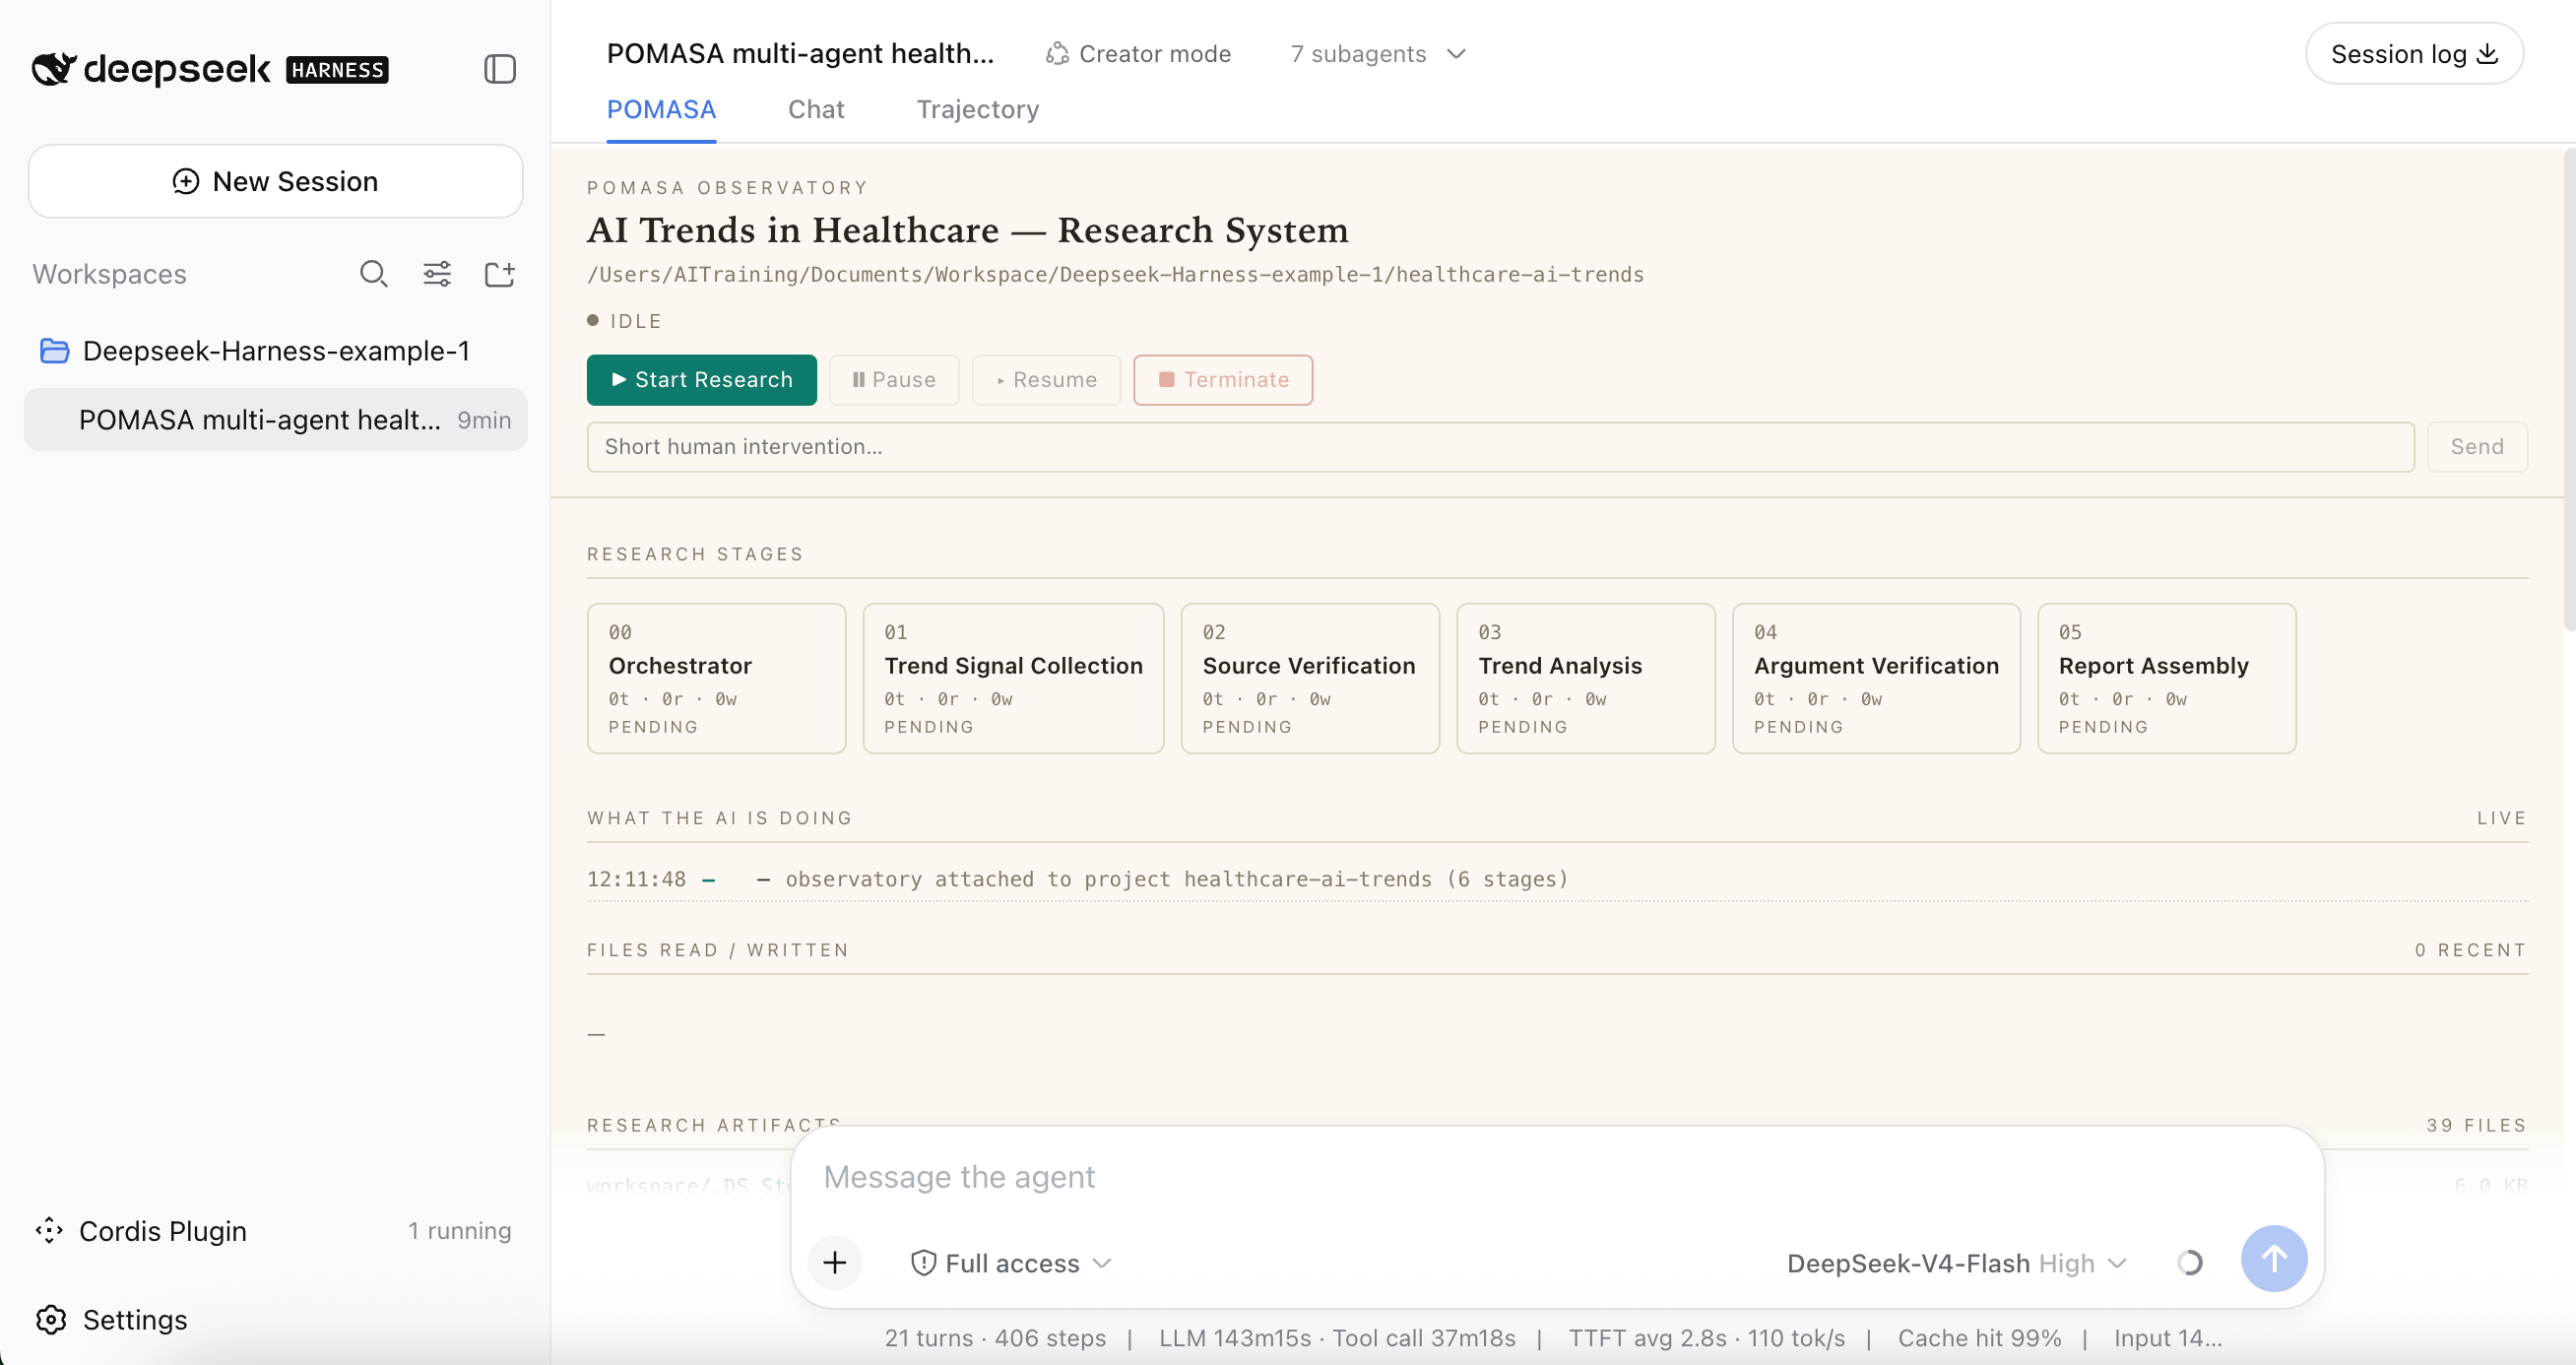
After several rounds of modifying the style and adding functions, it has completed the task of converting the skill into a visualisable plugin. The whole process does not require professional technical skills; you only need to describe your needs in natural language.
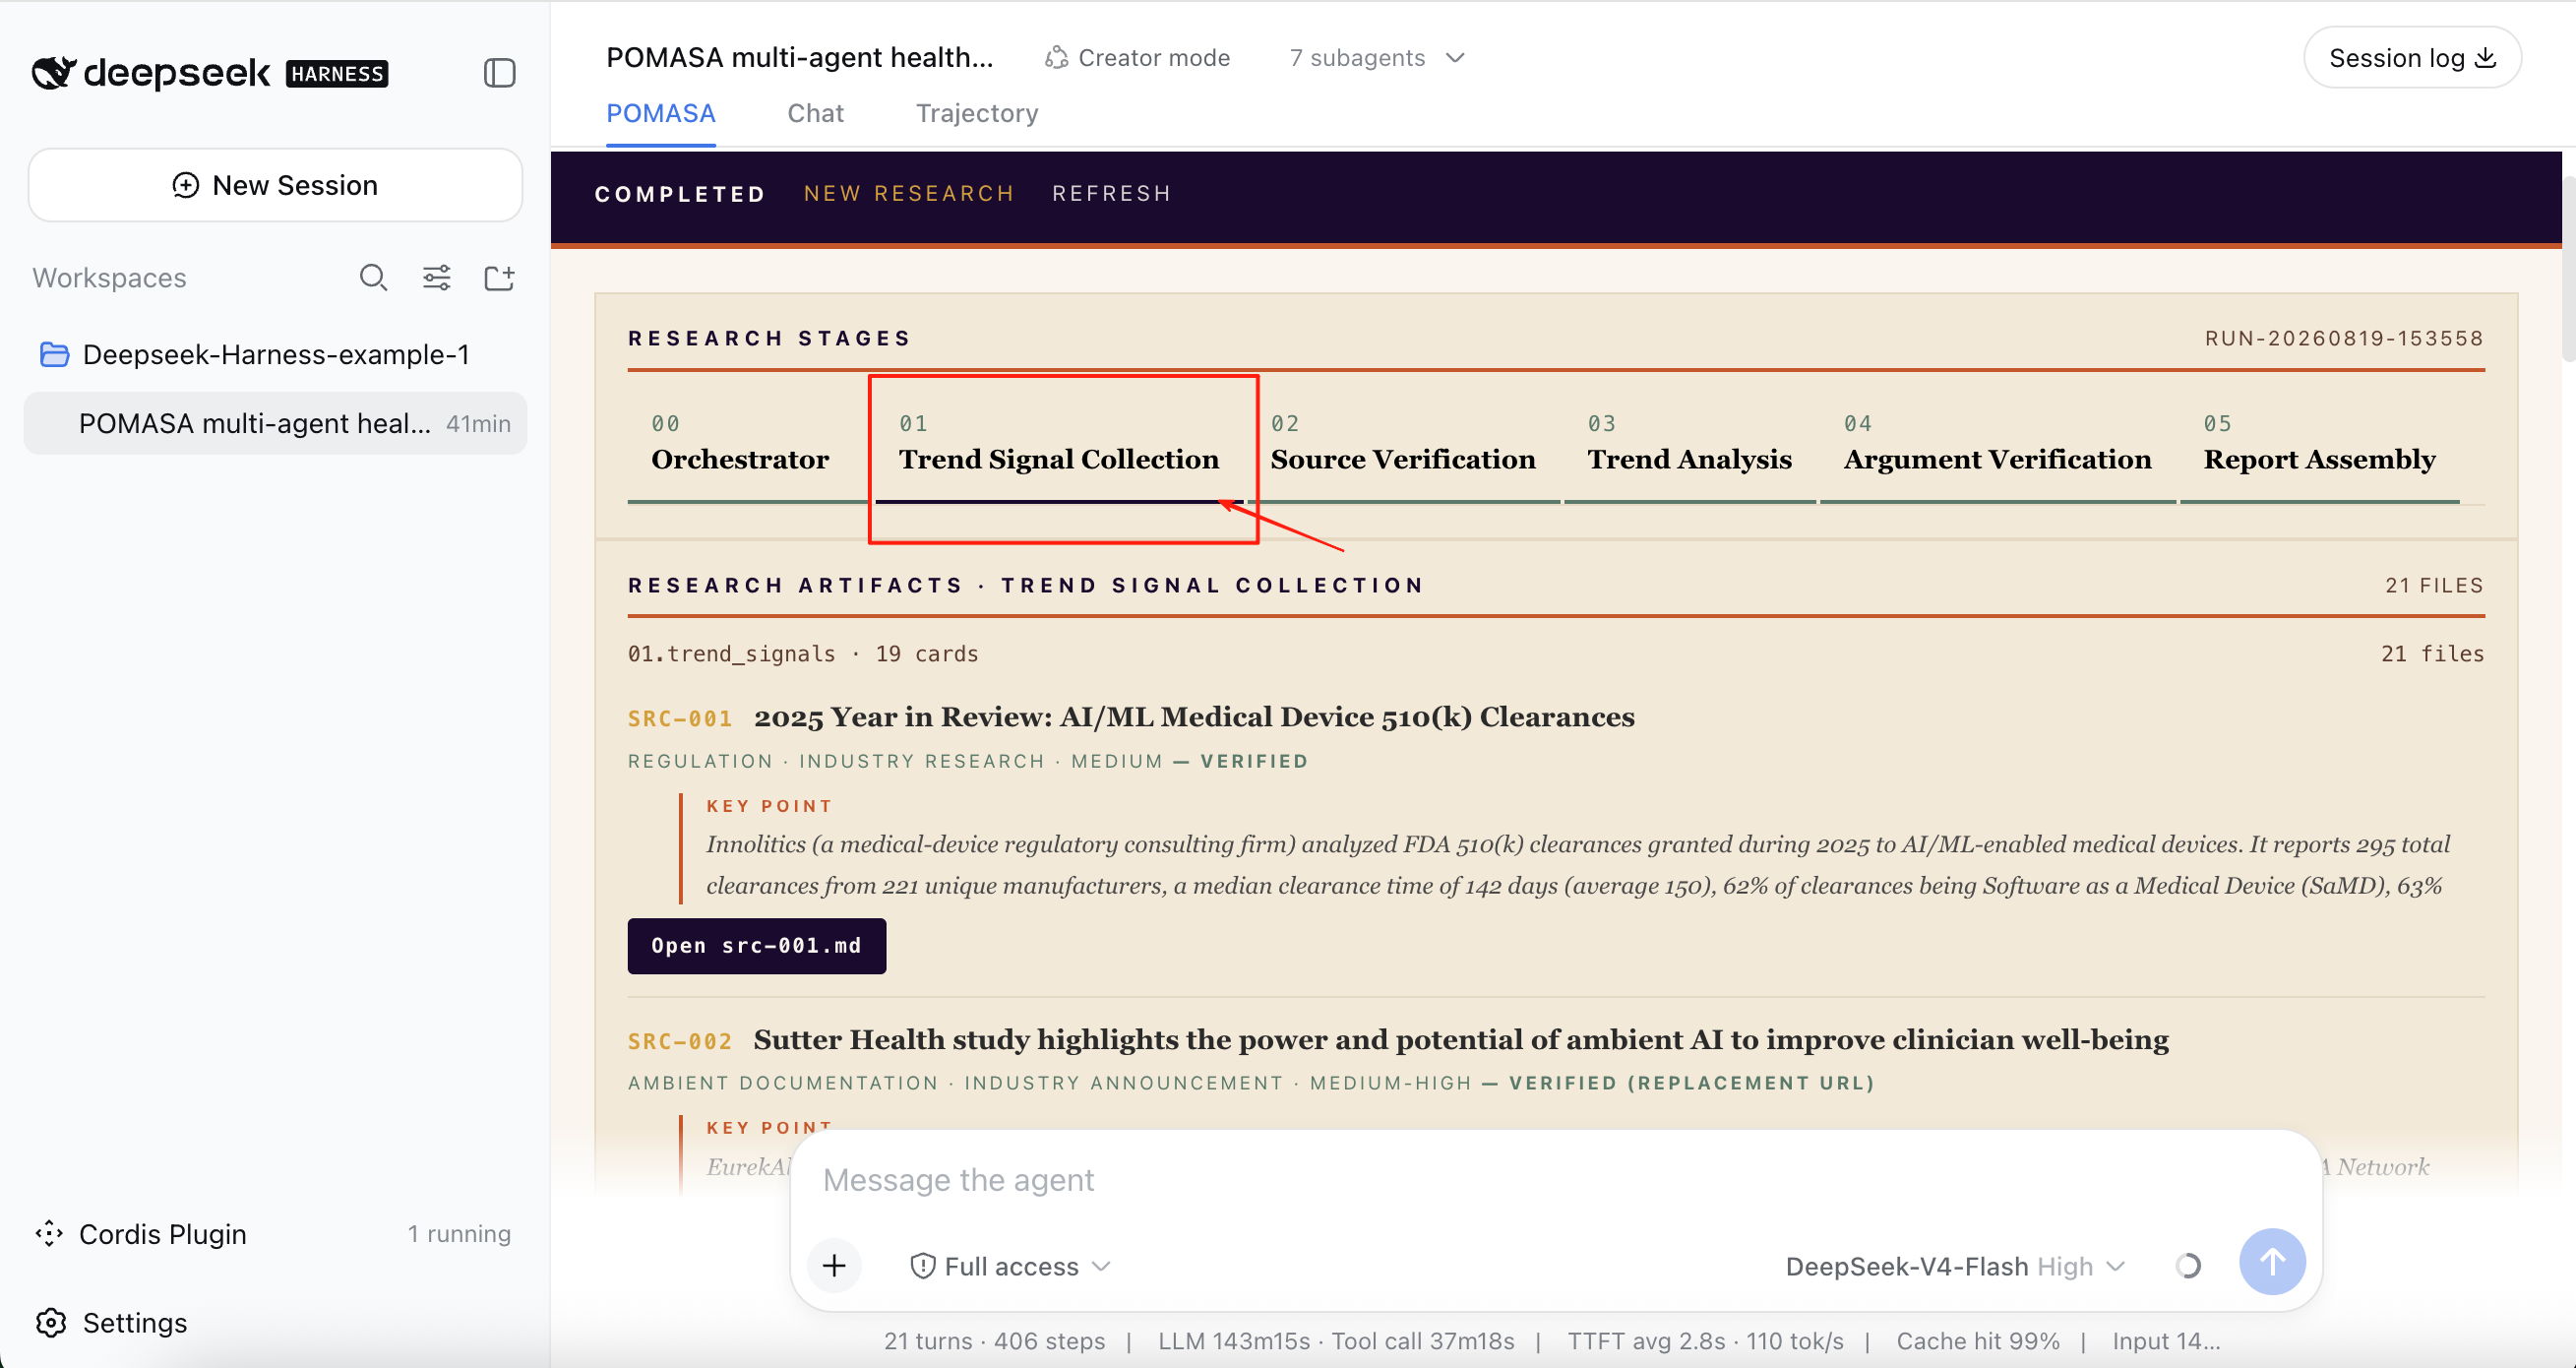
Let us look at the generated result. Click Tab 1, Trend Signal Collection. In this stage, the AI searches for data online, summarises them, records their sources, and classifies them. In the example run, it collected 19 cards for this research.
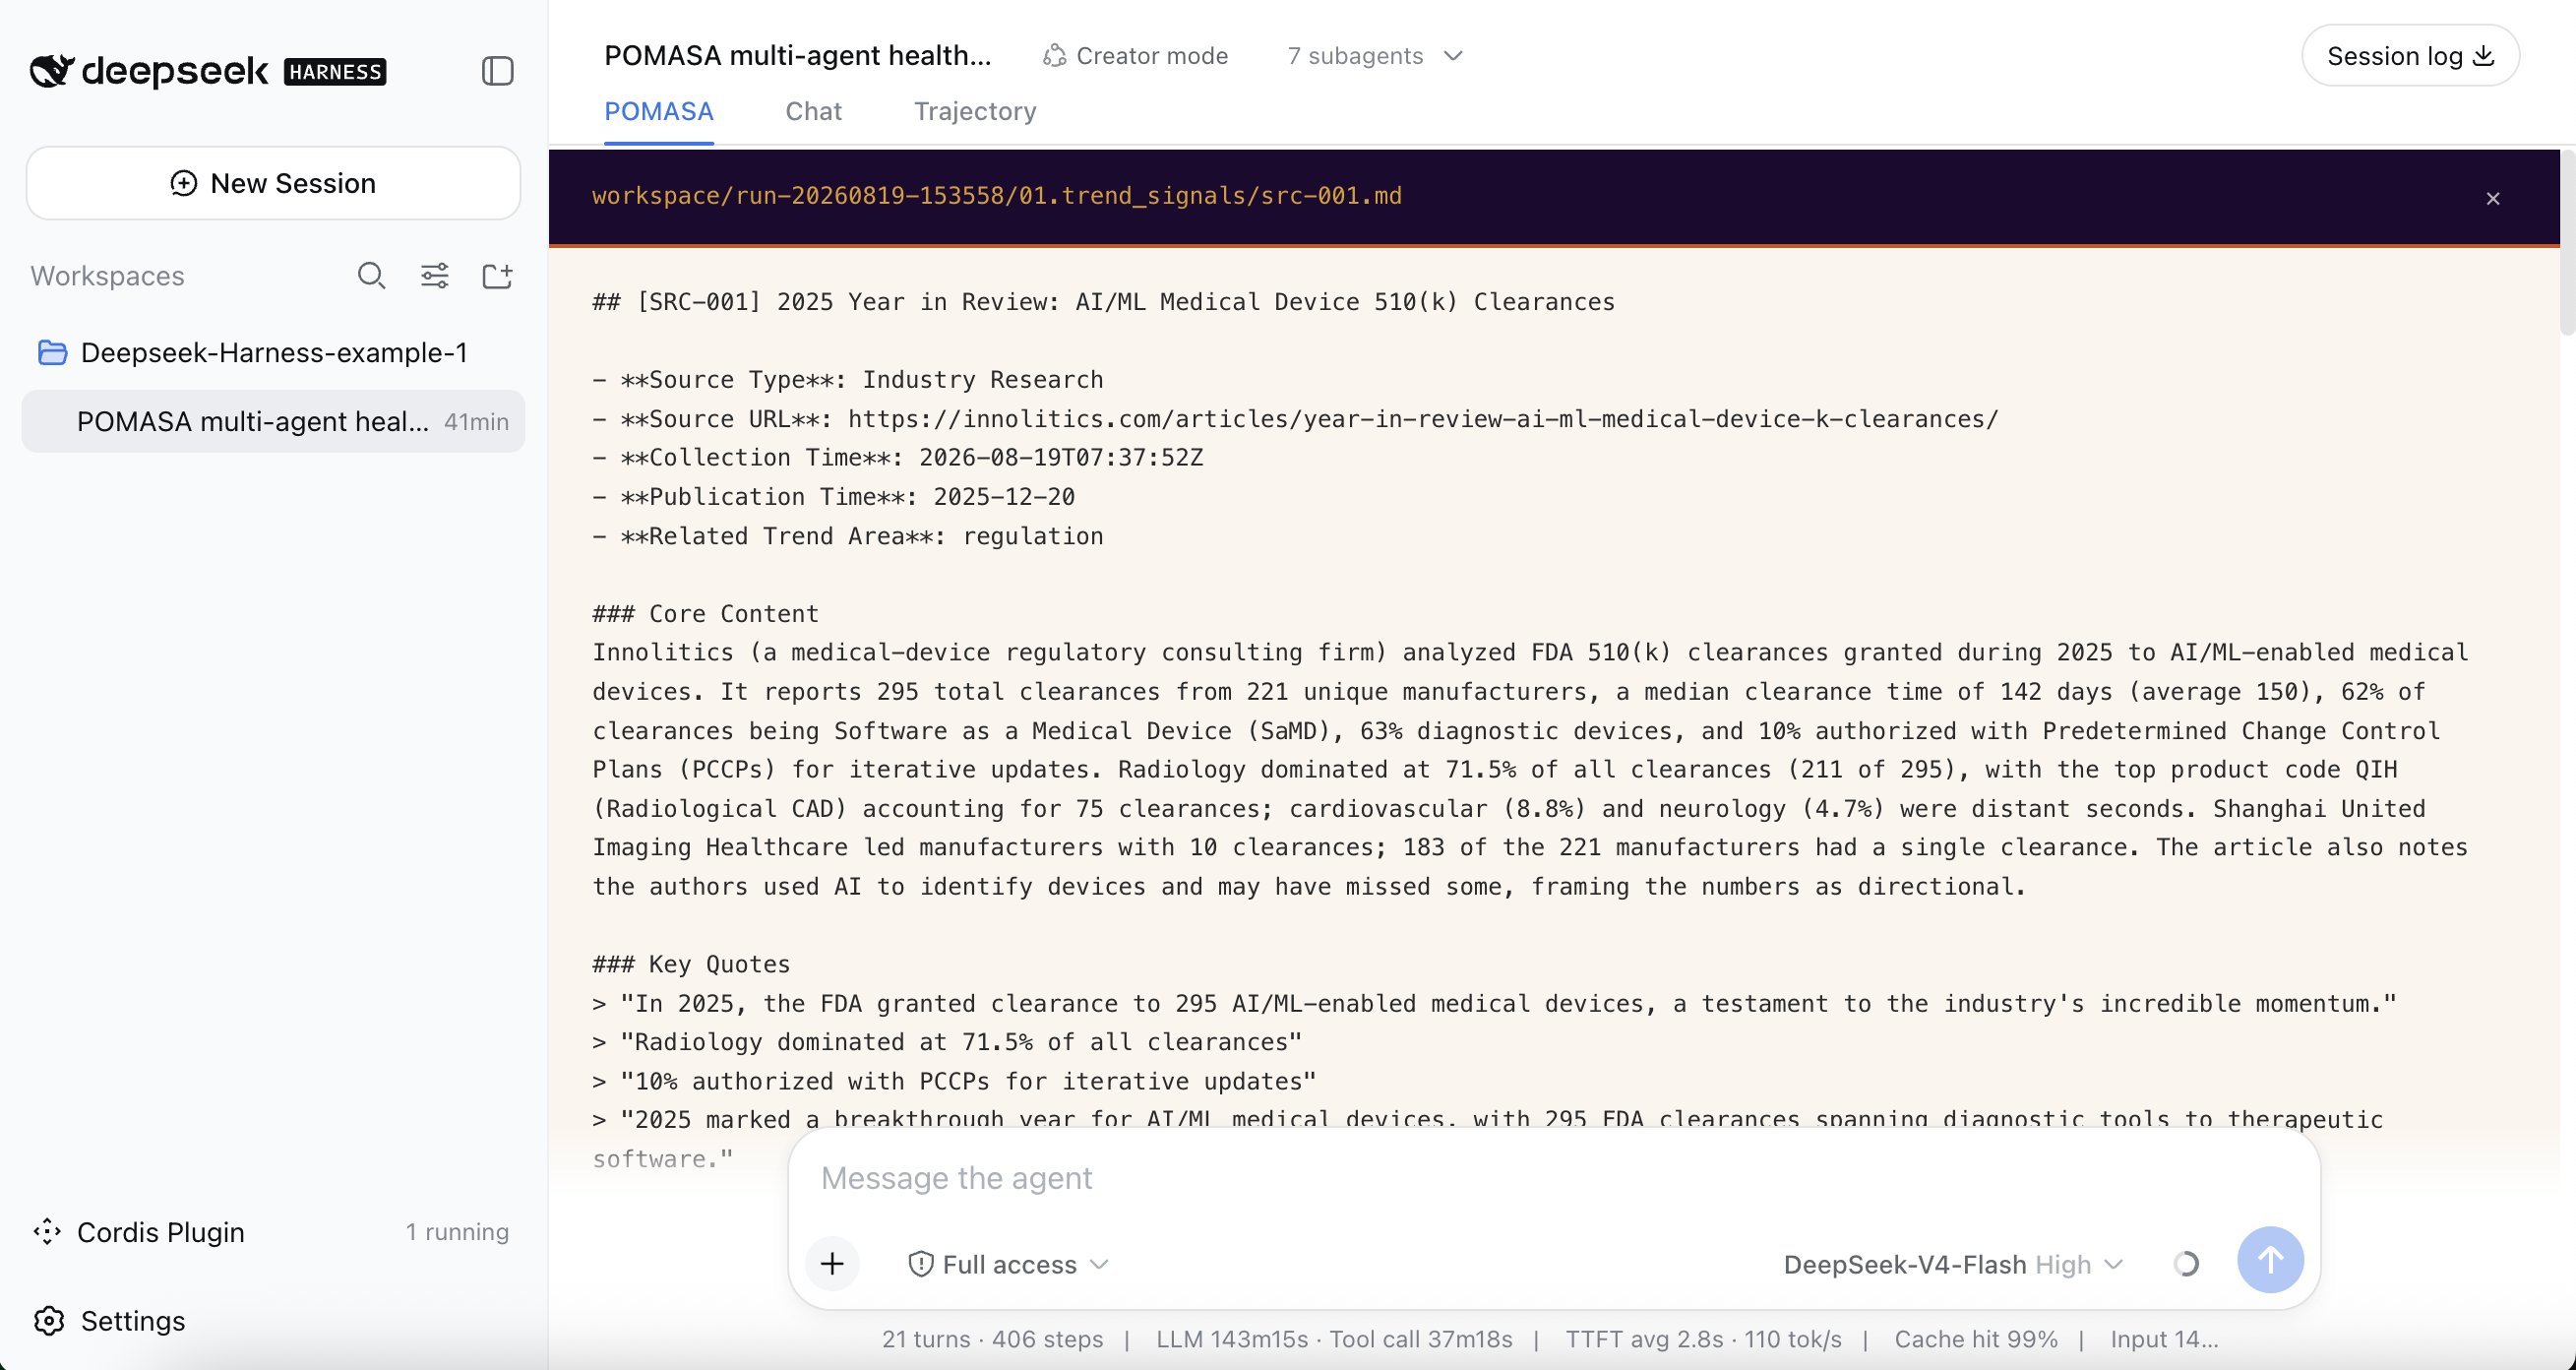
Open one card, and we can see the content of the source. Each source has been clearly organised into three sections: Core Content, Key Quotes, and Credibility Assessment, making it easier for humans to read and audit.
It will be updated as the research system runs, so people can check it and find errors immediately.
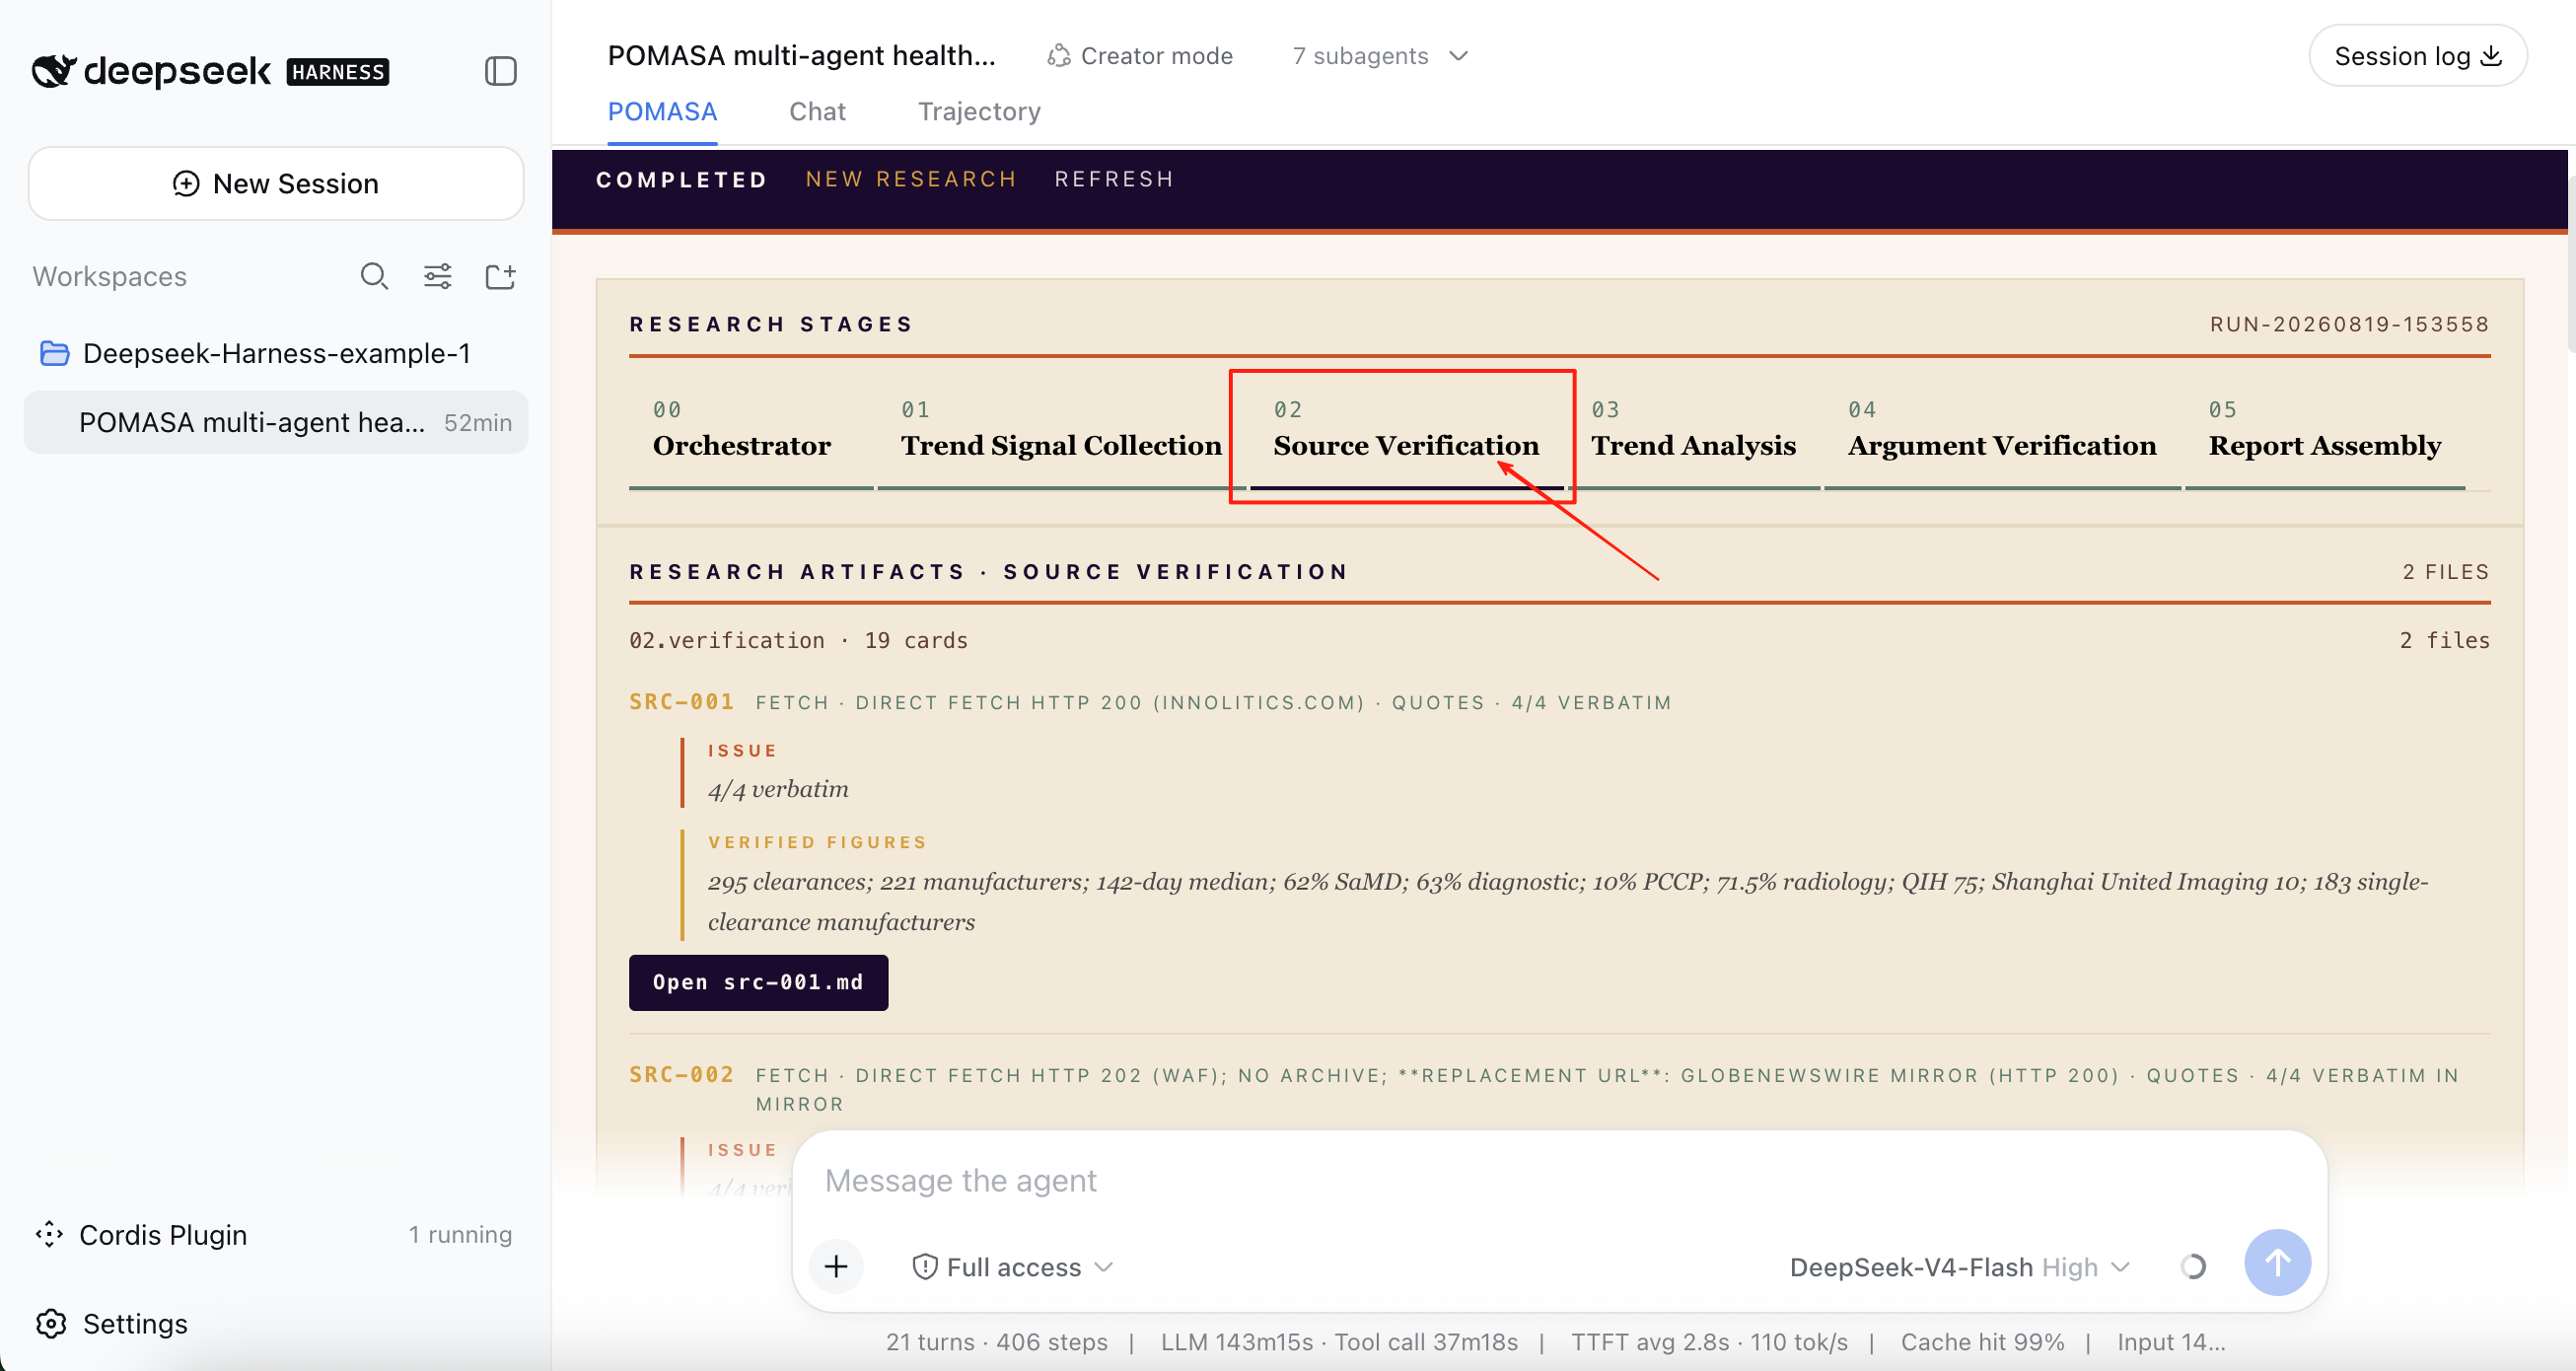
Tab 2, Source Verification, checks whether the source of each card is credible.
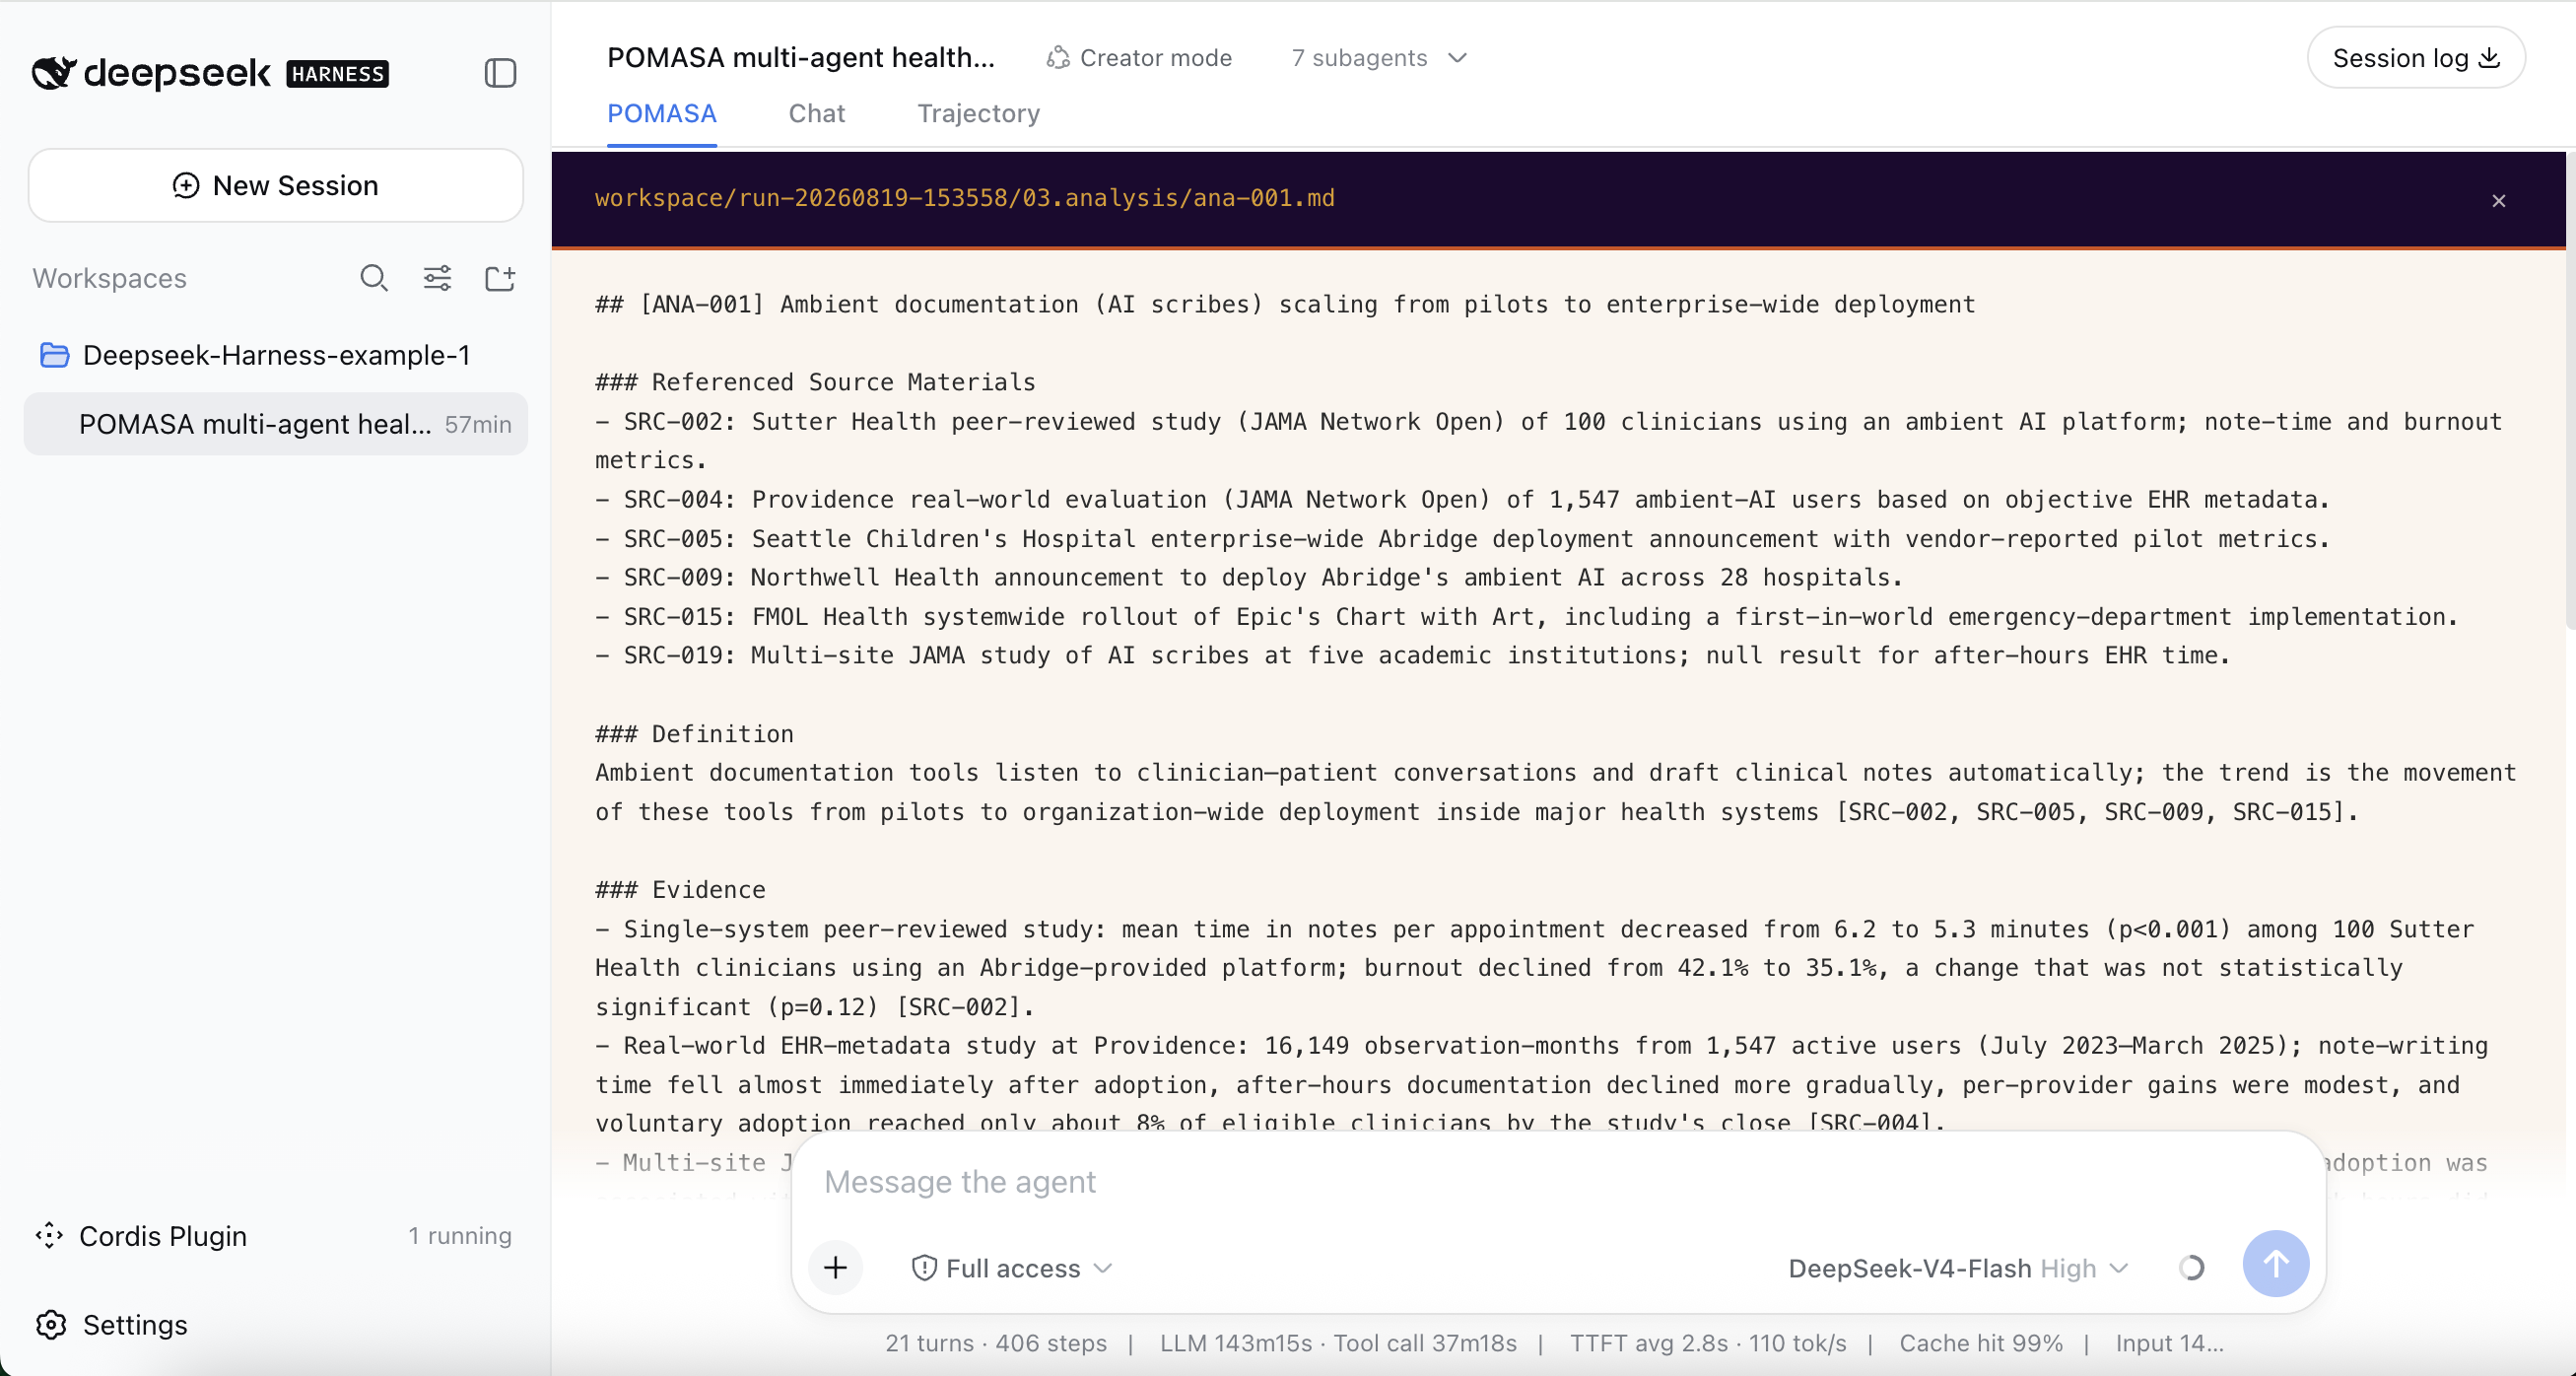
Tab 3, Trend Analysis, puts forward arguments on the basis of the cards collected earlier.
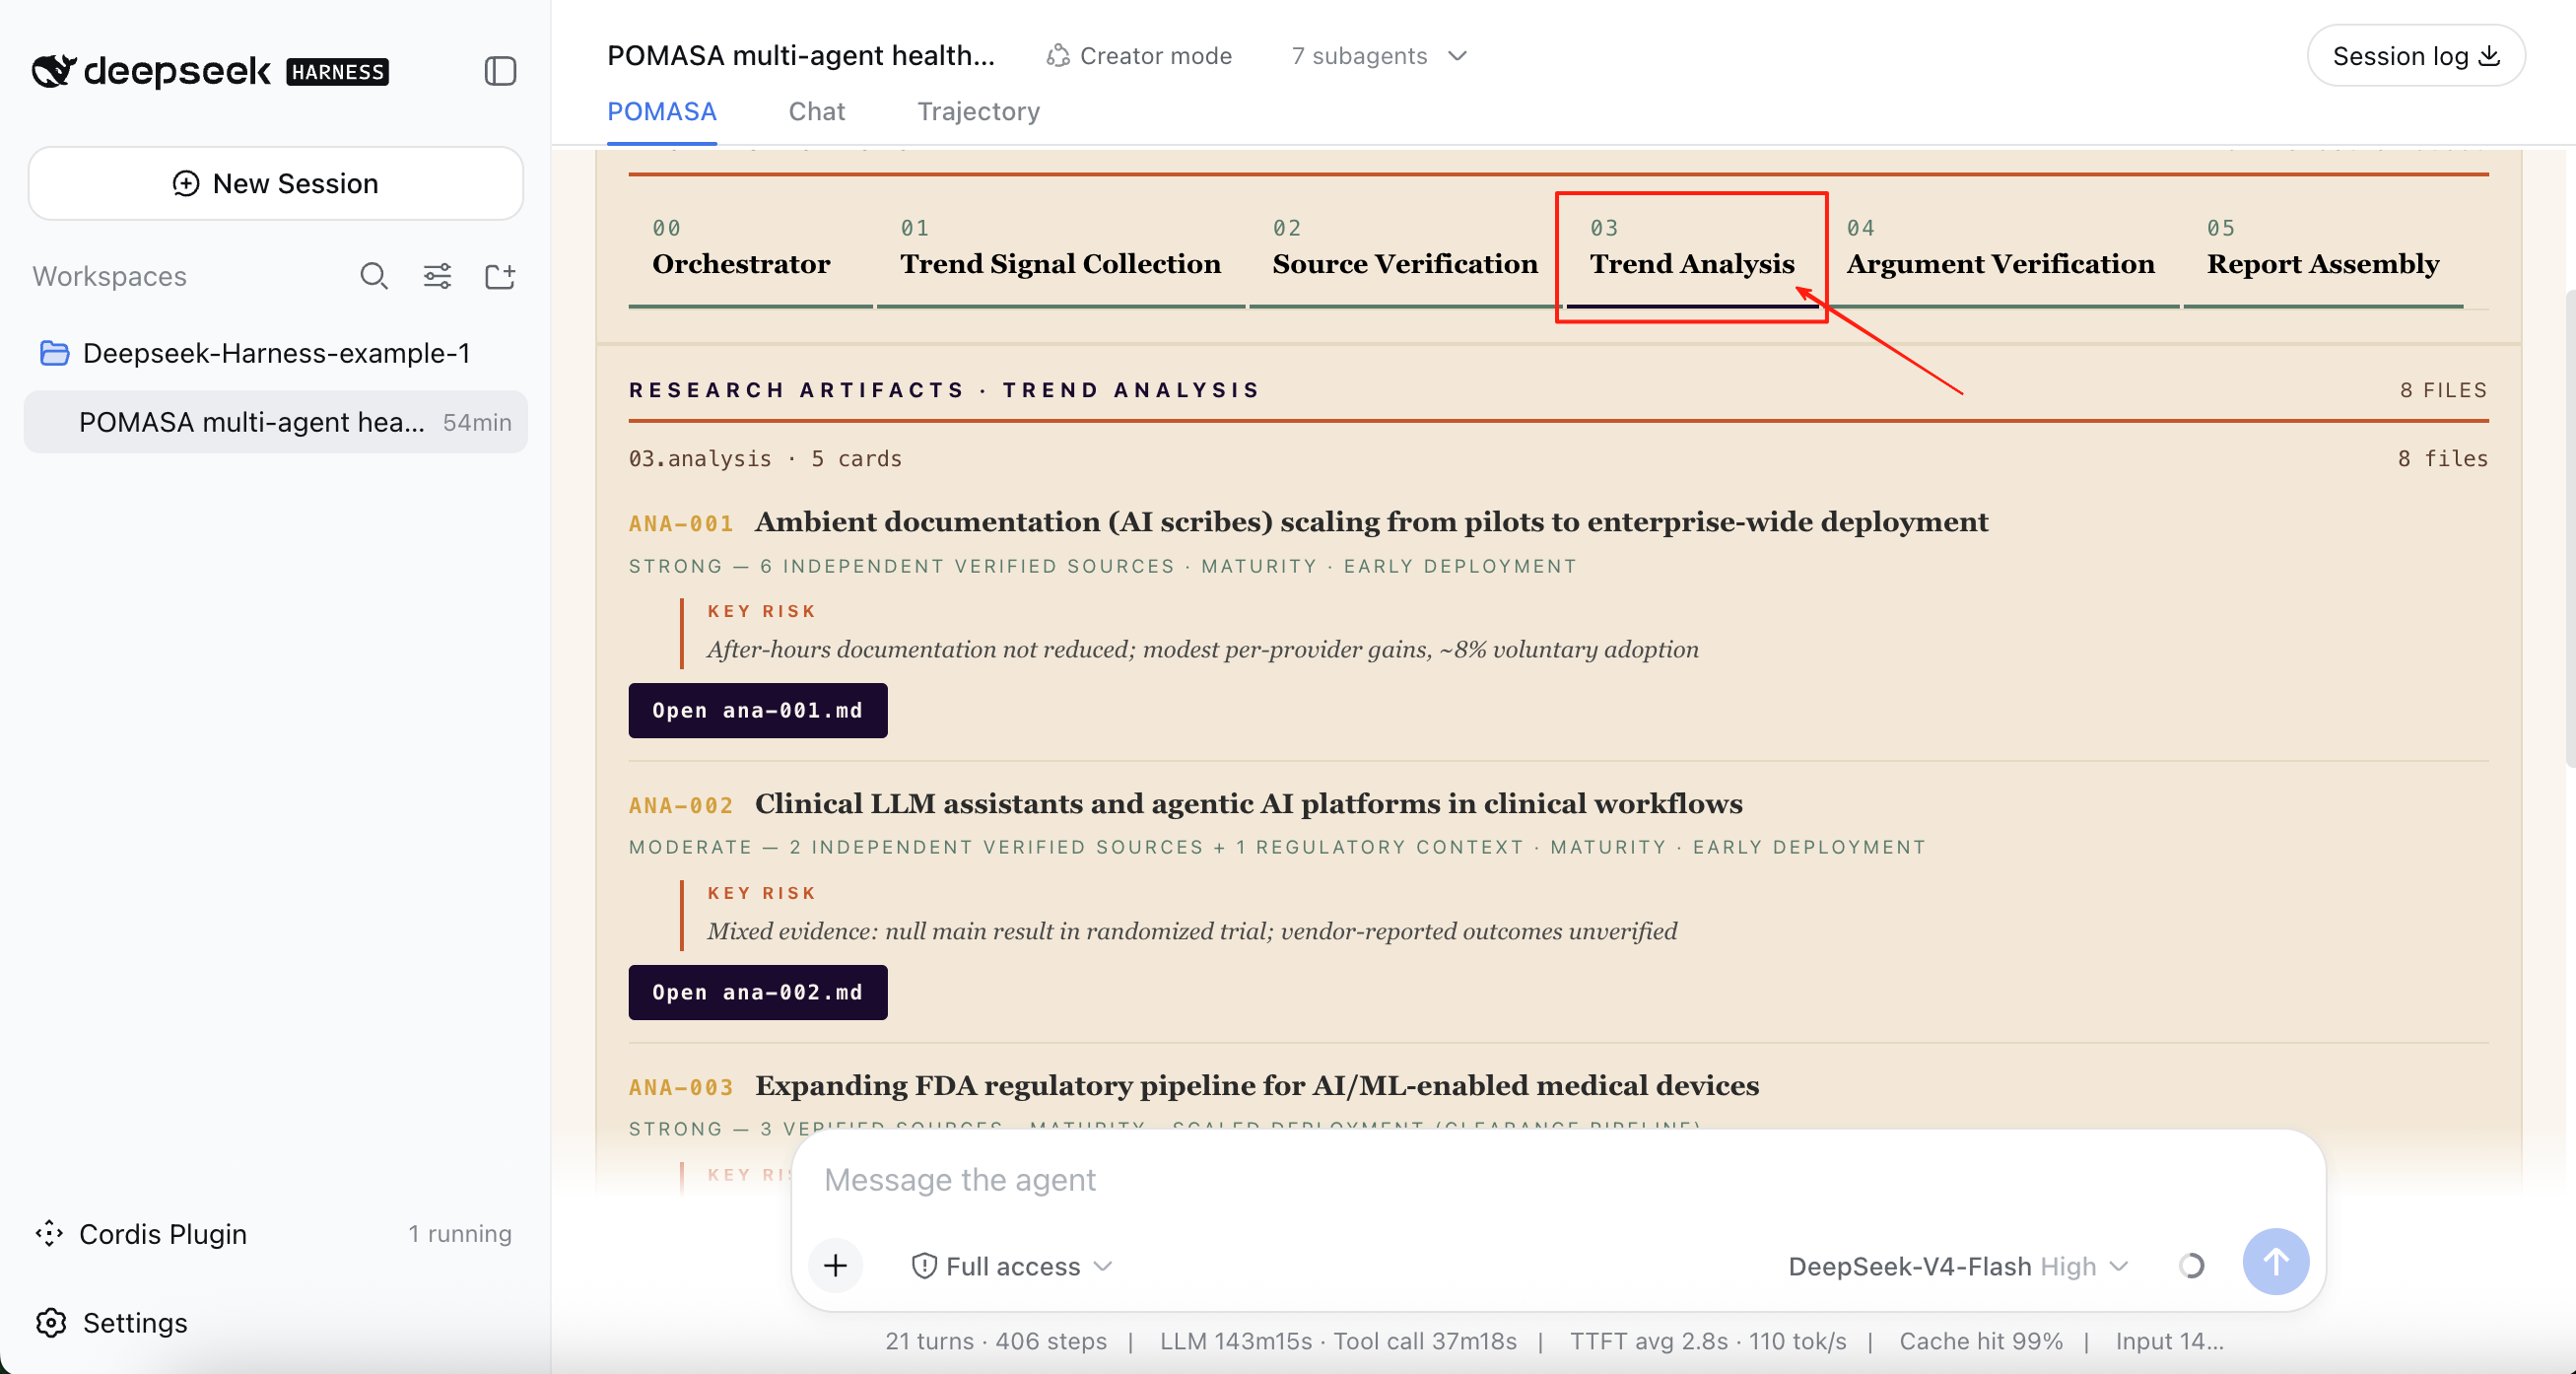
Since it is related to the cards collected earlier and forms the basis of the final report, it plays an important role in shaping the final result. If something goes wrong at this stage, the quality of the final article will be affected.
The last stage shows the final report, which is assembled from the artefacts created earlier.
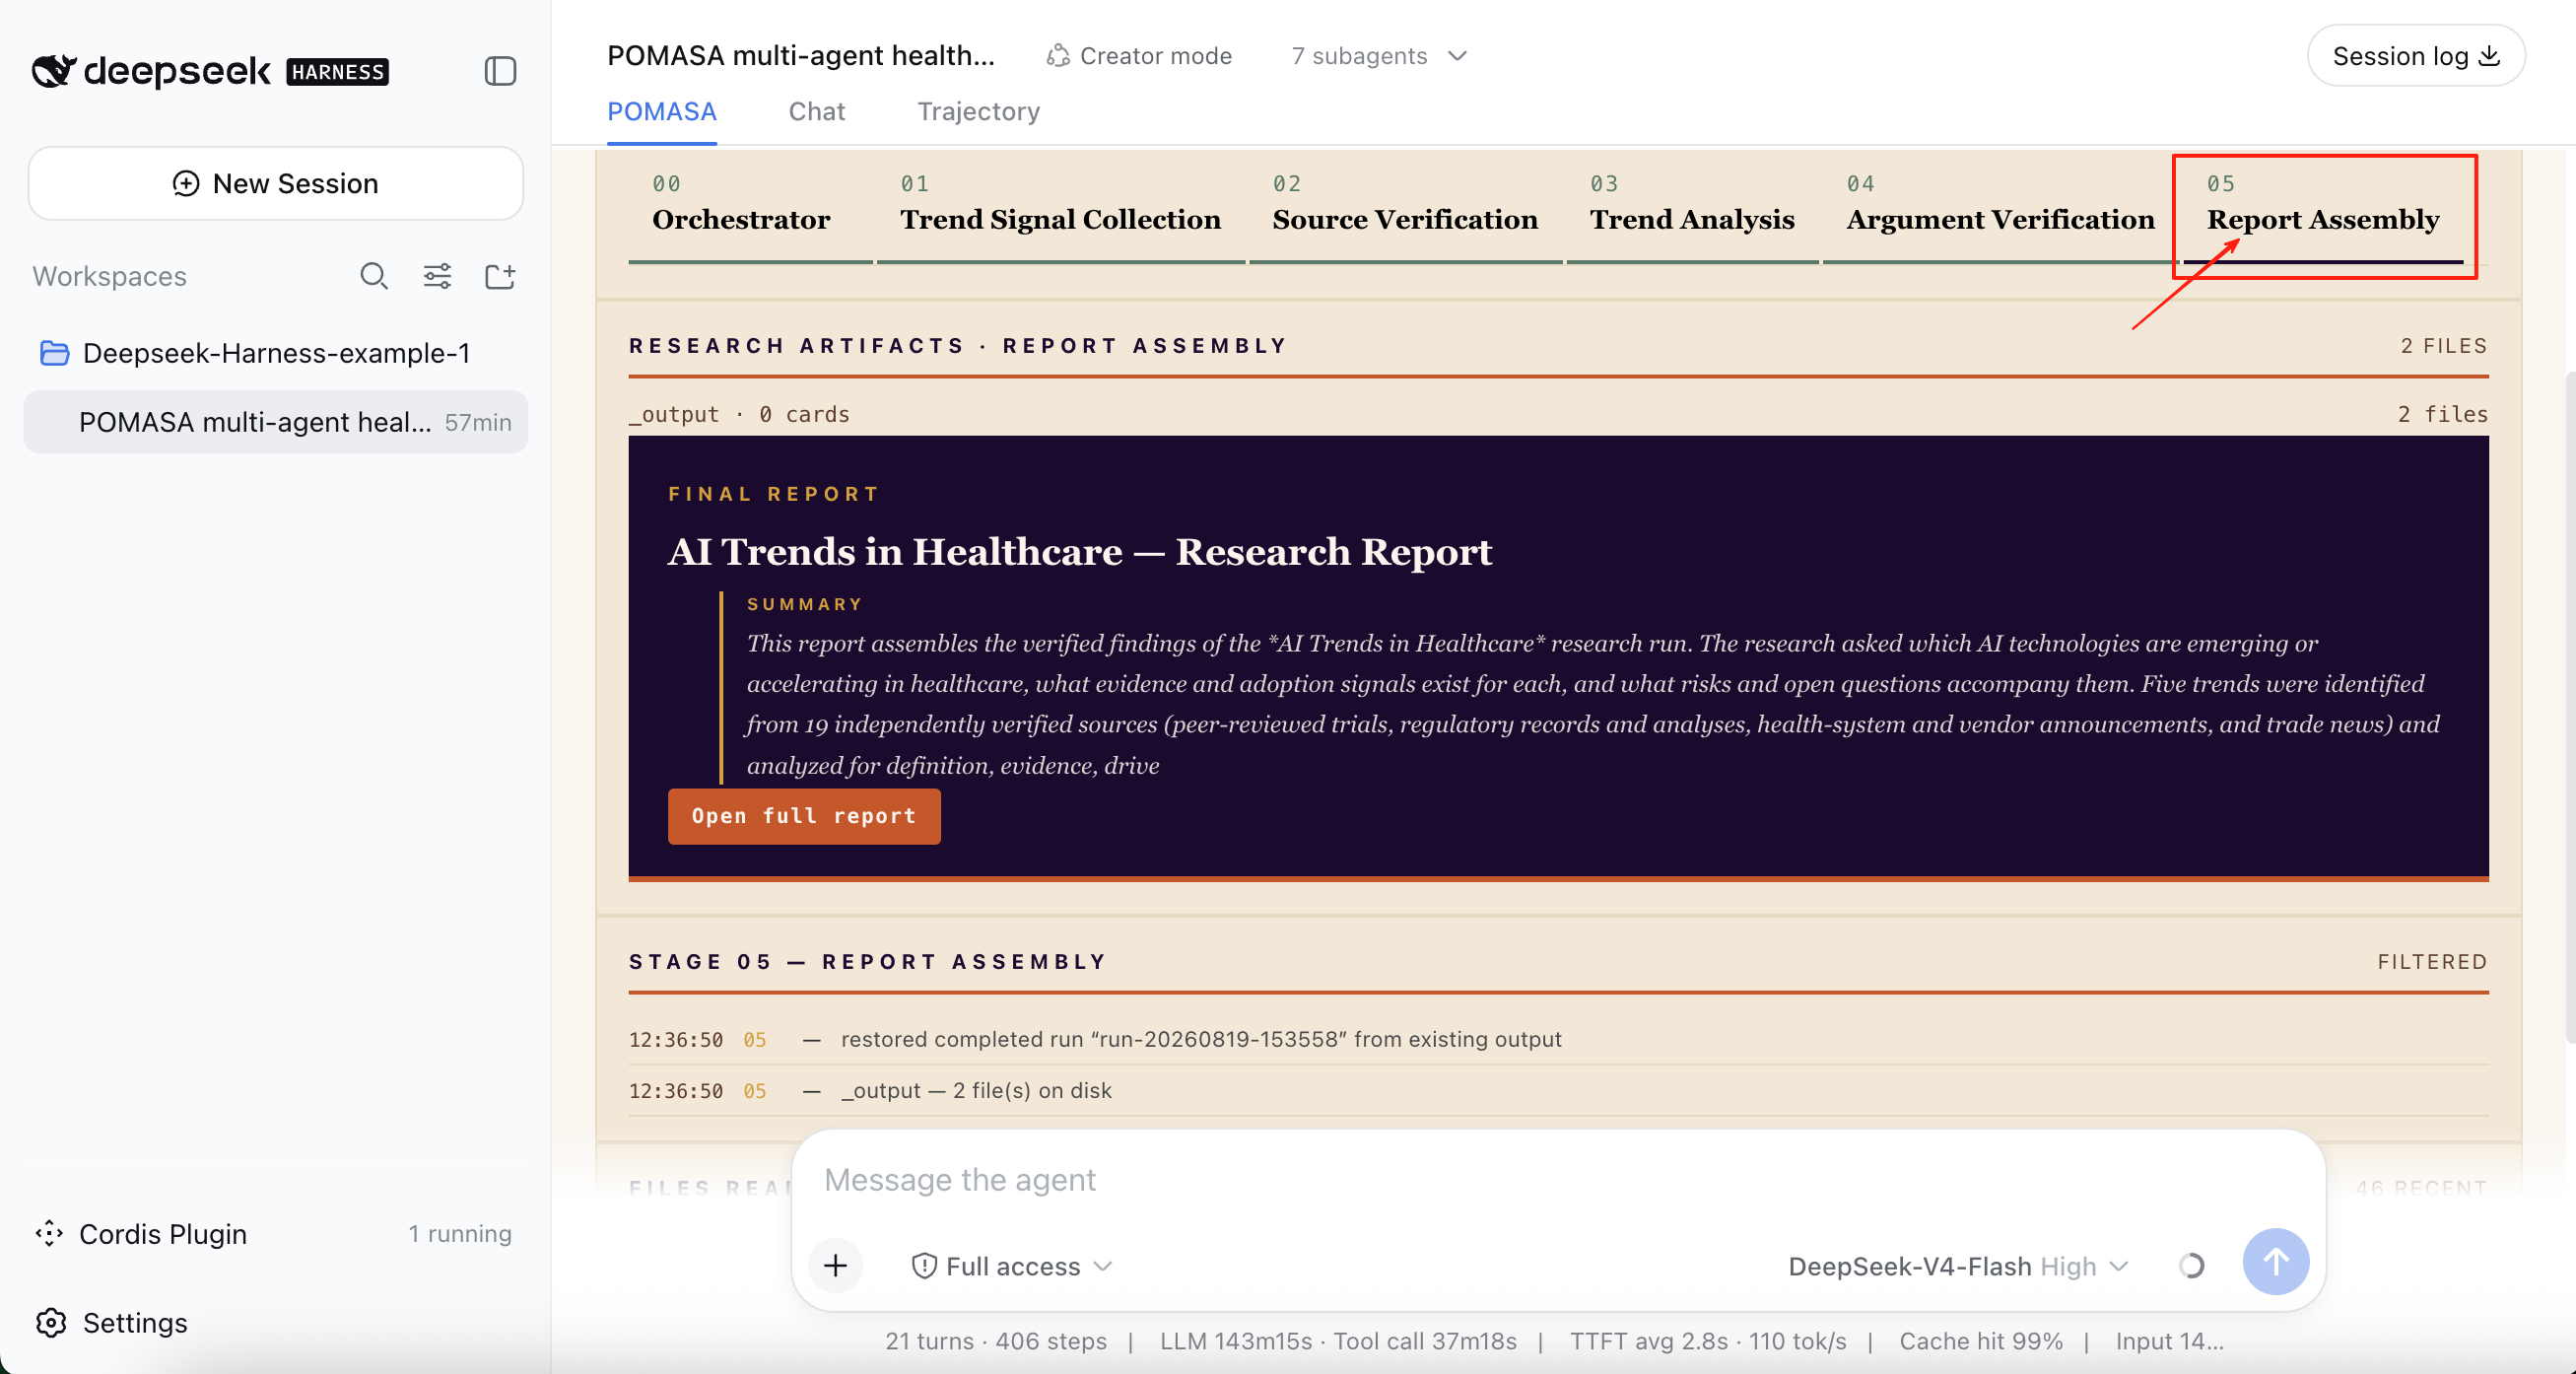
Plugins serve as a visual representation of the thought process behind skills, which means that users do not need to understand a skill deeply to intervene in its process.
This makes the skill more complete and opens up possibilities for users without advanced technical skills to customise their experience.
Conclusion
DeepSeek Harness is more than a tool for running AI agents. Its significance lies in opening up the agent itself: users can add, replace, and customise the components that make it work, rather than being limited to a fixed system. Built around a plugin-based architecture, and supported by the Cordis framework, Harness gives users greater freedom to shape both the agent’s capabilities and its interface.
Just as importantly, Harness makes the agent’s work more inspectable. By retaining a detailed record of the execution process — including the instructions, tool calls, intermediate results, and other information passed between steps — it becomes easier to understand what the agent actually did.
The larger promise of DeepSeek Harness, then, is not simply that it can run more capable AI agents. It is that it gives users more freedom to shape the system and see how it works — making AI workflows more customisable, inspectable, and controllable.
From | Tricontinental: Institute for Social Research via This RSS Feed.