


How to Connect Claude Code to Alternative APIs (macOS)
Why Connect GLM / KIMI Alternative Routes to the Client?
After installing an AI coding assistant client, many users run into a similar issue: long-term stable usage often depends on official model subscriptions or pay-per-use billing. At the same time, different regions and teams may prefer different routes depending on performance and availability.
If you want to use an alternative inference service in addition to the official default route, providers such as Zhipu GLM and Moonshot Kimi offer interfaces compatible with common clients. In this way, the interface and workflow remain the same, but the underlying model can be switched, without changing tools.
First Clarify One Thing: Client ≠ Model
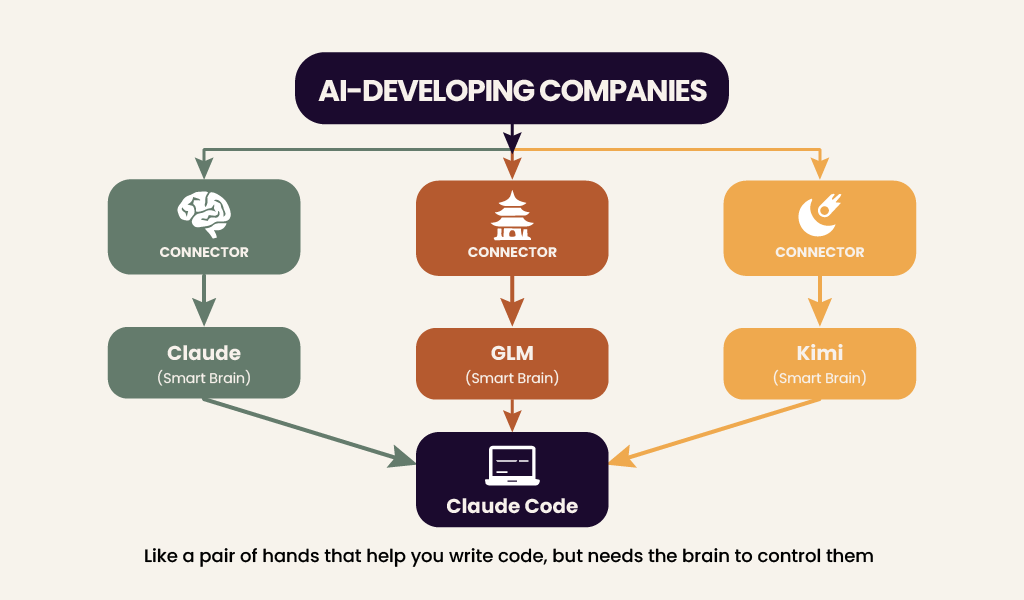
This can be understood as two layers:
- A local ‘client / execution layer’ (edits files, runs commands)
- A cloud ‘model service’ (interprets requests and returns results)
The client itself does not ‘think.’ It sends requests to a model service and returns the response to you. As long as the API endpoint and API key are correctly configured, the client can connect to different providers.
Therefore, the ‘thinking’ part can be Claude, GLM, or Kimi, depending on your configuration.
Why We Choose GLM and KIMI?
Choosing a provider generally requires considering latency, pricing, stability, and service terms. There is no single optimal choice.
In practice, some Chinese models strike a reasonable balance between “capability” and “cost control”, making them suitable for daily coding and document editing tasks.
How Capable are GLM and KIMI?
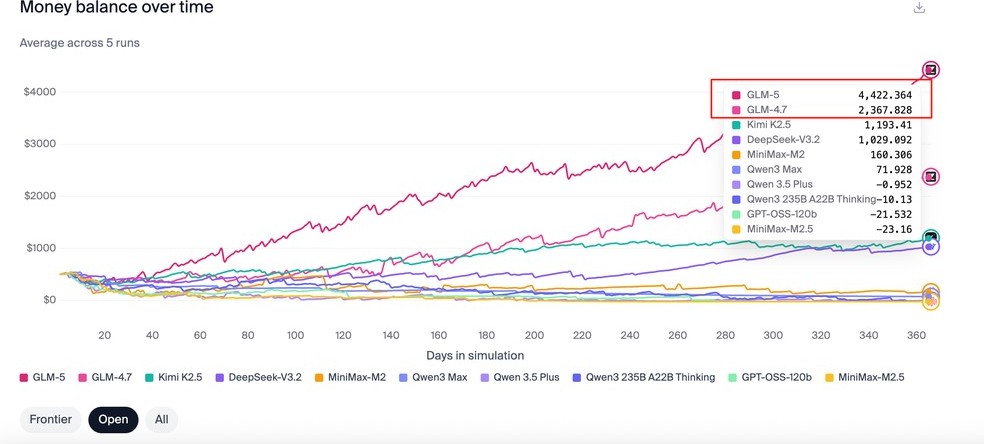
In a publicly available third-party evaluation (see Vending-Bench 2), models from Zhipu and Moonshot performed well in complex tasks.
Note that rankings change over time. This is for reference only. Whether they fit your real-world needs should be validated through your own testing.

AI Workflow Looks Like This
You give a request → Model reasons → Outputs code → Task completed
After configuring the API key and endpoint, this workflow is identical to using the official model.
If you already have a stable official route, this guide can serve as supplementary reading. If you want to set everything up from scratch, continue to the ‘GLM Setup Guide’ and ‘KIMI Setup Guide’ below.
GLM Setup Guide
Step 1: Get Your ‘Access Key’
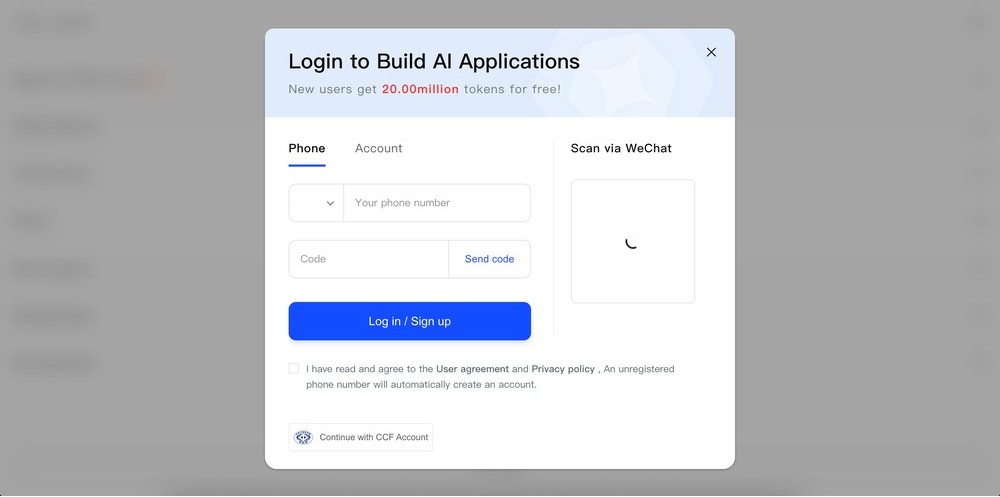
Everything starts with an API key.
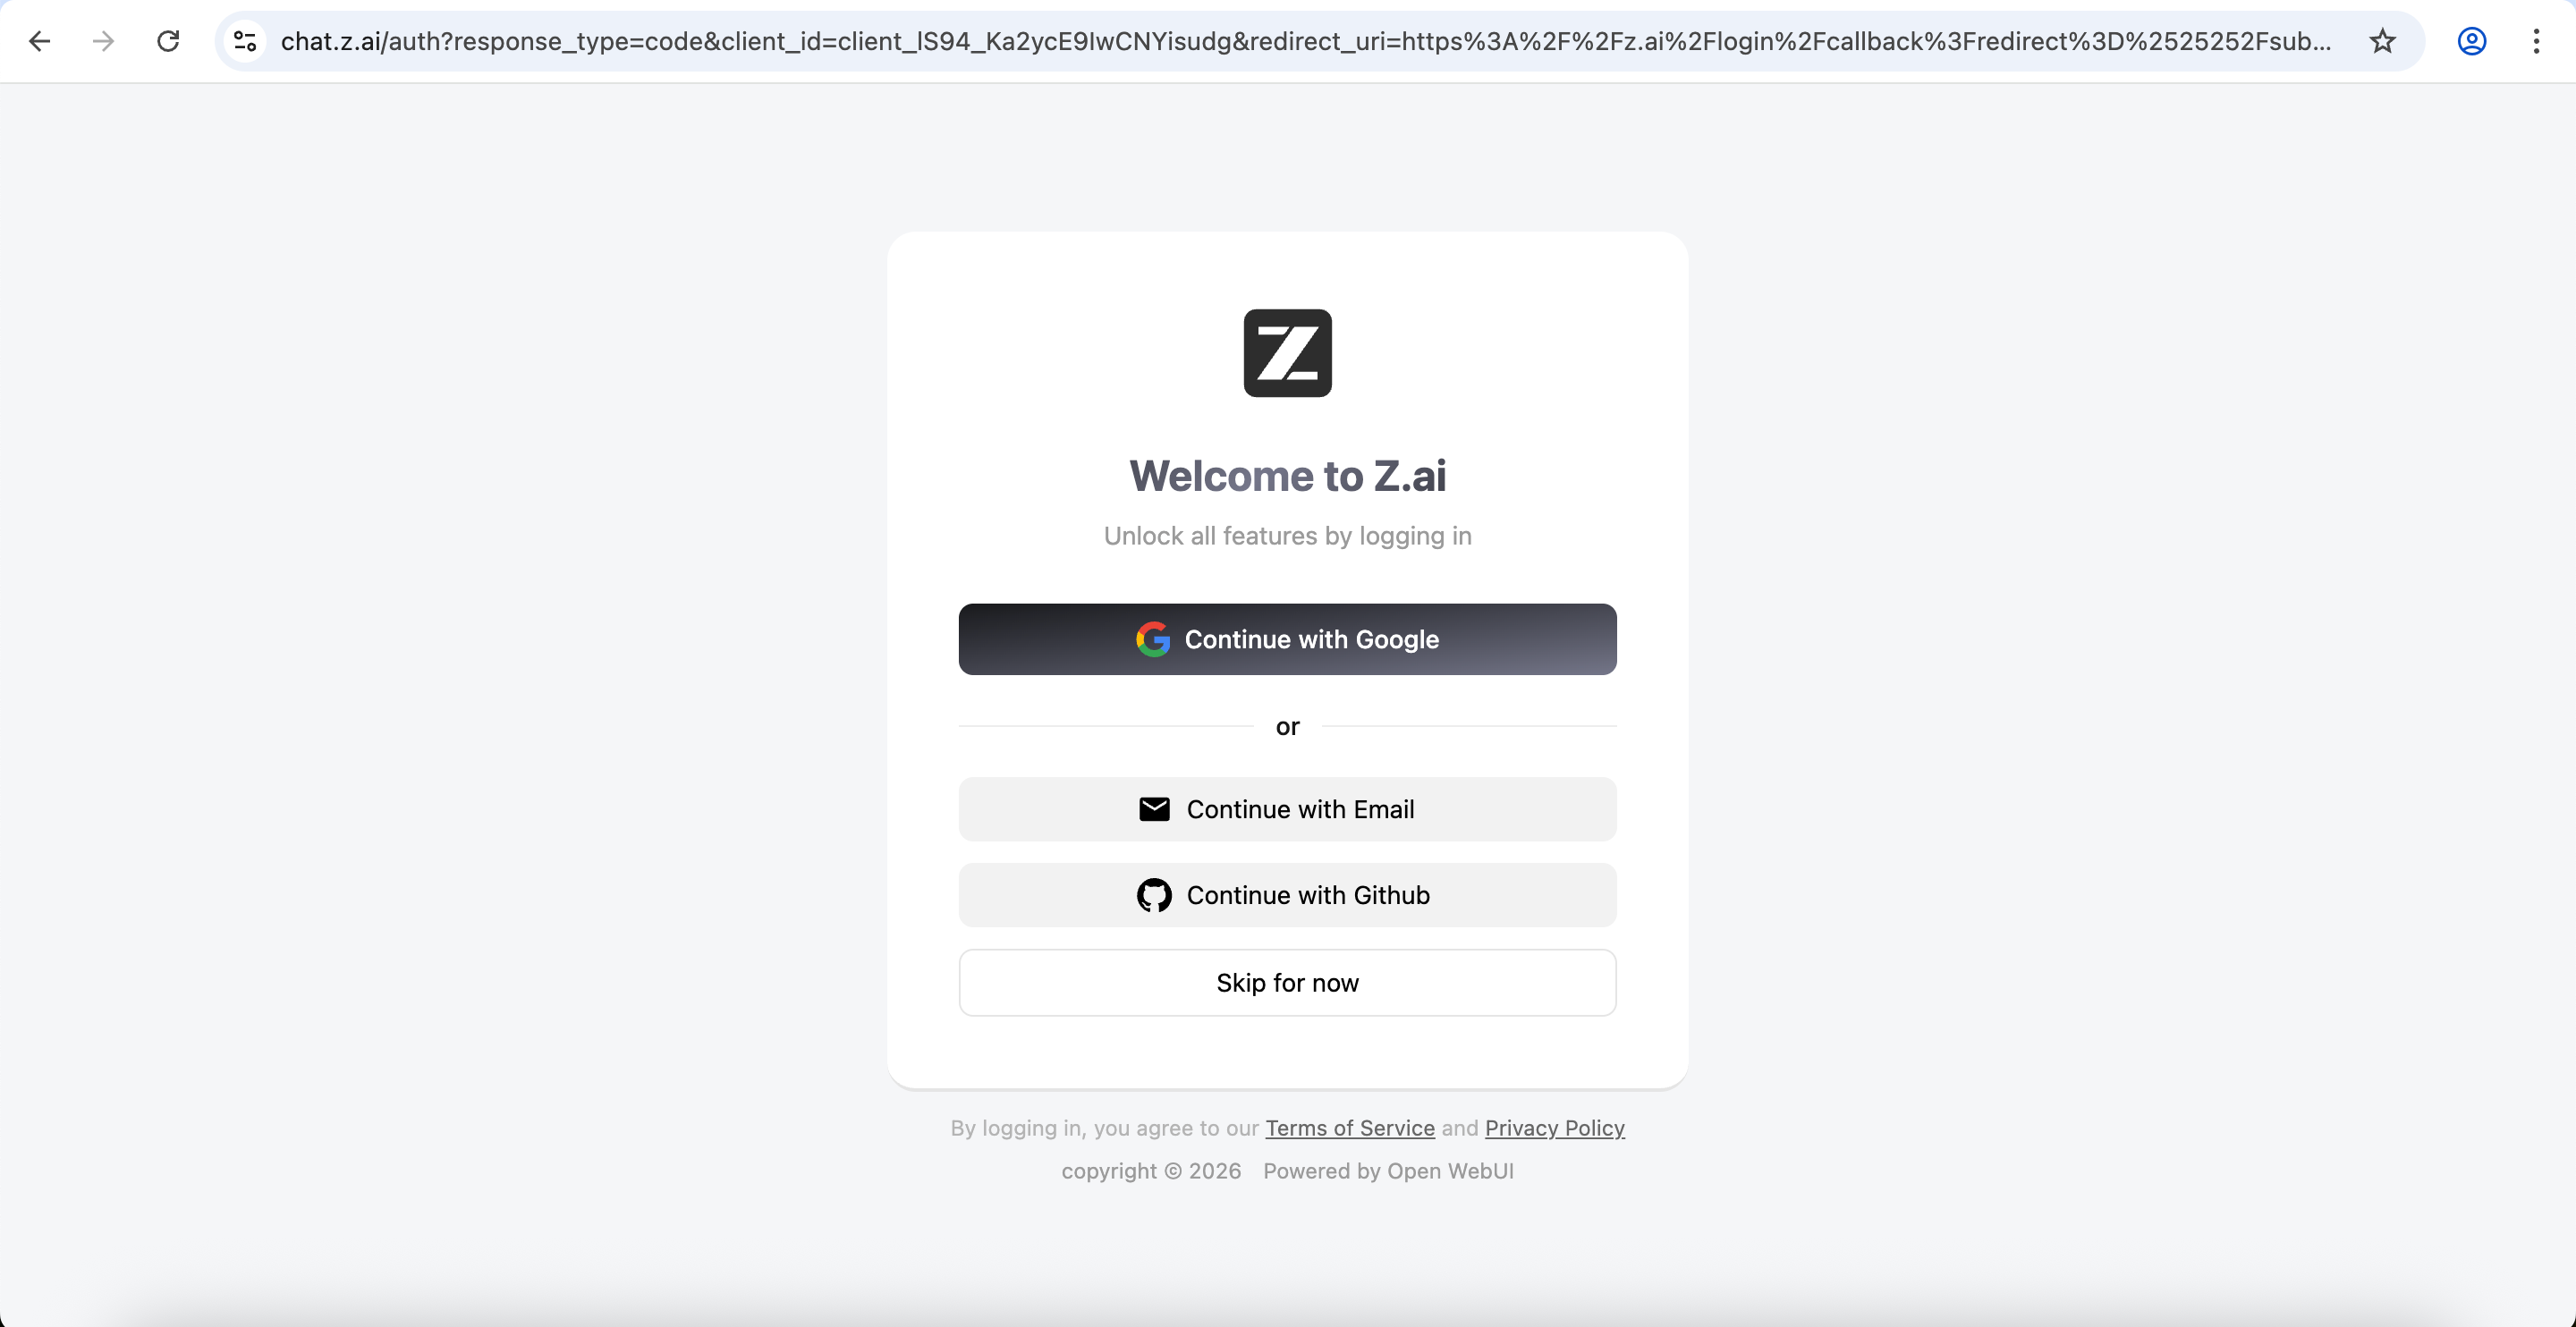
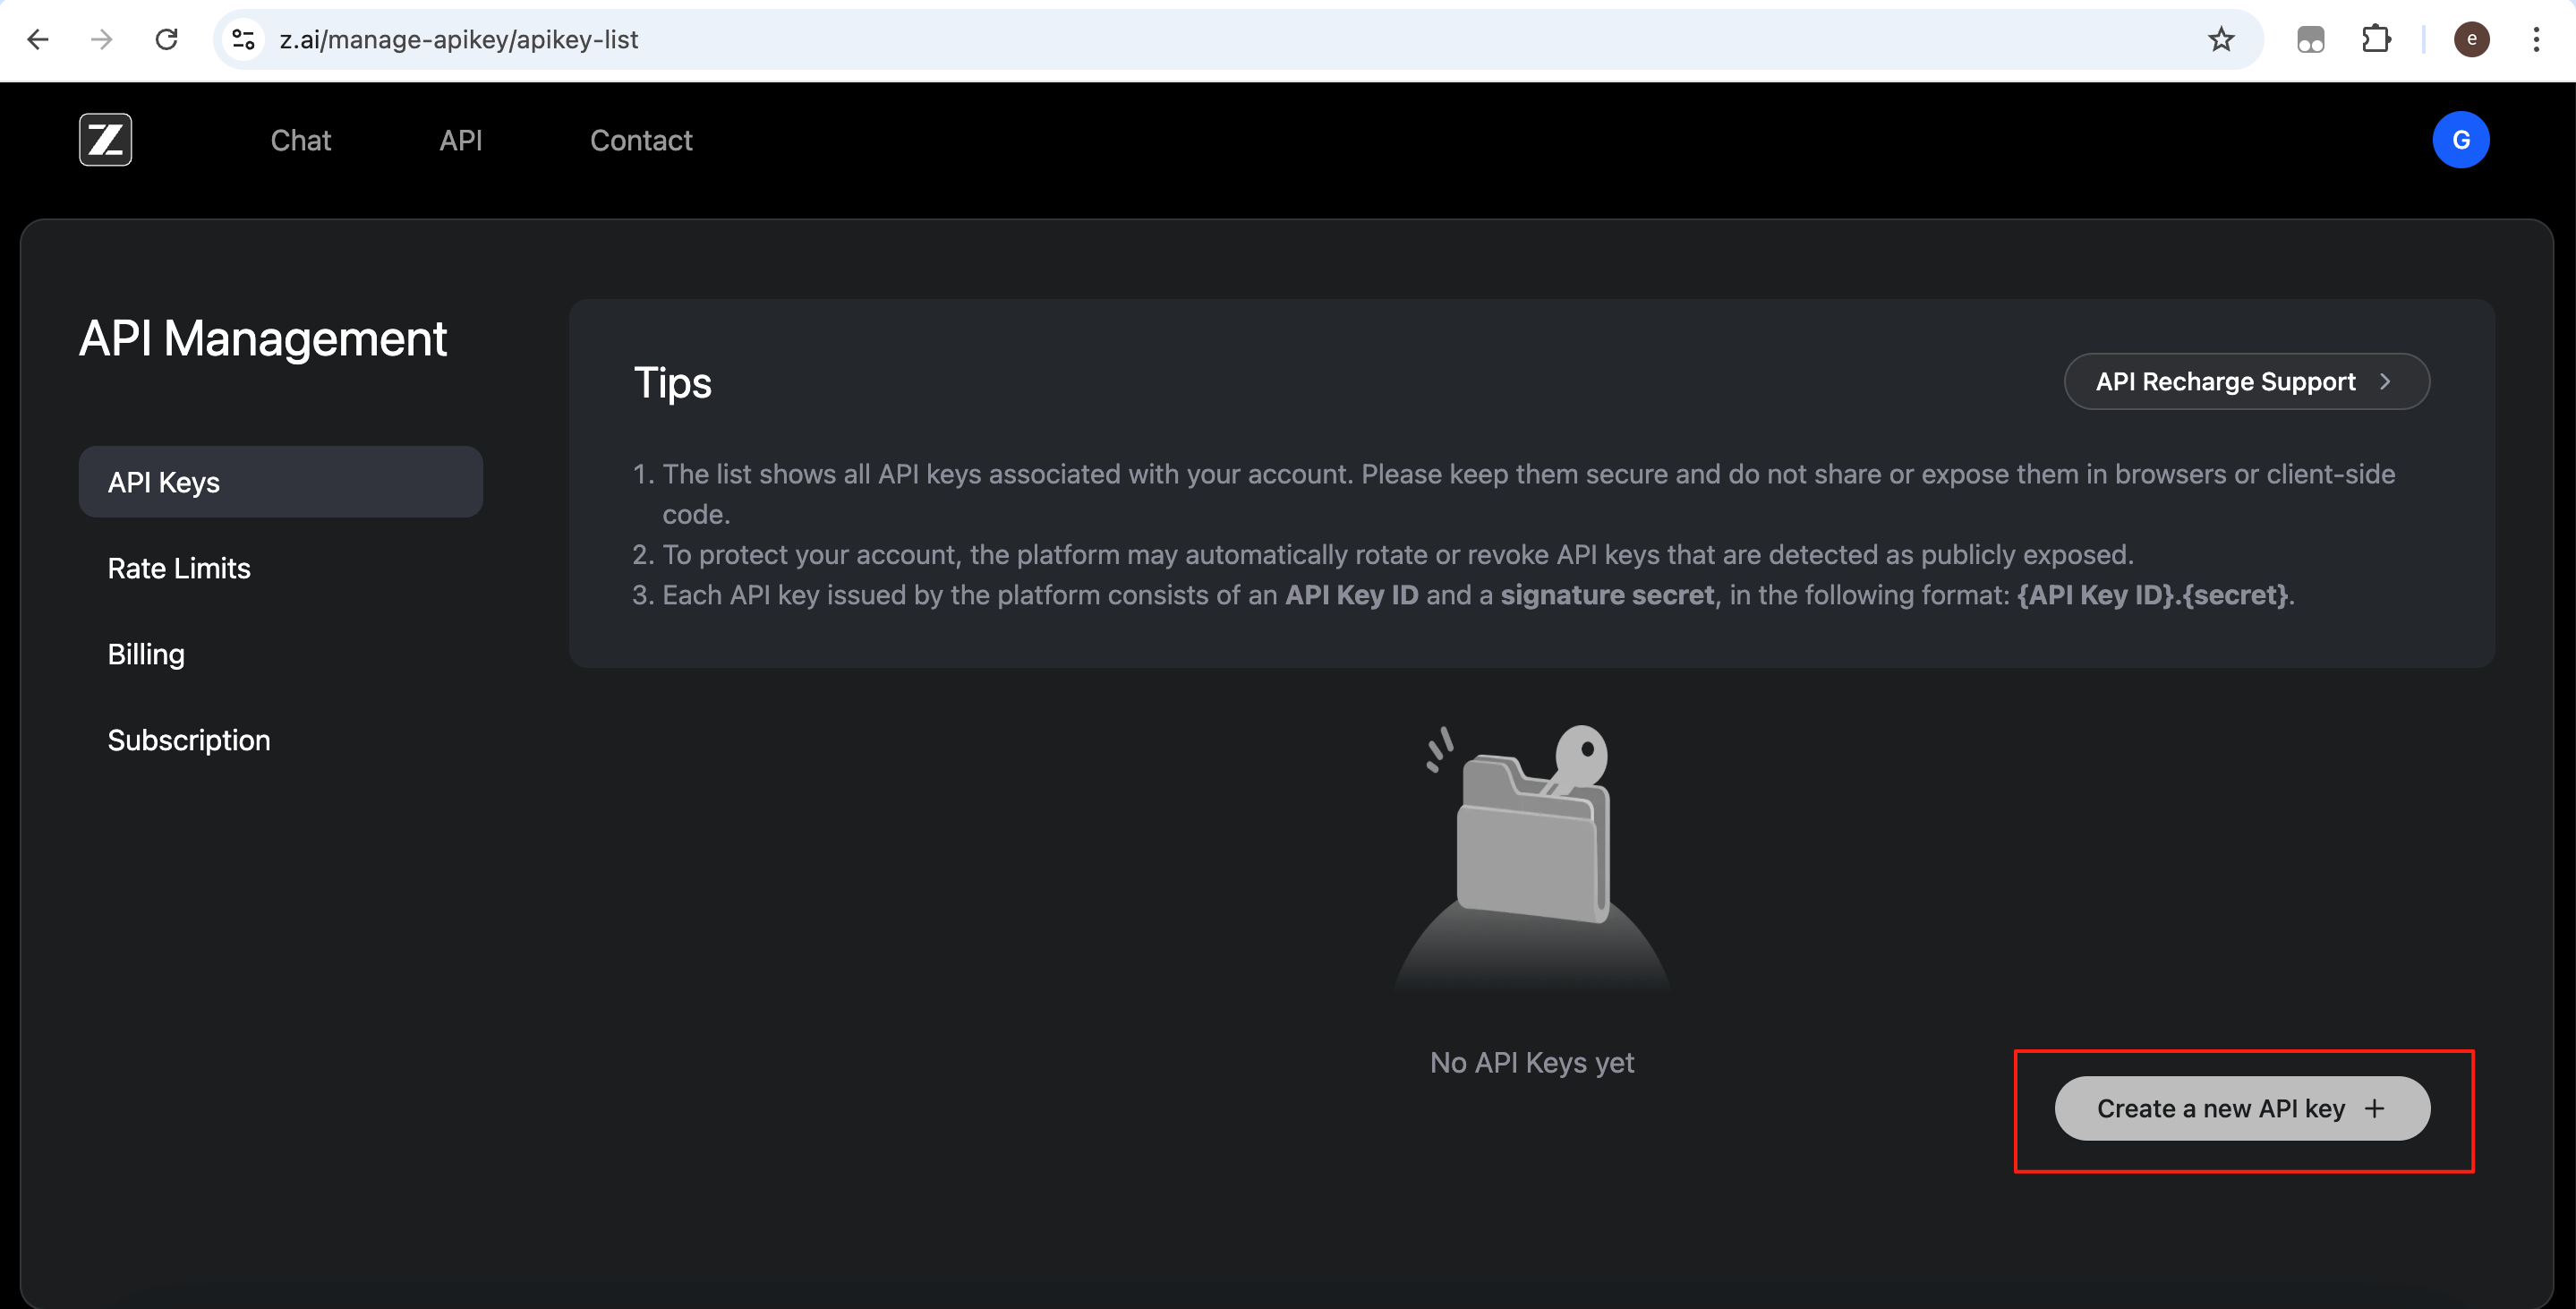
Open: https://z.ai/manage-apikey/apikey-list
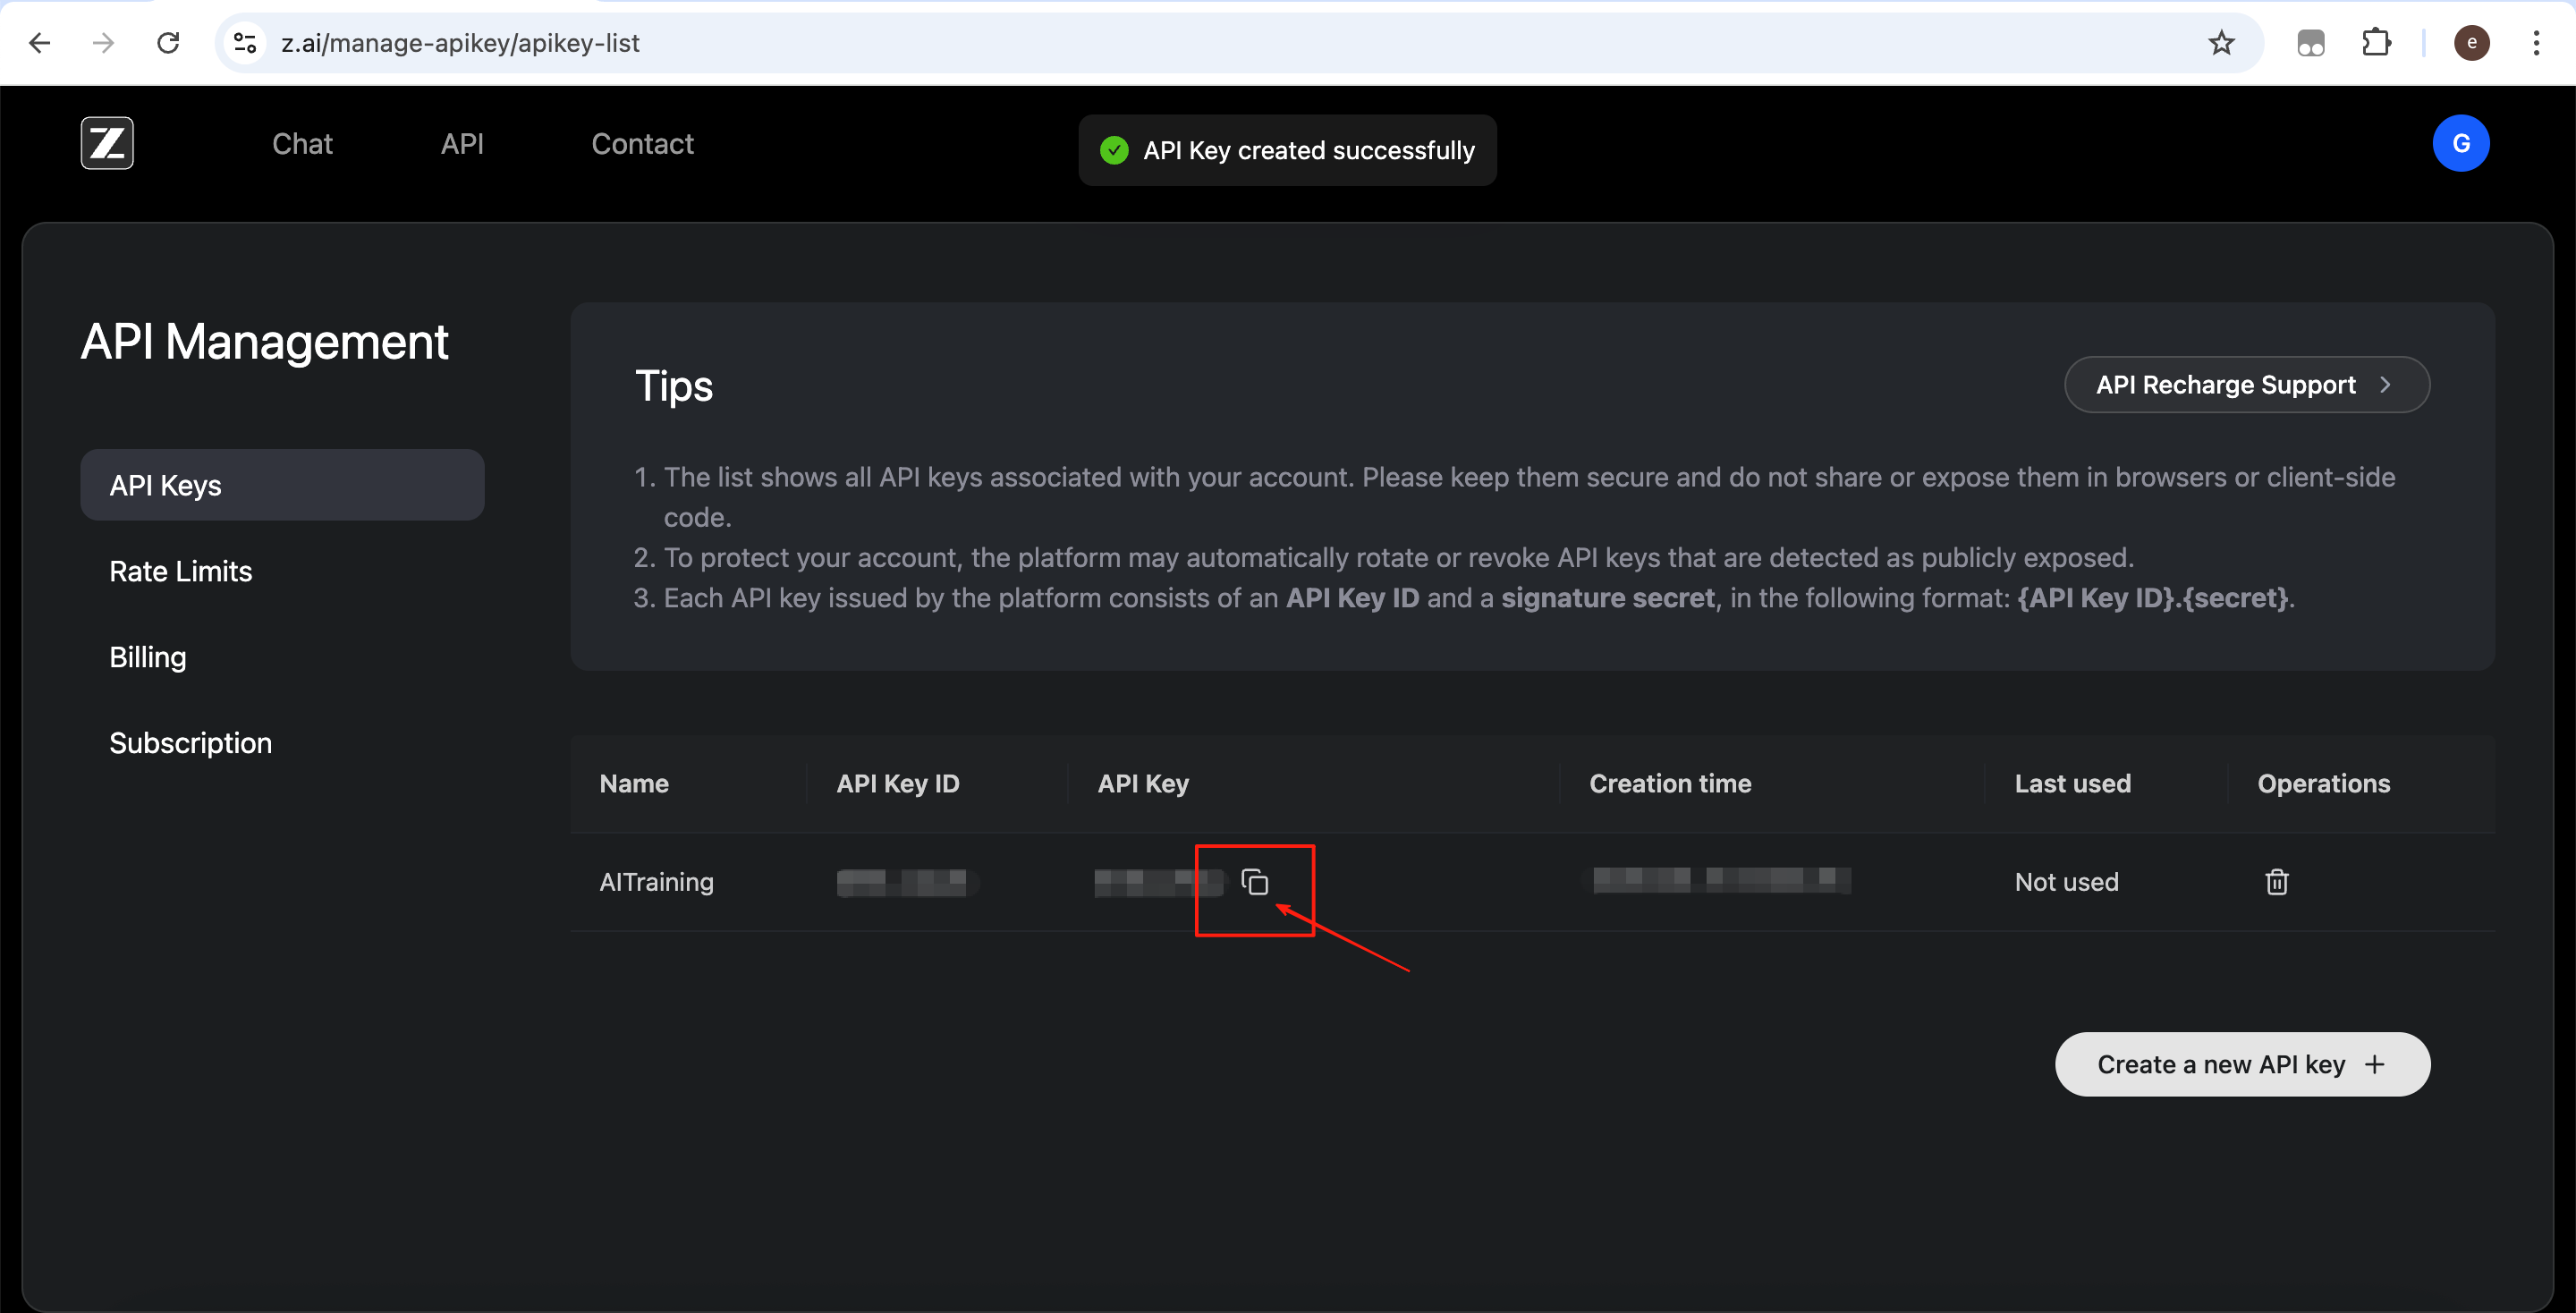
Click Create a new API Key.
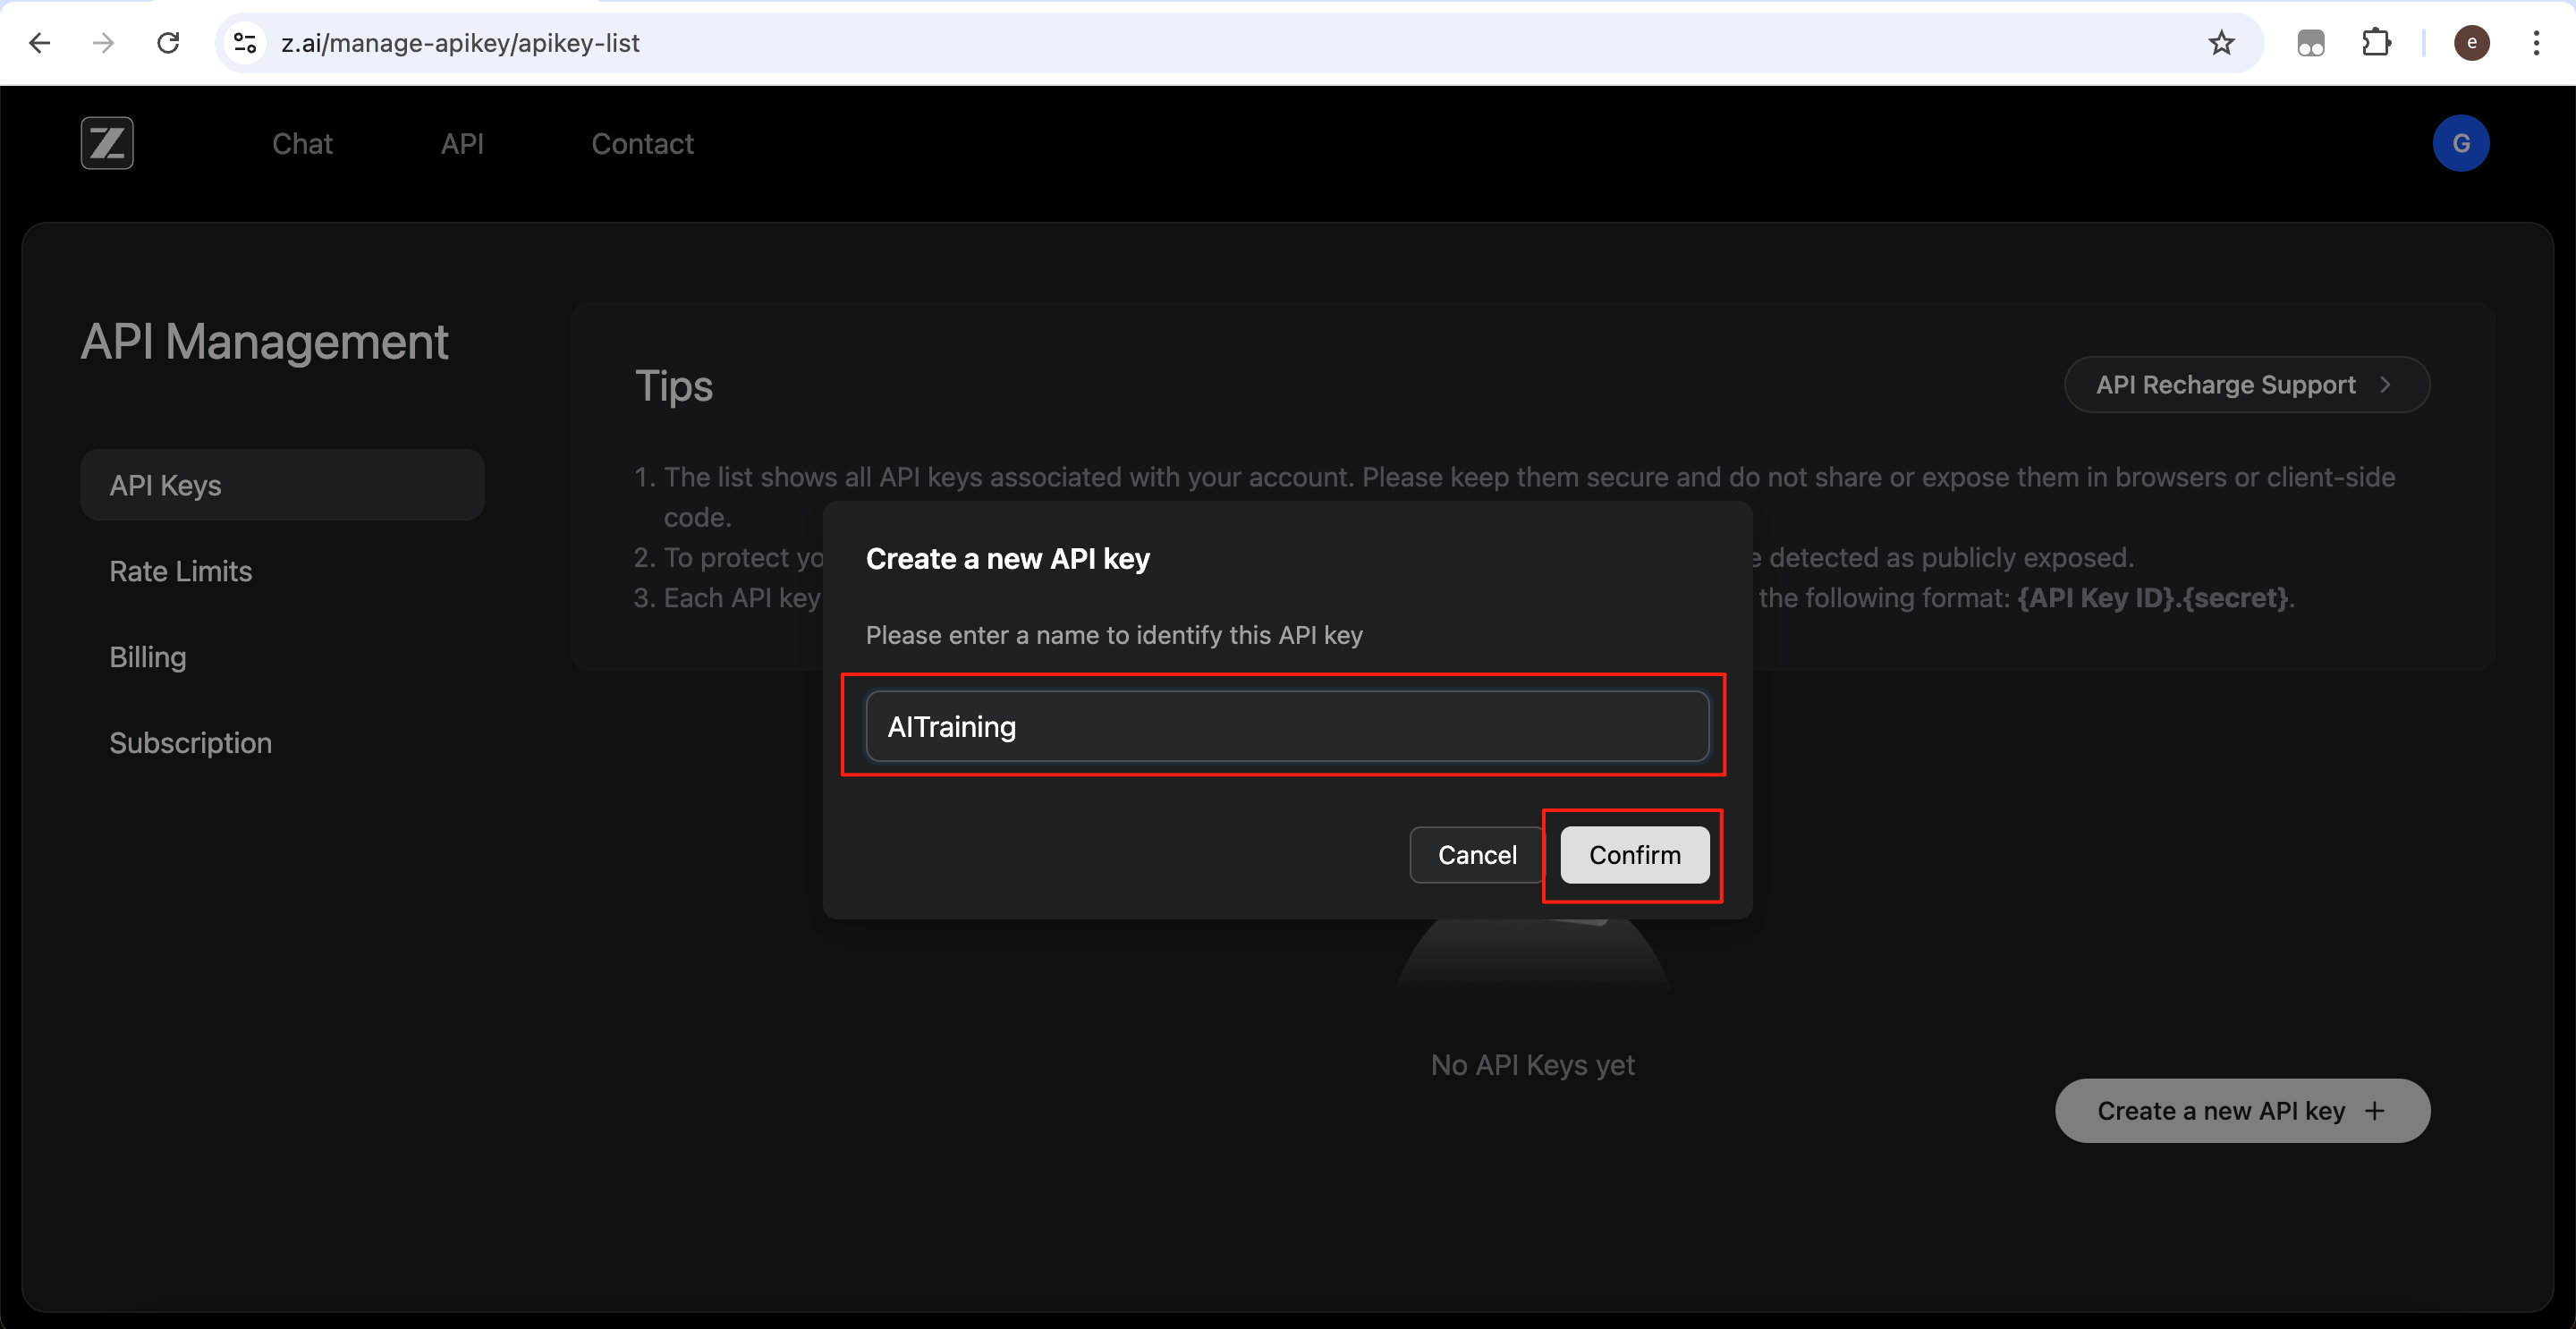
Enter a recognizable name (for example ‘AITraining’), then click Confirm.
Click the copy button and store the API key securely.

Step 2: Subscribe or Not?
Without a paid subscription, there is usually a limited free quota available for testing basic models.
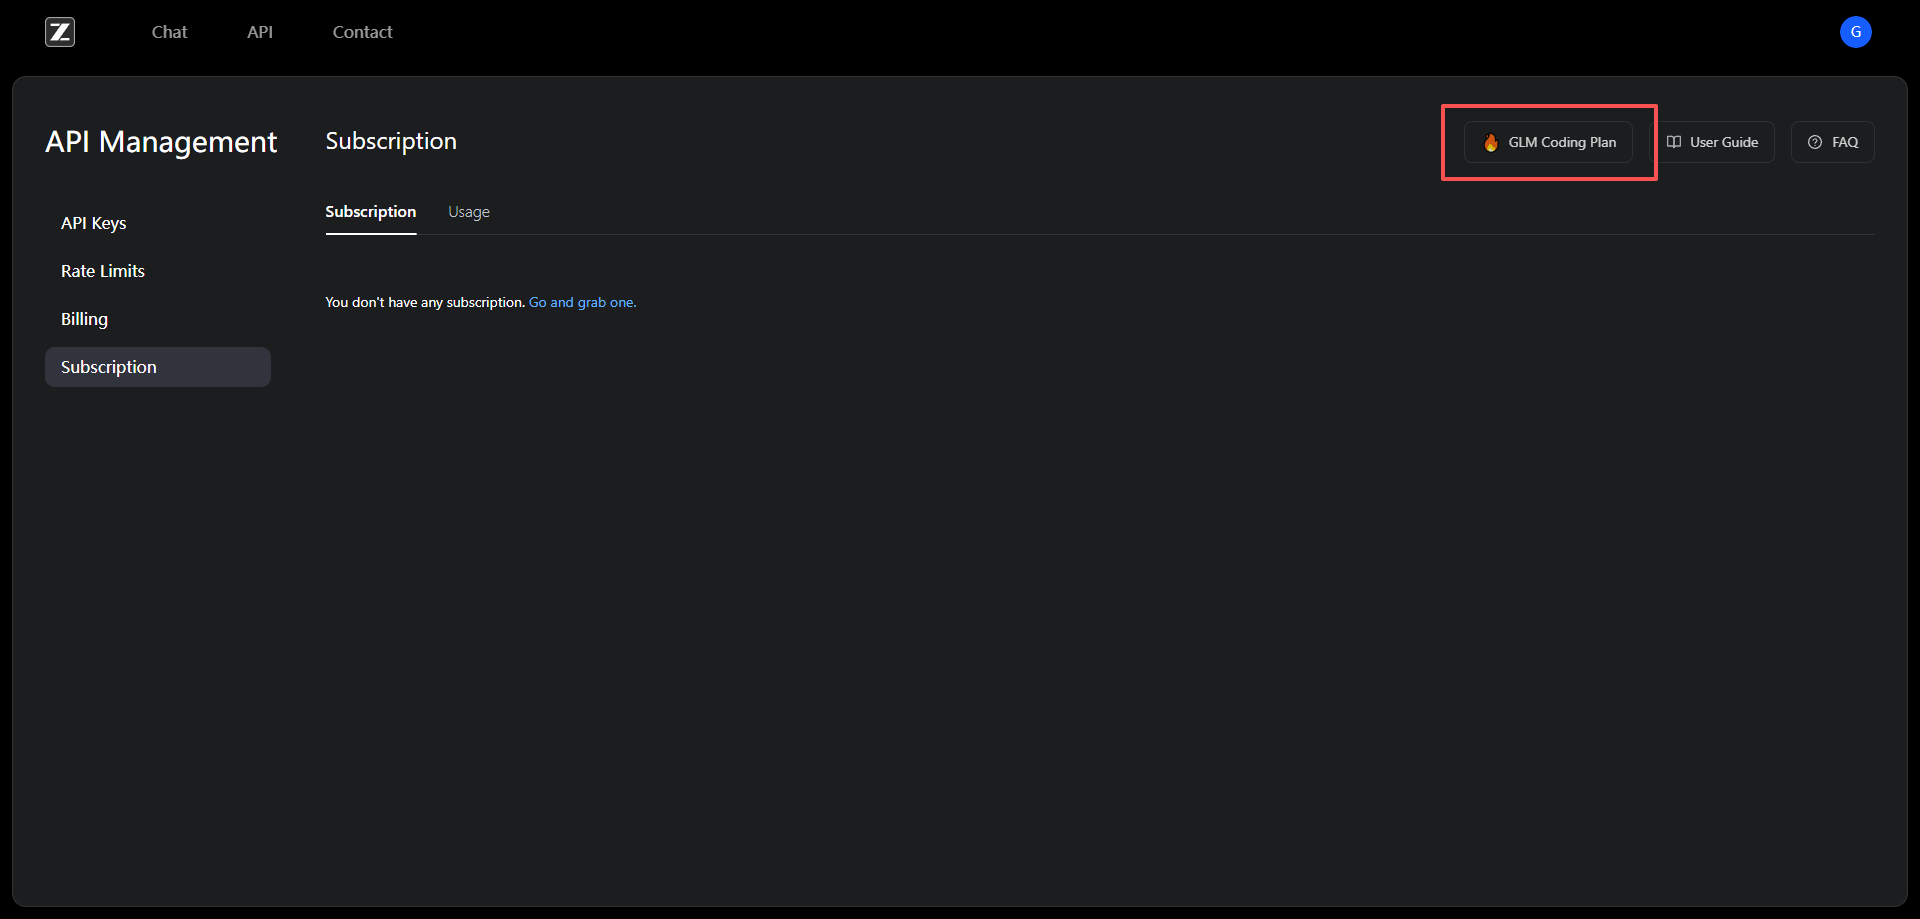
If your usage is high, or you need higher quotas and stronger models, you can subscribe to the GLM Coding Plan. Otherwise, start with the free tier and upgrade later if needed.
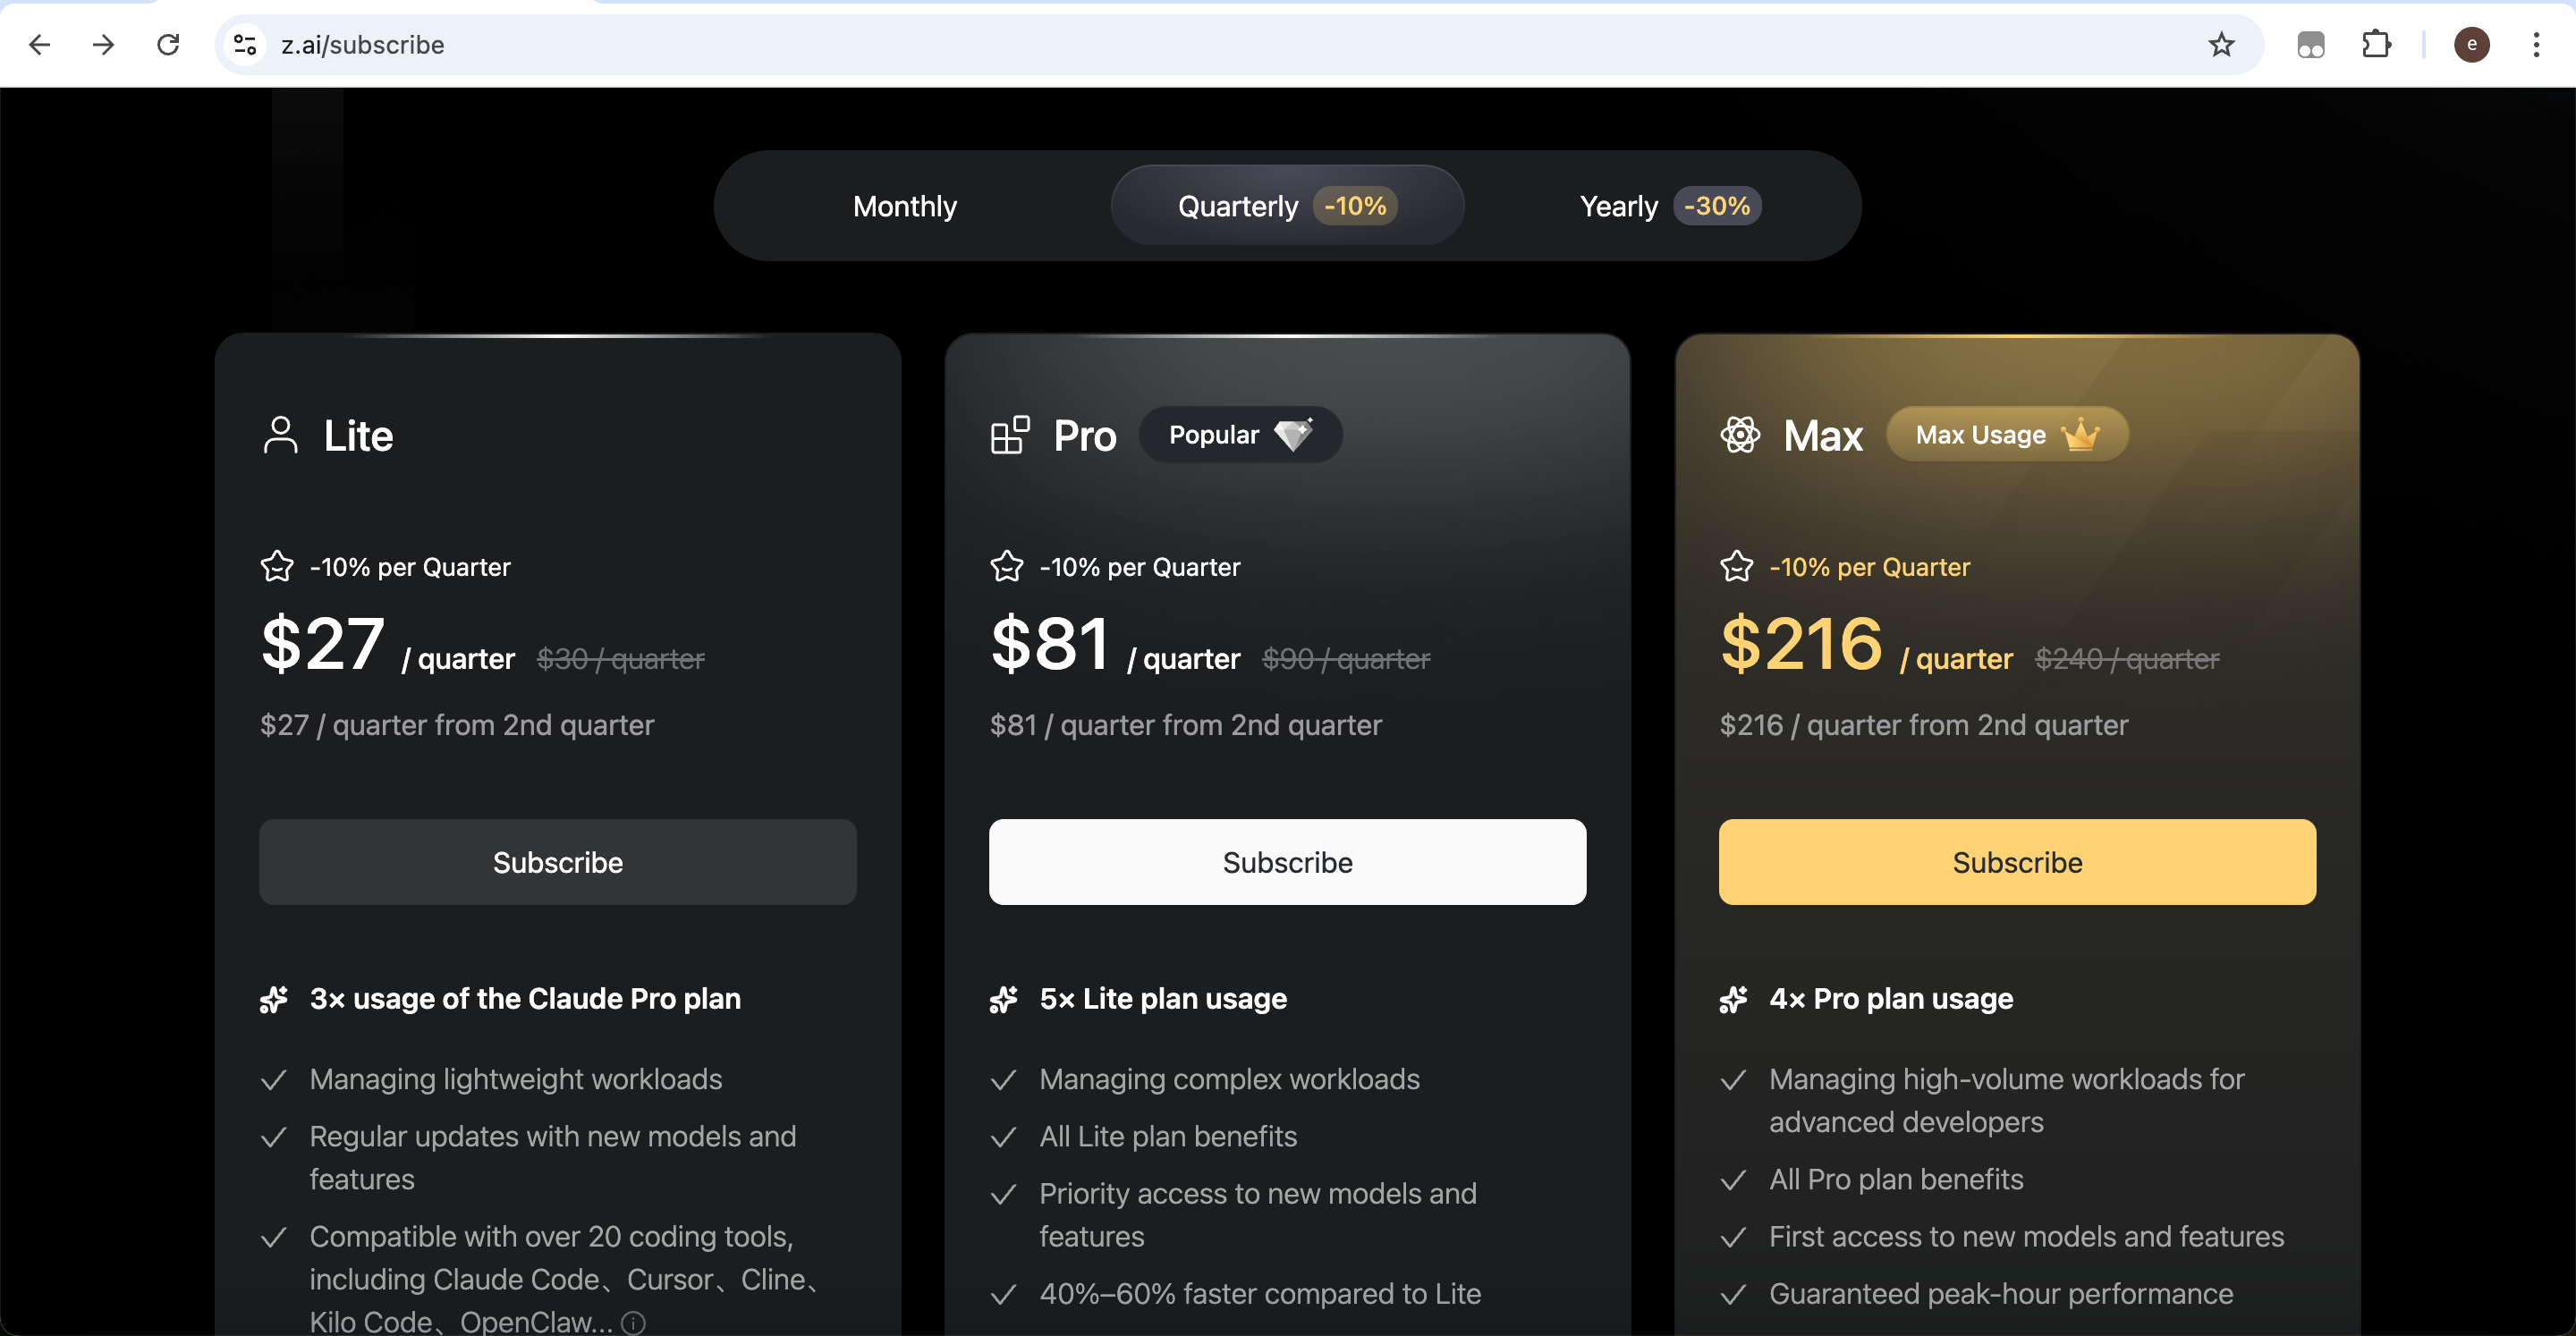
In the console, click Subscription → GLM Coding Plan.

Scroll down to the subscription section and choose a suitable plan.

Step 3: Actual Configuration
Claude Code allows you to customize backend model services. To integrate GLM, configure the following parameters:
- ANTHROPIC_BASE_URL: API base URL pointing to the provider’s compatible endpoint
- ANTHROPIC_AUTH_TOKEN: Your API key used for authentication and billing
- ANTHROPIC_MODEL (optional): Specific model name depending on provider documentation
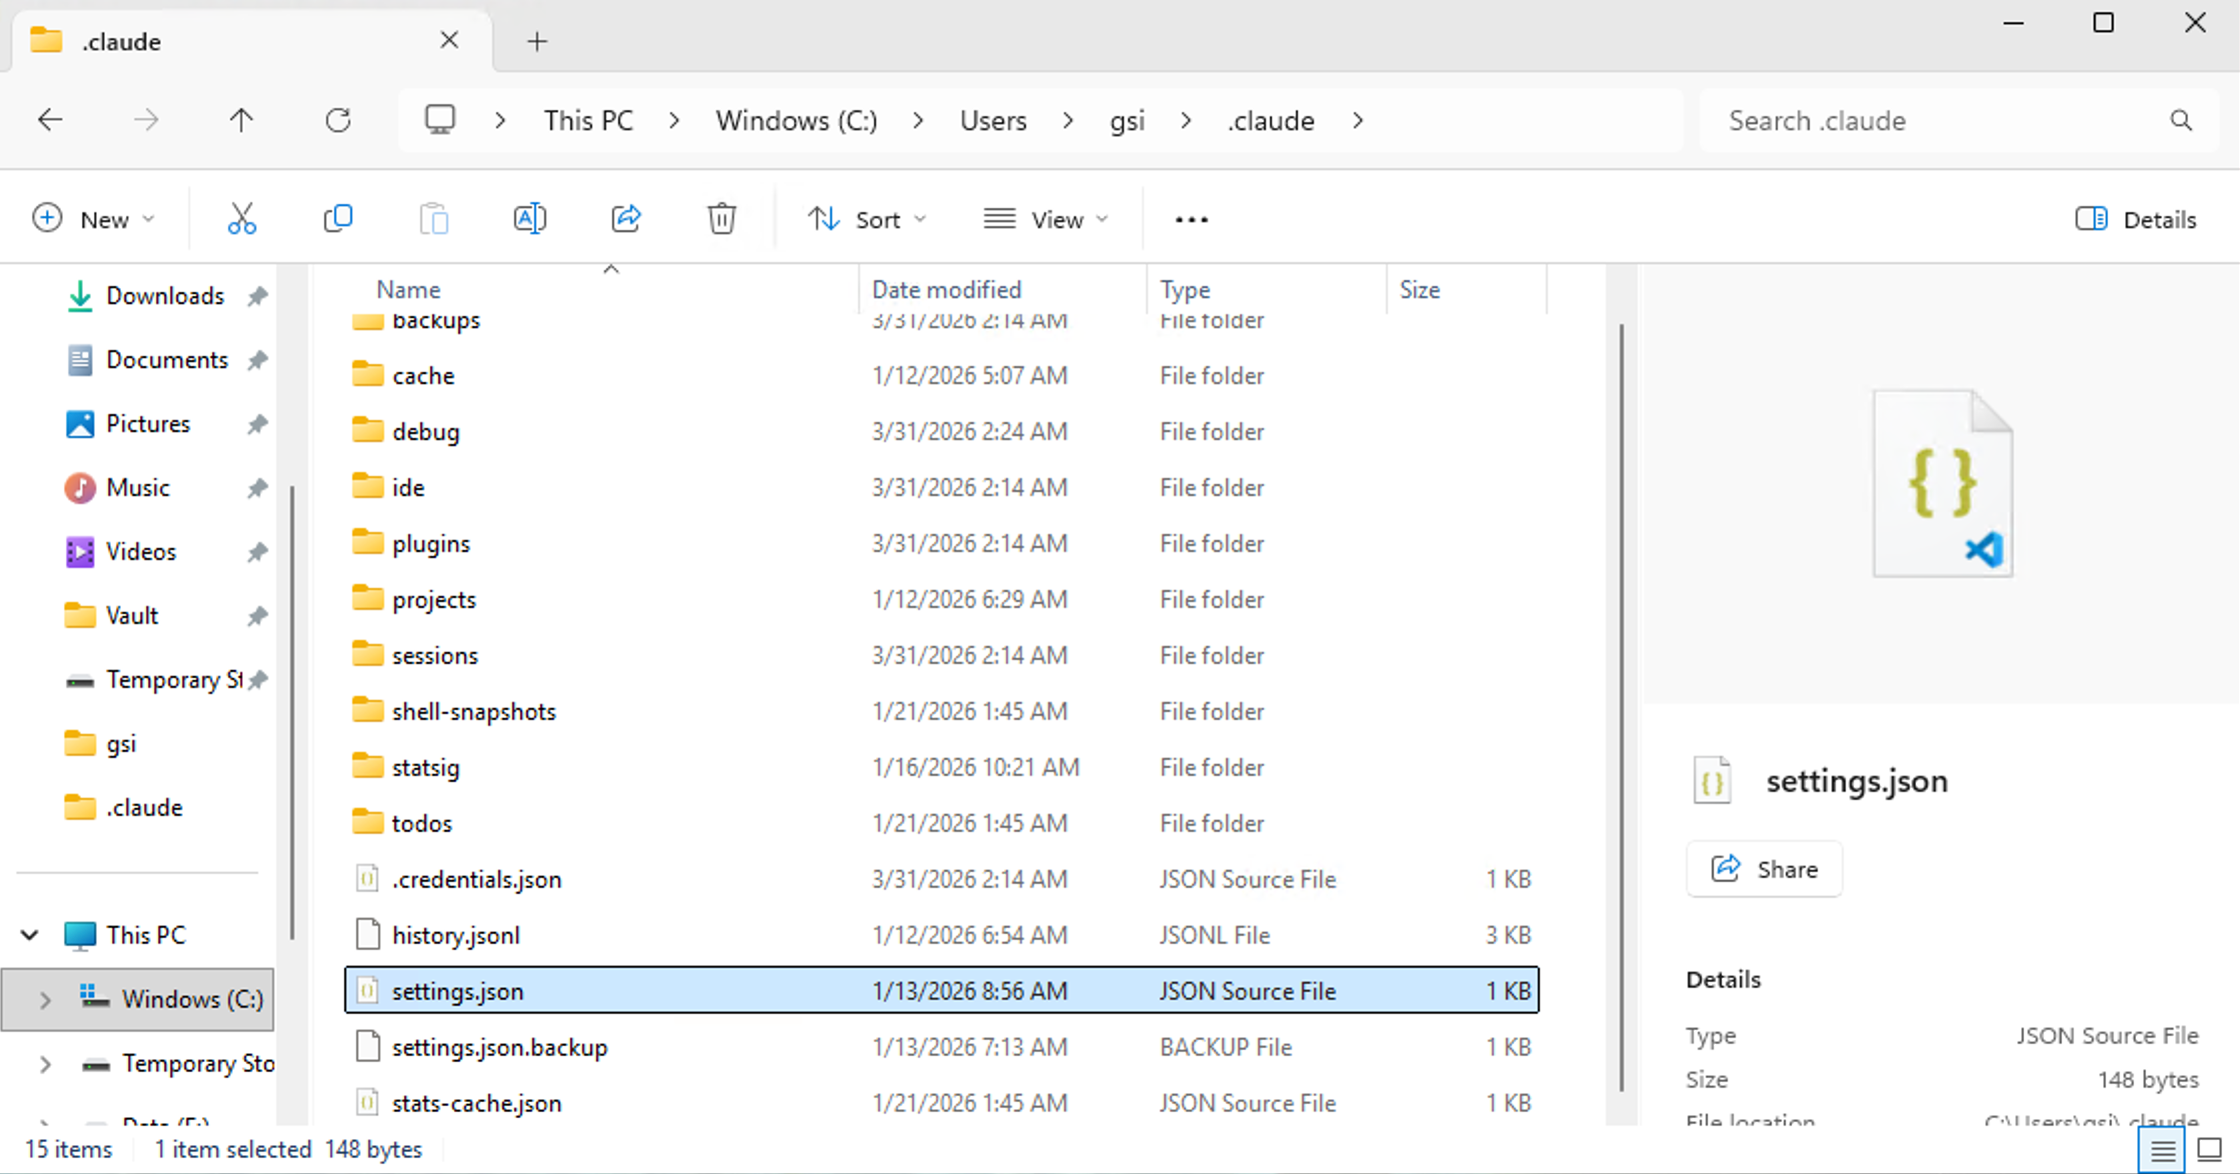
Edit the configuration file:
Home -> .claude -> settings.json
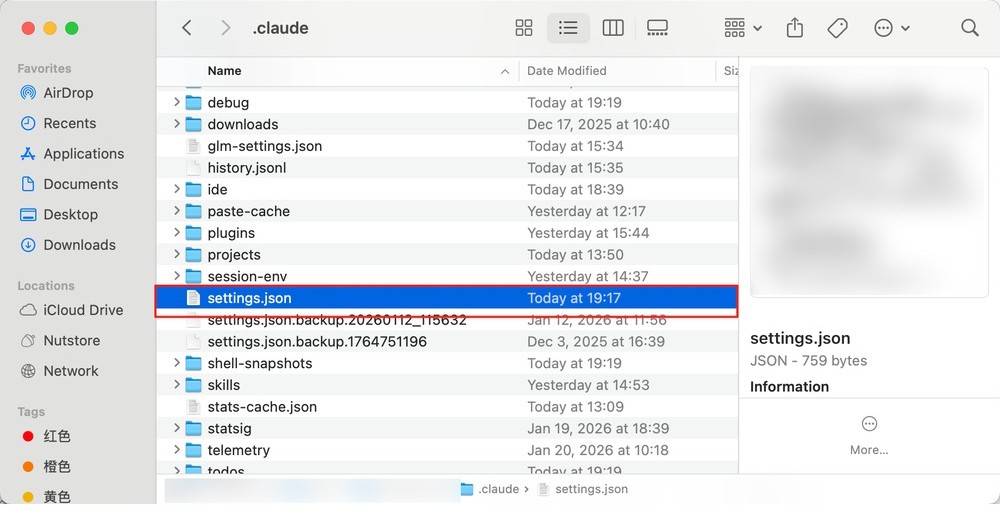
Replace your api key with your actual key. You may also change glm-5 if needed. If you have no other custom settings, you can directly use the following configuration:
{
  ‘env’: {
    ‘ANTHROPIC_BASE_URL’: ‘https://open.bigmodel.cn/api/anthropic%E2%80%99,
    ‘ANTHROPIC_AUTH_TOKEN’: ‘your api key’,
    ‘ANTHROPIC_MODEL’: ‘glm-5’
  },
  ‘hasCompletedOnboarding’: true
}
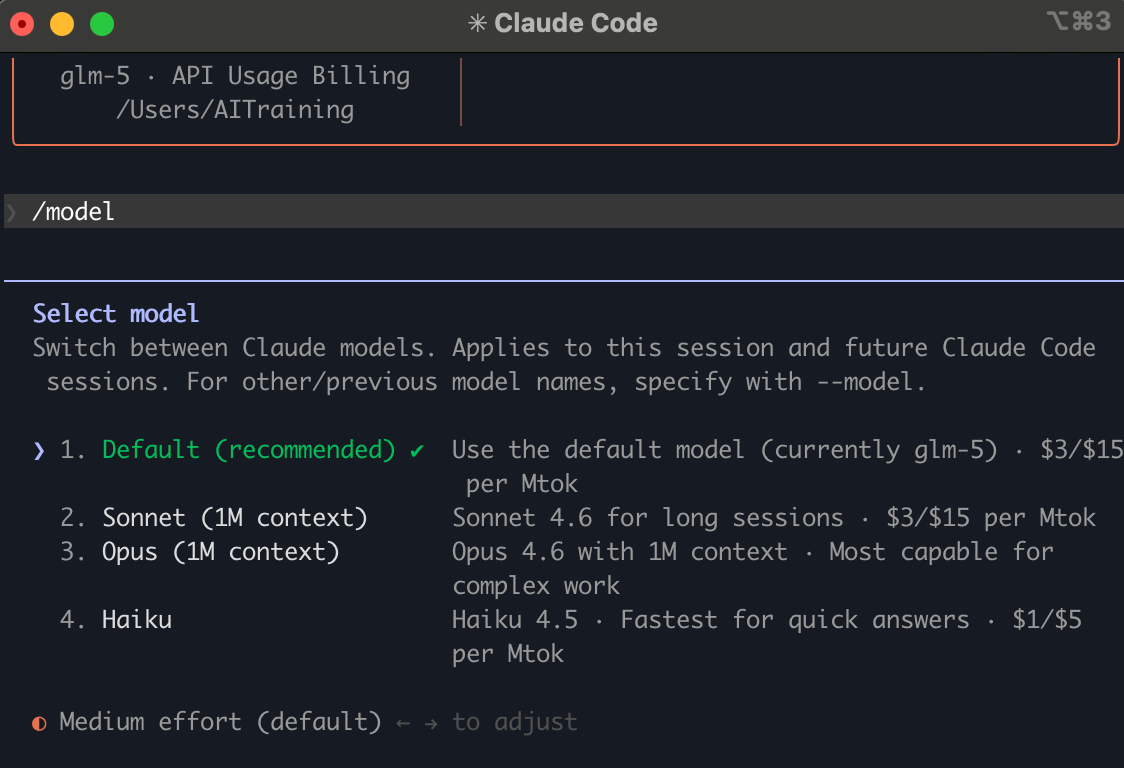
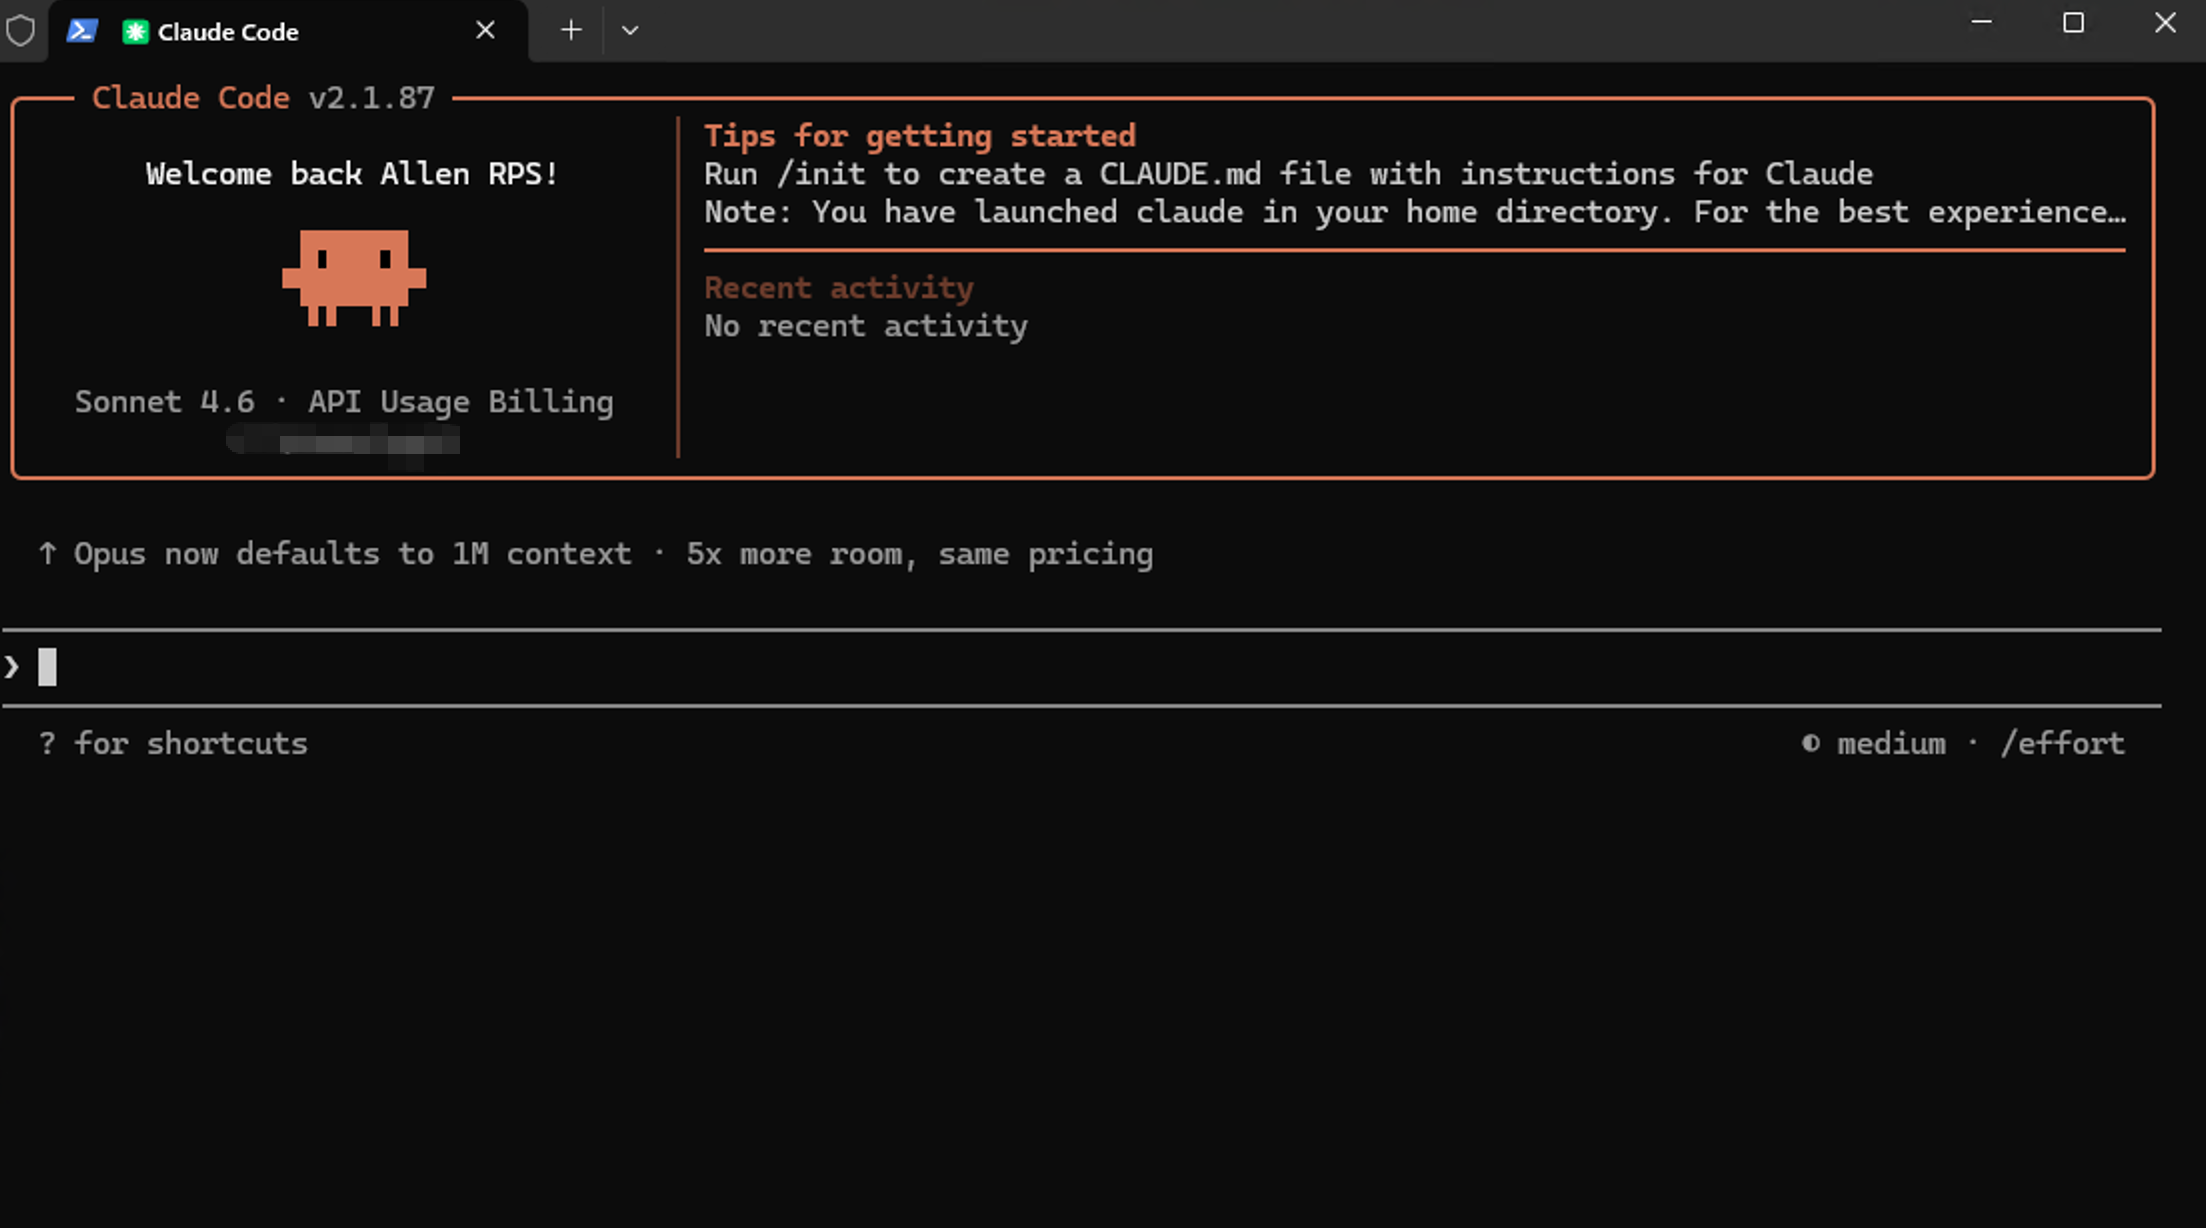
After saving, restart the client and run /model to verify it is working.
KIMI Setup Guide
Step 1: Get Your ‘Access Key’
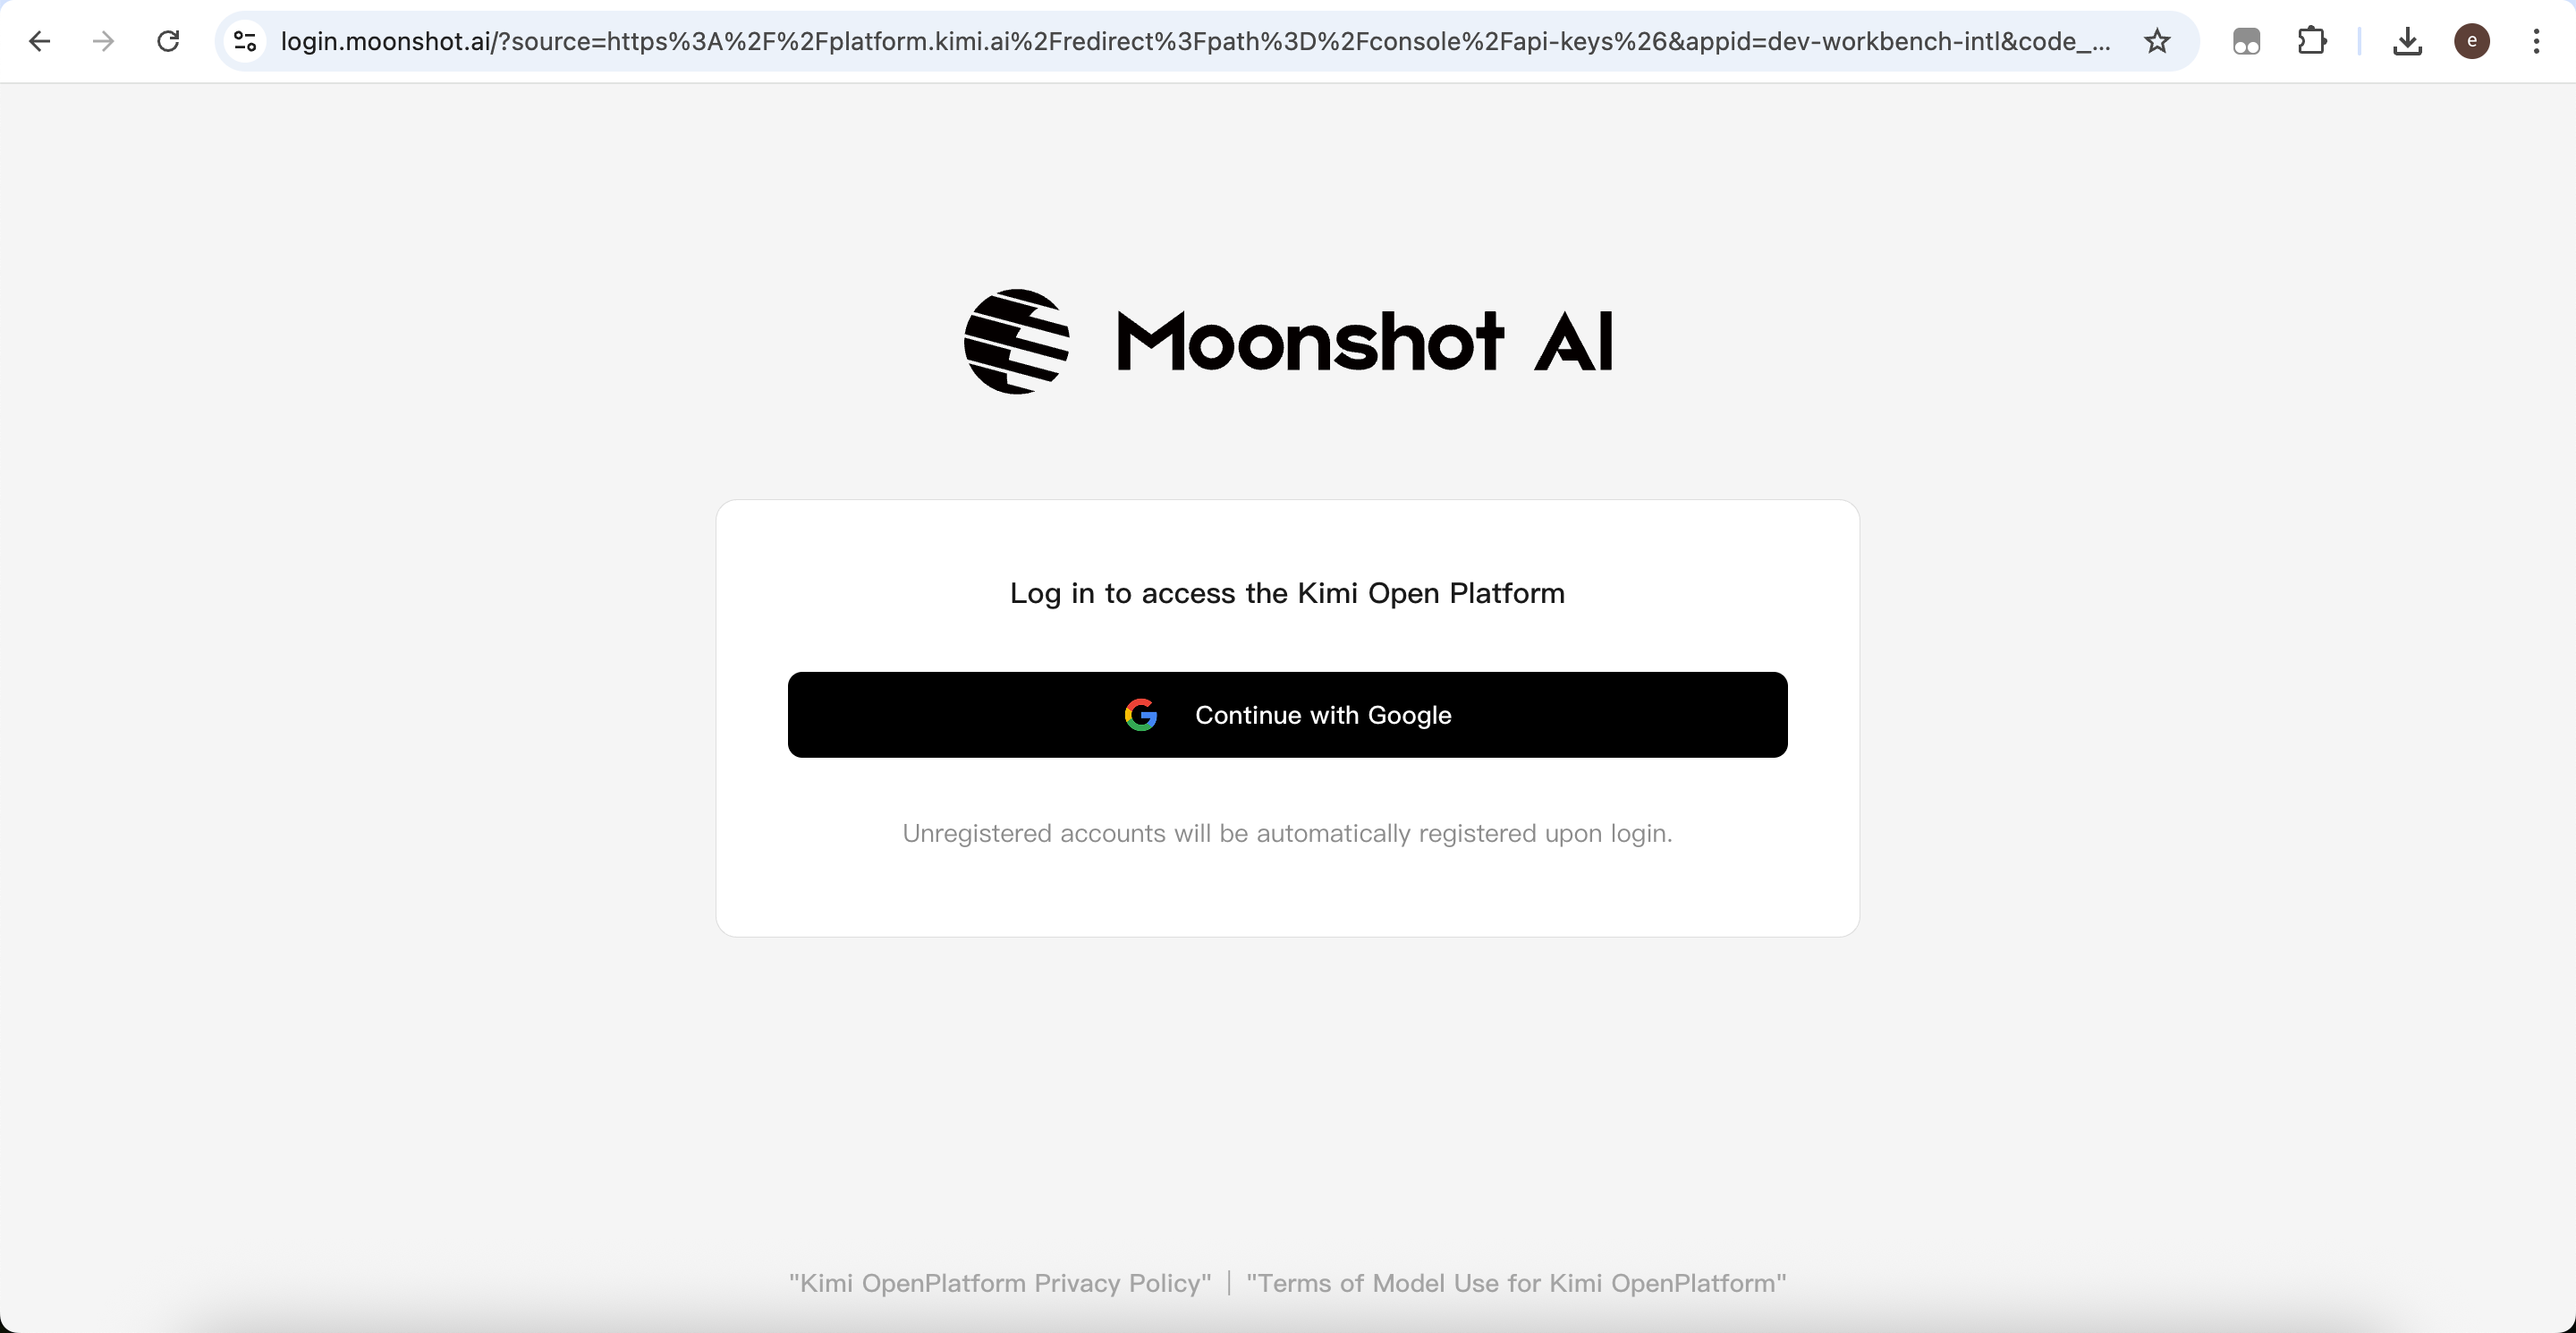
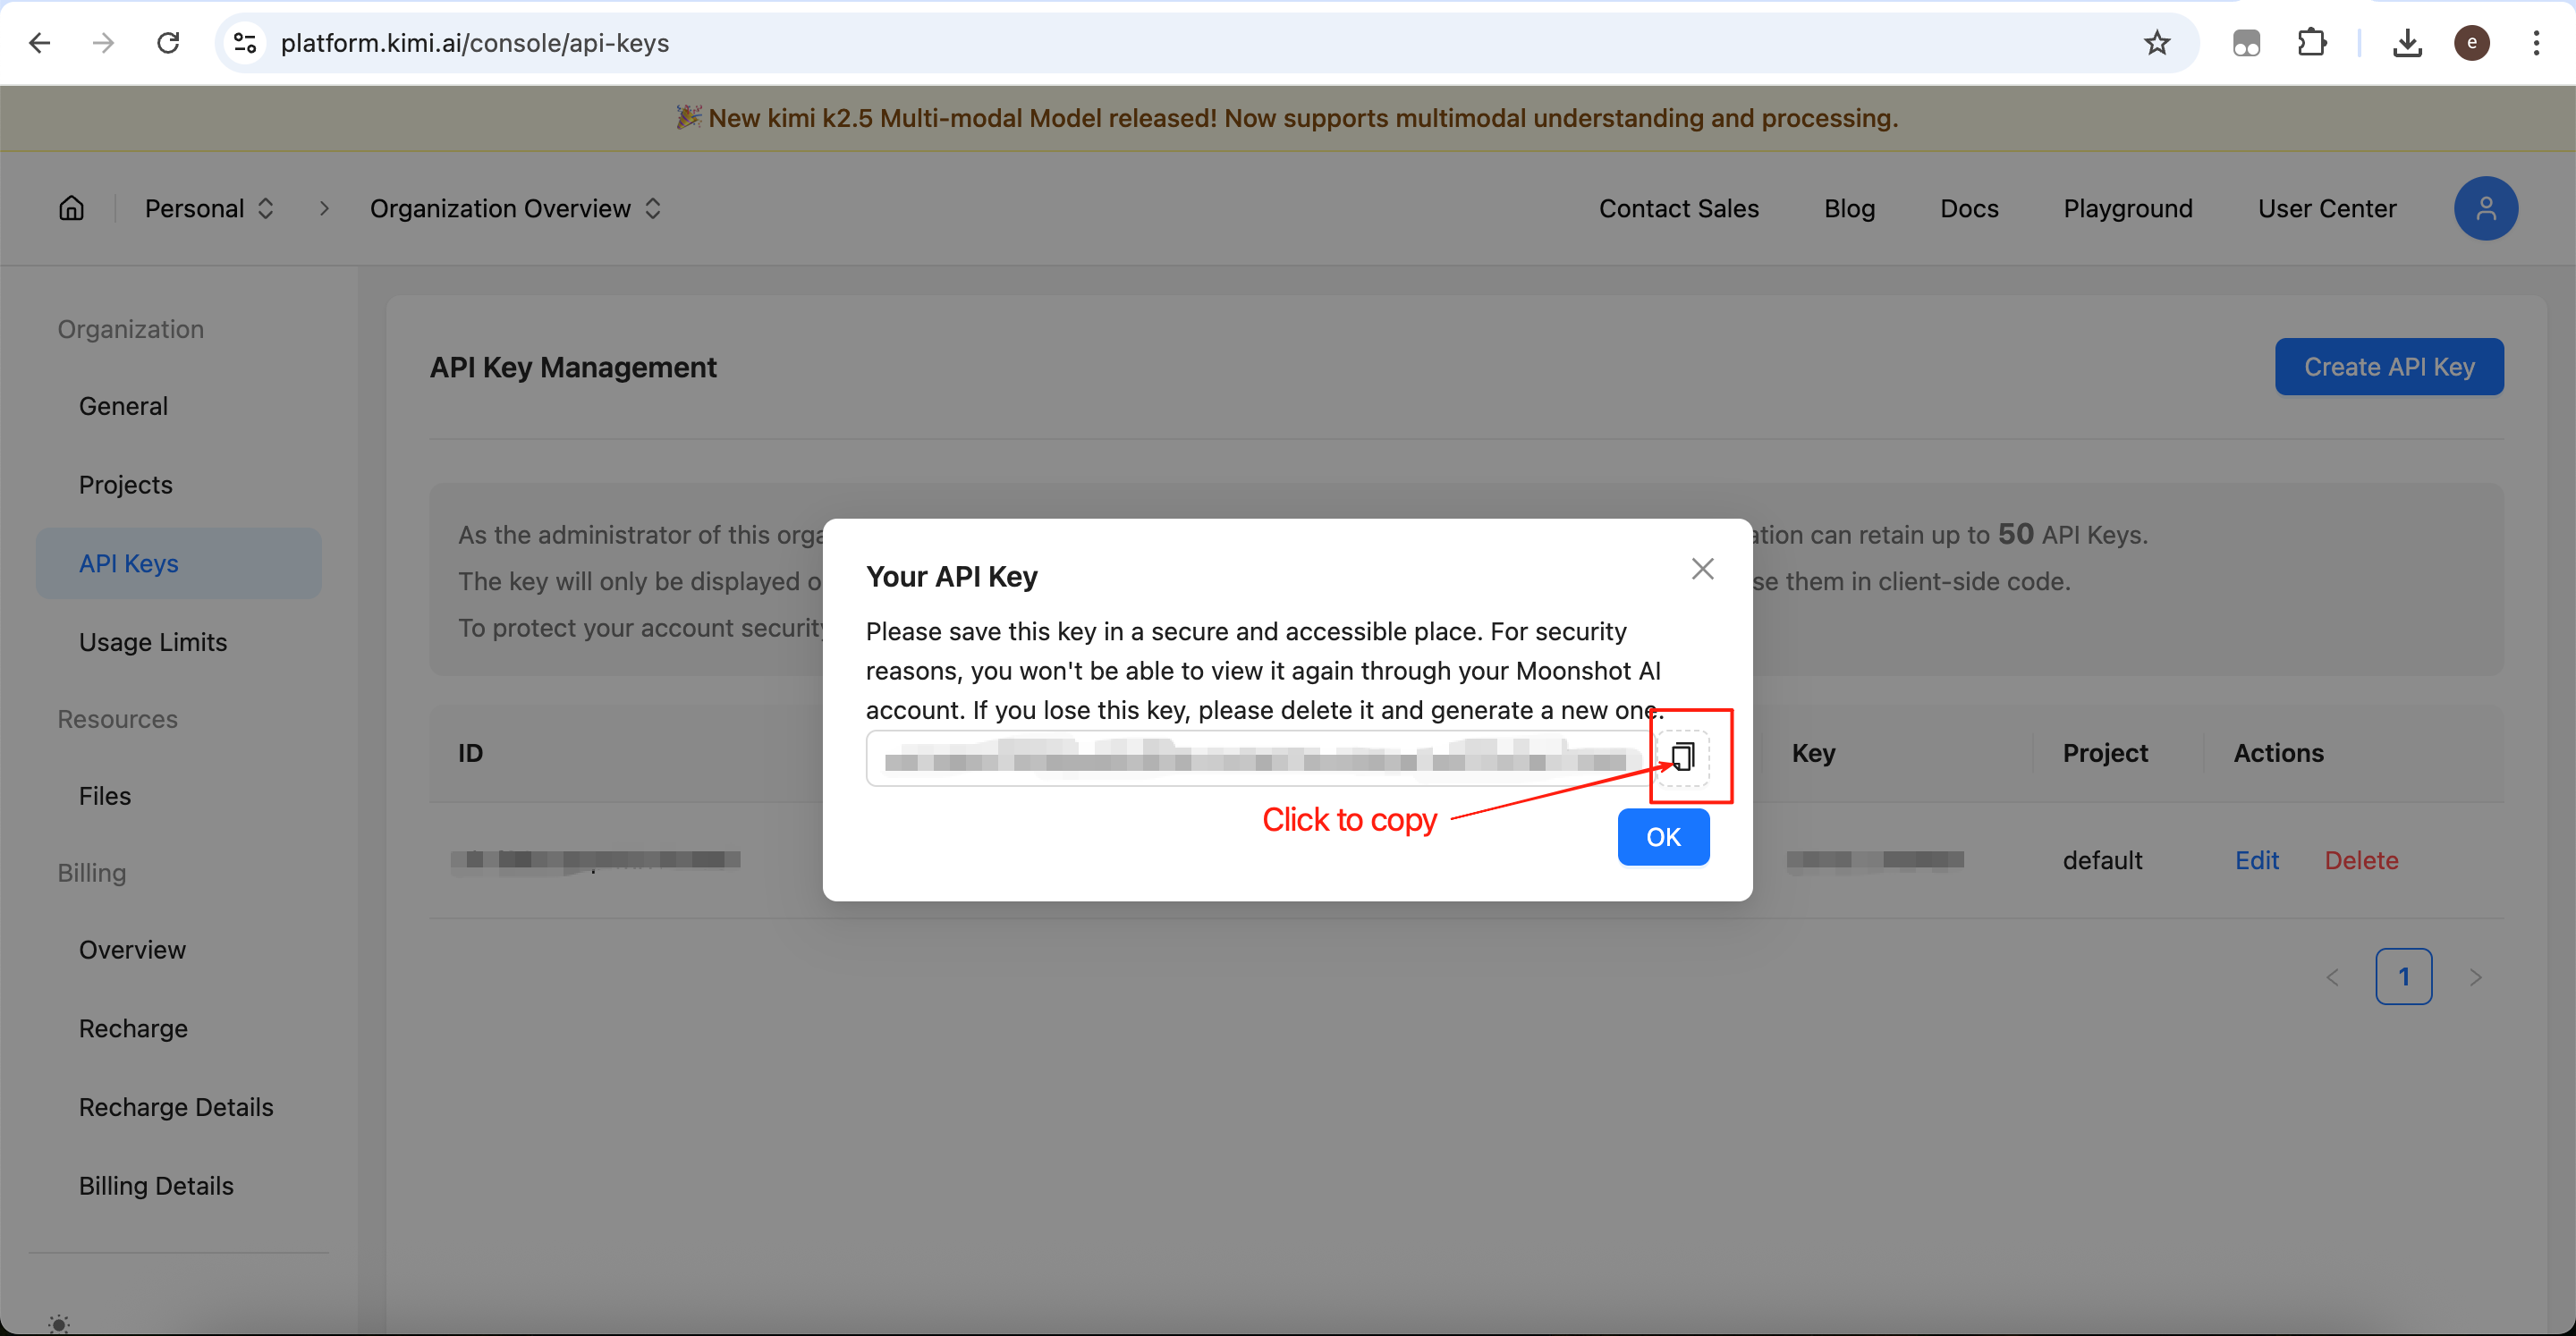
Open: https://platform.kimi.ai/console/api-keys and log in.
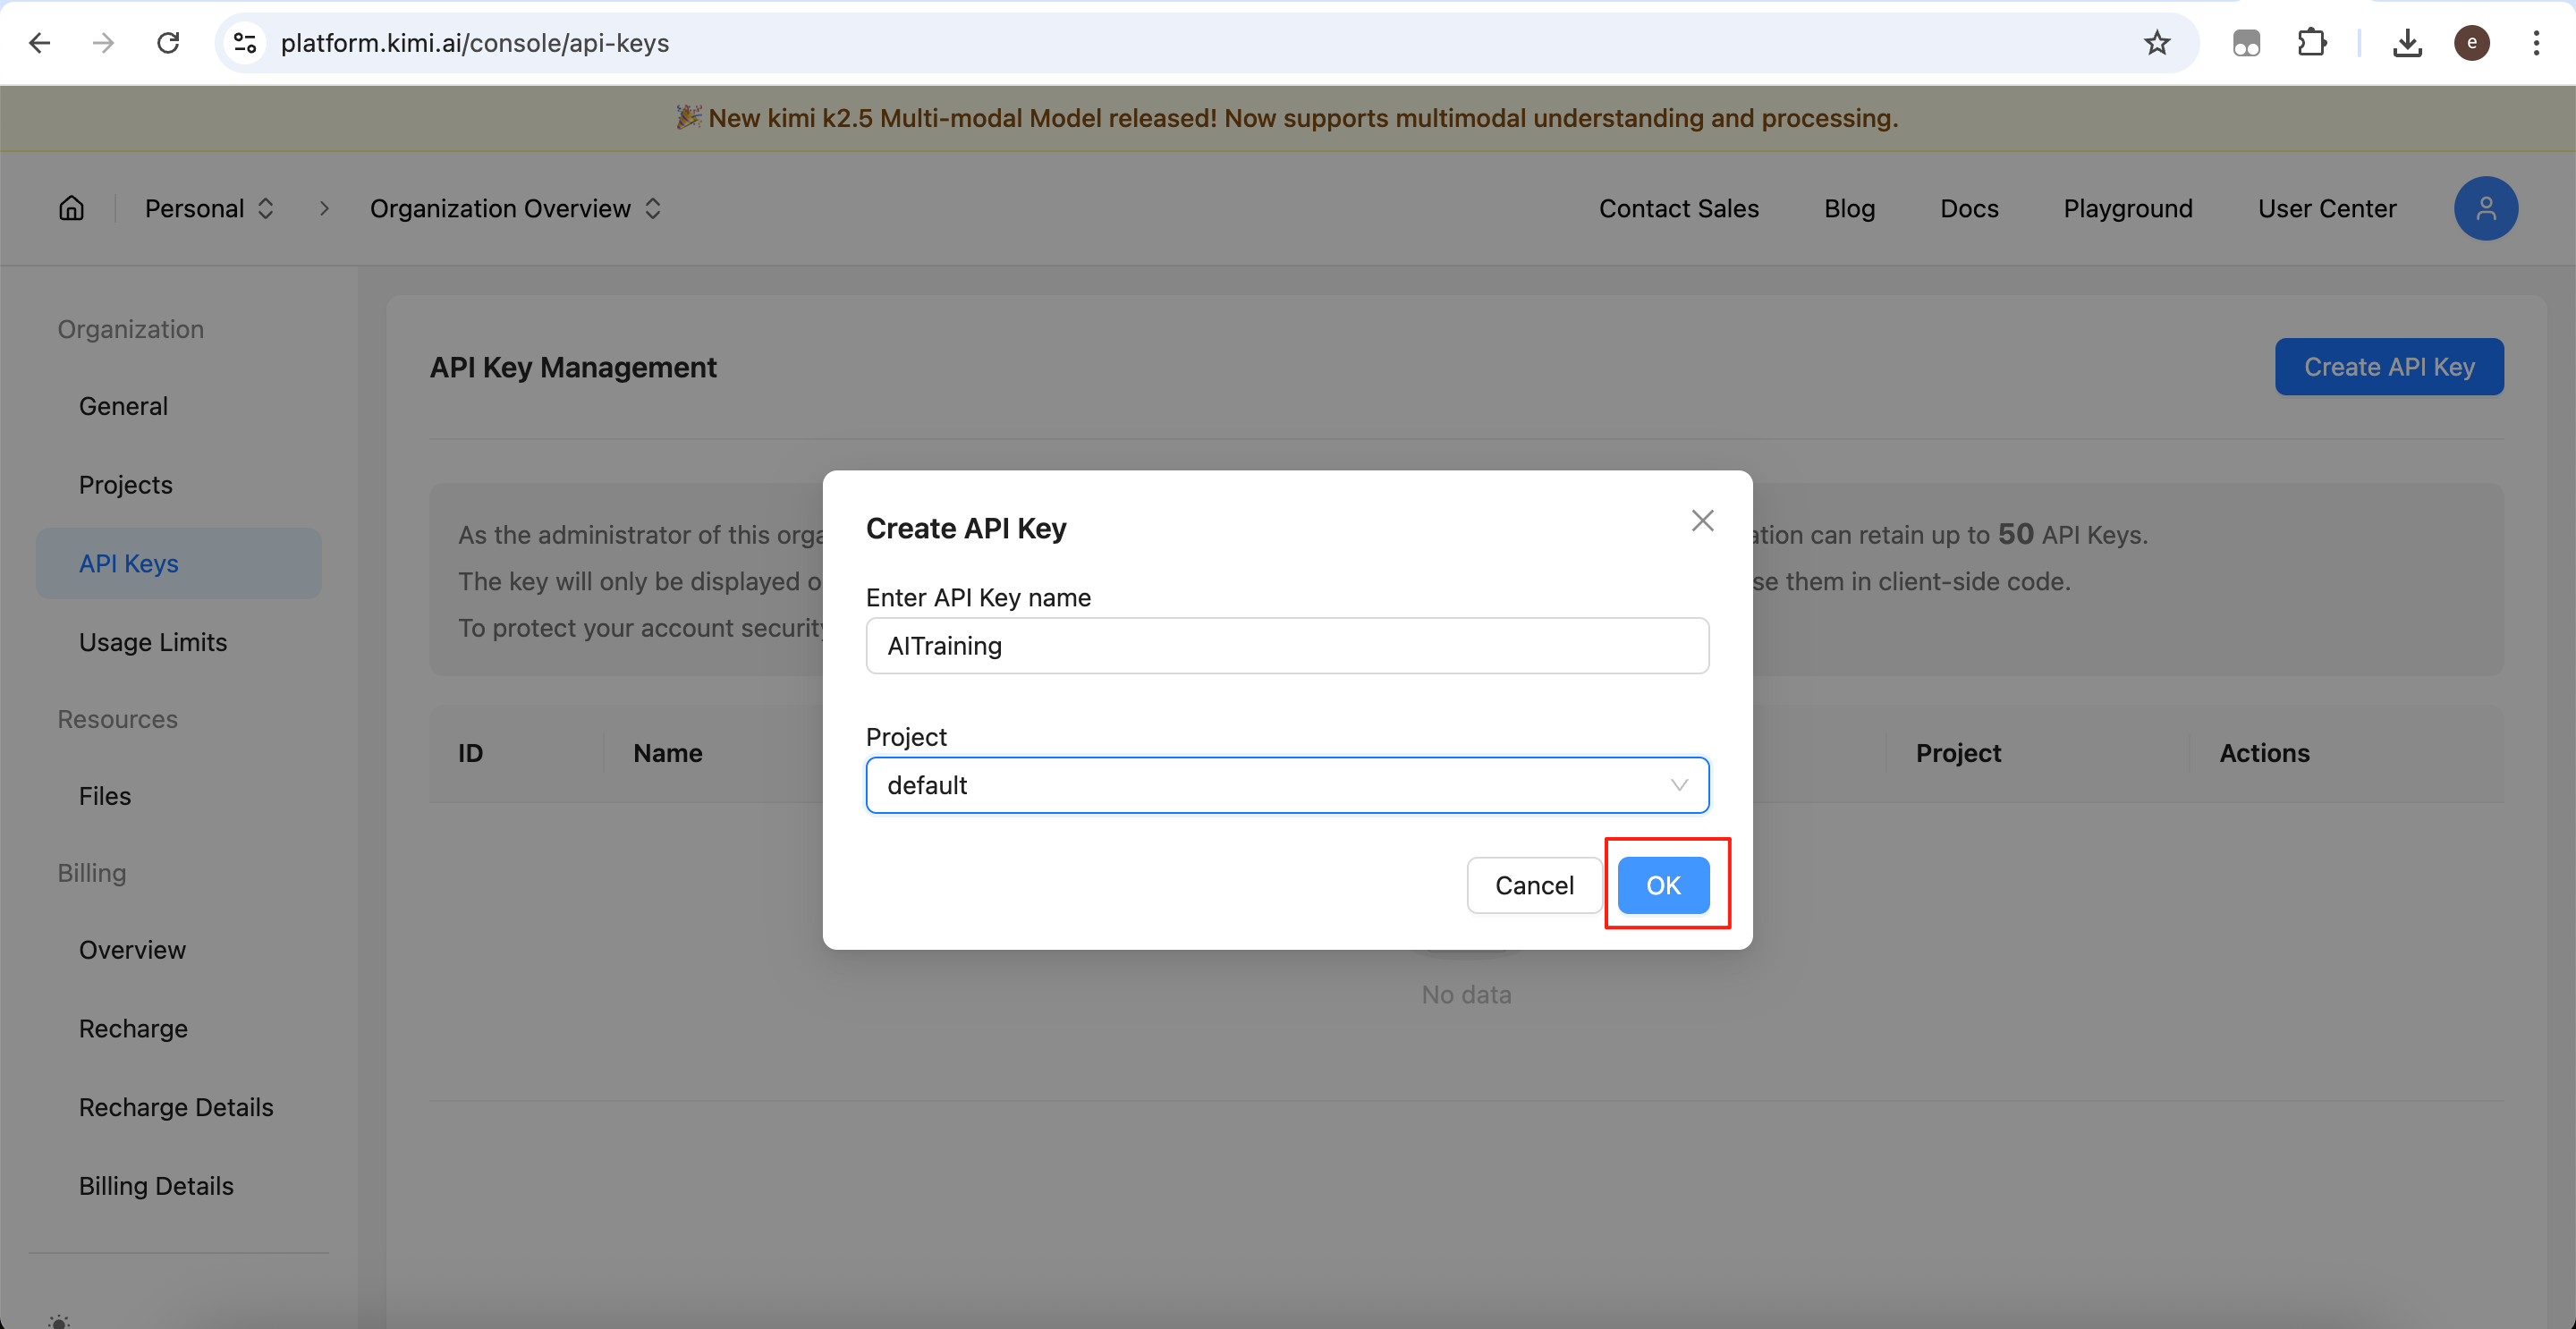
Click Create API Key.
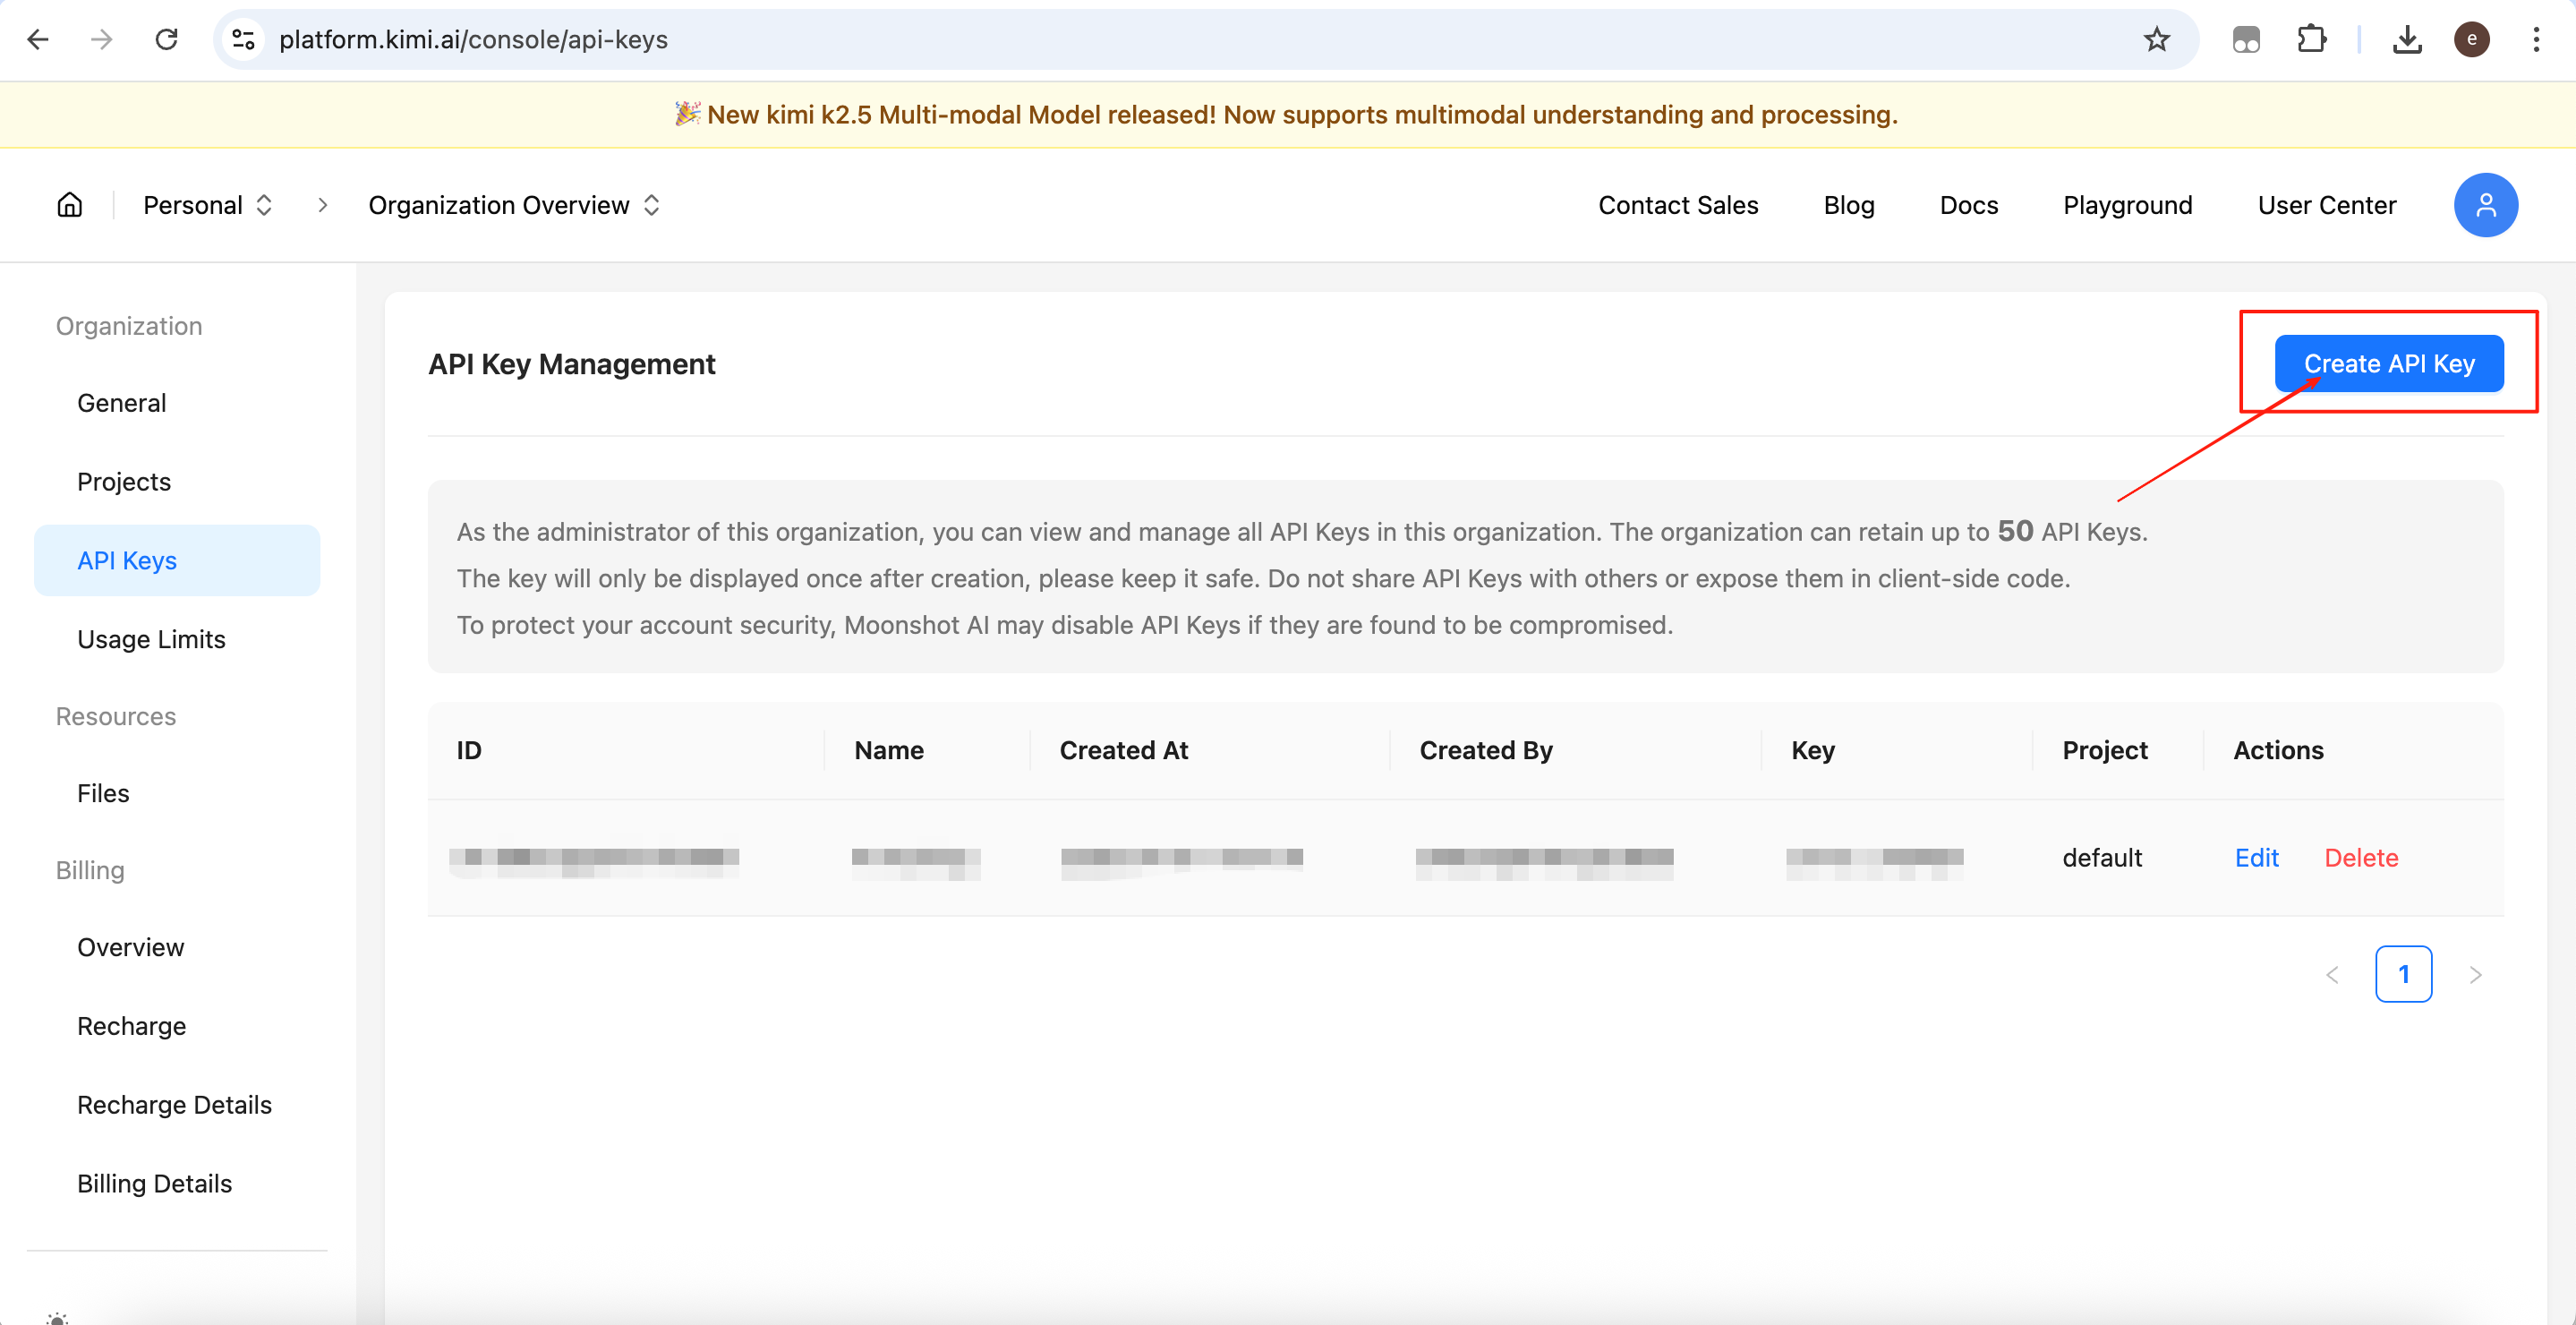
Fill in a name, select default as the project, then confirm.

Click the copy button to save your API key.
Note: This key will only be shown once. Please store it securely.

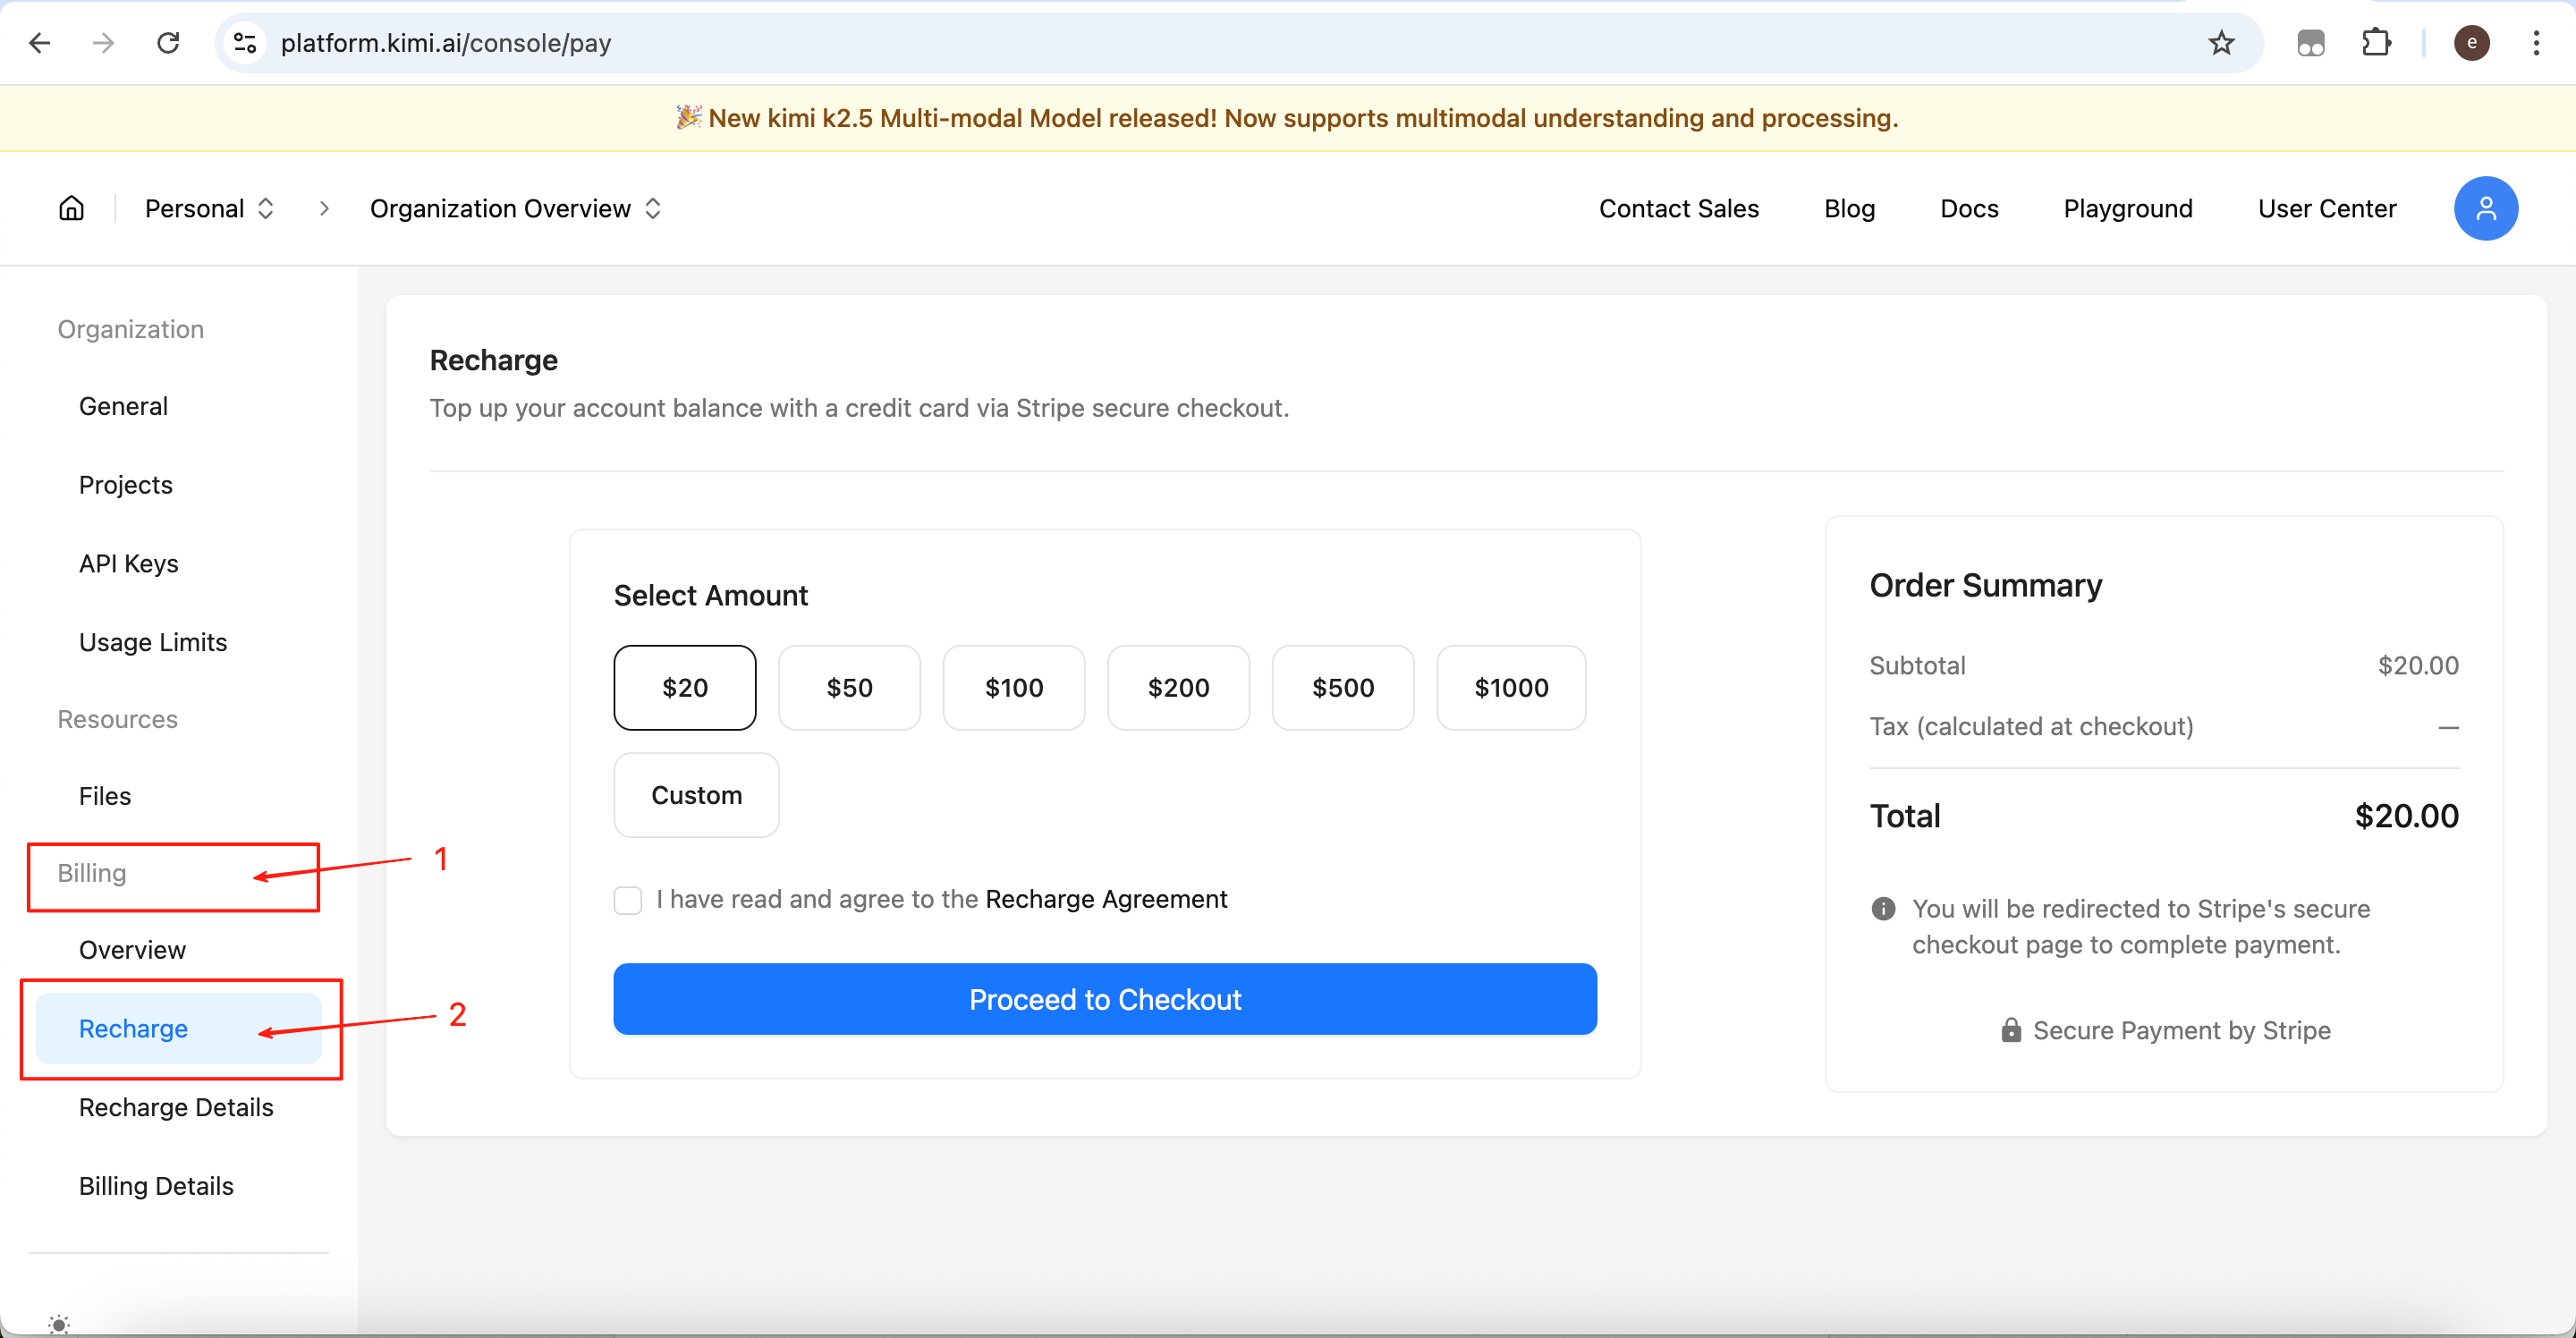
Step 2: Add Account Credit
Kimi API keys require account balance to function; otherwise requests will fail.
In the console, go to:
Billing → Recharge
Select an amount and complete payment.
Step 3: Actual Configuration
Claude Code allows custom backend model services. To integrate KIMI, configure the following parameters:
- ANTHROPIC_BASE_URL: API base URL pointing to the provider’s compatible endpoint
- ANTHROPIC_AUTH_TOKEN: Your API key used for authentication and billing
- ANTHROPIC_MODEL (optional): Model name depending on provider documentation
Edit the configuration file:
Home -> .claude -> settings.json
Example configuration:
{
  ‘env’: {
    ‘ANTHROPIC_BASE_URL’: ‘https://api.moonshot.cn/anthropic/%E2%80%99,
    ‘ANTHROPIC_AUTH_TOKEN’: ‘your api key’,
    ‘ANTHROPIC_MODEL’: ‘kimi-k2.5’
  },
  ‘hasCompletedOnboarding’: true
}
After saving, restart the client and run /model to verify it is working.

Claude Code (CC) Switch Introduction
CC Switch is an open-source desktop tool designed to centrally manage and switch between different AI assistants. With this tool, you no longer need to manually edit configuration files, replace API keys, or restart tools to switch between different AI providers.
The tool is developed by farion1231 and hosted on GitHub. Repository:
https://github.com/farion1231/cc-switch
A macOS installation package is also provided and can be downloaded here:
https://github.com/farion1231/cc-switch/releases/download/v3.13.0/CC-Switch-v3.13.0-macOS.dmg
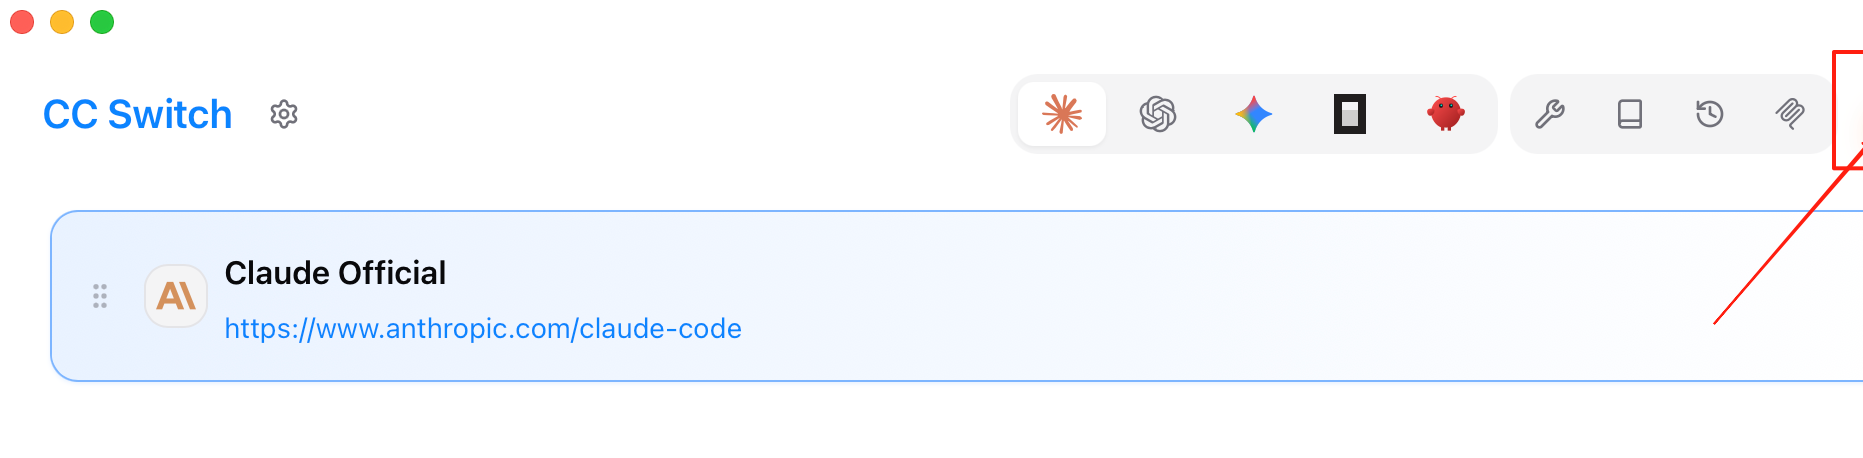
After installation and launching the app, click the ‘Add’ button in the top-right corner to create a new switching profile.

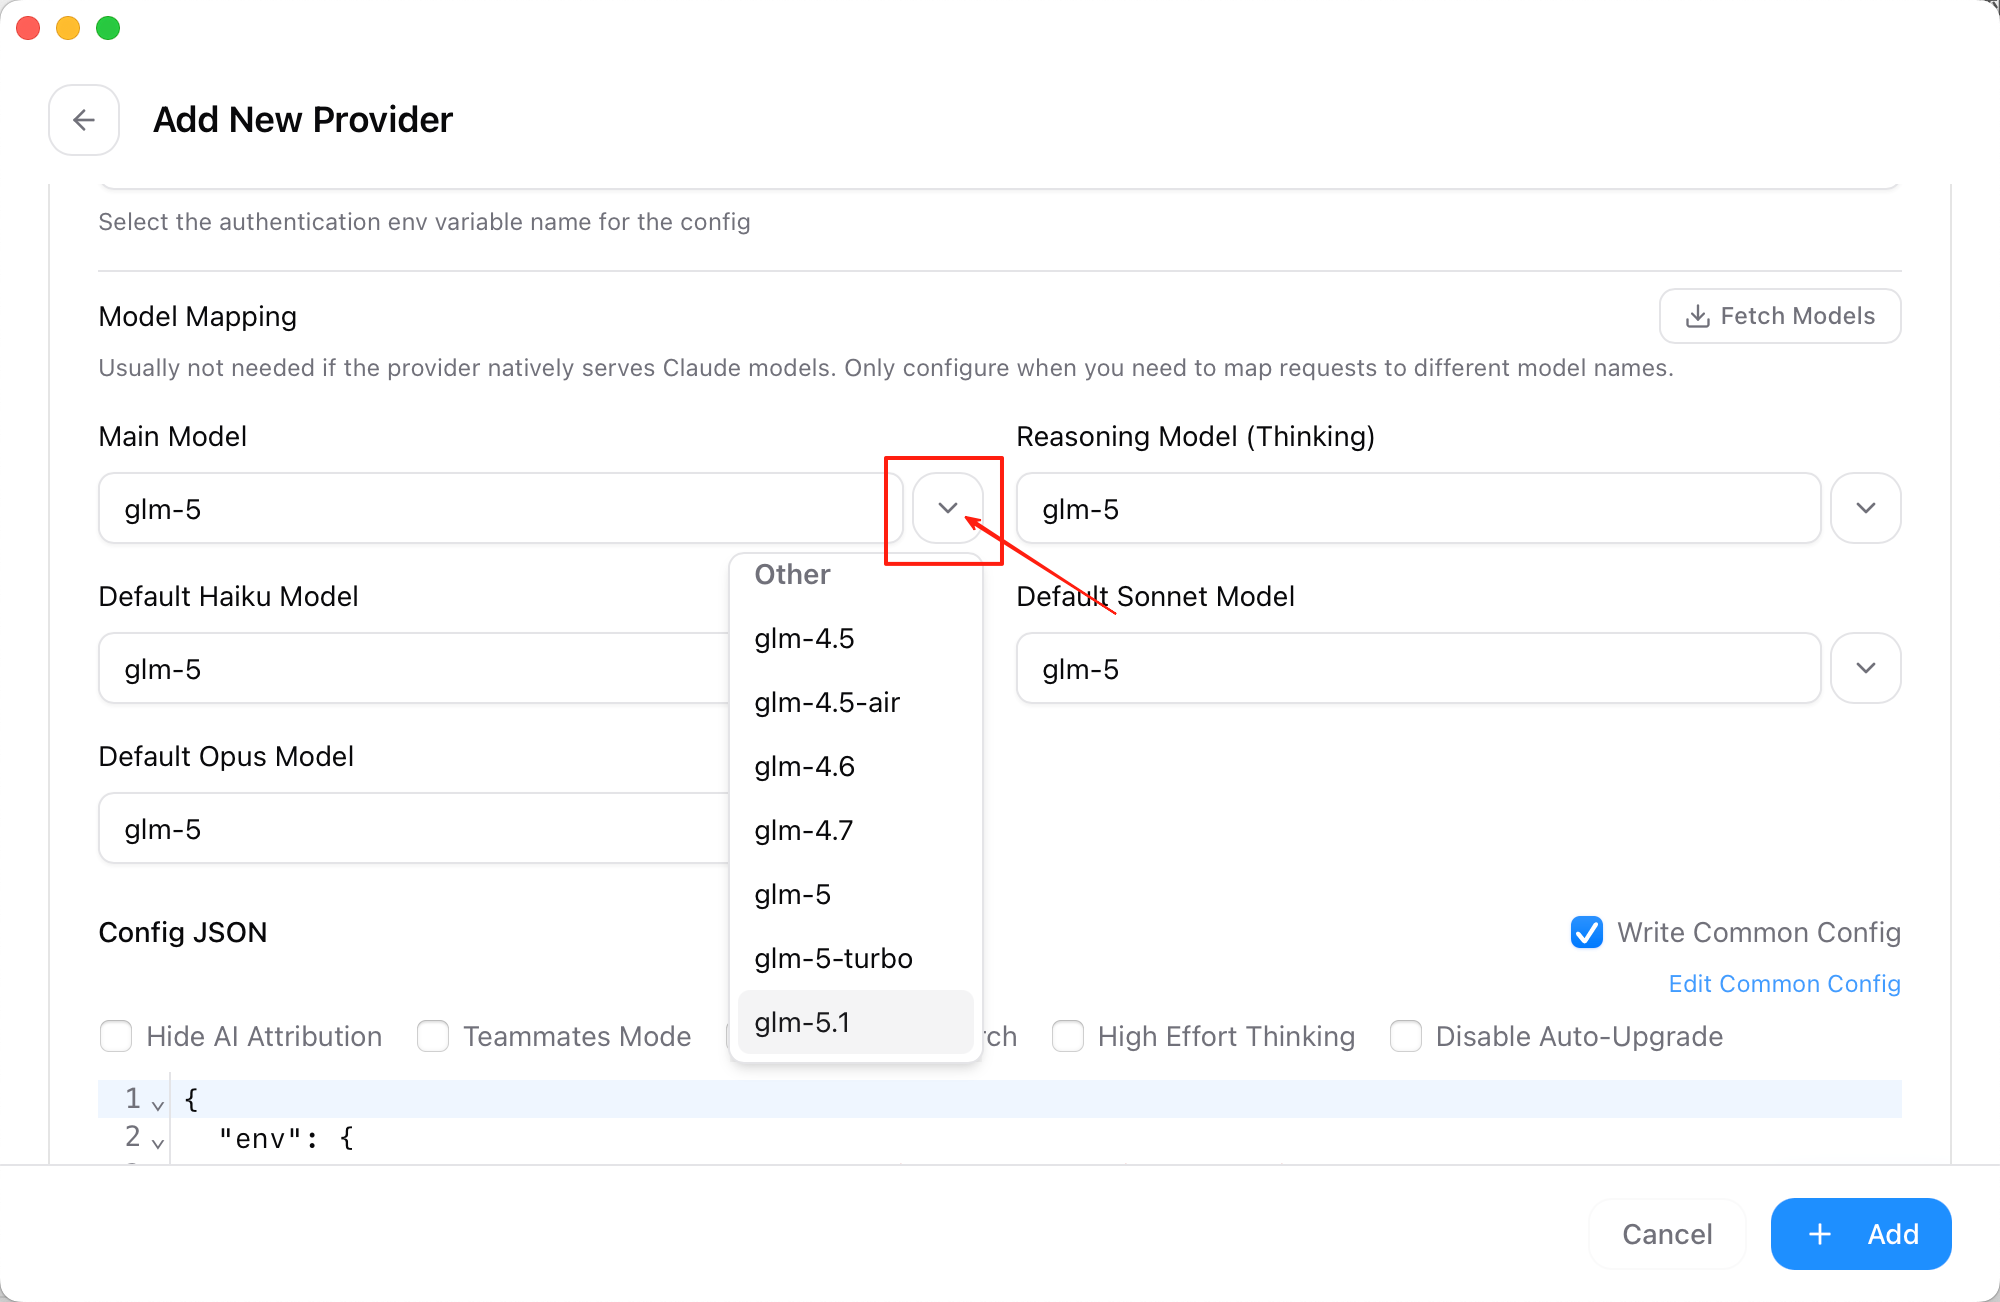
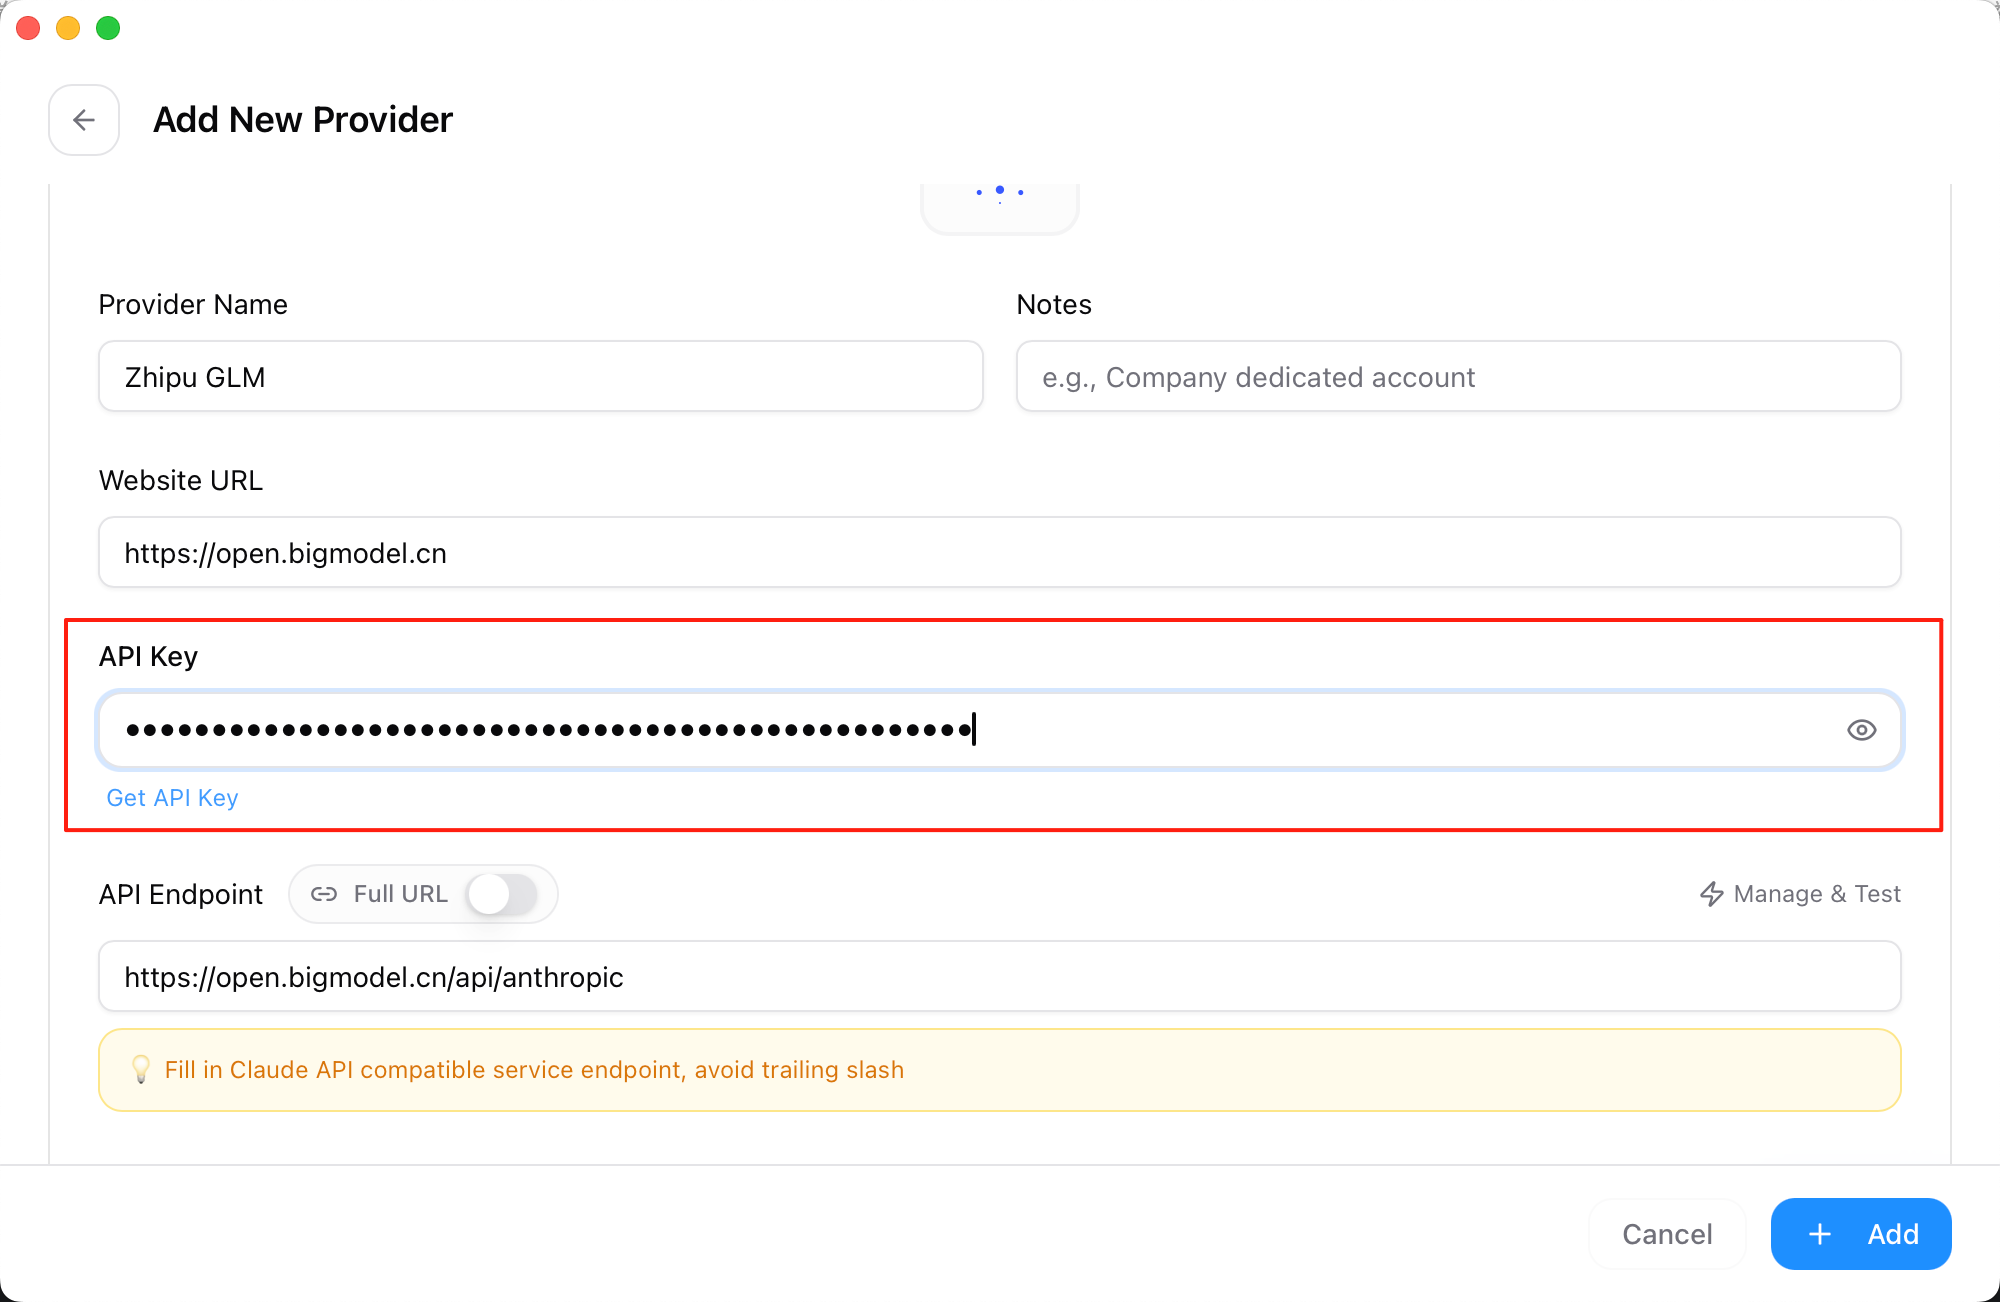
When creating a new profile, you can select providers such as GLM or Kimi. The software will automatically fill in most required configuration fields. GLM is used here as an example; other providers follow a similar setup.

Next, enter your API key.

Click ‘Fetch Models’ to load available models for that provider, making switching easier later.
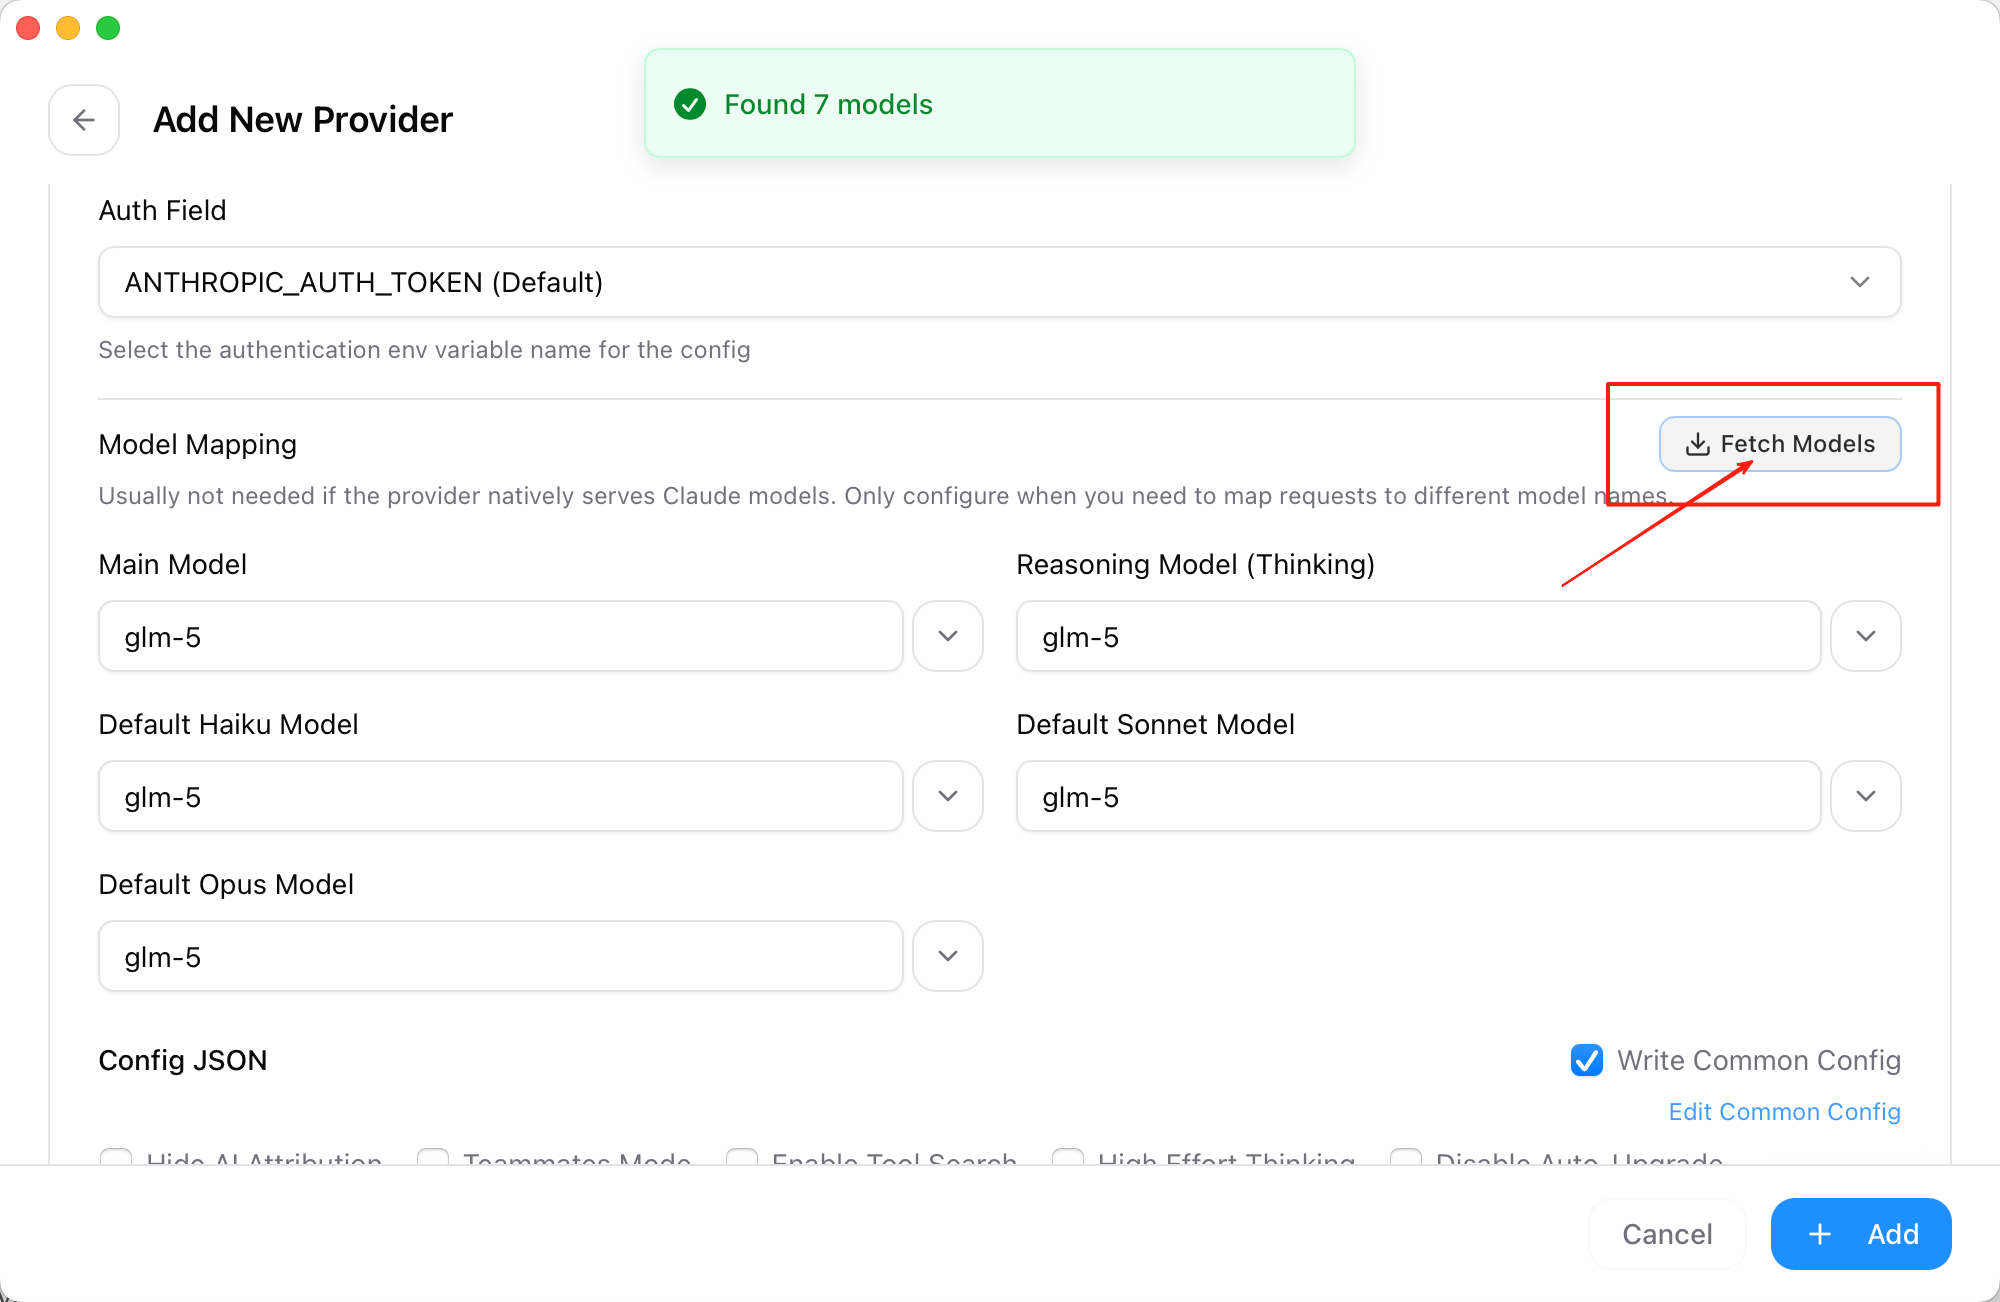
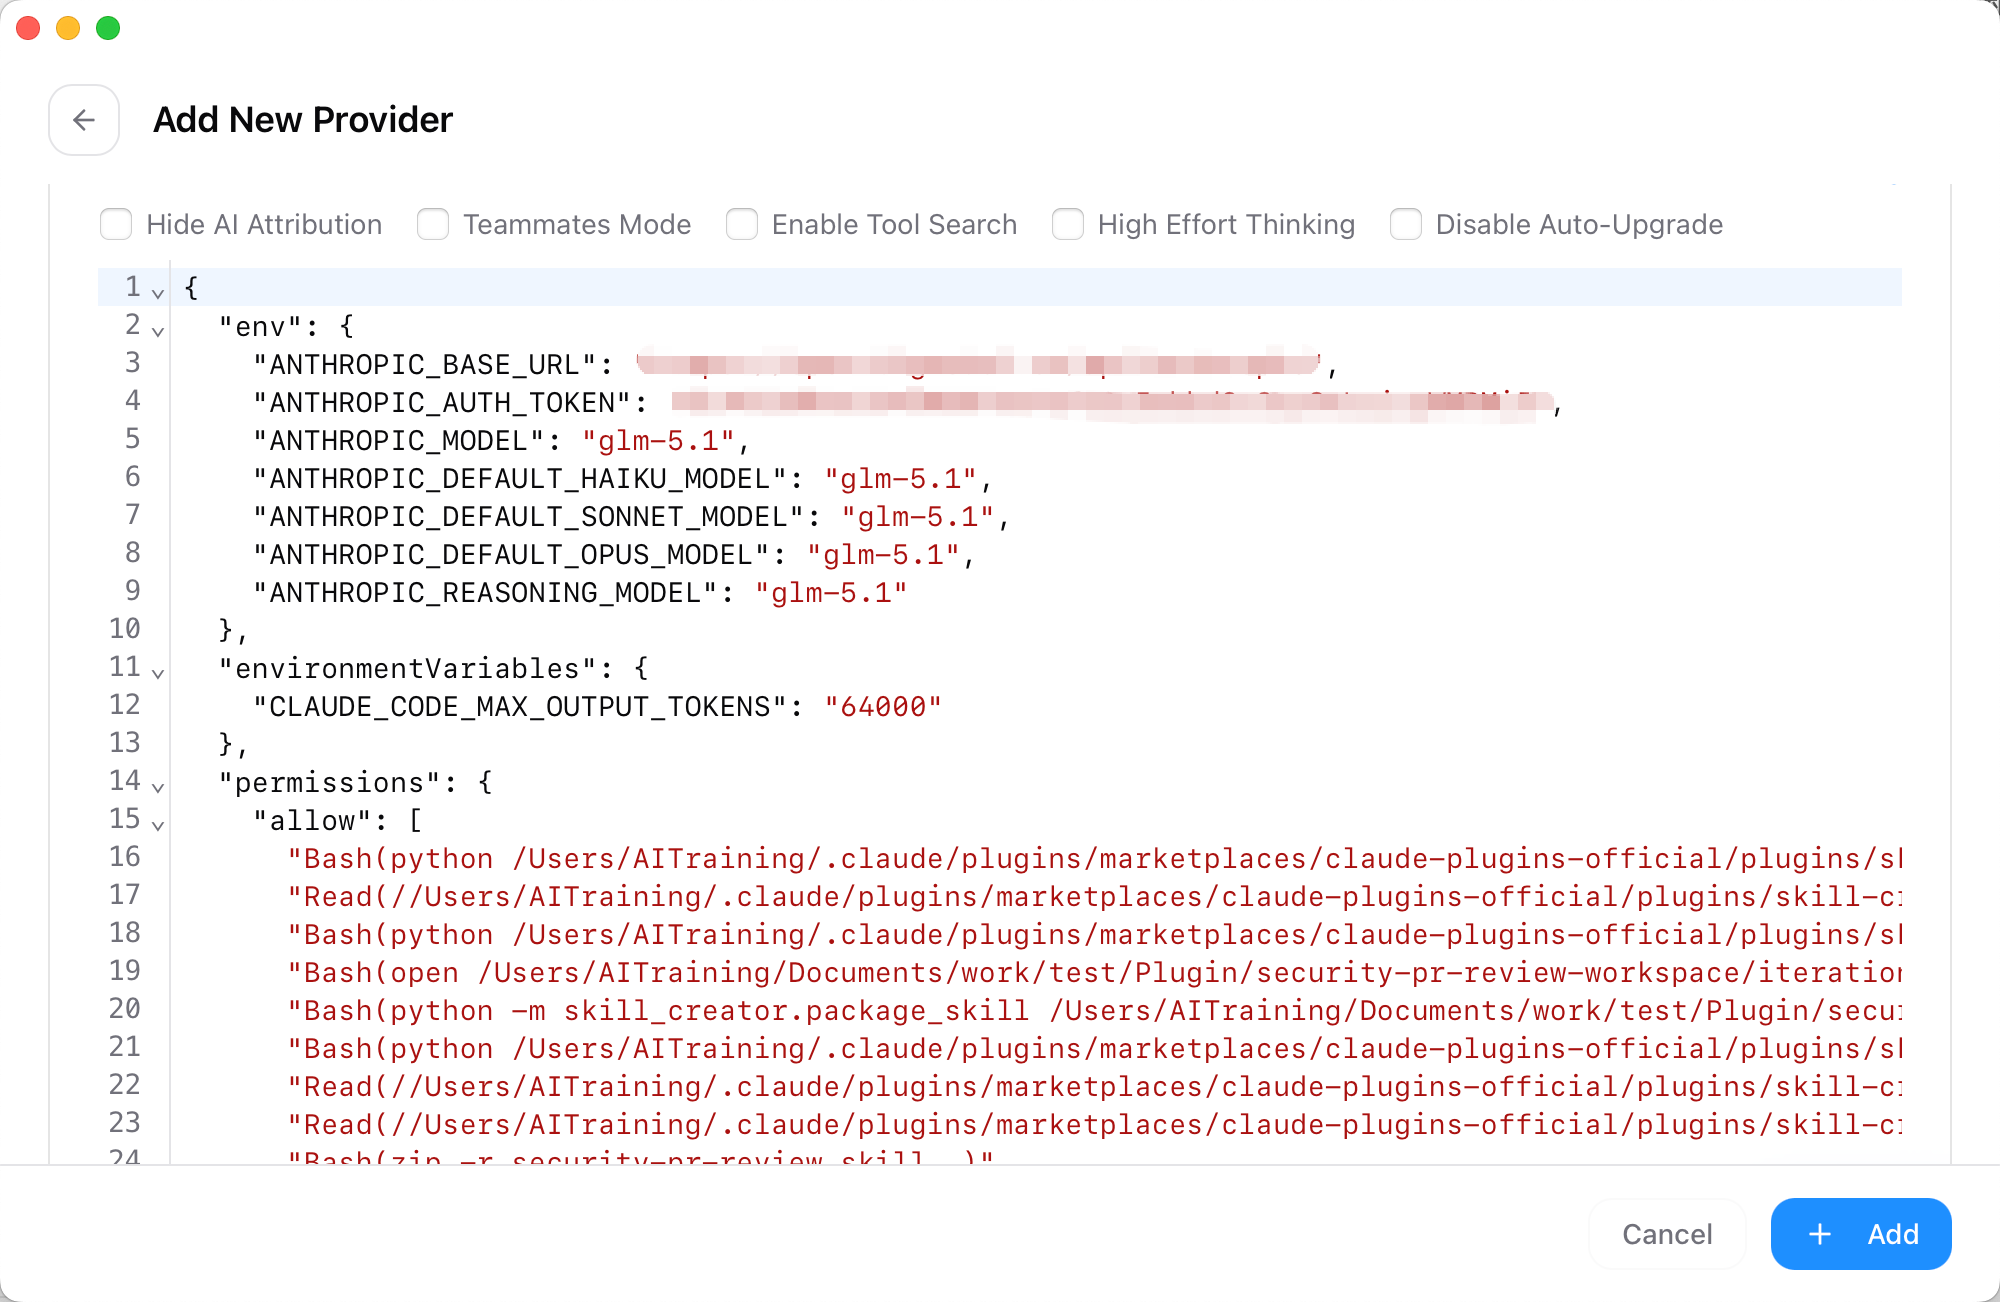
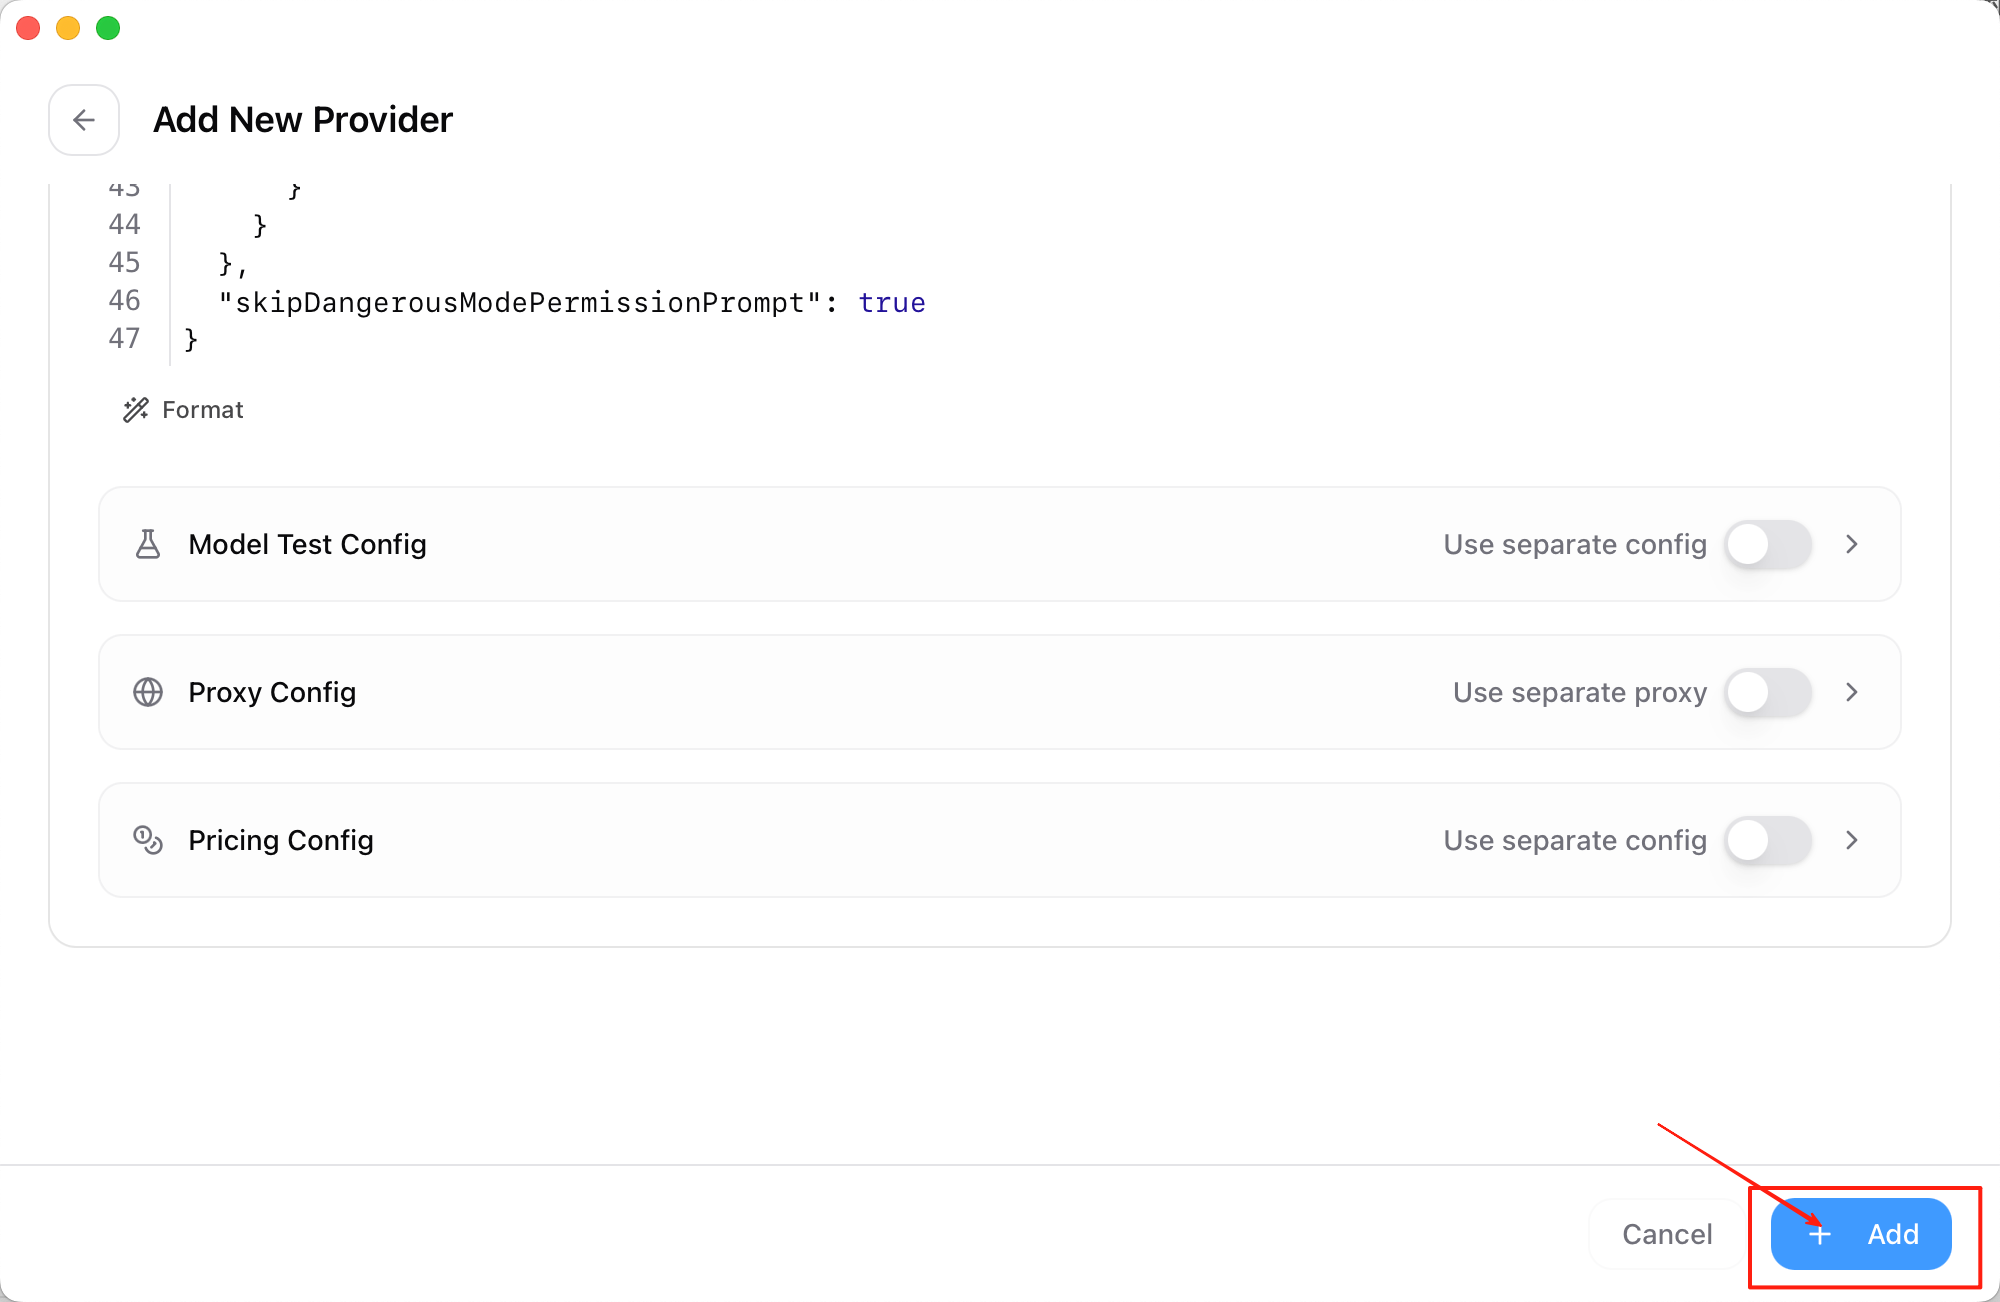
The software will automatically generate the corresponding configuration file.

Once confirmed, click ‘+ Add’ to save the profile.

Then click ‘Enable’ to activate the Zhipu GLM model service.
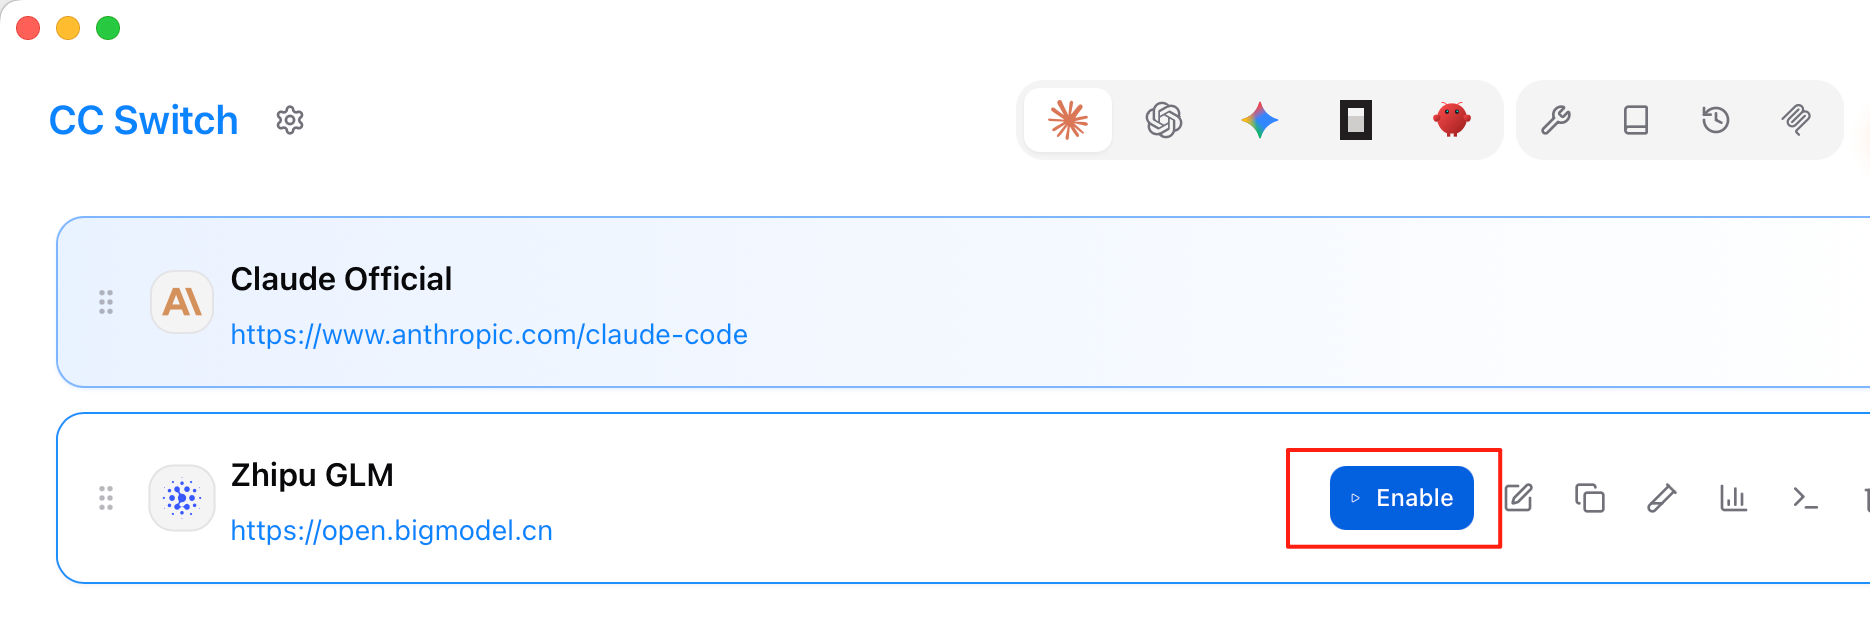
Finally, launch Claude Code and you can use the GLM model normally.
How to Connect Claude Code to Alternative APIs (Windows)
Why Connect GLM / KIMI Alternative Routes to the Client?
After installing a coding assistant client, many people encounter the same situation: if they want stable long-term use, they often need to rely on official model subscriptions or pay-per-use pricing. At the same time, different regions and teams may prefer different “routes” depending on convenience and latency.
If you want to add an alternative inference service outside the default official route, providers like Zhipu GLM and Moonshot Kimi offer APIs that are compatible with common clients. In this way, the interface stays the same, but the underlying model can be switched, without replacing the tool itself.
First Clarify One Thing: Client ≠ Model
It can be roughly divided into two layers:
- One layer is the local ‘client / execution side’ (editing files, running commands)
- The other layer is the cloud ‘model service’ (understanding requests and returning results)
The client does not ‘think’ on its own. It must send requests to a model service and receive responses. As long as the API endpoint and key are correctly configured, the client can connect to different providers.
Therefore, the ‘thinking’ part can be Claude, GLM, or Kimi, depending on your configuration.
Why We Choose GLM and KIMI?
The choice depends on factors such as latency, pricing, stability, and service terms. There is no single correct answer.
In practice, some Chinese models strike a good balance between ‘capability’ and ‘cost control’, making them suitable for daily coding and document editing.
How Strong are GLM and KIMI?
In a publicly available third-party evaluation (see Vending-Bench 2), models from Zhipu and Moonshot performed well in complex tasks.
Note that rankings change over time. This is only a reference. You should test whether it fits your own workflow.
AI Workflow Looks Like This
You give a request → Model thinks → Outputs code → Task completed
After configuring API keys and endpoints, this workflow is the same as using the official backend (and independent of the operating system).
If you already have a stable official route, this guide can be treated as supplementary reading. Otherwise, continue to the GLM and KIMI setup sections below.
GLM Setup Guide
Step 1: Get Your ‘Access Key’
Everything starts with an API Key.
Open: https://z.ai/manage-apikey/apikey-list

Click Create a new API Key.

Enter a recognizable name (e.g. ‘AITraining’), then click Confirm.

Click the copy button and store the key securely.
Step 2: Subscribe or Not?
Without a paid subscription, there is usually a limited free quota available for testing basic models.
If your usage is high, or you need higher quotas and stronger models, you can subscribe to the GLM Coding Plan. Otherwise, start with the free tier and upgrade later if needed.
In the console, click Subscription → GLM Coding Plan.
Scroll down to the subscription section and choose a suitable plan.
Step 3: Configuration
Claude Code supports custom backend model services. To connect GLM, you need to configure three parameters:
- ANTHROPIC_BASE_URL: API base URL pointing to the provider’s compatible endpoint
- ANTHROPIC_AUTH_TOKEN: Your API key used for authentication and billing
- ANTHROPIC_MODEL (optional): Specific model name depending on provider documentation
Edit the configuration file:
C:\Users\<your user name>\.claude\settings.json (replace <your user name> with your actual Windows username)
Replace your api key with the real key. You may also change the model name (e.g. glm-5). If you have no other custom configuration, you can directly use the following:
{
  ‘env’: {
    ‘ANTHROPIC_BASE_URL’: ‘https://open.bigmodel.cn/api/anthropic%E2%80%99,
    ‘ANTHROPIC_AUTH_TOKEN’: ‘your api key’,
    ‘ANTHROPIC_MODEL’: ‘glm-5’
  },
  ‘hasCompletedOnboarding’: true
}
After saving, run claude in PowerShell or terminal to start using the GLM model.
KIMI Setup Guide
Step 1: Get Your ‘Access Key’
Open: https://platform.kimi.ai/console/api-keys and log in.

Click Create API Key.

Enter a name, select default as the project, then confirm.
Click the copy button to save your API key.
Important: this key is shown only once. Save it carefully.
Step 2: Fund your Account
Kimi API requires account balance; otherwise requests will fail.
Go to:
Billing → Recharge
Choose an amount and complete payment.

Step 3: Configuration
Similar to GLM, you need to configure:
- ANTHROPIC_BASE_URL: API base URL pointing to the provider’s compatible endpoint
- ANTHROPIC_AUTH_TOKEN: Your API key used for authentication and billing
- ANTHROPIC_MODEL (optional): Specific model name depending on provider documentation
Edit configuration file:
C:\Users\<your user name>\.claude\settings.json
Example configuration:
{
  ‘env’: {
    ‘ANTHROPIC_AUTH_TOKEN’: ‘your_kimi_api_key’,
    ‘ANTHROPIC_BASE_URL’: ‘https://api.moonshot.cn/anthropic/%E2%80%99
  },
  ‘hasCompletedOnboarding’: true
}
After saving, run claude in PowerShell to start the client using Kimi.
Claude Code (CC) switch introduction
CC Switch is an open-source desktop tool designed to unify and switch between different AI assistants. With this tool, you no longer need to manually modify configuration files, replace API keys, or restart tools to switch between AI providers.
This tool is developed by farion1231 and is open-sourced on GitHub. Repository:
https://github.com/farion1231/cc-switch
The author also provides a Windows installer, available here:
https://github.com/farion1231/cc-switch/releases/download/v3.13.0/CC-Switch-v3.13.0-Windows.msi
After installation, open the application and click the ‘Add’ button in the top-right corner to create a new switching profile.
When creating a new profile, you can select common providers such as GLM and Kimi. The software will automatically fill in most required configurations. Below we use GLM as an example; other providers follow the same process.

Next, enter the API key.
Click ‘Fetch Models’ to load available models from the provider for quick switching.


The software will automatically generate the corresponding configuration file.
After confirming everything is correct, click ‘+ Add’ to save the profile.
Then click ‘Enable’ to activate the Zhipu GLM model service.

Finally, start Claude Code, and you can use the GLM model normally.
From | Tricontinental: Institute for Social Research via This RSS Feed.
You must log in or # to comment.